Rotolight NEO II User manual

USER MANUAL
Version 1.8

BOX CONTENTS
Box contents
Operation flowchart
Technical specifications
About Rotolight
About NEO 2
Basic operation
Advanced operation
Flash mode
F-stop table
Fade and CineSFX™
Throb and cycle
Fire
Police and television
Shot, neon and film
Weld, paparazzi and True Apertrure Dimming™
Control menu
Skyport and Technical Utilities menu
Voltage, calibrated custom colour mode and temperature
Serial number, firmware and display
Text control, Fine Dimming and demo mode
Filter information
Mounting
Batteries
Manufacturer’s Warranty
Limitation of Liability
Optional Accessories
Please register to activate your warranty at
www.rotolight.com/register
1 x Rotolight NEO 2
1 x 1/4” Shoe Adapter
1 x Rotolight universal power adapter with regional mains cable
1 x Filter holder
1 x NEO 2 Filter pack: 1x 216 Full Diffuser (1.5 Stops); 1x 250 Medium,
Half White Diffuser (3/4 Stops); 1 x 184 “Cosmetic Peach” Diffusion;
1 x 279 1/8th Minus Green (Magenta).
2
2
3
4
6
7
9
11
13
21
23
25
26
27
28
29
32
33
37
38
39
40
41
42
43
44
45
PAGE CONTENTS
Thank you for purchasing Rotolight NEO 2! We hope you enjoy
using it as much as we enjoyed making it.

KNOBS
Left knob = BRI
Right Knob = COL (kelvin)
Click both knobs to
Enter/ Exit menu mode and
navigate menu
Left knob = BRILeft knob = BRI
Right Knob = COL (kelvin)Right Knob = COL (kelvin)
Click both knobs toClick both knobs to
Enter/ Exit menu mode andEnter/ Exit menu mode and
navigate menunavigate menu
MENU
BRI COL
NEO 2 OPERATION FLOWCHART
POWER
Switch ON/OFF
DISPLAY
Displays menu item or
selected item
FLASH PORT
3.5mm Flash sync
socket for third party
flash triggering
DC INPUT SOCKET
15V 60W DC - Only use
provided PSU or
Rotolight adapters
6 x AA BATTERIES
Holds 6 X AA Batteries NIMH or Lithium
(Recommended Rotolight
Lionheart NiMh Rechargeable -
available on www.rotolight.com)
FLSH SFX CTRL TECH DEMO
STRB
LTNG
THRB
CYCL
FIRE
PLCE
To enter menu
Click both
red knobs
To exit menu
Click both
red knobs
TV
SHOT
NEON
FILM
WELD
PAPA
ADDR
LOCK
MODE
FREQ
3
COLD SHOE
1/4” Male adapter
SKYP
GRP
VOLT
CAL
TEMP
SRNO
VERS
DISP
SCRL
FINE
FADE
DN
UP
F-DIM
ISO
EXP
FEET

“NEO 2 IS A GAME-CHANGER. YOU’LL NEVER MISS A SHOT.
THERE’S NO RECYCLE TIME, NO LIGHT LOSS, NO POWER LOSS”
Jason Lanier - Rotolight Master of Light
4Top photo by Jason Lanier www.jasonlanier.com / Bottom photo by Rod Aaron Gammons

Photo by Rod Aaron Gammons

FOREWORD – WHAT IS NEO 2?
NEO 2 is an industry-first High Speed Sync
flash and continuous on-camera LED all-in-one.
Integrating the ‘shoot what you see’ benefits of
continuous lighting with the flexibility of HSS flash
with zero recycle time.
The NEO 2’s continuous modelling light allows
photographers to easily acquire focus in dimly
lit environments and optimise the composition
of their shots. Designed for photographers and
videographers on the go, NEO 2 provides up to
500% flash output for whenever users need to
freeze action. HSS also enables users to shoot with
wider apertures to create beautiful separation
between the subject and background.
Rotolight has collaborated with Elinchrom to
integrate its Skyport 2.4Ghz HSS wireless flash
receiver into NEO 2, which eliminates the need to
purchase a stand-alone flash receiver. Providing
range, flexibility and control for off-camera
lighting setups, Skyport enables users to wirelessly
control up to ten lights in four groups at up to
200m (656ft) with the Rotolight HSS transmitter;
optimised for Rotolight by Elinchrom and available
for Canon, Nikon, Sony, Olympus/Panasonic and
Fujifilm camera systems.
“The NEO 2 is going to revolutionise how people
use light and eliminate the need for external
flash. If you have those moments that you just
cannot afford to miss, this is an incredible light
for you. You’ll never miss a shot,” says Jason Lanier,
a Rotolight Master of Light and professional
photographer.
“I tested NEO 2 on a Sony A6500 at 11 frames per
second,” explains Lanier. “It fired every single time.
There’s genuinely no recycle time, no light loss, no
power loss. That is just a game-changer, there is no
other light in the world that can do that.”
6

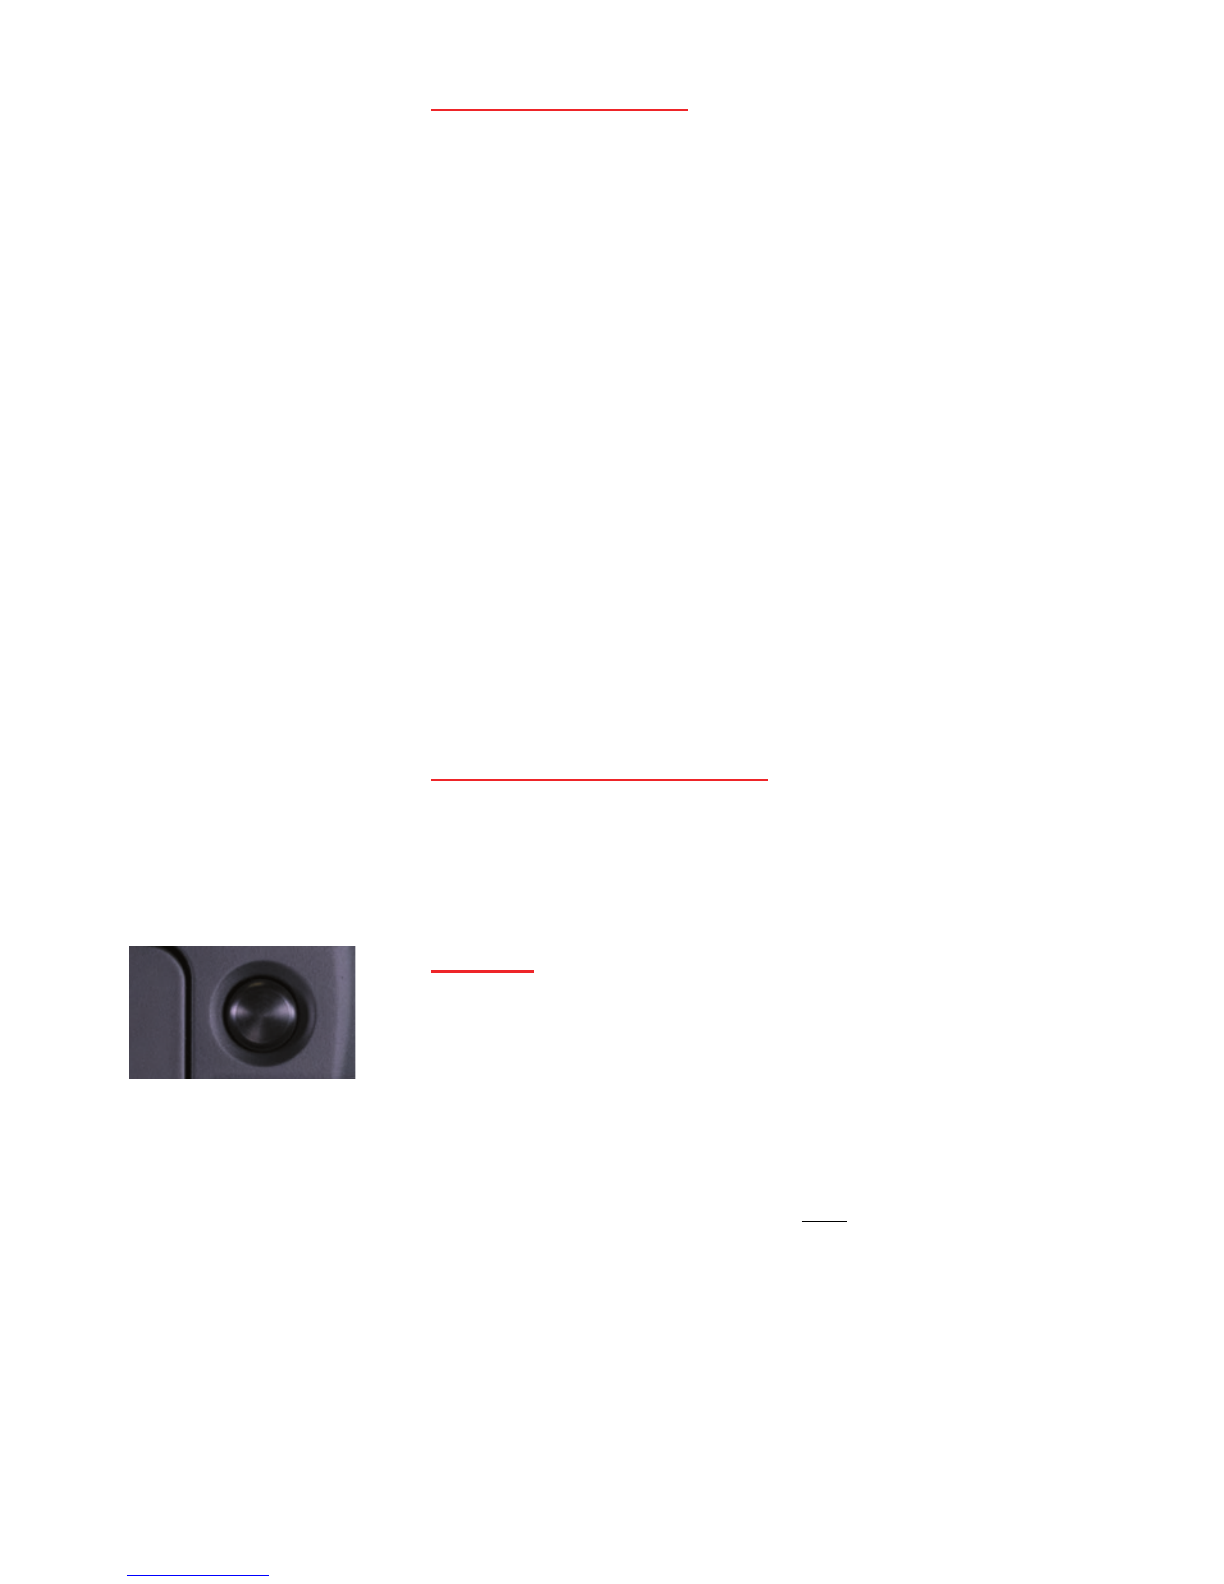
Featuring electronically adjustable colour
temperature (3150-6300k) in both flash and
continuous modes and a built-in kelvin display,
NEO 2 enables photographers to easily adjust
white balance or match ambient light settings to
create more natural looking shots.
Lightweight and portable, NEO 2 can be mounted
both on or off camera for ultimate creative control.
Delivering unrivalled battery performance, NEO 2
provides 85,000 full power flashes on a single set
of rechargeable AA batteries, compared to the
200 flashes of a typical speedlight. 85% brighter in
continuous mode than its predecessor, NEO 2 is a
small light that delivers big results.
“Rather than spending time on cumbersome
lighting setups, NEO 2 enables photographers to
focus on composing the perfect shot. For those
shooting both stills and video, it entirely eliminates
the need for two separate purchases,”
says Rod
Aaron Gammons, managing director of Rotolight.
Packed with innovative features for
cinematographers, NEO 2 also provides an
updated suite of Rotolight’s industry-first, built-
in CineSFX™. Designed in conjunction with VFX
veteran Stefan Lange, CineSFX™ enables the
simulation of Fire, Lightning, TV, Paparazzi and
more for added drama in productions. In addition,
NEO 2 offers the Designer Fade™ function for the
creation of custom in-camera fade FX.
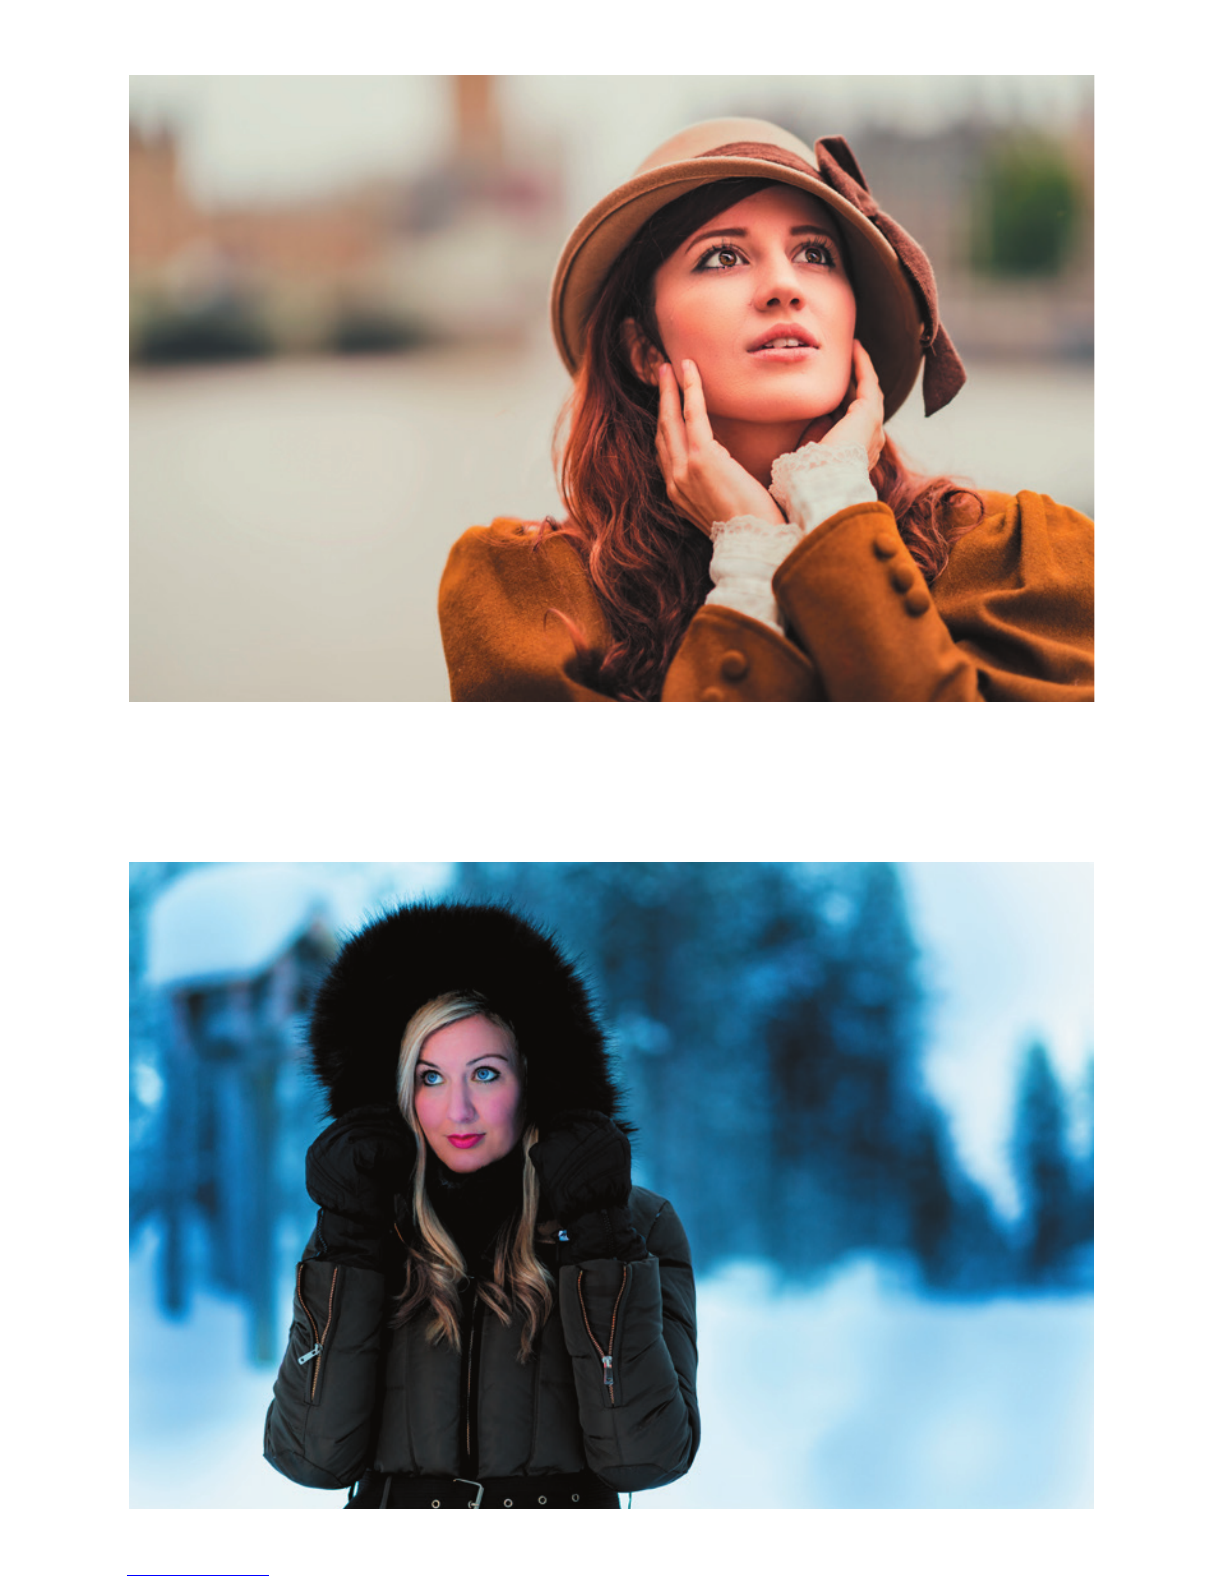
NEO 2 also features Rotolight’s AccuColour™
phosphor technology that delivers outstanding
colour rendering (CRI 96,TLCI 91) for perfect
skin tones. The unique circular shape provides
a naturally soft, flattering light output, with
Rotolight’s signature catchlight effect.
7

ABOUT ROTOLIGHT
Rotolight is a pioneering British technology
company, specializing in creating award-winning
LED lighting products for photographers,
cinematographers and videographers. Known for
constantly pushing the boundaries of innovation,
Rotolight strives to create products that provide
unique tools for image makers, allowing them to
realise their creative aspirations. Leading where
others follow, Rotolight has developed countless
industry first features and has been widely
recognized with numerous global awards and
accolades for its innovation, technical excellence
and product quality. As a family business, Rotolight
has a unique long term outlook allowing the
company to focus on continually investing to
deliver outstanding quality products and a totally
unique customer experience.
For more information visit www.rotolight.com
NEO 2 BASIC OPERATION
To operate NEO 2 you will find two red rotary
controls, a DC input and an on/off switch, located
on the rear of NEO 2.
POWER
To power up NEO 2 click the power switch (located
next to the DC input jack).
NEO 2 is a high performance light and requires
high performance batteries. NEO 2 can be
powered by 6 x AA high performance NiMH
rechargeable AA or Lithium batteries
(Note: Alkaline batteries are not suitable for
NEO 2.) NEO 2 can also be powered by 1 x V-Lock
battery (with D-Tap cable), DC from the supplied
AC mains adapter or from a DC source in the
range of 7v-15v (i.e. optional 12v Car Adaptor Cable).
When connecting a power source to the DC input
socket, for instance mains adapter or an optional
D-Tap to DC connection, the internal batteries are
automatically disconnected, thus saving battery
power. Note: if you are connecting an external
8

DC source make sure the power is the correct
polarity to avoid damaging your NEO 2. For best
results use the Rotolight ‘Powerex Pro’ LionHeart
AA batteries and charging systems. These are the
most powerful NiMH AA rechargeable available
(2700mAh) and are designed for demanding
systems like the NEO 2. Alternatively use the
Rotolight RL-Batt-95, 95Wh V-Lock batteries with
D-Tap cable (available from Rotolight.com) which
will power your NEO 2 for up to 8 hours at full
power.
On power up, you will see ‘Rotolight NEO 2’ scroll
across the screen, you can interrupt this anytime
by operating one of the control knobs.
To power NEO 2 down , click the power switch
again. Note: NEO 2 stores and will recall your last
used settings.
RESET
You can reset all the user parameters in NEO 2
by holding down the left red control knob whilst
simultaneously powering NEO 2 ON. This resets all
the parameters to the factory default settings.
The word ‘ZERO’ will be displayed, select YES (reset
all data), or NO.
BASIC OPERATION MODE (BRI / COL)
(‘Bri’) BRIGHTNESS
You can adjust the brightness output of NEO 2 by
rotating the left control knob.
If you rotate the knob quickly it will speed up the
data input. You can press and rotate to deliberately
adjust the brightness in steps of 10% (Fast Mode).
Simply rotating the knob will adjust the brightness
in steps of 1%. NEO 2 has a dimming range of
0% -100% and is completely flicker-free at any
brightness level, shutter speed or frame rate.
(Note: There is a special mode called ‘True
9
BRI

Aperture Dimming’ (F-DIM) , available in the MENU
section, which will display the brightness as an
f-stop (Aperture), based on your camera exposure
settings – see ‘True Aperture Dimming’.)
(‘Col’) COLOUR
You can adjust and accurately display the Colour
Temperature (CCT) of NEO 2 by rotating the right
control knob.
If you rotate the knob quickly it will speed up the
data input. You can press and rotate to deliberately
adjust the colour in steps of 100 kelvin (fast mode).
Slowly rotating the knob will adjust the brightness
in steps of 10 kelvin.
NEO 2 has a colour temperature range of 3150
kelvin (Tungsten) up to 6300 kelvin (cloudy/
overcast/daylight).
Note: As a bi-colour light, NEO 2 will be brightest
at the ‘mid point’ colour: roughly 4100 kelvin,
where both sets of LEDs are at full power. This also
applies in flash mode. When mid point colour is
set, a small dot will appear in the window of the
NEO 2.
NEO 2 has a special technology called ‘Dynamic
Drift Stabilisation’™, which maintains the colour
temperature through the entire dimming range.
(‘Menu’) ADVANCED OPERATION
You can enter the MENU by pressing both red
control knobs together (or clicking and holding
down the left knob followed by the right control
knob). If you wish to leave MENU at any time, you
can return to the basic operation (BRI/COL) by
pressing both red control knobs together again.
In ‘MENU’ Mode rotating the left knob navigates
the menus and takes you ‘back’ one level. Rotating
the right knob is ‘value/data entry’ and pressing
the right knob in is ‘activate/go/enter/start/trigger’
depending on the menu position.
For a full flowchart of the NEO 2’s menus, refer to
page 03.
10
COL
MENU

11
Lit by Rotolight NEO 2, Photo by Master of Light & Sony Europe
Imaging Ambassador Terry Donelly
NEO 2 - RESULT SHOT

(‘Flsh’) FLASH MODE
NEO 2 is capable of High Speed Sync Flash (HSS,
1/8000th), and has a built in Elinchrom Skyport
wireless HSS receiver.
For best results, use the ‘Rotolight HSS Transmitter’
(RL-HSS-TX) (by Elinchrom) available now for Sony,
Canon , Nikon, Fujifilm, Olympus and Panasonic
cameras from www.rotolight.com and all major
stores.
Capable of controlling up to 10 Rotolight NEO 2,
in four groups, the Rotolight HSS transmitter also
provides wireless control of NEO 2 brightness and
colour temperature in both flash and continuous
modes (Rotolight HSS transmitter only), and can
trigger CineSFX™ and Designer Fade™ (see page
25).
USING THE FLASH MODE: Scroll to ‘FLSH’ and click
the right knob to enter ‘FLSH’ mode.
Note: in order to use the flash, you must be in
flash mode (indicated by flash duration on the
display. If you see word ‘FLSH’, you are not in flash
mode and must right click to ENTER flash mode).
12 Photography by Rotolight Master of Light Jason Lanier
FLSH

13
Photography by Rotolight Master of Light Jason Lanier

Set your camera to manual flash mode. NEO 2 is
not a TTL flash, it is a manual flash with adjustable
flash power, modelling light, colour temperature
and duration settings.
Simple operation: set your camera into Manual
flash mode, refer to the f-stop table (p.20) for an
exposure guide, take a test shot and either adjust
flash power, or distance to the subject to achieve
optimal exposure.
Rotate the left knob to set the desired ‘modelling
light’ level in order to preview focus, shadow and
highlights on your subject (in %, 0-100%) and
compose your photograph.
Note: NEO 2 is intentionally less bright whilst in
modelling light mode than regular continuous
light mode, in order to make the light more
comfortable for the subject and prolong battery
life.
Press, hold and rotate the left knob to set the
desired ‘Colour Temperature’ for your flash (in
kelvin, from 3150-6300K.
Rotate the right knob to set the desired duration
for the flash, in fractions of a second, i.e. 1/50s,
1/60s, 1/80s, 1/100s…up to 1/1000s (‘1/1K0’).
Note: you can just leave the duration set to 1/50th
and NEO 2 will automatically adjust the duration
for you if the number of frames per second
requires a shorter flash.
Press, hold and rotate the right hand knob to
set the flash output power, ‘MAX’ (=250% of MAX
continuous output), ‘1/2’ (=125%), ‘1/4’ (=62%), ‘X8’
(=modelling light level x 8), and ‘X16’ (= modelling
light level x 16).
Note: when an external 15v power source is
connected (such as the AC adapter or V-Lock
battery) the NEO 2 will automatically raise the
flash output power to ‘MAX +’ ( = 500% of the
14

normal continuous maximum output, or 1 x f-stop
more flash power).
To trigger the flash from your camera (wired
operation), connect a PC sync cable from your
camera’s PC sync port to the 3.5mm mono jack on
the NEO 2.
If your camera does not have a PC sync port, then
you can purchase the optional Rotolight accessory
shoe to PC Adapter and the PC Flash sync cable,
which converts your accessory shoe into a PC
socket.
Note: PC sync is limited to your camera’s internal
sync speed (usually 1/60th up to 1/250th). It is not
High Speed Sync.
Rotolight HSS trigger by Elinchrom :
To shoot in High Speed Sync, you will need an
HSS wireless transmitter, such as the Rotolight or
Elinchrom HSS transmitter (both are compatible
with the internal receiver inside the NEO 2)
Using third party Triggers :
Alternatively, you can connect third party flash
receivers which have a PC sync or 3.5mm flash
output, with a PC sync/3.5mm cable to the 3.5mm
mono jack trigger input located on the rear of NEO
2.
Use the provided cold shoe to mount NEO 2 to
the third party receiver, or the Rotolight Mini
Arm (RL-ARM-MINI, sold separately). Connect
the transmitter on your camera and follow the
instructions supplied with your transmitter.
Recommended settings for simple one-light NEO
2 flash operation:
1) Set flash power to MAX (or MAX +, if available).
2) Set flash duration to 1/50th (any faster shutter
speed eg 1/100th will be automatically captured).
15
MAX

3) Set colour temp (kelvin) to midpoint (approx.
4100K – midpoint is indicated by a dot in lower
right hand corner of the kelvin display).
Shooting in High Speed Sync
NEO 2 is a High Speed Sync (HSS) capable flash.
High Speed Sync allows you to utilize the flash
of NEO 2, and synchronize it with your camera’s
shutter release, at speeds faster than your camera’s
native internal sync speed (typically 1/160th or
1/250th). This enables you to freeze action, and
shoot with wider apertures for improved subject
isolation.
NEO 2 will happily work with any camera and any
trigger/receiver with a PC sync input, however
to shoot in High Speed Sync your camera must
itself be capable of HSS (many are not), and you
must use a HSS capable trigger and receiver (most
trigger/receivers are not natively HSS compatible
unless explicity stated).
Note: when syncing in HSS, NEO 2 will flash
once to match the duration of the shutter speed,
ensuring that the complete frame is illuminated.
If NEO 2 detects a flash re-trigger event during
the set interval, it will automatically adjust the
duration of the flash to a shorter interval, to avoid
damage occurring to the LEDs.
Recommended triggers :
The NEO 2 is compatible with the Rotolight HSS
transmitters and the Elinchrom Skyport Plus HS
transmitters available for Canon, Nikon, Sony,
Fujifilm, Olympus and Panasonic camera systems.
You can also use third party HSS transmitters with
the NEO 2 via the PC sync port, but you will require
the transmitter and receiver set. Compatible
transmitters include, but are not limited to:
• Godox X1T
• Pixel King Pro
16

• Flashpoint R2
• Phottix ODIN II
• Pocketwizard Flex TT5 and Flex TT6
• Cactus VI II
To Exit Flash Mode
Click the left knob to return to MENU, alternatively
you can return to the basic operation (BRI/COL) by
pressing both control knobs together.
SETTING UP THE HSS TRANSMITTER
First turn on your NEO 2, then after a few seconds,
turn on your Rotolight or Elinchrom Skyport Plus
HS Transmitter (the latter requires a free firmware
update available from www.elinchrom.com).
In the setup menu, scroll down to ‘ELSP’ and
within that sub menu, rotate the rotary wheel to
‘speed’ mode, and press the centre button (inside
the rotary wheel) to activate speed mode (the
transmitter display should turn red).
Next, in the setup menu, scroll down to ‘sync’
mode and within that sub menu, rotate the rotary
wheel to ‘HS’ (for high speed) mode, and press the
centre button (inside the rotary wheel) to activate
speed mode (HS will be displayed on the screen
– note: sync menu does not appear in Nikon
transmitters and is not required to be activated for
HSS).
The Rotolight HSS transmitter by Elinchrom will
default to group 1, channel 1, same as NEO 2.
When the transmitter is connected to NEO 2, you
will see it listed as a connected device on the LCD
display, with an ID number.
You can check the transmitter is set to the same
group as NEO 2 by pressing the ‘group’ button
(toggles through ‘All, 1, 2, 3, 4’).
Check it is set to the same ‘frequency/channel’ as
NEO 2 by pressing ‘setup’/frequency (set channel
number 1-20). Put the NEO 2 into flash mode
(you will see duration stated eg 1/50th), press the
17

Elinchrom logo test button on the transmitter, and
NEO 2 will flash if correctly connected.
If nothing is received, check the receive channel
and group are correctly set on both NEO 2 and the
HSS Transmitter and that SKYP/SPED are activated
in NEO 2’s CTRL menu.
Once working, on NEO 2, click the left button to
exit, or both left and right buttons together, to exit
back to (‘BRI/COL’).
You have now configured your HS Transmitter and
NEO 2.
Please see our YouTube tutorial for additional
assistance if you need this. www.youtube.com/
rotolight
Note: Turn on the NEO 2’s first, followed by the
Rotolight Elinchrom HSS transmitter, then your
camera. If you later add an additional NEO 2 in
your setup, or you turn the NEO 2 off during a
shoot, then press the ‘refresh’ button to rescan for
available lights.
Make sure the Skyport Transmitter is set to HS
mode in settings. Select your desired exposure
duration from the camera, and shoot in single
or multiframe mode using your camera shutter
release, the NEO 2 will flash in sync with the
camera at up to 1/8000th second exposure.
The Rotolight/Elinchrom HSS transmitter is
currently available for Canon, Nikon, Sony, Fujifilm,
Olympus, and Panasonic camera systems,
For more information visit www.rotolight.com
WHEN YOU HAVE NEO 2 SKYPORT CONFIGURED
YOU CAN REMOTE CONTROL NEO 2*
On the Rotolight/Elinchrom Transmitter press the
second ‘soft key’ MOD+(click twice to see mod+)
and use the wheel to control NEO colour.
On the Rotolight/Elinchrom Transmitter press the
first ‘soft key’ (PWR) and use the wheel to control
NEO 2’s brightness on all lights connected on that
channel and group.
18
PWR Button (control
brightness of NEO 2)

To enter flash mode, on the Rotolight/Elinchrom
Transmitter press the test key (Elinchrom logo key)
, (‘MENU’ …then ‘FLSH’ will be displayed). Press the
test key again to enter flash mode.
To test the flash, press the test key (Elinchrom
logo).
To change the flash power settings press the
second ‘soft key’ (MOD) and flash power setting
will be displayed on the NEO 2. Rotate the rotary
control to change the setting.
In flash mode, press (PWR) and use the encoder to
change the modelling light brightness.
In flash mode, press (MOD+) and use the encoder
to change the flash and modelling light colour
temperature (3150-6300).
To exit flash mode, press (MOD) and rotate the
encoder wheel to the left (anticlockwise), NEO 2
will flash briefly and return to (BRI/COL) mode.
NAVIGATING MENU MODE USING HS
TRANSMITTER REMOTE CONTROL*
When you are in (BRI/COL) mode press the test
Button (Elinchrom Logo), (‘MENU’ then ‘FLSH’
is displayed). Use the rotary encoder to select
the menu item you would like to control (‘FLSH’,
‘FADE’, ‘SFX’, ‘FDIM’, ‘TECH’, ‘DEMO’).
Press the test button Elinchrom logo to enter the
sub menu, e.g. ‘SFX’ then you can select menu
items using rotary encoder, and press the test
button once to select/trigger/pause etc.
Note: To exit and go back one step, press the test
button twice. To exit ‘MENU’ and go back to (BRI/
COL), press the test button twice.
If NEO 2 is in MENU mode, you can use the wheel
to scroll through the menu items, and use the
Elinchrom logo button to enter or trigger a menu
item (this way you can select or remotely trigger
fades or the CineSFX™ items). Note: Elinchrom
Skyport key positions and functionality may vary
with camera type and firmware version.
19
Test Flash Key (single
click=right click,
double click=left click
from NEO 2)
Encoder Wheel

20
Distance
(ft) 3 6 9
Lux 2000 510 227
Fc 185 47 21
Lumens 1032 1032 1032
ISO F-stop
FLASH
mode
(AA)
Guide
Number
(GN)
F-stop
FLASH
mode
(PSU)
Guide
Number
(GN)
F-stop
FLASH
mode
(AA)
Guide
Number
(GN)
F-stop
FLASH
mode
(PSU)
Guide
Number
(GN)
F-stop
FLASH
mode
(AA)
Guide
Number
(GN)
F-stop
FLASH
mode
(PSU)
Guide
Num-
ber
(GN)
200 5.6 16.8 824 2.8 16.8 424 218 2.8 25.2
400 824 11 33 4.0 24 5.6 33.6 2.8 25.2 436
800 11 33 16 48 5.6 33.6 848 436 5.6 50.4
NEO 2 F-Stop table in FLASH MODE (measured at midpoint colour 4110K)
Shutter Speed = 1/60th
Measured at midpoint colour temperature 4110 kelvin with Sekonic flash meter, no modifiers or intensifiers used.
Other manuals for NEO II
2
Table of contents