With Hood Mount
INSTALLATION INSTRUCTIONS
1. The ROUSSEAU 5000 mounts to two stanchion assemblies installed
separate from the saw on the work stand or bench supporting the miter
saw. Proper location of the stanchions will allow full use of the saw
features at all miter and bevel angles and will optimize the location of the
hood assembly. Thus maximizing dust collection.
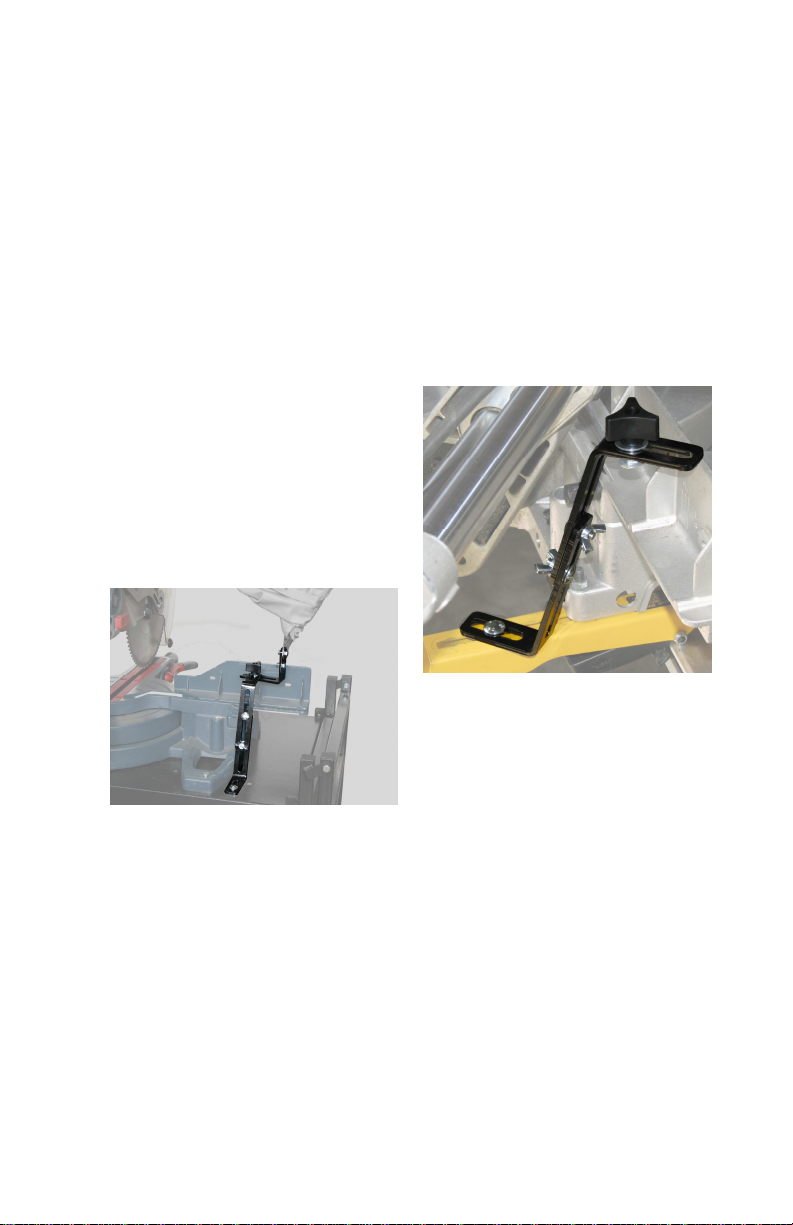
2. Assemble the stanchion assemblies utilizing the four slotted stanchions
(#1), four 5/16” x 5/8” carriage bolts (#5) and four wing nuts (#4). Note this
assembly is adjustable. See Figure 1.
3. Locate the saw on the stand or work bench.
4. Install the stanchion assembly on the stand or bench using two 5/16 x 2”
carriage bolts (#2) and two 5/16” KEP nuts (#3). IMPORTANT: The
stanchion assemblies must be located so as to not interfere with the use of
the saw at any angle. Ideally the
location of the Stanchion
assemblies will allow the front
baffle of the 5000 hood to be
positioned parallel to the back
fence of the saw and the hood
opening (left to right) to be at least
36”. See illustrations of installation
positions.
5. Add a clamping knob (#8) and
a washer (#7) to each stanchion
assembly using the 5/16” x 1”
carriage bolts (#6). Leave loose
to allow attachment of the hood.
See Figure 2.
6. Attach the ROUSSEAU 5000 hood by inserting the Hoop Mount between
the clamping knob/washer and stanchion assembly. See Figure 2.
ADJUSTMENT
Positioning adjustments may be made by raising or lowering the height of the
stanchion assemblies. To maximize efficiency of the ROUSSEAU 5000 the front
baffle of the hood should be parallel to the back fence of the miter saw while
keeping the hood clear of the work pieces. The opening to the right and left of the
saw should be such as to allow adequate airflow into the hood to capture the fine
dust created when the saw blade engages the wood.


