*depending on model 10
3 • Use
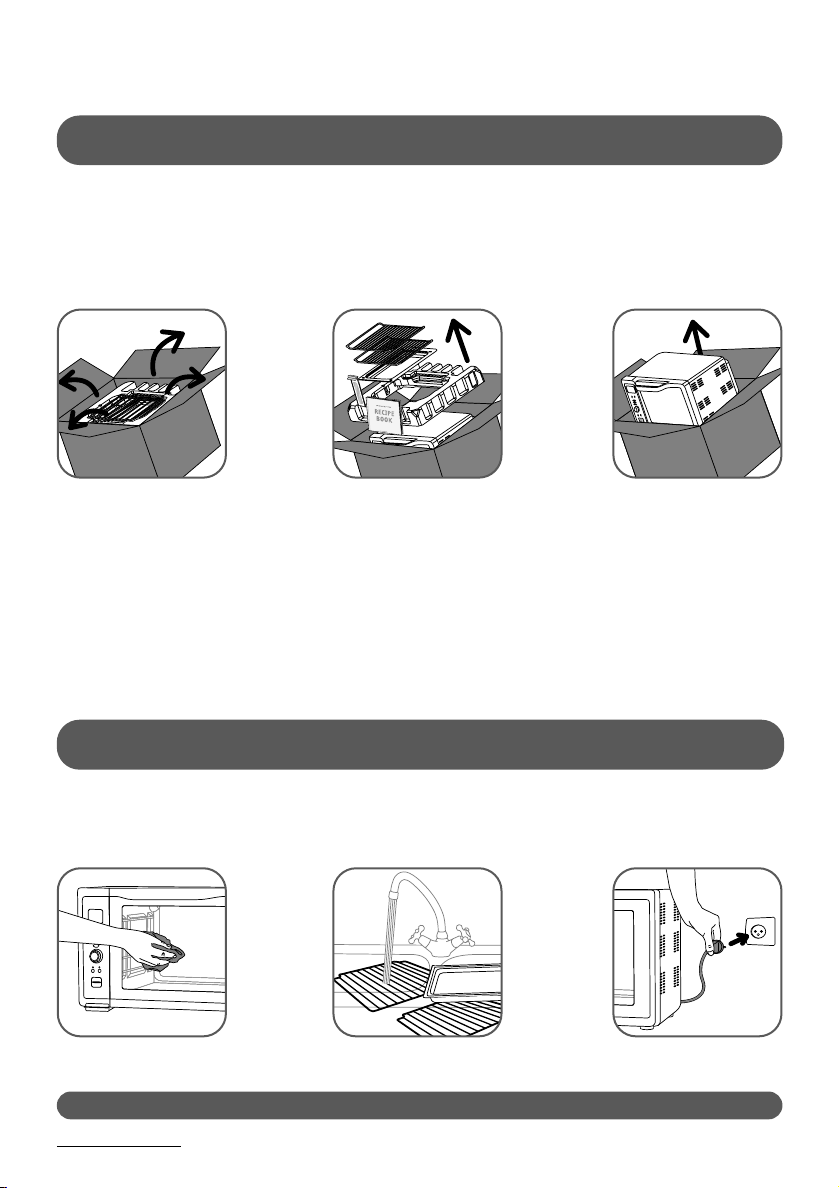
Clean the door, coated or painted surfaces, accessories and transparent parts with a damp sponge
and mild detergent. Dry well. Close the door. Pull down the cord. Plug into earthed power outlet.
3.1 • Setting up
GENERAL USE
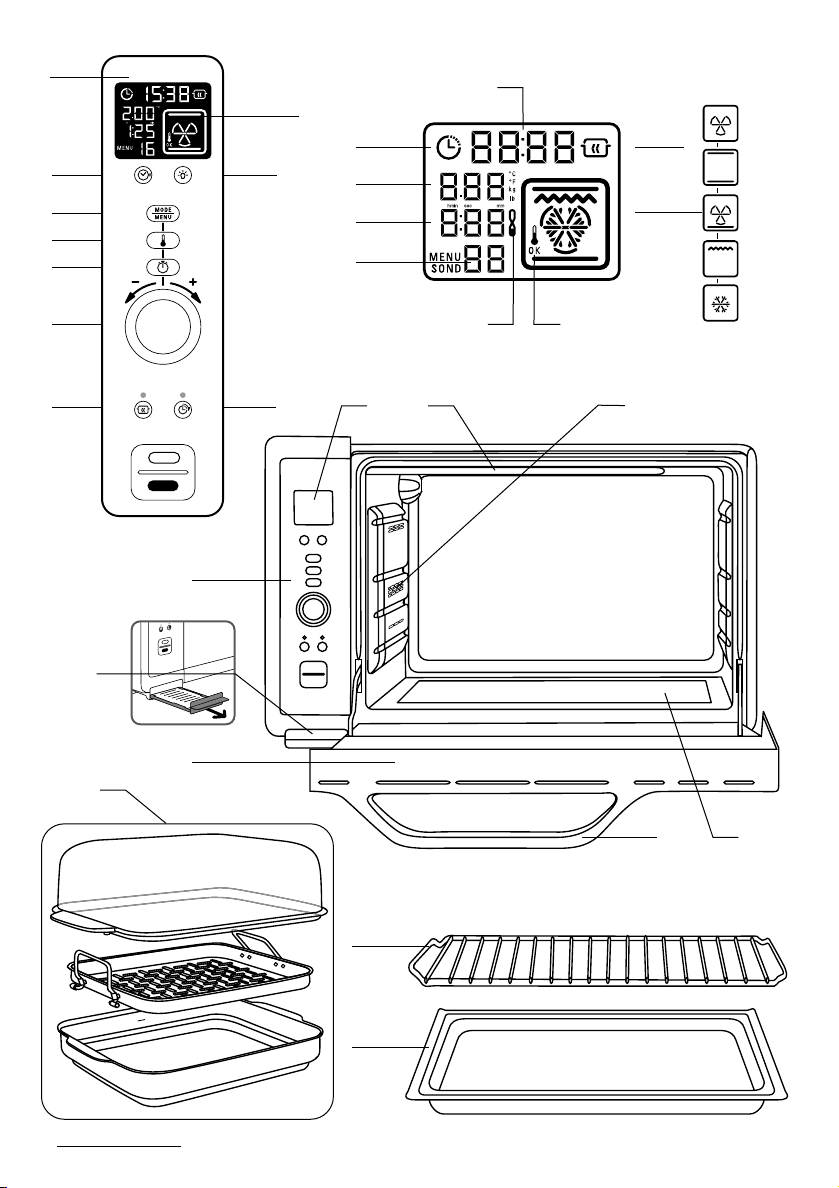
1 • Characteristics
Note that the net weight of the appliance is 15 kg. Place it on a surface able to support
this weight.
2 • Before Use
Keep your guarantee card. Read your manual and keep it carefully.
Check that the appliance is not damaged. If it is, immediately contact the seller or after-sales
service.
Place your oven on a stable surface. Remove all stickers and protection both inside and outside
of your oven.
Remove all accessories from the oven (3 in 1 steam dish)*.
Packaging is recyclable and it may be useful to use it to carry or return the oven to an
approved service station.
2.1 • Unpacking (Reminder)
Unpack your oven based on the following procedure:
Remove the tape and
open the flaps
Remove the 2 grilling racks, take
out the recipe book and remove
the oven tray*. Remove the top
section of packaging and take out
the “start guide” drawer.
2 people required to
remove the oven but
do not pull on the
handle.
WARNING do not allow water to flow over the display.
*
*