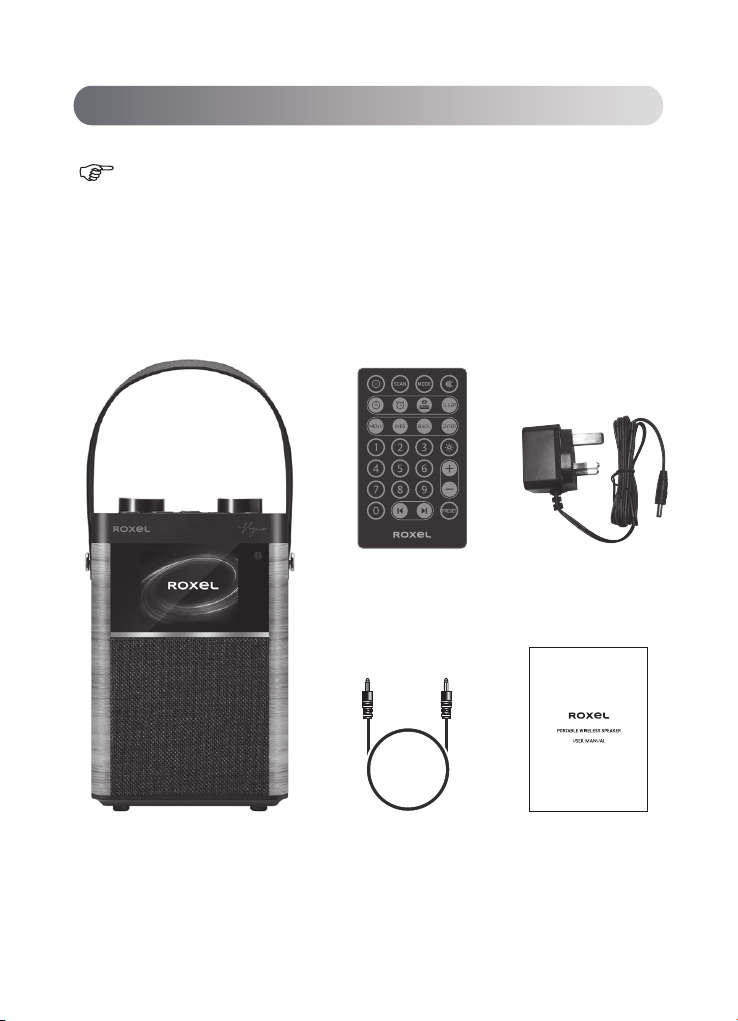
09
English
Instructions
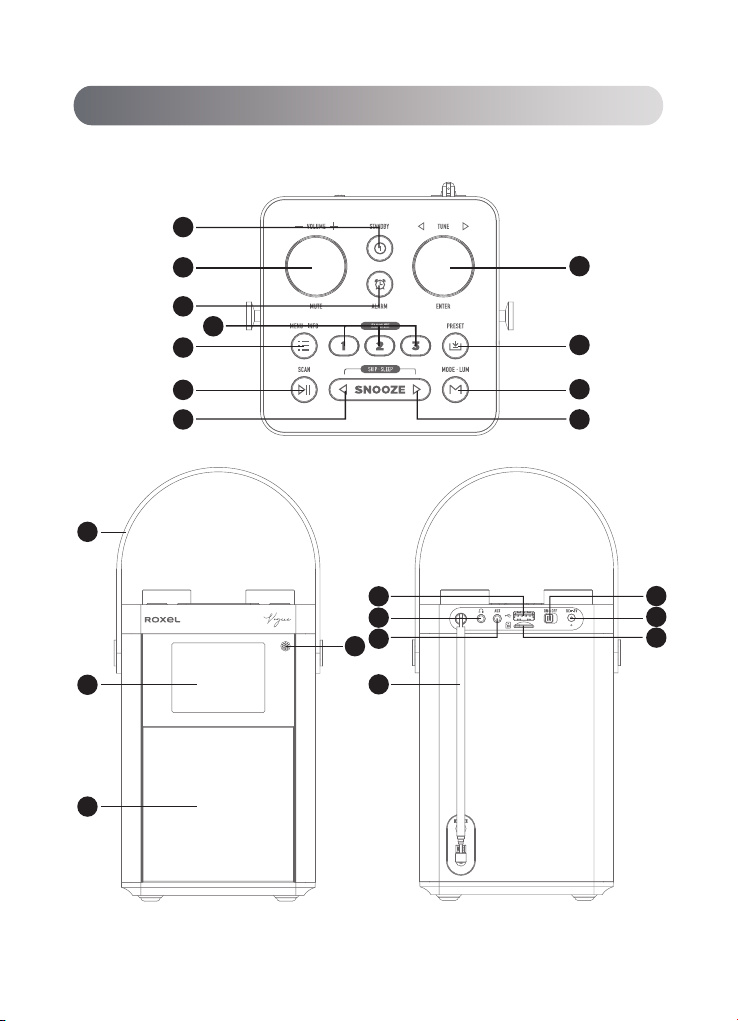
Power ON/OFF
When using this radio, please pull out the telescopic antenna to close the station.
Move the power switch on the back of the device to ON/OFF side to power on/off the
device.
DAB Radio
1. Upon being powered on, the device will go to DAB mode automatically and will
start searching for available DAB stations, which will be stored after the search is
complete. (If the device has already searched for radio stations, you can also press
and hold the SCAN button to perform automatic searching).
2. Rotate the TUNE knob to select your desired DAB station, then press the
ENTER(TUNE) button to play. Rotate the VOLUME knob to adjust volume. Press the
MUTE(VOLUME) knob to mute sound.
3. Short press the MENU•INFO button to view the current station information: text
information, signal strength, program type, episode name, channel number/
frequency, signal error rate, bit rate, time and date, etc.
4. Saving stations into preset mode:
(1) Long press SCAN button ( if a full scan was previously done please move to step 2)
(2) Find the radio station by rotating the TUNE knob.
(3) Select the channel you want to save, and press the ENTER button to enter.
(4) Press and hold the PRESET button for 3 seconds.
(5) Pick one of the available (Empty) slots from the preset store screen.
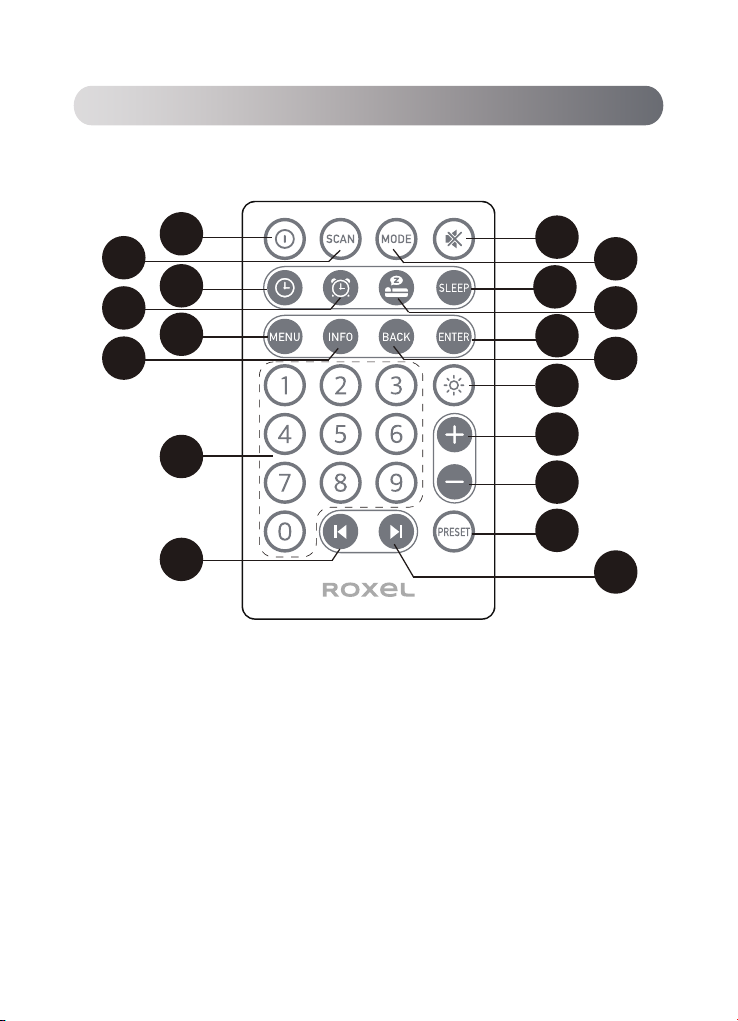
11. Sleep timer
12. Snooze key: when the alarm rings, short press to enter snooze function.
13. ENTER key: DAB / FM mode - Confirm , BT/USB/SD mode-Play or pause, Menu
mode - Confirm / Enter
14. BACK key: short press to return.
15. Brightness key: press it to adjust the display brightness level 1-2-3
16. VOL +
17. VOL -
18. PRESET key: short press --- recall radio list, long press --- add current radio
station to the radio list.
19. SKIP +