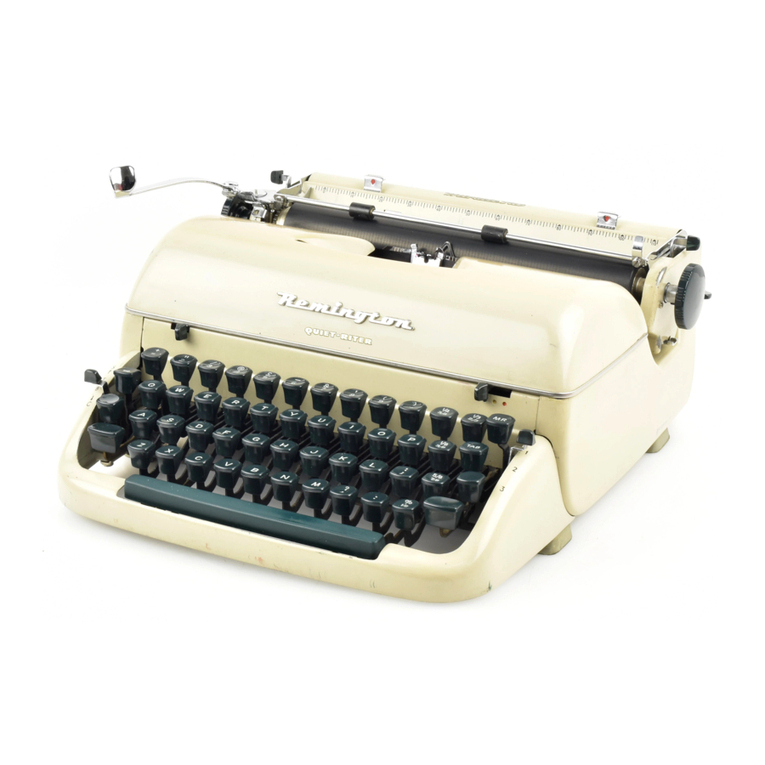
Royal SCRIPTOR II User manual

ROYAL
®
OPERATIONAL
MANUAL
Portable
Electronic
Typewriter
with
Display
SCRIPTOR
II

GENERAL CONTENTS
INSTRUCTION
MANUAL/
ENGLISH...............
..
...........
....
......... 1
SPELL CHECK.........
..
.............................................................. 22
FOR USA ONLY
NOTE:This equipment has been tested and found to comply with the limits for a
Class B digital device, pursuant to Part 15
of
the FCC Rules. These limits are
designed to provide reasonable protecti
on
against harmful interference in a
residential installation. This equipmentgenerat€
s,
use and can radiate radio
frequency energy and,
if
not installed and used in accordance with the
instructions, maycause harmful interference to radio communication
s.
However, these is no guarantee that interference will not occur in a particular
installation. If this equipmentdoescause harmful interference to radio
or
television reception, which can be determined by turn
in
g the equipment off and
on,the user is encouraged to try to correct the interference
by
one
or
more
of
the following measures:
-Reo
ri
ent
or
relocate the receiving antenna.
-Increase the separation between the equipmentand receiver.
-Connect the equipment into
an
outlet on a circuit different from that to which
the receiver is connected.
-Consult the dealer
or
an experienced radio/TVtechnician for help.
FCC WARNING:
-Changes
or
modifications not expressly approved by the party responsible for
compliance could void the user's authority to operate the equipment.
-Use a shielded interface cable.

ENGLISH
INTRODUCTION
Your
new
Electronic Typewriter increases your typing efficiency throu9h
the
use
of
the
latest,
most
advanced
technology. This manual describes
yovr
typewriter
's
functions, operating controls
and
procedures,
and
replacement procedures
for
accessories: Thorough st
udy
of
these instructions will
allow
.you
to
maximize the
efficient
use
of
your
new
electronic typewriter. ·
TABLE OF CONTENTS
RULES FOR
SAFE
OPERATION
................
..
.............................................
..
......................
..
...
......
.............
..
1
PART
NAMES
AND
FUNCTIONS
..
.......
..
............................................
..
...........
..
............
....
.......
..
..........
..
...... 2
BASIC OPERATIONS ...............................................................
..
..........
..
.....
....
.
....
..
..
..........
..
.....
....
.............. 2
HOW
TO
CHANGE
ACCESSORIES ............
....
..
............
..
...
....
..............
..
....
..
....................................
..
.
..
....
..
. 3
KEY FUNCTIONS ..............
..
.............
..
.............
..
.......
....
....
....
.
..
..
.
..
...
..
...
..
..
..
........
..
.....................
..
...............
..
4
SPECIAL FUNCTIONS
..
..........
..
.....
..
............
..
.
....
..
..
............
..
.
..
.......
..
.....
....
.....
..
....
..
...
..
............
..
..
..
.
..
........... 6
WORD CORRECTION ...................................
..
................
..
.................:
..
.
..
..
....
...
..
.
....
....
....
...........
..
......... 6
CORRECTION ON LCD
..
.
..
.
..
...
......
..
.................
..
...
..
....
..
...............
......
..............................
..
...
..
............
..
6
PARAGRAPH INDENTATION .........
..
.
..
......
..
...
..
.........
...
..
...
..
......
...
....
...
......
..
.......
....
...................
..
........
...
7
AUTOMATIC CARRIER RETURN
..
......
..
....
..
...
.................
..
....
..
.................
....
.
..
...
.....
..
.........................
..
..
7
REQ
UIRED HYPHEN AND REQUIRED SPACE .....................
....
......................
......
....
..
...........
..
.....
......
. 7
SYLLABLE HYPHEN .........
..
........
..
................
..
.....
..
....................
..
...
..
.......
..
..........................
..
................. 7
CAPS
LOCK ............
..
......
...
..
...........
..
.....
..
..............
......
.
..
.
....
....
..
.
....
....
..
....................
...
.
..
..
..
.................... 8
KB
II
......
..
...
..
......................
..
.........
..
..........
....
.........................
..
..
....
..
.....
....
..
..
...
..
.................
..
.
...
..........
..
.... 8
OVERLAY .........
..
........
..
............
..
...
..
...........
...
............
..
.......................
..
......
..
.
....
.....
..
............................
..
8
SUPER SCRIPT/SUB SCRIPT ...............
....
..
.
..
..
.....................
...
..
....
..
.........
..
...
..
..
..
.
....
.....
....
..
................
..
8
MEMORY
FUNCTIONS
...
......
.......
..
.
..
.......
..
.............
..
.
..
.............
..
.
....
........
....
..............................
..
................ 9
CREATING A TEXT FILE
......
..............................
..
..
...
..
...
..
..
.
..
.........
..
.................
..
.
...
....
..
.......
..
................ 9
MO
DIFYING A TEXT FILE ....
..
..........................
...
..
....
......
......
....
....................
....
.................
..
..
..
...
..
.....
...
..
11
CREATING A PHRASE FILE ..................
....
..................
..
......
....
.............
....
.
....
.....
..
................
..
....
..
..........
12
MODIFYING A PHRASE FILE
..
...
..
...................................................
..
...
.........
..
.....
..
................................ 13
INSERTING A PHRASE FILE WITH IN A TEXT FILE
........
....
..
.
..
...
....
....
..
.......................
..
............
..
.....
..
. 13
SETTINGTHE PAGE LENGTH
OF
A TEXT FILE ................................
..
..
....
....
........
........
....
..
...
........
..
... 13
STOP CODE .
...
..
......
.
..
...............................................
...
..
......
...
.................................
......
....................
...
. 14
SEARCH ..
....
.....
..
...........
....
.....................
...
...........
..
...
......
..
............
..
.............
..
......................
....
.........
...
..
14
BLOCK OPERATIONS (C
OPY
/MOVE/DELETE) .....................
...
...
..
........................
..
.
..
...
..
.....
..
.....
...
.
..
.
..
15
RE
CAL
LI
NG A TEXT FILE .................................
....
....
..
...........
..
..........................
..
.
..
................................ 16
RE
CALLING A PHRASE FILE ..............................................
..
..
..
......................
...
...
..
............................... 16
CHAIN RECALL .....................................................
..
.........
....
..............................
..
.......
..
........
...
....
....
...... 17
FORMAT FILE ..................................................
...
..........................
..
......................
..
...
...
.
..
....
...
.......
...
..... 17
FILE DELETION
...
....
..
............
..
.......................
..
.
..
..
..
..
..
..
.....................
..
.............................
..
............
..
..... 18
LIST OF FILES IN MEMORY .......................................................
...
...........................
....
..
..........
..
............ 18
MEMORYOVERFLOW .
..
.
..
.............................
....
......
..
...................
....
........................
...
.................
..
...... 19
MEMORY
AL
L CLEAR ........................................
..
........
......
.............
..
......................................
....
...
...
..... 19
SUPPLIES ...................................................................................
....
....................................................
........
..
20
CLEANING ..
..
...
..
........
..
......
..
.....
....
.................................
..
...................................
..
...............
..
...
....
.
..
..
..
.
..
.
..
...
20
SERVICE........
..
...............
..
...................................................
..
....................
....
.
..
.............................................
20
SPECIFICATIONS.................................. .........................
..
.
..
...
..
...
..
.....
....
..................................................... 21
RULES FOR SAFE OPERATION
1)
Make
sure
you
are
using a
prope
rty rate<!
power
s
ou
r
ce
,
as
indicated
on
the
name
pl
ate
on
the
b
ac
k of t
he
typewriter.
2)
Your
typewriter
conta
i
ns
high
ly
sop
hi
sticat
e<!
mech
anisms.
Never
attem
pt
to
repair
ii
you
r
se
lf. If rep
air
b
eco
mes
necessary, take it to
your
neares
t authoriz
e<!
service
center.
3)
Never
insert metal obj
ec
ts
such
as
a screwdriver, pa
per
clip,
nai
l file,
et
c., in
to
the ty
pe
wr
ite
r.
T
his
co
uld c
ause
damage
to
the typewri
ter
and/or
elect
ri
ca
l
shock.
4)
Do
not
leave
you
r type
writ
er
unattended
when
it
is
tu
rned on.
Always
turn
off
the
ty
pe
wri
ter
when
y
ou
finish typing.
5)
Dust
the typewriter lightly, using
on
ly a
dry
cloth.
Nev
er
u
se
water
or
so
lv
en
ts su
ch
as
th
inner
, al
co
hol,
etc
.,
to
cl
ean
yo
ur
typewriter.
6)
Make
sure
that
an
ea
sily-a
cc
essible
power
outlet
is l
ocated
close
to
the
equipment.
7) Justincase unexpected matter happens, the power cord should be immedia
te
ly removed from the wall socke
t.
The socket-outlet shell be installed near equipment and shell be easily accessible.
8) We equip our typewriter with the insulating power pack stipulated in Class I
I.
The symbol of
[g]
(IEC60417-5172) means "Class
II
Devices
".

PART NAMES AND FUNCTIONS
OPERATING
PARTS
CARRIAGE
MECHANISM
1. PLATEN ROLLER
Rolls paperin andout.
2. PLATEN KNOB
Used
to
turn the Platen Roller.
3. PAPER BAIL
~~..!,.--8
..,£...,,:__---,~
9
6. LCD (Liquid Crystal Display)
Displays the typed characters.
7. MARGIN SCALE
Provides a numerical indication
of
the printing position.
Holdsthe paper against the Platen.
8.
PAPER RELEASE KNOB
Releases paper
for
alignment.
TOP
COVER
4.
CARRIAGE
Pr
intscharacters; moves at it prints. 9. Open
to
replace accesso
ri
es.
5. CARRYING HANDLE
Used
to
carry the machine.
Normally contained inside the
bottom pan.
BASIC OPERATIONS
SETTING
UP
THE
TYPEWRITER
Place the typewriter
on
a flat surface.
Lift upthe keyboard cover and remove.
Before using
your
typewriter, be sure
to
remove
the
packing materials
as
de
scribed
in
the unpacking instructions
(See illustration 2).
Open thecord compartment cover
on
the rear
of
the typewriter and pull out
the powercord. .
Place the powercord in one
of
the
notches in the cord compartment and
then close the cover. Plug the power
cord into a suitable outlet.
2
10
. POWER SWITCH
Turnspower on and off.
TURNING
ON
THE
TYPEWRITER
Paper
Support
Push the pap
er
support up. Turn
on
the powerswitch located on the right
side
of
the typewriter.
Make sure the printwh
ee
l, ribbon
cassette and corr
ect
ion tape are
properly installed.
The typewriter will beep and the green
powerLED on the keyboard will fight.
Theprintwheelwill turn and the carriage
will move to the right, stopping atthe
programmed position.
'Jlf
/'l'--""'t:,,:----
13
~~~--
14
11. PRINTWHEEL
Element with characters for
pr
i
nt
ing.
12. RIBBON CASSETTE
13. CORRECTION TAPE
GUIDE
GuidestheCorrection Tape.
14. CORRECTION
TAPE
15. PRINTWHEELSET/
RELEASELEVR
Used when replacing the
Printwheel.
INSERTING
PAPER
15
Insert a sheetof paperbetween the
platen and the papersupport.
~
Turn the platen knob
to
feed the paper
forward. When the leading edge of the
paperbecomes visible underthe
platen, lift upthe paperbail. Continue
to
feed the paperforward until it is
between the platen andthe paper bail.
~
PaperRelease
Knob
Push the paperrelease knob towards
the rear
of
the typewriter
to
release the
paper. Adjust the position of the paper
so that it
is
straight.
Return the paperbail
to
its original
position, and return the paper release
knob
to
the forward position.

....
HOW
TO
CHANGE ACCESSORIES
RIBBON CASSETTE
Remove the
top
cover.
When installing a new ribbon, wind
up
all
of
thecolored portion
of
the start
of
the
ribbon.
Insert the t
wo
projections on the rear
of
the ribbon cassette into the two
holes in the ribbon cassetteholder.
CORRECTION
TAPE
Co
rr
ect
i
ons
Tape
Guides
I
Remove the top coverand the ribbon
cassette.
Unpack
th
e correction tape
and
hold
the t
wo
spools
in
both hands. Insert
thecorrection tapebe
hind
the
correction tape
gu
ide
and
the print
wheel as shown in the diagram.
Make sure th
at
the powdered side
of
thecorrection tape
1s
facing the card
holder.
PRINTWHEEL
Pr
int H
ead
Ca
rd
Holde
c
Printwheel SeVReleaseLever
Card Holder Printwheel
Carefully lower the frontportion
of
the
cassette so that the ribbon is located
between the card holder
and
the print
whee
l.
.
Press on the locations marked·
"@
"
until the ribbon cassette snaps into
place.
Take
up
Sp
indle Supply
Spind
le
Mount the spool holding the bulk
of
the
correction tape ontothe spindle
on
th
e
right sid
e.
Mo
unt the left spool (with
theknob) onto the left spindle.
Turn the ribbontake-up knob
to
the
left until there is
no
sla
ck
in the ribbon.
C
lo
se the top cover.
Card
Holder
Turn the leftspool to the le
ft
and wind
up the color
ed
porti
on
of
the tape.
Make sure th
at
the correction tape
passes behind both the left and right
tape guides. Re-install the ribbon
ca
ssette and close
the
top cover.
Remove the top coverand the ribbon cassette. Gently grasp the edge of
the
print wheel and carefully lo
wer
it between the card holder and the print head.
Be
sure that the characterfaces point in the directi
on
of
th
e platen.
Pressthe printwheel set/release lever until it
sn
aps into place, locking the
printwheel in.
Re-install the ribbon cassette andclose the t
op
cover.
Ifthe printwheel makes any unusual noise,
or
if the wrong characters are
printed, re-install the
pr
intwheel.
• Aft
er
replacing the printwheel and with the poweron, pressing
CODE+W
.
The
p
ri
ntwheel turns and stops
at
a default position.
3

KEY FUNCTIONS
MARGIN RELEASE
KEY---------...J
Releases
the
margin setting so that
you
can type
beyond
the
margin
or
set new margins.
TAB
KEY------~-------_J
Moves
the carriage to
the
next
tab
position.
SHIFT LOCK
KEY----
------
--------l
When ty~ing a string
of
capital letters, press
this
key to
lock
the
Shift key. When locked, the Shift
LED
(rea)
lights.
The
lock
can
be
released
by
pressing either
of
the
Shiftkeys.
SHIFTKEY--
-
--
----
---------l
Press this key to type incapital letters
or
to type
the
symbol
on
the upperportion ofa key.
LEFT/RIGHT MARGIN SET KEYS
_____
_
____
...J
Setsa new margin. Move
the
carriage to
the
position
where
you
want
to
set the newmargin. Press the MAR
LEFT
key
to
setthe left margin. Hold
down
the
Code
key
and
press the MAR
LEFT
key to set
the
right margin.
When a
new
margin is set.
the
typewriter beeps.
• When setting new margins,the display must be clear.
Furthermore,
new
margins
can
notbe set when
the
Auto
Center
or
Decimal
Tab
functi
ons
are active.
•
The
left and ri
ght
margins
must
be set
at
least one
inch apart.
When the typewriter is turned on, the auto margin
function
is
set.
Left Marain RiahtMarain
10
pitch (PICA)
10
75
12
pitch (ELITE)
12
90
15
pitch (MICRO)
15
113
SPACE BAR
__
__J
Pr
essonce gently
to
move
the carriage
one space. Holding
down
the Space
Bar
causes
the
carriage
to
move
continuously.
CODE KEY
Press this key along with another key in
order
to use a special function.
TAB SET/CLEAR KEY
This
key is
us
ed to set
and
cleartabs.
Movethe carri
age
to
the
position where
you
want
to
set
a tab and then pressthe Tab
Set
key. The typewriter
then bee
ps
to indicate that
the
tab has been set.
Up
to
16tab
po
sitio
ns
can be set.
To
cl
ea
r a tab,
move
the
carriage to the tab
to
be
cleared and then press
CODE+
TAB
SET/CLEAR. The
typewriter th
en
beeps
to
indicate that
the
tab
has
been
cleare
d.
< that
can
be used by pressi
ng
the
Code
key togetherwith other keys >
PaperEject < CODE +
(ID
> Autom~ic Full
U_nderline
< CODE +
(I]
>
This function automatically ejects the paper. Thts function underlines all characters (including spaces) that
HALF
BACK
are typed. Press CODE +
4.
The
"T"
mark appears above
HaltBack
<CODE+
~-
-
....,
> the symbol "XX"on the display.
To
release this function, press
Hold down
the
Code key and press
the
HALF BACK key. The C
ODE+
4 again. The
"T
' mark above the symbol "XX"
on
carriage moves a half space to the left. This function can only thedisplay disappears.
be used in NP mode. Automatic Word Underline < CODE +
[[]
>
Line Spacing < CODE +
~
>
Th
is funct
ion
underl
in
es each word that
is
typed. PressCODE
This function allows you to set the line spacing. Press CODE
+.
5.
The
"T
"mark appears above
the
symbol
"XX"
on
the
+ 2. "LINE
SP
1 1.5 2" appears on the display. To changet
he
d
is
play.
To release
this
function,press CODE + 5 again. The
line spacing, hold down the Code key and press the "2"
ke
y 'T "markabove the symbol "X X"on the
~lay
disappears.
again. Each time the
"2"
key is pressed,the line spacing Automatic Centering < CODE +
l_gJ
>
changes. Each time the setting
ch
anges, the new setting This function allows you to centeryour typing between the left
begins to blink. When the Codekey isreleased, the current and right margins. While holdin~ down the Code
key
, press
setting becomes the line spacing and the typewriter exits the the key with the label "CENTER on the side. When this
line spacing setting mode. function is turned on,the carriage/cursorautomatica
ll
y moves
Print Pitch < CODE +
'al
> to the center point between the two margins. After inputting
Th's f n f t th
·t
h~ d · h h · h I the characters
th
at you wantto type, press the Return key.
1 u c ,on se s e P1c ,n accor ance wit t e pnntw
ee
· (The textthat was entered appears on the display.) The text is
Press CODE + 3. "PITCH 1O12 15" appears onthe display.
To change t
he
print pitch, hold down the Code key a
nd
press printed
in
th
e center between the left and right margins, the
the "3" key again. Each time the "3" key is pressed, the print carriage/curs
or
returns to the left margin on the next li
ne
, and
pitch changes. Each time the setting changes, the
ne
w the function is then released.
setting begins to blink. When
th
e Codekey is released, the •
To
cancelthis function before printing anything, usethe
current setting becomes the pri
nt
pitch and the typewriter exi
ts
Correction key to erase
th
e text
on
the display
and
press
the print pitch setting mode. t
he
Return key.
• This typewriter is equipped with a memory backup battery Right Margin Flush < CODE +
iRl
>
that allows itto retain the line spacing and print pitch
It
is possible to print text so that the r
igh
t edge of the text is
settings for approximately five years with t
he
power flush with the right margin. Press CODE +
R.
turned off. "RIGHT MARGIN FLUSH" appears
on
the display and the
Bold < CODE +
[§]
> carriage/cursor moves to the right margin. Input text andthen
This functions prints characters in bold type. This function is press the Return key. (The inputtext a
pp
ears on
th
e display.)
useful for titles and for emphasizing important information. The.text is printed so that it isflush with the right margin, the
Press
CODE+
6. The "T" mark appears above the word carnage/cursor returns to
th
e left margin ofthe next line, and
"BOLD" on the
di
splay, indicating that the "Bold" function is this function
is
then released.
se
t.
To r~lease this function, press CODE+ 6 again. The "T " •
To
cane:el this function before printi
ng
anything, use
the
mark above the word "BOLD" on the display disappears. Correction key
to
erase
the
text on the displayand
pr
e
ss
the
Return key.
4
~-------
--
----BACKSPACEKEV
CORRECTION
KEV
Deletescharacters.
To
delete
a character, pr
ess
the
Correct
i
on
key;
the
carriage
moves
back
one
space
and
the
character
Is
deleted
.
ff
the
Correction
key
is
held
down,
characters
on
that
same
line
are
deleted
until t
he
Cor
r
ection
key
is
released. (Full
line
correction
mem
ory
)
•
To
delete
characters
outside
of
the
correction
memory,
move
the
carriage
one
space
to
the
right
of
the
character
to
be
deleted.
Press
the
Correction
key
and
then
press
the
key
corresponding
to
the
cha
racter
to
be
deleted
.
RELOCATION
KE
V - -
---
- -
--
---'
Moves
the
carr
i
age/cursor
one
space
to
the
right
of
t
he
last
character
typed.
Decimal Tabulation < CODE +ITAB
I>
Th
is fun
ct
i
on
allo
ws y
ou
to
line
up
co
l
umns
of
numbers
containing
decimal
points
so
that
the
decimal
po
i
nts
are
all
in
the
same
position
in
the
column.
Se
t a
tab
at
the
decimal
po
int
posit
i
on
in
each column.
Return
the
carriage/cursor
to
the
left marg
in
. Pr
es
s C
ODE
+
T
AB
.
The
ty
pe
writer enters d
ec
i
mal
t
ab
mode
,
and
t
he
"T "
mark
appearsabove "
DE
C"
on
the
display. Press the
TAB
key.
The
carria9e/cursor
moves
to
the
decimal tab position.
Inp
ut
text. (The inpUt text appears
on
the
display.)
If
the
Ret
urn
key
is
pressed,
the
text
is
ponied,
an
d
the
carria
ge
/c
u
rsor
returns
to
the
left
marg
n.
If
the
TAB
key is
pr
e
ssed
,
the
text
is
piin'ed
and
the
carriage/
c
ur
so
r m
oves
to
the
next
deo"18l
tab
posi
tion.
To
release
this
function,
press
CODE
-
....
AB
again
.
The
"T"
mar
k
ab
ove
'
DEC
' disappears.
Ribbon Select Setting
This
func
t
ion
is
used
to
indicateto a'E!
ryrewnter
w
hether
a
multi-strike ribbon
or
a
correctable
'1000"
is
be
i
ng
us
ed
in
the
rib
bon
cassette.
To
se
lect
th
e multi-strike
ribbon
""°'°
OOWll
the
co
de key
and
press
th
e
key
to
the
l
eft
of
tne
R,g.-· Sn-ft key.
To select the correctable
caJbon
rtiocr
'ad
down
the
code
k
ey
and press the second key
to
lne
~
rY
:re
Right Shift key.
Wheel Setting < CODE + .:!!_>
After
chang
ing
the
printwheel.
hold
00,,.
11
the
COD
E
key
and
pr
ess
fhe
W key.
Impression
Co
ntr
o l
Impre
ssion
control
allows
you
to
control
tne
striking force
of
the
pr
int
head
as
best
suits
the
type
of
pmt
wheel,
ribbon
or
paper
,
or
the
number
of
carbon
copies
be;ng
printed.
Determ
ine
the
best
value
for
each
situation
experimenta
lly,
choosin
g
from
the
following
settings.
•
LOW
:P
ress
the
I
key
while
holding
down
the
Code
key
.
One
beep
will
sound,
and
impression
strength
will
be
s
et
to L
ow.
•
MEDI
UM:Press
the
I
key
while
holding
down
Code
key
.
Tw
o
bee
ps will
sound,
and
impression
strength will
be
s
et
to
Mediu
m.
• HIGH:Press
the
I
key
while holding
down
the
Code
key.
Thr
ee
beeps will sound, and
imp
ression
will
be
set
to
High.
Each
time the
key
is
presse
d,
the
se
tt
ing will
change
in
t
he
follwing
ort
der:Low,
Med
i
um,
H
igh
, L
ow
...
Press
the
Backspace
key
once
to
move
the
carriage
back
one
space.
On
the
display,
the
cursor
moves
one
space
to
the
left. Hold t
he
Backspace
key
down
to
move
the
carrier
continuously
to
the
left.
EXPRESS
KEV
Press
this
key
to
move
the
carriage
to
the
left
margin
with
out
a line
feed.
(The
i.:lisplay
must
be cleared.)
On
the
display,
the
cursor
moves
one
space
to
the
right.
lf
this
key
is
held
down,
it
repeats
the
same
operation continuously.
RETURN
KEV
Pressing
the
Return
key
causes
the
paper
to
feed
forward
one
line
and
causes
the
car
r
iage
to
return
to
the
left
margin.
In addition,
the
correction
memory
is
cleared.
~ - - INDEX
KEV
Pressing
th
e I
ndex
key
feeds
the
paper
forward without
moving
the
carr
iage.
The
paper
is
fed
one/ha
lf
ol
a line
(1
/
12
")
each
time
this
key
is
pressed.
If
th
is
key
is hefd
down,
the
paper
is fed
forward
continuously. In
addition,
the
correction
memory
is cfeared.
~-
--
REVERSE INDEX KEV
Feeds
the
paper
backwa
rd
without
moving
the
carriage.
The
paper
is fed one
/h
alf
of
a line
down
(1/12")
each
tim
e
th
is k
ey
is
pressed.
If
this
key
is
held
do
wn,
the
pap
er
is fed
backwards
continu
ou
sly.
In
add
ition,
the
correction
memory
is
cleared.
MODE
KEV
This
key
is
used
to
chang
e the mo
de
the ty
pe
wri
ter
is in.
(The
typewriter can
be
in one
of
f
our
modes.)
When
the
Mode
Key
is
pressed
,
the
mode
changes
and
the
"T"
mark
appears
on
the
di
splay
above
the
mode
that
is
in
use.
(NP mode)
When
the
typewriter
is first
turned
on,
it
is
in
Normal
Pr
i
nt
(NP)
mode.
(LP
mo
d
e)
In
this
mode,
lines
or
text
are
printed
one
at
a time.
Characters
that
are in
put
appear
on
the
display. T
hi
s
mode
allows
you
to
corr
e
ct
in
p
ut
ch
aracters
on
the
disp
lay
before
printing t
he
m on p
ap
er. T
he
characters
on
the
d'splay
are
pr
inte
d w
hen
the
Ret
urn
key
or
th
e
T
ab
key
is pressed.
(JUST mode)
Th
is
mode
automatical
ly
ali
gns
words
between
the
left
and
right
marg·ns
when
they
are
print
ed
out.
When
c
ha
racters are
input
they
ap
pear
on
the
display,
where
th
ey
can
be
corrected
before
printing
them
on
paper.
Wh
en a w0<d
that
will
extend
bey
ond
the
right
margin
is
inpu
t, all
of
the
text
prior
to
that
wor
d
is
automaticany
prin
ted
between
the
l
eft
and
ri9
ht
margins
wi
th
the
spac
es
between
the
words
adJusted so
that
the
outpu
t
lines
up
with
the
left
and
right
margins
.
The
word
that
woul
d
have
extended
beyond
the
right
margin
rema
ins
on
th
e
disp
lay
and
becomes
the
first
wor
d in
the
next
line.
•
If
th
e
Return
key
or
the
Tab
key
is
presse
d while
typi
ng
a line,
the
text
is
im
mediately
print
ed
with
no
adju
stments
made
to
the
spacing
betwe
en w
ord
s.
(STORE mode)
In
this
mode
,
the
text
is
stored
in
the
typewriter's
mem
ory.
For
details,
refer
to
the
sectio
n on 'Me
mory
Funct
ions
".
5

SPECIAL FUNCTIONS
WORD CORRECTION
Key
to
symbols used on the following pages:
• : Explanation of how
to
use a function
■
:Explanation
of
how to make a
se
tting
• : Explanation of howto release a setting
*:Warning
,..
: Notes
• This typewriter
is
equippedwith a
Hine
correction memory. Text in the correction memory can be deleted word by word.
■ 1) Using the backspace key
or
the space
bar
,move the
carrier
to
the last letter
in
the word
to
be deleted.
2)
While holdingdown
th
e Code key, press the Correction
key. Thetypewriter will beep intermittently.
4
3) Press the space bar
or
first character key.
) Typethe newword.
5)
Press the Relocation key. The carriage moves
to
the end
of the
cur
rent line.
,..
Itis alsopossible to delete a portion
of
a word.
a)
Move the carrier
to
the lastcharacter
in
the word that you
want to delete.
b) While holdingdown
the
Code key, press theCorrection
key.
c) Type the first characterthat you want
to
delete. The
specified portion of the word is deleted.
CORRECTION ON LCD(DISPLAY)
• Text
on
the displaycan be corrected
or
deleted.
■
1)
To
make corrections, press
the
Backspacekey
or
the
Express key
to
movet
he
cursor
so
that
it
is underneath the
character to be changed. Typethe correct character. The
newcharacterautomatically replacesthe old character.
2)
To delete a characterin the middle of other text, press the
Backspace key
or
the
Express key to move the cursor
so
that
it
1s underneath the char-
c1c
ter
to
be
deleted. Pressing
the Correction key thencauses the character
to
disappear
and the remaining text
to
shift
to
the left.
6
•
• Holdingdownthe Correction keymakes it possible
to qui
ck
lydelete more than one character.
When the cursoris located at the end
of
the text,
the text moves
to
the right as each character is
deleted.
3) To delete text one word
at
a time, move the cursor
so
that
it is underneath the space following the word to be deleted.
While holdingdown the Code key, pressthe Correc
ti
on
key. The word is deleted and the remaining text shifts to
the
left.
4)
To
insert a character
in
the middle of text, press the
Backspace key
or
the Express key and move the cursor
to
the character
to
the right
of
where you want to insert a
character.
While pressing theCode key, press the
"O"
(I
NSERT) key.
The character above the cursor begins blinking in
alternation with the 'I" mark. Type the character (or space)
that you want
to
insert. The character is inserted
to
the left
of
the cursor. Each timea character is inserted, the cursor
moves
to
the right. (When the cursoris
at
the right-hand
edge
of
the
display, the text shifts
to
t
he
left.)
To
terminate insertmode, hold down
the
Code key and
press the
"O"
(INSERT) key again.
The
gooi
typewriter
I
l
cooE
I +
~
I
or
[i]
Theli I
typewriter
The
The
best6
rpewriter
best typewrite~
bb.est
typewriter
LP
b~st typewriter
y
◄
42
◄
43
very very_fine
◄
42
...
LP
l
cooE
I +
~
I
veryJine day
◄
43
...
e best typeriter
◄
43
LP
l
cooE
j +
..
SERT
0
e best typeriter
◄
43
e best typewriter
◄
42

I
)..
..
PARAGRAPH INDENTATION
• It is possible
to
seta temporary left margin.
■
1)
2)
Movethe carriage to the position where you wantto set the
temporary left margin.
Wh
il
e holding down the Code key, pressthe Express
(INDENT) key.
The
"T"
mark
will appearabove "INDENT"
on the display, indicating that the currentposition
has
now
been set as a temporary margin.
3) Typethe text that you want indented.
_..
To
release the temporary left margin, hold down the Code
key
and pressthe Express (INDENT) key again. The "T"
mark above "INDENT" disappears.
AUTOMATIC CARRIER RETURN
IN
DENT
I
CODE
I + I
EXPR
I
y
NP
◄
62
y
INDENT
• This function makes it possible to type continuously and havethecarrier/cursor automatically return
to
t
he
start
of
the next line withouthaving to press the Return key at the end of each line.
■
1)
While holding down theCode key, pressthe
Re
turn (AUTO
RET) key.
The
"T"
mark will appear above "RETURN" on
the
display.
2) Oncethis function is activated, the typewriter will beep
when thecarrier enters the autoreturn zone (the five
spaces
to
the left of the
ri
ght
margin). When a hyphen
or
space is typed in the autoreturn zone, the carriage/cursor
automatically returnsto the leftmargin
on
the next line.
_..
In order
to
release this function, hold downthe Code key
and press the Return (AUTO RET) key again the
"T
"mark
above "RETURN" disappears.
,..
(For the typewriterwith USA
or
CanadaFrench keyboard)
Ifa hyphen
or
space
is
nottyped in the hot zone, the
carriagewill advance past the right margin.
REQUIRED HYPHEN AND REQUIRED SPACE
ICODE I +
~ETUR
N I
◄ 62
y y
LP
RE
TU
RN
• Thisfunction allows you
to
input a hyphen
or
space within the auto return zone without triggering the
auto
return
function.
■
1) Hold
dow
n the Code key andpress
th
e (HYPHEN) key at
the position where you want the requir
ed
hyphen.
On
the
display,
the"
~"
markappears, representing a required
hyphen.
2)
Holddown the Code key and press the space bar
at
the
position where you want the req
ui
•eo space.
On
the
display,
the"
~ " mark appears. representing a required
space.
SYLLABLE HYPHEN
•
This
function allows you
to
hyphe
nate•
,•,
ords
at
the right margin.
* Syllable hyphensare available in STORE mode only.
■
Ho
ld down the Code
key
and press the ·w key. The
"H"
mark appears on the display, representing a syllable
hyp
hen.
As
this manual goes to press, the
sy
llable hyphen is printed
only when ii falls in the auto return zone. Ifyou
mo
dify the
file andthe hyphenated word shifts out
of
the autoreturn
zone, the syllable hyphen is ignored and is not
pr
inted.
ICODE I +
l]
ICODE I +
I
CODE
I +
[EJ
7

' I
CAPS LOCK
• This function allows you
to
type uppercase letters without pressing the Shift key.
■
1) While holdin~ down the Code key, press the "1" (CAPS)
CAPS
key. The
"T
markappears above "CAPS" on the display. l
cooE
I
OJ
+
* In Caps Lock mode, pressing a letter key causes an upper
case character
to
be typed without pressing the Shift key.
CAPS
LOCK
-
◄
43
The number/symbol keys are printed in lowercase. Ifyou y y
press the Shift key
in
this mode, letterkey are printed in
LP
CAPS
lowercase, and the number/symbol keys areprinted in I
SHIFT
I
uppercase
.
...
In order to release this function, hold down the Code key caps lock _
◄
43
and press the "1" (CAPS) key. The "T" mark above
"CAPS" disappears. y y
KEYBOARD II (SPECIAL CHARACTERS)
• The following method is used
to
type the upperright-hand characters shown on keys that display three characters.
■
1)
While holding down the Code key, press the Margin
Release (KB
11)
key. The "T" markappears above "KBII"
on the display.
2) While pressing the Shift key
or
with the Shift Lock key
down, press the key containing the symbol that you want to
type.
3) In order
to
release this function, hold down the Code key
and press the Margin Release (KB II} key again. The
"T"
markabove "KBII" disappears.
OVERLAY
lco
oE
I +
~
I- y
◄
62
y
LP
[1
SHIFT
1
◄
61
y
Thisfunction is used
to
create characters notfound
on
the keybord by printing onecharact
er
on top of another.
• This function is available
in
the LP, JUST mode and STORE modes.
1) Press the first key desired. Thecorresponding character
appearson the display.
2)
Hold down the Code key and then press the Backspace
(OVERLAY) key.
The"
~ " mark appears on the display.
3} Type the key forthe characterthat you want to type
ov
er
the previous character.
O_
y
LP
l
cooE
I
0+-_
y
LP
OVERLAY
BACK
+
SPACE
◄
30
◄
31
SUPERSCRIPT/SUBSCRIPT
• This function allows you
to
type text that contains superscripts
or
subscripts, such as H20
or
E=
MC
2•
8
SUPERSCRIPTS
■
With the carriage/cursor located at the position where you
want to type the superscript character, hold down the Code
key and press the Reverse Index key. In NP mode, the
printing position moves
up
one-half
of
a line. In LP, JUST,
or
STORE mode, the "t" mark appears on the display.
Type the superscriptcharacter. When the superscript
character is printed, the carriage returns to its original
position.
SUBSCRIPTS
■
With the carriage/cursor located at the position where you
want to type
the
subscript character, hold down the Code
key and press the Index key. In
NP
mode, the printing
position moves down one-half
of
a line. In LP,
JUST
, or
STORE mode, the
"f'
markappears
on
the display. Type
the subscript character. When the subscript character is
printed, the carriage returns
to
itsoriginal position.
MC;
_
◄
28
y
LP
ICODE I + j INDEX I
H;_
◄
29
y
LP

..
MEMORY FUNCTIONS
This function allows you to type quickly and efficiently by letting you store frequently used phrases, long words, and
correspondence, all of which you can lateredit and print immediately. You can also create format files containing
marginand tab information.
The
typewriter's memory stores 16,000 characters that can be divided intoa maximum
of
50 files. The contents
of
the
files in memory are maintained by a back-up battery for about five years, even when you turn
off
thetypewriter.
You can create three types of files with this typewriter:
1)
Text files ------------------forstoringcorrespondence, etc. (including tabs and margins)
2) Phrase files ---------------forstoring frequently used phrases and words
3) Format
fi
les ---------------F
or
storing li
ne
formats (margin and tab information only)
Select the appropriate file according to
your
requirements.
CREATING A TEXT FILE
There are three ways to create a text file:
<Displ
ay
mode>
You create a text file line by line using the margin settings, in the same way
as
you would type on paper. Characters
appearon the display as you type. When a line is compfeted, the line is stored in memory,
but
nothing is printed on the
paper.
<Printmode>
You create a text f
il
e line by line using the margin settings, in the same way as you would type on paper. Characters
appearon the display as you type. When a line is compreted, the line is stored in memory and printed on paper.
In boththe Display mode and Print mode, a column counter appears on the right side
of
the display indicating the
remaining number
of
spaces
to
the right margi
n.
<Edit mode>
You create a text file as one continuous line of text. Characters appearon the display continuouslythrough to the end
of
the file, without changing the line. You can scroll
to
any point in the file
to
make changes, corrections,
or
to si
mp
ly review
the text.
Creating a text file in
the
Display mode
or
Print mode
■
1) Press the Mode key until a "T " appe
ar
s above "STORE"
on the display. The message
'NAM
E OF FILE?" appears.
Type the file n
ame
(five letters/numbers), then pressthe
Return key.
2) The message "Text/Phra/Form? apoears on thedisplay.
Press the "T" key
to
select a text Re. The p
aper
advances
one
li
ne and the carriage returns to
me
left margin. The
me
ssage "Displ
ay
/Print/Edit?" appears
on
the display.
3) Press the "D" key to choose tr,e Displaymode,
or
pressthe
"P" key to ch
oo
se
the Print mode. The display iscleared
and the column counter apoea'S
on
the right side
of
the
di
sp
la
y.
The automaticretu'l'l
'vicnon
is automatically
activated.
Set
or
cle
ar
any
marg\llsand .aos
as
required foryour
document.
4)
Type the text. Characters appear
on
the display
as
you
type. When a li
ne
is completed. the line is
st
ored in
me
moryanddisappears from the display. In the Print
mode, the line is
pr
i
nt
ed
onto
the paper
at
this time.
.-
Correct errors while the
li
ne of text appears on the display,
since you cannot scro
ll
b
ack
after the line
is
stored and
disappears from the display.
.A.
1) Press the Mode key to exit the Store
mo
d
e.
Thetypewriter
returns to the
NP
mode.
2) You
ca
n exit the STORE mode by pressing the Mode key
at
any
time.
NAME OF FI
LE
?
!'.
STORE
( type file name
Text / Phra / Form ?
!'. I
cp
Display /
Print/
Edit ?
y
~
or
0
I -
◄
65
RETURN
[ typetext j
I
MODE
I
9

' i
JI
10
Creatinga text file in
the
Edit
mode
■
1)
Press
the
Mode
key untila
"T"
appears
above
"STORE"
on
the
display.
The
message
"NAME
OF
FILE?" appears.
Type
the
file
name
(five letter/numbers), then
press
the
Return key.
2)
The
message
"Text/Phra/Form?"
appears
on
the
display.
Press
the
"T" key
to
select
a
text
file.
The
paper
advances
one
line
and
the carriage returns
to
the
left mar~in.
The
message
"D
ispl
ay/Pr
int/Edit?"
appears
on
the
display.
3)
Press
the
"E"
key
to
choose
the
edit
mode. The
display
is
cleared.
4)
Type
the
text.
As
you
type, characters
appear
on
the
display
as
one
continuous line
of
text,
without
chang
ing
the
line.
~
1)
Press
the
Mode
key
to
exit the
Store
mode.
The
typewriter
returns
to the
NP
mode.
2)
You
can
exit
the
Store
mode
by
pressing
the
Mode
key
at
any
time.
Some
tips
for
using the edit mode
1)
The
typewriter
functions
are
indicated by
the
following
symbols
on
th
e display.
In
the
edit
mode,
the
column
counter
does
not
appear
and
the carriage
does
not
move.
The
following
symbo
ls
appear
to
represent carriage
movement.
At
the
position
where
you
activatea function, a
box
mark
"I"
appears
to
represent
the
function.
The
box
mark
alternatelyflash
es
with
th
e function
name
when
you
pos
ition
the
c
ursor
under
the
box
mark. To cancel the
function,
delete
the
box
mark
.
Margins
and
tabs
are
set,
two
box
symbo
ls
appear
on
the
display
(TEXT
files only).
The
right
box
symbo
l flashes in alternation with the function
name,
such
as
LEFT
MARGIN
SET"
or
"TAB
SE
T". T
he
left box
symbol
fl
ashes
inalternation with the m
ess
age
"MOVE
CARRIER
TO
XX."
The
number
"
XX
"indica
tes
the
margin
or
tab position.
If
the
numbers
"XX"
in
t
he
left
box
are changed,
the
ma
rgin
or
tab setting changes. Pressing
the
Index
key
causes
the
number
to
increase,
and
pre
ssing
the
Reverse
Index
key
causes
the
number
to
de
creas
e.
To
set
a
margin
or
tab
in the middle
of
text
, first
hold
d
own
the
Code
key
and
then
press
the
"O"
key
to
e
nt
er
Inse
rt
mode. Next, press
the
Code
key
and the "M" k
ey
to
insert
the
box
symbol
(MOVE
CARRIER
TO
XX
). N
ext
,
pres
s
th
e
Left Margin key, the
Tab
Set/Clear
key
or
a
similar
function
key,
and
insertthe
box
mark. Then
mov
e the cu
rs
or
underneath the
"XX
"
marks
and
enter
the
de
sired number.
2)
Move
the
cu
r
sor
to
scro
ll
to
any
position in the file.
Press
the
Backspace
key
to
move
the
cur
s
or
o
ne
space
to
the
left.
Press
the
Express
key
to
move
the
cursor
one
s
pace
to
the
right.
Press
the
Relocation
key
to
move
the
cursor
to
the
end
of
the file.
Pr
es
s
th
e
Code
key +
the
"B"
key
to
move
th
e
cursor
to
the
beginning
of
th
e file.
NAME OF FILE ?
y
STORE
[ type file name
~TU
RN
I
I
Text/
Phra
/Form?
,,
Display / Print / Edit ?
,,
y y
RETURN
type text
.J Return
->
Tab
.J.
Index
i Reverse Index
i-
Sub script
f Superscript
_ RequiredHyphen
~
Required Space
(:J
Stopcode
l
<->
LEFT
MARGIN
SET'
IH
RIGHT
MARG
IN'
IHMARGIN RELEASE
IH
MOVE
CARRIER
TO
XX
IH
RIGHT
MARGIN
FLUSH
IH PAGE
LENGTH=XX
HIT
'
IH
ALL
TABS
CLEARED
l<->TAB
SET'
IH
TAB
CLEAR
l<->INDENT
IHAUTO CENTER
You can not usethefunctions
marked•
in Phrase files.
I
EXPR
I
IRELOC I
I
CODE
I +
~

MODIFYING A
TEXT
FILE
There are two ways
to
modifythe text file stored in memory.
<Add mode>
You addsome text at the end of
the
text file line
by
line, the
same
way
you created the file in the Display mode
or
Print
mode.
<Editmode>
You edit the text file scrolling to a desired location in the file.
Modifying a text file in the
Add
mode
■
1) Press theMode
key
until a
"T"
appearsabove "STORE"
on
thedisplay.
2)
Typethe name
of
the text file you want to addtext to. Then
press the Return key. The message "Edit/Add?" appears
on thedisplay. Press
the
"A"
key
to choose the Add mode.
The
message "Display/Print?" appears
on
the display.
3) Press the "D" key
to
choose the Displ
ay
mode or press
the
"
P"
key
to
choose the Print mode.
4) Type the text
to
be
added. Characters appear
on
the
display as you type. When a line iscompleted, the line is
stored
in
memoiy
and disappears from thedisplay. Inthe
Print mode, the line is printed
on
the paperat this time.
.&.
Press the Mode
key
to exit
the
STORE mode. The
typewrit
er
returns
to
the NP mode.
Modifying a text file in
the
Edit
mode
■ 1) Press the Mode key unt
il
a "T"' appearsabove " STORE"
on the display.
2)
Type
the name of the text file
you
want
to
edit. Then press
the Return key. The message 'Edit/Add?" appears
on
the
display. Press the "E" key to choose the Edit mode.
The textfile appears on the di
sp
lay
as
one continuous line
of text. You can scroll to
any
po
inl
in the file
to
make
changes, corrections,
or
to simply review.
.&.
Press the
Mode
key
to
ex
it the STORE mode. The
typewriterreturns
to
the
NP
mode.
NAME
OF FILE ?
"'
STORE
I
type file name
I
M
TU
RN
I
I
Edit/
Add?
y
Dis~ay
/
Prin~
?
@]
or
[El
type text
NAME OF FILE ?
y
STOR
E
type f
il
e name
E
di~
Add?
:
◄
55
RETU
RN
xxx
;xxxx
xxx~
xxxx
xxx
xxxx1
~
11

1,
I
CREATING A PHRASE FILE
There
aretwo ways
to
create a phrase file.
<Displaymode>
You cre
ate
a phrase file
on
the display as onecontinuous line of text, regardless
of
the margin settings. Nothing is
printed
on
the paper.
<Editmode>
You create a phrase file on the display line by line.
The
line is
pr
inted on the paperaccording
to
thecurrent margin
settings, but the margin settingsare notstored in the file.
Creating a phrasefile in
the
Display mode
■
1) Press the Mode key until a "T" appears above "STORE"
on
the
display. The message "NAME
OF
FILE?" appears.
Typethe file name (five letters/numbers), then press the
Return key.
2)
The
message "Text/Phra/Form?" appears on the display.
Pressthe "P" key
to
select a phrase file.
The
message
"Disp
la
y/Print PHRA?" appearson the display.
3)
Press the "D" key
to
choose the Display mode. The display
iscleared.
4) Typethe phrase to be stored. Characters appear on the
display
as
one continuous line of text. You can scroll to
any
point in the file
to
makechanges, correction,
or
to
simply
review.
• Pr
ess
the Mode key to exit the Store mode.
The
typewriter
returns
to
the
NP
mode.
Creating a phrase file in the Print mode
■
I)
Press the Mode key until a "T" appears above "STORE"
on the display.
The
message
"NAME
OF
FILE?" appears.
Typethe file name (five letters/numbers), then press the
Return key.
2)
The
message "Text/Phra/Form?
"appear
s on the display.
Pressthe "P" key to select a phrase file. The message
"Display/Print PHRA?" appearson thedisplay.
3) Press the "P" key
to
choose the Print mode.
The
display iscleared and the column
co
unterappears on
the right side
of
the display.
The
automatic return funclion
is automatically activated.
4)
Type in the phrase
to
be stored. As you type, characters
appearon the display line
by
line aligned
to
the current
margin. When a line is completed, the line is stored and
printed on the paper.
Although phrase files areentered and printed one line at a
time in the
pr
i
nt
mode
, they are stored
as
onecontinuous
line with
no
margins.
NAME
OF
FILE ?
y
STORE
type file name
Q
I
TextI Phra / Form ?
y 0
I
Display/
Print PHRA ?
y
I- y
type text
NAME
OF
FILE?
STORE
type file name
Text I Phra / Form ?
y
Display/
Print PHRA ?
y
y
◄
65
• Press
the
Mode key to exit the Store mode. The typewrit
er
returns
to
the
NP
mode.
12

-!,
..
t
MODIFYING A PHRASE FILE
■
1) Press
the
Mode
key
until a
"T"
appears above "STORE"
on the display.
2)
T
ype
the name
of
the phrase file you want
to
edit. Then
press the Return key.
The
phrase file appears
on
the display
as
one continuous
line
of
text. You can scroll
to
any
point in the file to make
changes, corrections,
or
to simply review the text.
.A.
Pressthe
Mode
key
to
exit the Store mode. The typewriter
returns
to
the NP mode.
NAME
OF
FILE?
y
STORE type file name
I
[!ETURN
I
I
~xx
:xxxx
xxxx
xxxx
xxx
xxxx1
I
M~DEI
INSERTING A PHRASE FILE WITHIN A
TEXT
FILE
• A phrase file can
be
inserted inside of a text file. When the text file is printed, the phrase file is printed at the position
where it was inserted.
■ 1) Position the cursor/carriage at the point in the text file
whereyou want
to
inserta phrase file.
2)
Ho
ld down
the
Code key and pressthe "G" key. The
message "NAME
OF
FILE?" appears on the display.
3) Typethe
name
of
the phrase file
to
be inserted. Then press
the Return key.
The
file name is inserted at the cursor
position, between two box marks.
To
deletethe inserted phrase file, move the cursor under
the first box and pressthe Correction key.
.A.
Ifthe phrase file you inserted does not exist in memory,
printing pausesand
the
message "NOTFOUND.J"
appears. Press the Return key to cancel the print operation.
SETTING THE PAGE LENGTH OF A
TEXT
FILE
• The page length can be set ins
id
e
of
a text file.
When
entering a text file, this setting reminds you that you
areapproaching
the
bottom
of
the page. When printing a
text file, the typewriterpauses after
it
prints the numberof
lines specified in this setting
so
that you can insert thenext
sheet
of
paper.
■
1)
While creating
or
modifying a text file, hold down the
Code
key and press the
"L
" key. The message 'PAGE LENGTH
=
54
HIT
.J
"appears
on the display.
" 54" is the preset setting for an
11
-inch-longsheet of
paperwith 1-inch
top
and bott
om
margin
s.
2) Type the number
of
lines (per page) for the page length.
Press the Return
key
to store the setting.
.-
When
entering text in the Displaymode
or
Print mode,
when you reach the 4th line from the bottom
of
the page,
the
message " 3LINES LEFT H
IT
MREL
' appears
on
the
display. This reminds you there are
on
ly three lines
remaining
on
the current page. Press the Margin release
key
andcontinue typing.
When printing the textfile, this setti
ng
appears before you
start printing. It reminds you that
pr
intingwill temporarily
stopfor a
new
paperinsertion afterthe numberof
li
nes in
this setting are printed.
l
cooE
I +
@]
I
NAME
OF
FILE ?
y
STORE I
type file name
I
P1
I
y
I
STURN
I
I
CODE
I +
Cu
I
PAGE LENGTH = 54 HIT .J
y
STORE
type numbers
I
Q
I
3 LINES LEFT HIT MREL
y
~
~
13

I,,
I
STOP CODE
• Stopcodes
ca
u
se
the p
ri
nting to pause the predetermined locations in the file in order for you
to
type in extra text.
Afteryou type in the text, the typewriter resumes printin
g.
You can enterstop codes in a text file
or
a phrase file.
Entering a stop
code
■
Position the cursor/carriage
at
the point in the text file
or
phrase file where you want
to
entera stop code. Hold
down the Code keyand press the "7" key. A highlighted "S"
appears
on
the display. When you create
or
modify a file
in
the print mode,
an
"X" is printed at the position where you
entereda stop code.
!Yping
text ata stop code
■
1) While printing, the typewriter pauses at a stop code. The
message "STOP CODE" appears
on
the display.
2) Type
the
text. Each characteryou type is immediately
printed.
3) Hold down the Code key and press the "8" key
to
resume
printing.
Dearm _
◄
59
,,
STORE
STOP CODE
type text
Enteringa function stop code
• You can
enter
a stop code with the auto center
or
right margin flush function,
or
at the decimal tabposition.
■ 1)
2)
First, activate the decimal tab, autocentering
or
right
margin flush function insi
de
of
the text file
or
phrase file.
Hold down
the
Code key and press
the
"7" key. A
highlighted
"ml"
appears
on
the display. I
CODE
I +
ID
, I
CODE
I + [§]
3) Press the Return key. The respectivefunction mode is
terminated. Continuetyping text.
!Yping
text
at
a function stop code
■
1) While
pr
inting, the typewriterpauses
at
a stop code
position. One of the following messagesappears
on
the
display:
AUTO CENTER
STOP
DECIMALTAB STOP
FLUSH RIGHTSTOP
2) Type the desired text. Each characteryou type appears on
the display.
3) Press the Return key. Thetext on the display is printed. It
is
aligned with the stopcode position according
to
the
respectivefunction.
4)
Hold down
the
Code key and pressthe "8" key
to
resume
printing.
SEARCH
• Thisfunction searches
for
and displays a word in a text file
or
a phrase file.
■
1) Displaythe text file
or
phrase file using the Eoit mod
e.
Hold
down the Code key and press the "9" key. The message
"S=" appears on the display.
14
2)
Type the word(s) you want
to
search for. You can type a
maximum
of
18
characters includingspaces.
3) Press the Indexkey
to
search from the currentcursor
position toward the end
of
the file.
or
Pressthe Reverse
index key to search from the the current cursorposition
toward the beginning
of
the file,
4)
The first occurrence
of
the word(s) appears
on
the left side
of
the display.
If there
is
no
occurrence
of
the word(s)
in
the file, "NOT
FOUND PRESS.J" appears on the display. Press the
Return key
to
cancel the function.
or
I
CODE
I+ I
TAB
I
lcoDEI + 0
I
◄
55
AUTO CENTER STOP
type text
I
MTURN
I
I
j
coDE
I + [I]
S=
STORE
type text
NOT FOUND PRESS .J
...

)
}
}
'
JJ
BLOCK
OPERATIONS (COPY/MOVE/DELETE)
Copying a block
of
text
• This function copies a block
of
text and inserts it into a specified location in the file. This operation does notchange
or remove
the
original text.
■
1)
Display the text fi
le
or
phrase file using the Edit mode.
Position the cursor underthe first character
of
the text
to
be
copied.
2)
Holddown theCode key and press the "P" key . This
marksthe beginning of the block.
Two
beeps sound.
3)
Movethe cursorto the lastcharacter
of
the text
to
be
copied. As you move the cursor, characterscontained in
the
blockbegin blinking.
4)
Hold downthe Code key and press the "P" key a9ain. This
marksthe end
of
the block.
Two
beeps sound indicating
the block
of
texthasbeen defined.
5)
Movethe cursor to the position where you want
to
copy the
blockoftext.
6)
Hold down the Code key and press the key
to
the
ri
ght
of
the TAB key. The block of text is copied
to
the specified
position.
Moving a block
of
text
• This functi
on
movesa block
of
text
to
a specified location
in
the file.
■ 1) Display the text file
or
phrase file using the Edit mode.
Position the cursorunderthe first character
of
the text to
be
moved.
2
3l Perform steps 2, 3, and 4 under "Copying a block
of
text."
Movethe cursorto the position where you wantto move
the block
of
text.
4) Hold downthe Code key and press the second key
to
the
right of the TAB key. The block
of
text is moved
to
the
specifiedposition.
Deleting a block
of
text
•
Th
is function deletes a block
of
te
xt
fromthe file.
■
1) Display the text file
or
phrase file using the Edit mode.
Position the cursorunderthe first character
of
the text
to
be
deleted.
2
3) Perform steps 2, 3, and 4 under •
copyi
ng a block of text."
) Hold downthe Code key and press the third key
to
the right
of
the
TAB
key. The block of text is deleted and all
succeeding textis shifted left
to
fill upthe space created.
(
display
text
]
position
cursor
at
first
character
l
coDE
I +
[E]
I
move
cu
r
sor
to
l
ast
character
lco
□
E
I
+ 0
I
move
cursor
to
target
pos
ition
I
l
co
□
E
I
+
□
15

I
''
I I
RECALLING A
TEXT
FILE
Stored text files can be recalled
(pr
inted) in NP, LP,
or
JUST
mode.
• If you select the
NP
/
LP
mode
, a file is printed normallyas you type into
th
e memory.
If
you select the
JUST
mode, a file
is
printed justified between the le
ft
and rig
ht
margins.
■ 1) Hold down the Code key and press
the
"8" key.
The
message "Recall/LisVDelete?' appearson the display.
Press the "R" key.
2)
The
message
"NAME
OF
FILE
?'
appears
on
thedisplay.
Type
the
name
of
the text file and
press
the Return key.
The
carriermovesto the l
eft
margin position
of
that file.
The
message "PAGE LENGTH=54 HIT.J " appearson the
display.
If
it
is necessary
to
change the
page
length, refer
to
"Settingthe Page Length
of
a
Text
File."
"
54
" is the preset setting
for
an 11-inch-long sheet
of
paper
with 1-inch top
and
bottom margins.
3) Press the Return key
to
startprinting. A
""'"
appears above
'RECALL
"
on
the display.
To
temporarily stopprinting, press the Return key.
The
message
'PAUSE
PRESS.J" appears
on
the display. Press
the
Return key again
to
resume printing.
To
cancel
the
print function, press
the
Space bar.
The
message "END
OF
FILE RECALL" appears
on
the display.
4)
The
printing will pausewhen the typewriter prints the last
lineon the page (specified
by
the pa~elength).
The
message "PRESS.J
TO
CONTINUE' appears
on
the
display. Inserta
new
sheet
of
paperand pressthe Return
key
to
resume printing.
When
the
printing of the text file
is
completed, the message
"END
OF
FILE RECALL" appears
on
thedisplay.
RECALLING A PHRASE FILE
Stored phrase files can be recalled (printed)
in
NP
, LP,
or
JUST mode.
Recall / List / Delete ?
y
NP I
~
NAME OF FILE ?
y
( ty
pe
file name
PAGE
LENGTH=
5~ HIT
-l
y I
~
ElV
RN I
I
printout
I
[Rhu••
I
I
PRESS
-l
TO CONTINUE
I
w
~·
I
I
END OF FILE RECALL
• A phrase file does not contain the margin settings. You can print it at
any
location on the page using
any
margin
settings youdesire.
Ifyou select the NP/LP mode, a file is printed
nor
mallyas you type in the memory.
Ifyou select the
JUST
mode, a file is printed justified between the currentleft and right margins.
■
1) Position
the
carria!:)e
at
the point
on
the page w
her
e
yo
u
want
to
start the printout
of
the phrase file.
Hold
down
the Code key and press
the
"8" key. The
message
'Recal
VLisVDelete?" appearson the display.
Press the "R" key.
2) The message "
NAME
OF
FILE?' appears on the display.
Ty£e
the
name
of
the £hrase file and pressthe Return key.
A ,... appearsabove 'RECALL" on the display .
16
The carriage beginsprinting from its current
po
sition using
the marginsthat are currently set.
To
temporarily stopthe printout, pressthe Return key. The
message "PAUSE PRESS.J" appearson the display. Press
the Return
key
again
to
resume printing.
To
cancel theprint function, press
the
Space
ba
r.
The
message "END
OF
FILE RECALL" appearson the displ
ay
.
When
the
printing of the phrase file iscompleted, the
message "END
OF
FILE RECALL" appearson thedisplay.
( positioncarrier ]
!
cooE
I + [I]
R;call
/ List / ~elete ?
NP
~
[ type file name ] Q
printout
END OF FILE RECALL

CHAIN RECALL
• This function prints
two
to
forty files continuously.
■
1) Hold
down
the Code key and ~ress the"8" key. The
message "Recall/LisVDelete?' appearson the display.
Press the "R" key.
2) The message"NAME
OF
FILE?" appears on the display.
Type the names
of
the files in theorderyou want them
to
print. Separateeach file name with a comma (,). For
example: Textl, Text2, Text3.
3) Press the Return key
to
start printing.
A""'"
appearsabove
"RECALL" on the display.
To
temporarily stopprinting, press the Return key.
The
message "PAUSE PRESS.J"' appears on the display.
Press the Return key again to resume printing.
To
cancel the print function, press the Space bar. The
message "END
OF
FILE RECALL" appears
on
the display.
When the printing
of
all the files is completed, the message
"END
OF
FILE RECALL" appears on the display.
,..
Ifone of the file names you entered in step 2) does not
exist in the memory, the message "NOT FOUND PRESS.J"
appears on the display and the remaining files are not
printed.
FORMAT FILE
Recall / List / Delete ?
NAME
OF
FILE ?
:r
type file name )
[5ru•"
I
I
printout
END OF FILE RECALL
• Frequently used formats can also be stored. (Margins and tabs can
be
set.)
■
1) Press the Mode key until a "
"'"
appears above "STORE"
on the display.
The
message
"NAME
OF
FILE?" appears
on the display.
Ty
pe the file name (five letters/numbers),
then press the Return key.
2)
The
message "TexVPhra/Form?" appearson the display.
Pressthe "
F"
key. The message "FORMAT FILE" appears
on the display. The paperadvances one line and the
carriage returns to the current left margin.
3) Set the margins and tabs to the des
ir
ed
locations the same
way as
in
any
othermode.
• 1) Press the Mode key
to
exitthe Store mode. The typewriter
returns
to
the NP mode.
2) You can exitthe Store mode bypressing the Mode
key
at
any
time.
Using aformat file
■
1) Hold down
the
Code key and press
th
e •a•key.
The
message "Recall/LisVDelete?· appears on the display.
Press the "R" key.
2)
The
message "NAME
OF
FILE ?" appears on the display.
Type the name
of
the format file and press the Return key.
The margin and tab settings in the format file arethen set
on the typewriter. The message "END
OF
FILE RECALL"
appears on the display.
I
NA~E
OF FILE ?
STORE
( type file name )
dru•"
I
I
TextI Phra / Form ?
y I
0
I
FORMAT FILE
y
[ set margin/tab ]
I
M~DEI
Recall I List / Delete ?
:r
NP
I
~
I
NAME OF FILE ?
y
( type file name )
f5"'""
I
I
END OF FILE RECALL
17

FILE DELETION
• Filesthat are no longer needed can be deleted to make room for new files.
This function cannot
be
used while
in
the Store mode. Exit
theStore mode and clearthe display before using this
function.
■
1) Hold down the Code key and press the "8" key. The
message "Recall/List/Delete?' appears on the display.
Press the "D" key.
2)
The message "NAME OF FILE?" appears on the display.
Type the name offile to be deleted and pressthe Return
key. The message "DELETE COMPLETED" appears on
the display.
,..
Tocancel the file deletion function, press the Return key
BEFORE typing the file name. Ifthe file name has already
been entered, use the Correction key to delete the file
name from thedisplay.
LIST
OF
FILES IN
MEMORY
• A list of stored files can be displayed
or
printed.
This function cannot be used while in the Store mode. Exit
the Store mode and clearthe display before using this
function.
Displaying
the
list
of
files
■
I)
Hold down the Code key and press the "8" key.The
message "Recall/List/Delete?" appears on the display.
Press the "L" key.
2) The message "Display/Printout?" appears on the display.
Press the "D" key.The file type (TEXT, PHRASE,
FORMAT), filename, and the characters at the beginning of
the file appearon the display.
You can scroll through the contents oftheentire file. Move
the cursorto the right using the Express key,
or
to
the left
by using the Backspace key.
,..
The message "NO FILES
STORED...!'"
appears on the
display if there are no files in memory.
3) Press the Index key to display the next file in the list. Press
the Reverse index key to display the previous file.
4)
Press the Return key to cancel the list function.
Printing
out
of
the
list offiles
■
1) Holddown the Code key and press the "8" key. The
message "Recall/List/Delete?' appears
on
the displa
y.
Pressthe "L" key.
18
2)
The message "Display/Printout?" appears on thedisplay.
Press the
"P"
key tostart printing the list. The
hi
e type
(TEXT, PHRASE, FORMAT), file name, and the c
har
acters
atthe beginning of the file are printed. At the bottom of the
list, the numberof available characters and the numberof
stored files
in
memoryare printed.
Totemporarily stopprinting, press the Return
key
, The
message "PAUSE PRESS.J" appears on the display. Press
the Return key to resume printing.
To cancel printing of the list, press the Space bar.
--
Recall / List / Delete ?
NP
@]
I
NA
ME
OF
FILE?
y
typ
e file
name
DELETE
COMPLETED
y
l
cooE
I + 0
Recall /
List/
Delete ?
NP
[TI
Display/
Printout ?
T
IINDEX I
or
~l~E
-
ri'E
-x--.
Recall /
List
/ Delete ?
y
NP
I
[TI
I
Display / Printout ?
y I
[E]
I
printout
I
S
TU
RN
I
I
Other manuals for SCRIPTOR II
1
Table of contents
Other Royal Typewriter manuals