Ryf AG Ash INSPEX II User manual


Inspex II User Manual
2 | P a g e INSPEX II English Rev 1.06, SW Rev 1.06
Contents
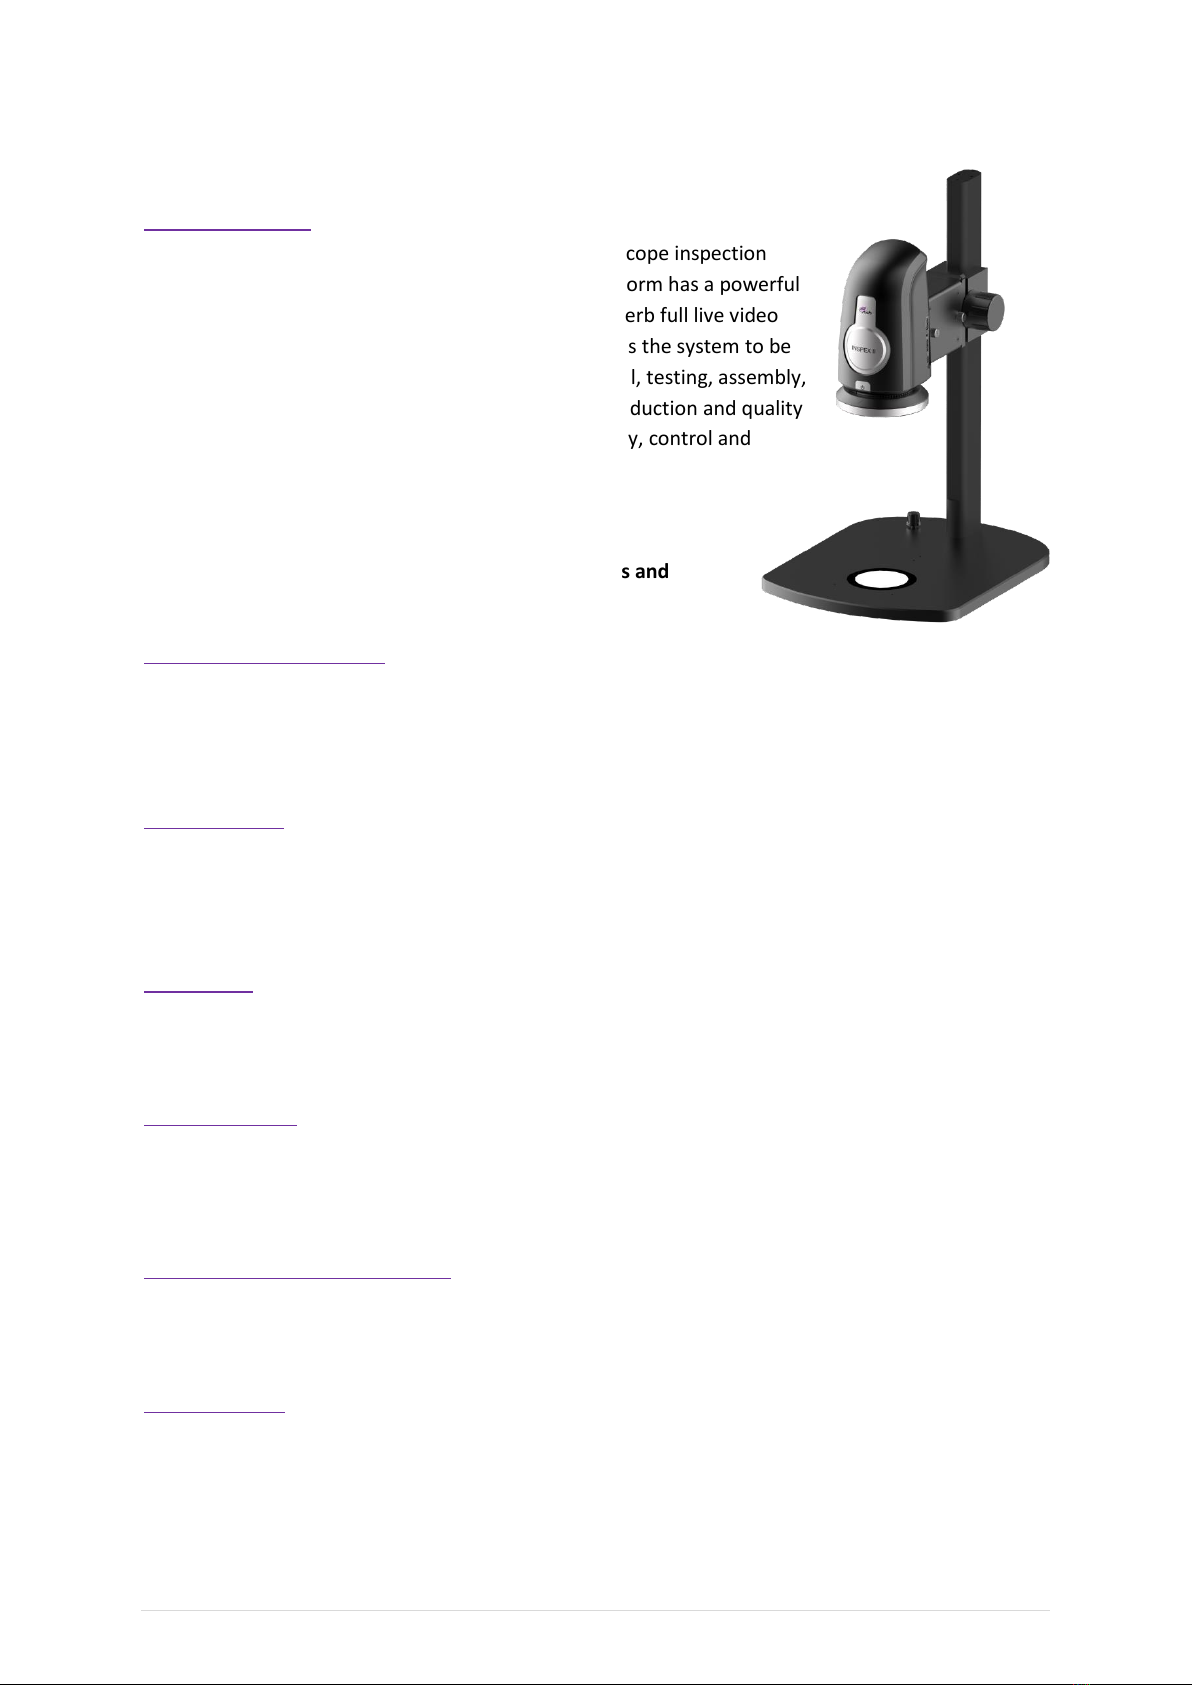
Introduction ........................................................................................................................................4
Package Contents:...............................................................................................................................6
Optional INSPEX II System Components:............................................................................................7
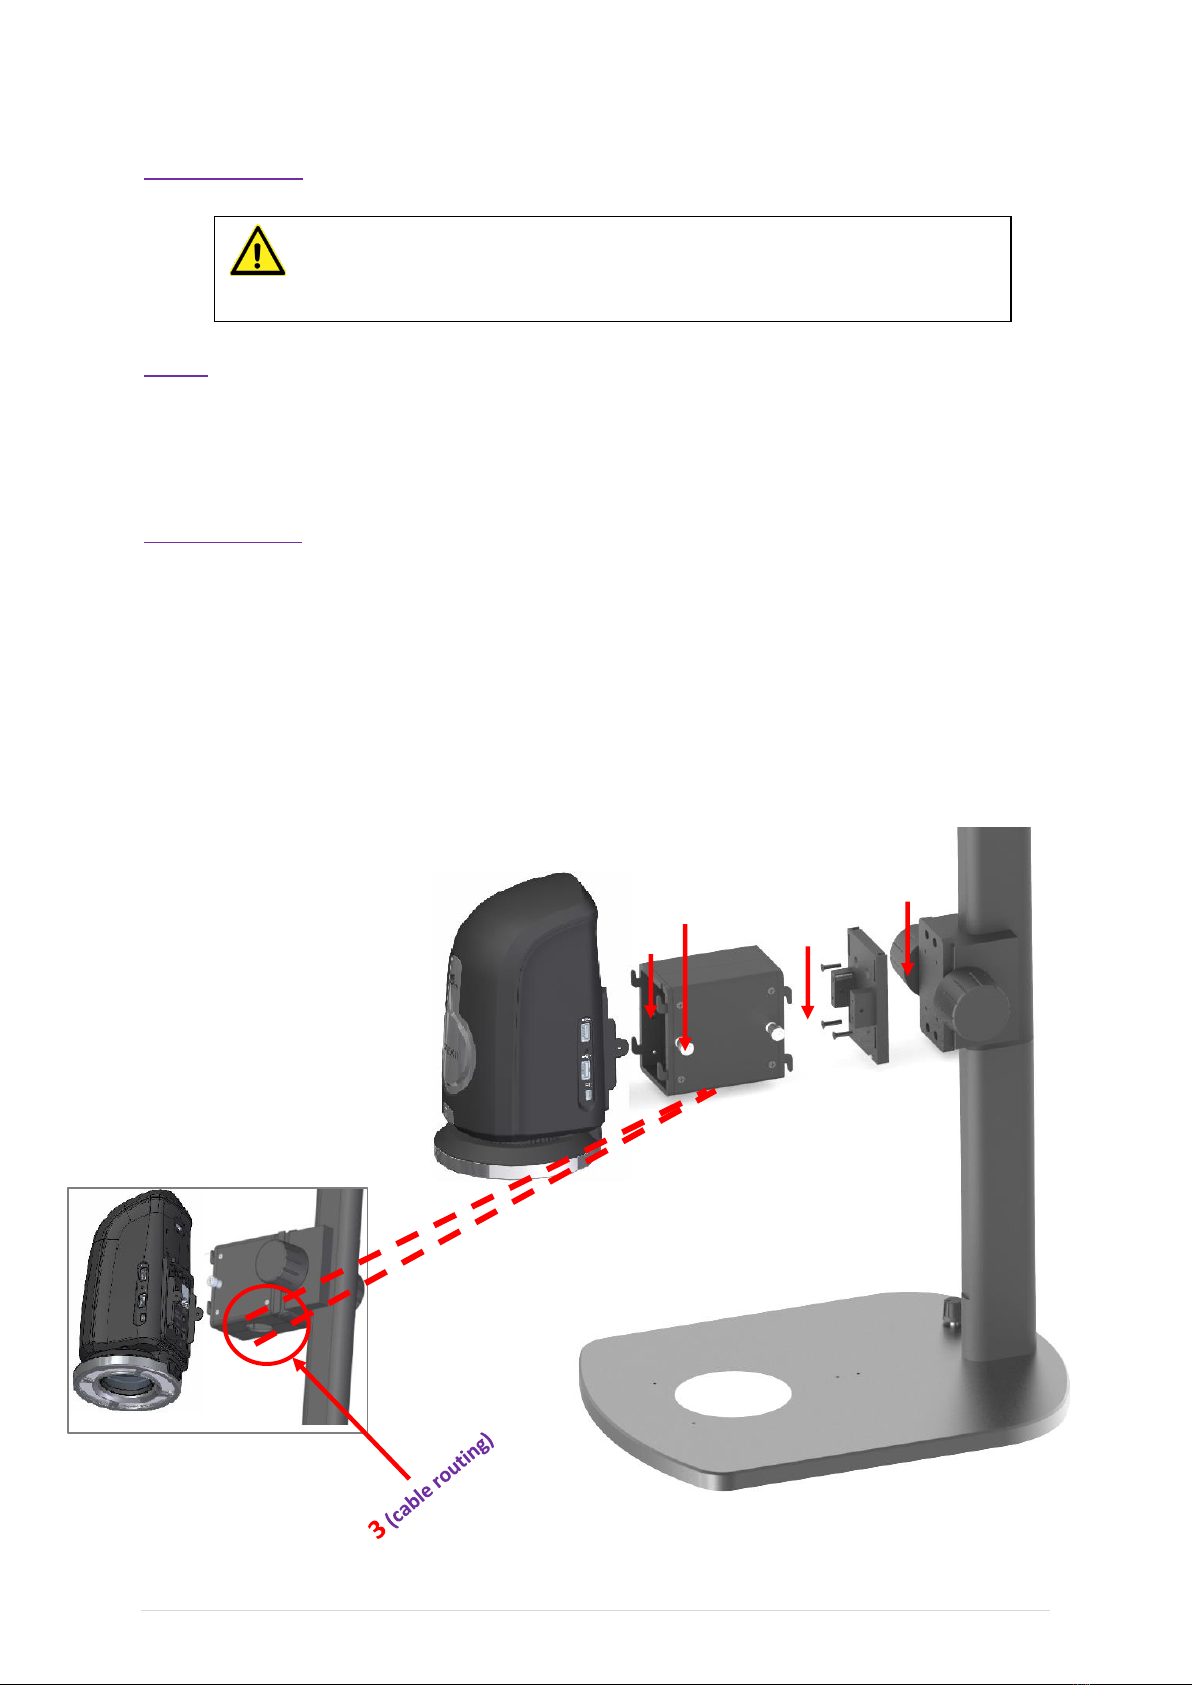
Installation: .........................................................................................................................................8
Setup:..................................................................................................................................................8
Cabling (Fig. 2a)...................................................................................................................................8
Connections ........................................................................................................................................9
Initial Start-up: ....................................................................................................................................9
System Navigation: ...........................................................................................................................10
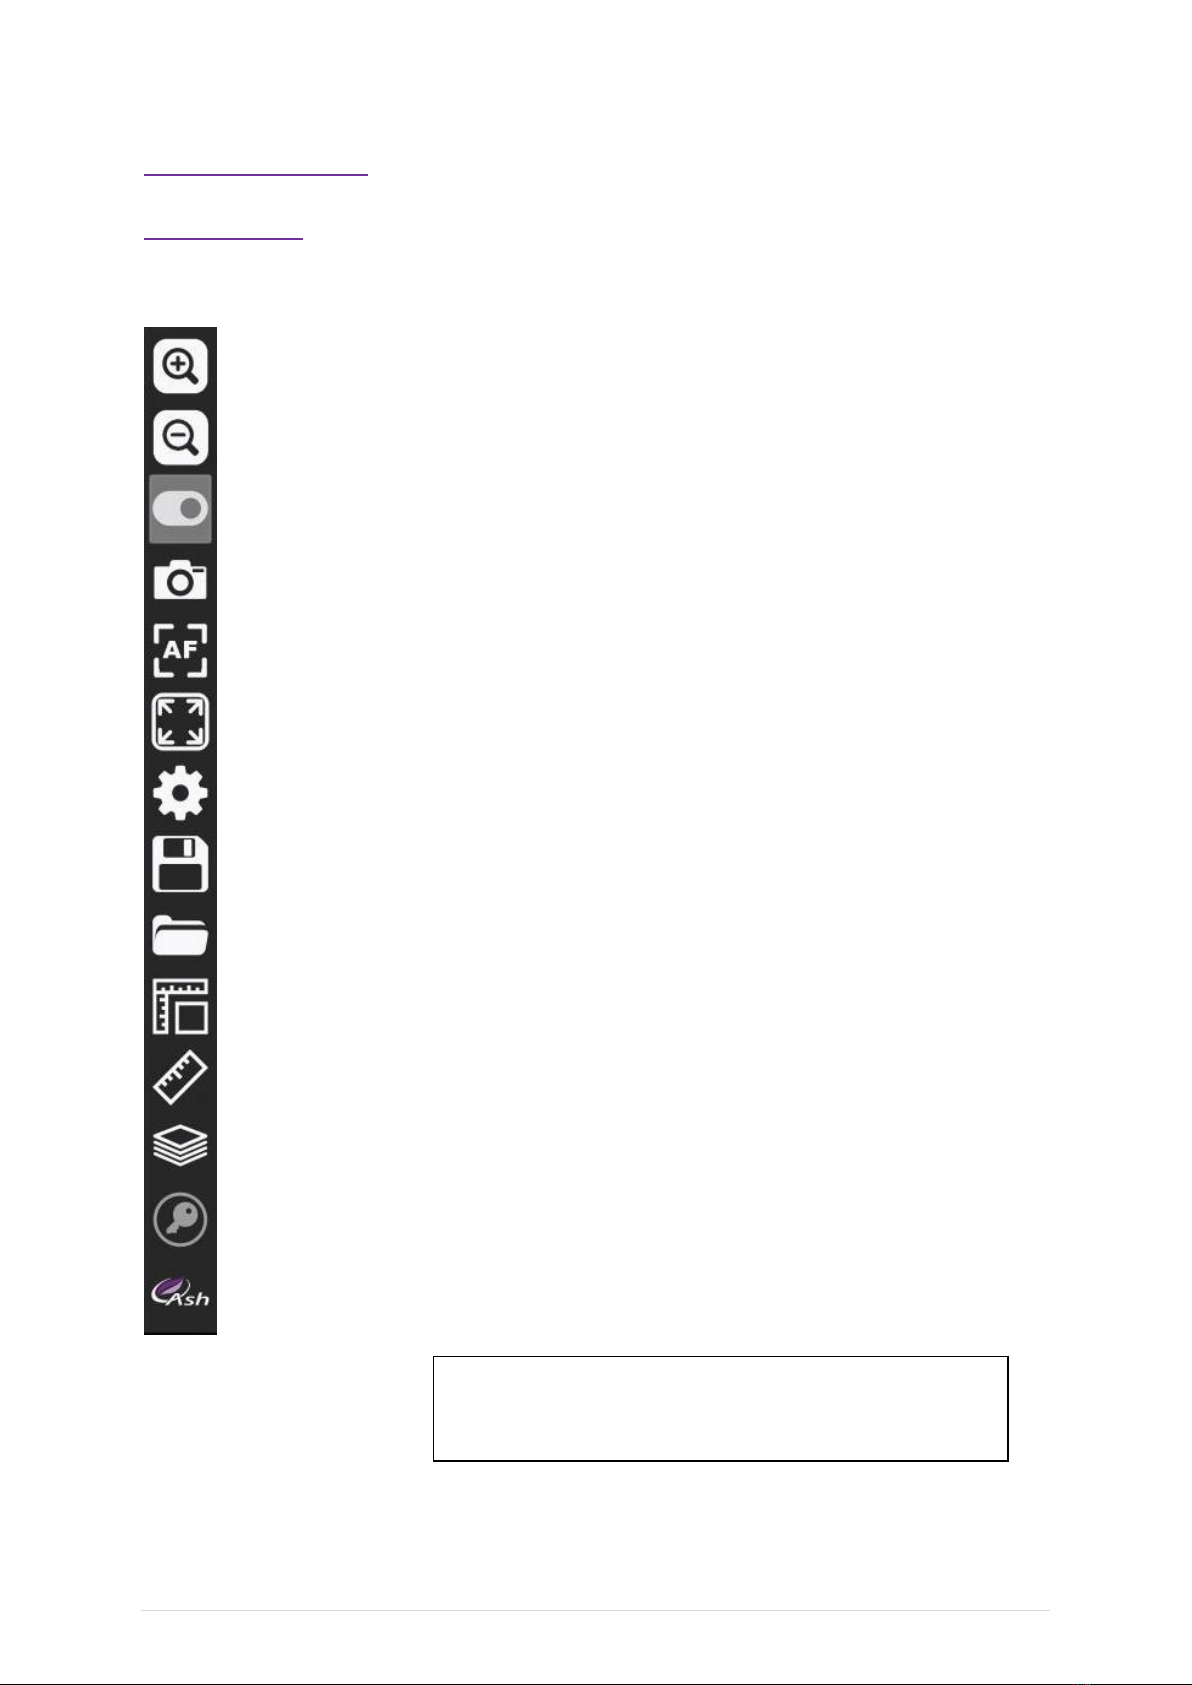
The Toolbar.......................................................................................................................................10
Toolbar Icons Explained:...................................................................................................................11
Toggle................................................................................................................................................11
Snapshot ...........................................................................................................................................11
Autofocus..........................................................................................................................................11
Settings: ............................................................................................................................................12
Camera:.............................................................................................................................................12
Lighting Control:................................................................................................................................13
System Settings:................................................................................................................................13
Network: ...........................................................................................................................................15
Inspex II SFTP Network connection:..................................................................................................15
NFS Configuration (Fig 7): .................................................................................................................16
Front Panel Capture Image:..............................................................................................................16
Users: ................................................................................................................................................17
Users Continued:...............................................................................................................................18
System Upgrades: .............................................................................................................................19
System Language: .............................................................................................................................19
Settings: ............................................................................................................................................20
Info:...................................................................................................................................................20
Save File ............................................................................................................................................21
Open File...........................................................................................................................................22
Overlay (Graticule):...........................................................................................................................23

Inspex II User Manual
3 | P a g e INSPEX II English Rev 1.06, SW Rev 1.06
To Create An Overlay:.......................................................................................................................23
Using existing Overlay(s):..................................................................................................................23
Alternative Method of Creating Overlays Using An Image Editor ....................................................24
Save Merged Overlay Image.............................................................................................................24
Measurement & Annotation:............................................................................................................25
Measurement Settings (Fig 14):........................................................................................................25
Grid Settings:.....................................................................................................................................26
System Setup for Measurement:......................................................................................................27
Image Stacking:.................................................................................................................................28
Measurement Accuracy:...................................................................................................................31
Magnification Table: .........................................................................................................................32
Presets:..............................................................................................................................................33
Creating A New Preset:.....................................................................................................................33
Technical Specifications:...................................................................................................................34
Declaration Of Conformity:...............................................................................................................35
Warranty...........................................................................................................................................35
End User Licence Agreement –Ash Technologies Ltd. 2016............................................................36

Inspex II User Manual
4 | P a g e INSPEX II English Rev 1.06, SW Rev 1.06
Introduction
The INSPEX II (Fig 1.) is a full HD (1080p) digital microscope inspection
system that operates without a PC. The INSPEX II platform has a powerful
image processing and control engine that delivers superb full live video
image quality at 50/60 frames per second. This enables the system to be
utilized as a solution in a broad range of quality control, testing, assembly,
inspection and documentation tasks. It is ideal for production and quality
control environments. The INSPEX II provides efficiency, control and
traceability of inspection.
The INSPEX II platform has the following key features and
benefits.
AshCal™ Auto-Calibration:
•The AshCal™auto-calibration feature removes the need for time-consuming zoom change
re-calibrations. Its unique ability to stay in calibration over the entire zoom range is one of
the many features that differentiate the INSPEX II from other digital inspection systems.
Image Capture:
•Image stamping with time, date, user details and magnification level allows for
traceability of inspection.
•Capture annotation and measurement values on an image.
Auto-Focus:
•The INSPEX II features a one-click auto-focus on-screen indicator. This allows the user to
rapidly change between auto-focus and manual-focus as required.
Internal Storage:
•16GB for storage of images or overlay files for off-network saving.
Save & Recall Inspection Settings:
•Custom settings such as brightness, exposure and magnification can be saved and easily
recalled enabling standardisation of inspection conditions.
User Privileges:
•Access to functionality can be restricted to enable operational control and traceability.
Fig 1.

Inspex II User Manual
5 | P a g e INSPEX II English Rev 1.06, SW Rev 1.06
GUI:
•The INSPEX II GUI (Graphical User Interface) is a custom designed, mouse-controlled
interface, delivering intuitive and efficient operation and control of the full application suite.
Camera control functions:
•Auto and manual focus, exposure, gain, brightness, and white balance customization ensure
ultra-sharp, high contrast imaging.
Illumination Options:
•INSPEX II offers several quick release, cable free, interchangeable illumination options. With
illumination intensity control and quadrant control, the user can ensure they have shadow-
free illumination and glare reduction.

Inspex II User Manual
6 | P a g e INSPEX II English Rev 1.06, SW Rev 1.06
Package Contents:
Your INSPEX II package contains:
•INSPEX II
•Quadrant Controllable Ring Light (attached)
•Lens +5 (attached)
•Mouse
•Mouse Mat
•Keyboard
•Power Supply
•HDMI to HDMI Cable
•Mini USB Cable
•USB Memory Stick
•Grounding Cable
•Arm Brackets
•Arm Receiver
•User Manual
•Cleaning Cloth
Please retain the packaging in case there is a need to return the unit for service or repair.

Inspex II User Manual
7 | P a g e INSPEX II English Rev 1.06, SW Rev 1.06
Optional INSPEX II System Components:
Lens:
•+10 Plan 1x Lens (AI 100-055)
•+25 Lens (AI 280-053)
External Keypad KPII : (FI806-002)
•Optional extra for use with Preset function.
•Useful to improve workflow speed and for user access control.
External Keypad KPIII : (FI 806-003)
•Simple to use keypad interface
•Toggle through 5 preset graticules, improving workflow speed & system usability
•Instant “desktop” access to system functions
•Improves and tailor’s user access
•Removes the risk of any accidental system movement throughout your process
•Ideal for Quality Control & Production environments
Diffused LED Dome Light: (AI 100-045)
•This system component offers diffused LED Light that reduces glare and shadow on the
object under inspection.
UV LED Light Ring: (AI 801-421)
•A controllable UV Ring Light, providing optimum shadow-free illumination for a wide range
of applications with no external power supply. This is particularly useful for the applications
of counterfeiting or conformance coating of PCB’s.
*For full list of system components please contact us: info@ashvision.com

Inspex II User Manual
8 | P a g e INSPEX II English Rev 1.06, SW Rev 1.06
Installation:
Setup:
1. Attach the Arm Receiver to the Stand Focus block using the 4 screws provided (Fig. 2).
2. Hook the Arm Bracket onto the Arm Receiver using the 4 hooks. Tighten the two thumb screws
at the rear of the Arm Receiver.
Cabling (Fig. 2a)
3a. Route all cables, such as power supply, External Keypad cables and ESD cables, through the hole
of the underside of the Arm Bracket and ground the ESD cable to bench. Route the HDMI cable to the
monitor. Insert the mouse dongle and keyboard dongle into the side ports on the INSPEX II. Note: The
mouse dongle must be plugged in before powering the INSPEX II unit on. This will enable the mouse
to be detected,
3b. Connect the cables to their corresponding ports on the INSPEX II.
4. Hook the INSPEX II onto the front hooks on the Arm Receiver using the 4 hooks.
5. Tighten the front two thumb screws on the Arm Receiver to secure the INSPEX II.
Cables feed through
hole in the Arm Bracket
5
1
2
4
Fig 2.
Fig 2a.
Never look directly at the LED light source for any prolonged period of time.

Inspex II User Manual
9 | P a g e INSPEX II English Rev 1.06, SW Rev 1.06
Connections
Rear:
1. HDMI connector to TV/Monitor
2. 2 x USB Ports
3. Ethernet Connection for Networking
4. DC Power Jack to Power Supply
5. 3 x Auxiliary Communications Ports
6. Grounding Connection (for grounding cable supplied)
Side:
7. 2 x USB Ports (Recommended to keep mouse dongle in side USB, keyboard dongle can go in
a rear USB port)
8. Mini USB (PC) Connection
Initial Start-up:
Setting the Correct Focal Point
Before using the INSPEX II the user must set the focal point of the lens first to suit the height of the
object.
1. Power up the unit.
2. Place the unit in Overview Mode by selecting the Overview tab in the menu bar.
3. Move the object until the desired viewing area is under the crosshair of the screen.
4. Exit Overview mode by again selecting the Overview tab in the menu bar.
5. Zoom to full magnification.
6. Manually adjust the height of the INSPEX II up or down on the stand via focus block
adjustment until the object is in focus. You have now achieved your optimal focal point.
7. When the focal plane is set you can only measure points at that plane. If the user wishes to
view a different object with a different height, then the focal point will have to be set again.
8. To recall an overlay file, you must also ensure the focal plane is set prior to opening the
overlay file.
*Refer to INSPEX II Quick Start User Guide

Inspex II User Manual
10 | P a g e INSPEX II English Rev 1.06, SW Rev 1.06
System Navigation:
The Toolbar
INSPEX II toolbar icons (Fig 3):
Zoom in
Zoom out
Toggle between live and static image
Take snapshot of a live image
Auto Focus
Camera Overview
Settings
Save File
Open File
Overlay
Measurement
Image Stacking
Log On/Off
Note: The toolbar can be hidden by selecting 'AutoHide
Main Toolbar' from the System Settings. (Page 13)
Fig 3.

Inspex II User Manual
11 | P a g e INSPEX II English Rev 1.06, SW Rev 1.06
Toolbar Icons Explained:
Toggle
Use the toggle icon to switch between LIVE and Saved/Captured images.
Snapshot
Autofocus
When this icon is highlighted in green, the INSPEX II is in autofocus. Click the icon to
disable/enable autofocus.
*When AF is enabled measurements are not possible and measurement tools deactivate;
suitable for inspection only.
Overview
To capture an image from a Live video feed, click on the Snapshot icon. A still
image from the camera is captured and displayed. To switch back to the Live
video feed, use the Toggle icon as explained above.
The Overview function will move the zoom position to a low magnification for an
overview of the object being viewed and allow centring. A crosshair is provided for
targeting areas of interest. When the Overview icon is clicked again, the camera will
return to the original zoom level.

Inspex II User Manual
12 | P a g e INSPEX II English Rev 1.06, SW Rev 1.06
Settings:
Camera:
Exposure: Switch between Auto & Manual exposure modes. In Auto Exposure mode,
the Gain and Iris settings are automatically adjusted, the user can adjust the
image brightness if required. In Manual Exposure mode the user can adjust
both the gain and the iris settings of the camera. Higher gain values will
increase noise on the image. Lower iris value will reduce the amount of light
entering the camera, but will improve focus depth.
(note: when Auto Exposure is enabled Gain, Iris and Shutter adjustments are disabled
and automatically adjusted. The values for these disabled settings are not relevant when auto
exposure is set active)
Focus: Switch between Auto & Manual Focus modes. In Manual mode the focal
point can be set by the user.
Lighting Control: Select which Ringlight LED quadrant to turn on/off. Set the Intensity value of
the LEDs and toggle all the LEDs ON/OFF. The INSPEX II will auto detect the
type of Ringlight that is connected. When the Dome Ringlight is connected,
the quadrant buttons are disabled.
Fig 4.
Please note:
Measurements are only valid if the measurement icon shows .
If the focus settings are not valid for measurement then click on the icon to set the focus
to measurement mode.

Inspex II User Manual
13 | P a g e INSPEX II English Rev 1.06, SW Rev 1.06
Lighting Control:
Select which ringlight LED quadrant to turn on/off. Set the intensity value of the LEDs and toggle all
the LEDs ON/OFF. The Inspex II will auto-detect the type of ringlight that is connected.
* When the Inspex II Diffused Domelight is connected, the quadrant buttons are disabled.
Settings:
System Settings:
Lens Diopter: Choose a lens from the drop-down list to correspond with the lens
that is fitted to the INSPEX II.
Screen Size: Enter the correct screen size in order to correctly display the
magnification.
Default Save Mode: Set the default file type to image files or measurement files.
Language: Select your system language.
Show Preset Toolbar: Enable if using defined presets (see Presets section p33).
Show Scale Bar: Enable to show on-screen scale bar.
Fig 5.

Inspex II User Manual
14 | P a g e INSPEX II English Rev 1.06, SW Rev 1.06
Auto-Hide Main Toolbar: To auto-hide the toolbar on the main window, enable this option. To
reveal the toolbar, move the mouse over the toolbar area.
Show Crosshair: Display full screen Crosshair when selected.
System: Start-up Settings: (Fig. 5)
Save: Save the current settings as the System Startup Settings.
Restore:Factory (default) System Settings. (When performing, images will not be
deleted. However, a backup is always recommended if performing this.)
Camera Refresh Rate: Set Frame Rate to 50Hz or 60Hz.
Image Stamp: Prints the magnification, time & date and/or user onto an image when
taking a snapshot or saving a measurement/image file.
Auto Shutdown Timer:
We have always considered the environment when designing our systems. For this reason, we have
introduced an Auto Shutdown Timer, to automatically shut-down the system at a specific time to
save energy. This feature allows the user to set a shutdown time after start-up. Once the user has
set the specific time and selected “Apply”, the user is prompted with a message to confirm that this
has been saved. This message will read: ‘Auto Shutdown Timer Set. Please save start-up settings to
make change persistent’.
After saving to start-up settings, the unit will power off after the set time has expired. To unset this,
set the values to zero and select “Apply”. The user will receive a confirmation message stating: ‘Auto
Shutdown Timer Disabled. Please save start-up settings to make change persistent’.
Settings N.B.* If you are viewing a particular object which requires custom settings such as
Brightness, Exposure, Magnification, etc.(System settings) then you may want to save them as a .ash
file so you can easily load them if viewing the object again in the future as a graticule or
measurement.
The .ash file holds all unique system settings for that file.

Inspex II User Manual
15 | P a g e INSPEX II English Rev 1.06, SW Rev 1.06
Settings:
Network:
The Inspex II supports Networking via the Ethernet port on the back. The network settings (Fig. 6)
can be configured automatically using (DHCP) Dynamic Host Configuration Protocol or manually by
assigning a Static IP, Network Mask and Default Gateway.
To configure the DHCP ,the Inspex II must be connected to a network via a straight ethernet cable.
Select DHCP and press apply and the network configuration will be automatically applied.
To configure the network with a Static IP, select Static IP and enter Static IP, Network Mask and
Default Gateway. Press Apply and the Networks Settings will be updated with the changes.
Inspex II SFTP Network connection:
The Inspex II supports ( SFTP ) Secure File Transfer Protocol, allowing all files to be accessed from the
Inspex II as a Read Only Drive. Any operating system software that supports SFTP should work but
below is software that has been verified by Ash Technologies.
For Microsoft Windows, Ash Technologies has tested and recommends WinSCP. This is open source
and is available at https://winscp.net .
When using this software, “Host” is the Inspex II IP address which can be found in Settings/Network.
For Linux this is already supported in the mainline distributions.
For Android Turbo Client has been tested and verified to work.
Username: network
Password: The network password needs to be set if you want to connect the Inspex II
to a network.
The User can then change the password by entering a new password and clicking Apply.
Fig 6.

Inspex II User Manual
16 | P a g e INSPEX II English Rev 1.06, SW Rev 1.06
NFS Configuration (Fig 7):
The Inspex II can connect to a Network File System (NFS) server running on a Linux/Windows
machine.
To connect to the NFS server you will need the IP Address of the server and the full Path to the
shared folder. These details can be obtained from your IT Administrator.
It should be similar to IP Address: 192.168.0.11 Path: /home/user/nfs_server_directory
Click the NFS Configuration button in the Settings->Network tab.
Enter the NFS server address in the following format. IPAddress:Path
Linux server: (example: 192.168.0.67:/home/user/nfs_server_directory)
Windows 10: (example: 192.168.0.11:/c/nfs_server_directory). (using FreeNFS, HaneWin)
Currently we do not support authentication with Windows Server
Hard Mount: If the server connection is lost while navigating the NFS directory, the system may
stall and will need to be manually restarted to reconnect.
Soft Mount: If the server connection is lost while navigating the NFS directory, the system will
not stall but data corruption may occur.
Click Connect.
The Inspex II will verify the server address and mount a new folder in the top directory of Inspex II.
If the connection is a success, Close the NFS Configuration window. Click on the Open File icon to see
a new folder called NFS. This is your shared Network folder.
Auto connect will automatically connect to the server when the unit starts.
It is recommended to back up all NFS data periodically.
NB** Username: ‘network’applies for all languages, DO NOT TRANSLATE. Some software
versions may translate Network Username: network to selected language translation. ‘network’ is
the username regardless of language and cannot be changed.
This applies for both SFTP and NFS connections.
Front Panel Capture Image:
This feature will assign a default path location for images captured by the Capture button on the
optional accessory the External Keypad KPIII.
Fig. 7

Inspex II User Manual
17 | P a g e INSPEX II English Rev 1.06, SW Rev 1.06
Users:
There are 3 levels of access on the INSPEX II. Superuser, Admin and User.
Superuser: Complete control of all functions with no restrictions. The Superuser can
create, edit and limit all “Admin”and “User”accounts. Please see Fig. 8a.
The Superuser can enable/disable a login requirement at startup.
Note: Once additional accounts are created, the Superuser must enable login at startup.
This will enable the Login/Log-off feature.
*There is only one superuser and this user cannot be deleted.
It is important to take note of the Superuser password if it is changed or before you enable login
at Startup.
Admin: Admin can create and edit “Admin”and “User”accounts. Set Access to
System functions, Apps and Networking for User accounts.
User: The User privileges are set by either the “Admin”or the “Superuser”. A User
cannot create or edit another account.
Superuser Login
Username: Superuser
Password: password123
You can view the Superuser password by selecting Superuser and clicking the edit button.
Fig 8. User Settings

Inspex II User Manual
18 | P a g e INSPEX II English Rev 1.06, SW Rev 1.06
Users Continued:
Fig 8a. User details

Inspex II User Manual
19 | P a g e INSPEX II English Rev 1.06, SW Rev 1.06
Settings:
System Upgrades:
To perform a system upgrade, insert a USB Memory Stick containing the upgrade file*. Click on the
“Upgrade System Software”button to upload the files. Upgrades should be installed individually for
System Software and ringlight firmware. (Fig. 9)
*Upgrade files, if available, can be obtained from Ash. Upgrades are included in your standard
warranty, which is valid one year from purchase. (Please see page 35 for full warranty policy). Please
contact Ash for further details on upgrades.
System Language:
Additional Language packages may also be installed by clicking the “Install Language”button and
selecting the .alf file.
Fig. 9

Inspex II User Manual
20 | P a g e INSPEX II English Rev 1.06, SW Rev 1.06
Settings:
Info:
System Information:
System information shows details of the software, firmware and language versions, serial number,
MAC address and Ring Light Version (if attached). NB*Please note or screenshot this detail if
system update or troubleshooting is required.
Disk Space:
Disk space displays the total, available and used space on the system.
System Time:
Click the Edit button to change the system time and date to your locality.
File System Check:
The INSPEX II provides a File System Check utility that can be used to scan the internal file system for
any errors, and repair any issues detected.
Fig. 10 Info
Table of contents
Other Ryf AG Microscope manuals