Ryobi R80XZTR54 User manual

FRONT PAGE
R80XZTR54

2
Original Instructions
IMPORTANT!
It is essential that you read the instructions in this manual
before assembling, operating, and maintaining the
product.
Subject to technical modication.
Safety, performance, and dependability have been given top
priority in the design of your zero-turn mower.
INTENDED USE
The zero-turn mower is intended for outdoor use only.
The product is designed for domestic lawn mowing. The
cutting blade should rotate approximately parallel to the
ground over which it is being wheeled. All four wheels
should touch the ground while mowing.
The product is to be used only in domestic application by
adults who have received adequate training on the hazards
and preventive measures or actions taken while using it.
The user must understand the instructions.
Do not use the product for any other purpose.
GENERAL PRODUCT SAFETY WARNINGS
WARNING! Read all safety warnings, instructions,
illustrations and specifications provided with this
power tool. Failure to follow all instructions listed below
may result in electric shock, re and/or serious injury.
Save all warnings and instructions for future reference.
The term “power tool” in the warnings refers to your mains-
operated (corded) product or battery-operated (cordless) product.
WORK AREA SAFETY
■Keep work area clean and well lit. Cluttered or dark
areas invite accidents.
■Do not operate power tools in explosive
atmospheres, such as in the presence of flammable
liquids, gases or dust. Power tools create sparks
which may ignite the dust or fumes.
■Keep children and bystanders away while operating
a power tool. Distractions can cause you to lose control.
ELECTRICAL SAFETY
■Power tool plugs must match the outlet. Never
modify the plug in any way. Do not use any adapter
plugs with earthed (grounded) power tools.
Unmodified plugs and matching outlets will reduce risk
of electric shock.
■Avoid body contact with earthed or grounded
surfaces, such as pipes, radiators, ranges, and
refrigerators. There is an increased risk of electric
shock if your body is earthed or grounded.
■Do not expose power tools to rain or wet conditions.
Water entering a power tool will increase the risk of
electric shock.
■Do not abuse the cord. Never use the cord for
carrying, pulling or unplugging the power tool. Keep
cord away from heat, oil, sharp edges, or moving
parts. Damaged or entangled cords increase the risk of
electric shock.
■When operating a power tool outdoors, use an
extension cord suitable for outdoor use. Use of a cord
suitable for outdoor use reduces the risk of electric shock.
■If operating a power tool in a damp location is
unavoidable, use a residual current device (RCD)
protected supply. Use of an RCD reduces the risk of
electric shock.
PERSONAL SAFETY
■Stay alert, watch what you are doing, and use
common sense when operating a power tool. Do not
use a power tool while you are tired or under the
influence of drugs, alcohol, or medication. A moment
of inattention while operating power tools may result in
serious personal injury.
■Use personal protective equipment. Always wear
eye protection. Protective equipment such as a dust
mask, non-skid safety shoes, hard hat, or hearing
protection used for appropriate conditions will reduce
personal injuries.
■Prevent unintentional starting. Ensure the switch
is in the off-position before connecting to power
source and/or battery pack, picking up or carrying
the tool. Carrying power tools with your finger on the
switch or energising power tools that have the switch on
invites accidents.
■Remove any adjusting key or wrench before turning
the power tool on. A wrench or a key left attached to a
rotating part of the power tool may result in personal injury.
■Do not overreach. Keep proper footing and balance
at all times. This enables better control of the power tool
in unexpected situations.
■Dress properly. Do not wear loose clothing or
jewellery. Keep your hair and clothing away from
moving parts. Loose clothes, jewellery, or long hair can
be caught in moving parts.
■If devices are provided for the connection of dust
extraction and collection facilities, ensure these are
connected and properly used. Use of dust collection
can reduce dust-related hazards.
■Do not let familiarity gained from frequent use of
tools allow you to become complacent and ignore
tool safety principles. A careless action can cause
severe injury within a fraction of a second.
POWER TOOL USE AND CARE
■Do not force the power tool. Use the correct power tool
for your application. The correct power tool will do the job
better and safer at the rate for which it was designed.
■Do not use the power tool if the switch does not turn
it on and off. Any power tool that cannot be controlled
with switch is dangerous and must be repaired.
■Disconnect the plug from the power source and/
or remove the battery pack, if detachable, from
the power tool before making any adjustments,
changing accessories, or storing power tools. Such
preventive safety measures reduce the risk of starting
the power tool accidentally.
■Store idle power tools out of the reach of children and
do not allow persons unfamiliar with the power tool
or these instructions to operate the power tool. Power
tools are dangerous in the hands of untrained users.
■Maintain power tools and accessories. Check for
misalignment or binding of moving parts, breakage
of parts and any other condition that may affect the
power tool’s operation. If damaged, have the power

3
Original Instructions
tool repaired before use. Many accidents are caused
by poorly maintained power tools.
■Keep cutting tools sharp and clean. Properly
maintained cutting tools with sharp cutting edges are
less likely to bind and are easier to control.
■Use the power tool, accessories and tool bits etc.
in accordance with these instructions, taking into
account the working conditions and the work to be
performed. Use of the power tool for operations different
from those intended could result in a hazardous situation.
■Keep handles and grasping surfaces dry, clean
and free from oil and grease. Slippery handles and
grasping surfaces do not allow for safe handling and
control of the tool in unexpected situations.
BATTERY TOOL USE AND CARE
■Recharge only with the charger specified by the
manufacturer. A charger that is suitable for one type
of battery pack may create a risk of fire when used with
another battery pack.
■Use power tools only with specifically designated
battery packs. Use of any other battery packs may
create a risk of injury and fire.
■When battery pack is not in use, keep it away from
other metal objects, like paper clips, coins, keys,
nails, screws or other small metal objects, that can
make a connection from one terminal to another.
Shorting the battery terminals together may cause burns
or a fire.
■Under abusive conditions, liquid may be ejected from
the battery; avoid contact. If contact accidentally
occurs, flush with water. If liquid contacts eyes,
additionally seek medical help. Liquid ejected from
the battery may cause irritation or burns.
■Do not use a battery pack or tool that is damaged or
modified. Damaged or modified batteries may exhibit
unpredictable behaviour resulting in fire, explosion or
risk of injury.
■Do not expose a battery pack or tool to fire or
excessive temperature. Exposure to fire or temperature
above 130°C may cause explosion.
■Follow all charging instructions and do not charge
the battery pack or tool outside the temperature range
specified in the instructions. Charging improperly or at
temperatures outside the specified range may damage
the battery and increase the risk of fire.
SERVICE
■Have your power tool serviced by a qualified repair
person using only identical replacement parts. This
will ensure that the safety of the power tool is maintained.
■Never service damaged battery packs. Service
of battery packs should only be performed by the
manufacturer or authorised service providers.
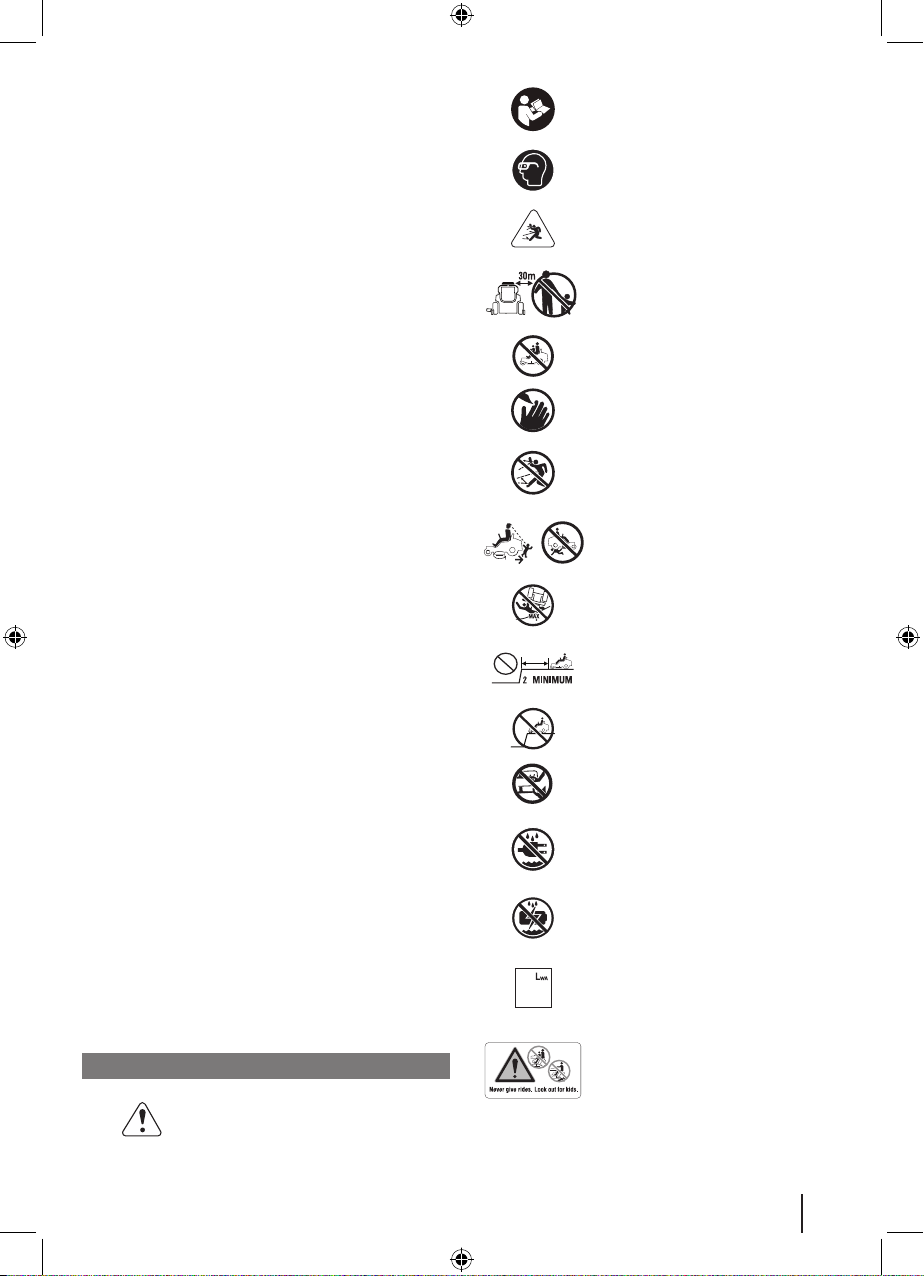
ZERO-TURN MOWER SAFETY WARNINGS
TRAINING
■Always use safety protective devices. Do not use the
product without the side discharge chute in place and
working properly. The mulch cover should be correctly
installed and working properly during mulching operation.
■Follow the manufacturer’s instructions for proper
operation and installation of accessories. Use only
accessories approved by the manufacturer. The use of
other accessories may increase the risk of injury.
■Never interfere with the intended function of a safety device
or reduce the protection provided by a safety device. Check
the proper operation of the safety devices regularly.
■Never use the product while people, especially children,
or pets are within 15 m because of the danger of objects
being thrown by contact with the blade.
■Do not use the product when there is a risk of lightning.
■Do not operate the product in poor lighting. The operator
requires a clear view of the work area to identify potential
hazards.
■Be familiar with the controls and the correct use of the
product.
■Be aware of possible hazards when not using the
product or when changing accessories. Following this
rule reduces the risk of electric shock, fire, or serious
personal injury.
■Never carry passengers or children, even when the
blades have stopped. They may fall off and be seriously
injured or interfere with the safe operation of the product.
Children who have been given rides in the past may
suddenly appear in the mowing area for another ride and
be run over or backed over by the product.
■Never allow children or people with reduced physical,
sensory, or mental capabilities, or persons who are
unfamiliar with these instructions to operate, clean, or
maintain the product. Local regulations may restrict the age
of the operator. Children should be adequately supervised
to ensure that they do not play with the product.
■Keep in mind that the operator or user is responsible for
accidents or hazards occurring to other people or their
property.
■Keep hands and feet away from the cutting area, which
is located under the mower deck and inside the side
discharge chute. Keep clear of the side discharge chute
opening at all times. Do not reach under the mower deck.
PREPARATION
■Wear heavy, long trousers, long sleeves, and sturdy,
anti-slip footwear. Do not wear short trousers, sandals,
or go barefoot. Avoid wearing clothing that is loose-fitting
or that has hanging cords or ties.
■Always wear safety glasses with side shields. Use a face
mask if operation is dusty.
■Objects struck by the blade can cause severe injuries to
persons. Thoroughly inspect the area where the product
is to be used, and remove all rocks, sticks, metal, wire,
bones, toys, or other foreign objects. Remember, string
or wire may entangle with the blades.
■Before use, always visually inspect the product to ensure
that blades, blade nuts, and the cutter assembly are not
worn or damaged.
■Never direct discharged material towards anyone.
Plan the mowing pattern to avoid discharge of material
towards bystanders, roads, sidewalks, windows, and
cars. Avoid discharging material against a wall or
obstruction, which may cause the material to ricochet
back towards the operator.
OPERATION
■Operating a zero-turn mower is different from operating a
standard riding mower. Zero-turn mowers are rear-wheel

4
Original Instructions
drive. The wheels operate independently based on the
position of the joystick. Practice operating the product
in a large, level, and open area using the instructions
that follow before mowing your grass. Once you can
comfortably and reliably perform the manoeuvres, you
are ready to mow your grass.
■Before starting the product:
●Check the brake operation.
●Check the tyre pressure.
●Check for loose fasteners.
●Make sure that all guards are in place and working
properly.
●Check the side discharge chute safety interlock
system.
●Test the operator presence safety interlock system.
●Adjust the seat to the preferred position.
●Verify the battery charge level.
■Do not mow in reverse unless absolutely necessary.
Before and while reversing, look behind and down for
small children, bystanders, and pets.
■Never leave a running product unattended. Always turn
off the blades, engage the parking brake, stop the motor,
and remove the start key before dismounting.
■The product must be started with the user properly
seated. Never start the product if:
●not all four wheels are on the ground
●the side discharge chute is exposed and is not
protected by the mulch cover
●hands and feet of all persons are not clear of the
cutting enclosure
■Never use the product in a closed area.
■Turn on the motor carefully according to instructions,
and keep hands and feet away from blades. Do not put
hands or feet near or under rotating parts.
■Stop the blade when crossing gravel surfaces to avoid
discharging gravel and rocks. Drive the product slowly
and carefully to avoid loss of control.
■Use extra care when approaching blind corners, shrubs,
trees, or other objects including overhanging shrubs,
which may block your view.
■Slow down before turning.
■Watch for traffic when operating near roadways. Do not
operate the mower on roadways.
WARNING! Slopes are a major factor related to loss of
control and tip-over accidents, which can result in severe
injury or death. Operation on all slopes requires extra
caution. If you cannot back up the slope or if you feel uneasy
on it, do not mow it. Never use the product on steep slopes
greater than 15°. Make a copy or cut out the slope guide at
the back of this manual, and use it to determine if your slope
is too steep for safe operation.
●Mow up and down; not across the face of slopes.
●Avoid holes, ruts, bumps, rocks, property stakes, or
other hidden objects. Uneven terrain could overturn
the product. Tall grass can hide obstacles.
●Use a slow speed so you will not have to stop
suddenly or accidentally accelerate while on a slope.
●Do not mow on wet grass when on a slope. Tyres
may lose traction and you may lose control.
●Do not shift to neutral and coast downhill, which may
cause you to lose control of the product. Always use
the brakes when travelling down the slope.
●Avoid starting, stopping, or turning on a slope. If
the tyres lose traction, disengage the blades and
proceed slowly straight down the slope.
●Keep all movement on slopes slow and gradual. Do
not make sudden changes in speed or direction,
which could cause the product to roll over.
●Use extra care while using the product with
attachments; they can affect the stability of the
product. Do not use the product on steep slopes
greater than 15°.
●Do not try to stabilise the product by putting your foot
on the ground.
●Do not use the product near drop-offs, ditches,
excessively steep slopes, or embankments. The
product could suddenly roll over if a wheel goes over
the edge or if the edges caves in and result in death
or serious personal injury.
CHARGER SAFETY WARNINGS
■The charger is for indoor use only.
■Do not recharge primary cells (non-rechargeable).
■Before every use, examine the supply cord for damage. If
there are signs of damage, it must be replaced by a qualified
person at an authorised service centre to avoid a hazard.
■Charge the product indoors, in a well-ventilated area. Do
not charge the product in a confined space.
■The charger is equipped with a plug featuring a
grounding pin and must be plugged into a matching
outlet that has been properly installed and grounded
in accordance with all local codes and ordinances. Do
not use adaptors or modify the plug provided. If the plug
does not fit the outlet, have the proper outlet installed by
a qualified electrician.
ADDITIONAL BATTERY SAFETY WARNINGS
WARNING! Risk of re, explosion, or burns. Do not
disassemble, expose to heat above 60˚C, or incinerate the
battery pack.
■To reduce the risk of fire, personal injury, and product
damage due to a short circuit, never immerse the product,
battery pack, or charger in fluid or allow fluid to flow inside
them. Corrosive or conductive fluids, such as seawater,
certain industrial chemicals, and bleach or bleach-
containing products, etc., can cause a short circuit.
■Charge the battery pack in a location where the ambient
temperature is between 10 °C and 38°C.
■Store the battery pack in a location where the ambient
temperature is between 0°C and 20°C.
■Use the battery pack in a location where the ambient
temperature is between 0°C and 40°C.
■Do not charge battery packs that show signs of cracks
and damage. Dispose of them properly.
BATTERY PACK REMOVAL AND PREPARATION
FOR RECYCLING
■To preserve natural resources, recycle or dispose
of batteries properly in accordance with the local
government guidelines.

5
Original Instructions
■Consult your local waste authority for information
regarding available recycling and/or disposal options.
■Upon removal, cover the battery pack terminals with
heavy-duty adhesive tape. Do not attempt to destroy
or disassemble the battery pack or remove any of its
components. Lithium batteries must be recycled or
disposed of properly. Never touch both terminals with
metal objects and body parts as short circuit may result.
Keep the battery pack away from children. Failure to
comply with these warnings could result in fire and/or
serious injury.
TRANSPORTATION AND STORAGE
■Turn off the product, engage the parking brake, and
remove the start key. Make sure that all moving parts
have come to a complete stop. Allow the product to cool
down before storing or transporting.
■Remove all foreign materials from the product. Store
the product in a cool, dry, and well-ventilated place
that is inaccessible to children. The start key should be
removed and stored in a separate location out of the
reach of children.
■Keep the product away from corrosive agents, such as
garden chemicals and de-icing salts. Do not store the
product outdoors.
■For transportation in vehicles, remove the start key,
and secure the product against movement or falling to
prevent injury to persons or damage to the product.
■Use extra care when loading or unloading the product
onto a trailer or truck. Step on the brake pedal as needed
to control the speed. The product will freely roll if it is
moved on an inclined surface without stepping on the
brake pedal or engaging the parking brake. When
loading or unloading the product, do not exceed the
maximum recommended operation angle of 15°.
■Use extreme caution when lifting or tilting the product for
maintenance, cleaning, storage, or transportation. The
blade is sharp. Keep all body parts away from the blade
while it is exposed.
TOWING SAFETY WARNINGS
■Use common sense when towing equipment. Too heavy
of a load while on a slope is dangerous. Tyres can lose
traction with the ground and cause you to lose control
of the product.
■Follow the manufacturer’s recommendations for wheel
weights or counterweights.
■The total towed weight must not exceed the maximum
towing load indicated in the product specifications section.
■Attach tow equipment only at the hitch plate.
■Never allow children or others on the towed equipment.
■Stopping distance increases with speed and weight of
load being towed. Travel slowly, and allow extra time
and distance to stop.
■Do not turn sharply when towing. Use additional caution
when turning or operating under adverse surface
conditions. Use care when reversing.
TRANSPORTING LITHIUM BATTERIES
■Transport the battery in accordance with local and
national provisions and regulations.
■Follow all special requirements on packaging and
labelling when transporting batteries by a third party.
Ensure that no batteries can come in contact with other
batteries or conductive materials while in transport
by protecting exposed connectors with insulating,
nonconductive caps or tape. Do not transport batteries
that are cracked or leaking. Check with the forwarding
company for further advice.
MAINTENANCE
■Use only original manufacturer’s replacement parts,
accessories and attachments. Failure to do so can cause
possible injury, can contribute to poor performance, and
may void your warranty.
■Service on the product and the charger must be
performed by qualified repair personnel only. Service or
maintenance performed by unqualified personnel could
result in injury to the user or damage to the product. Have
the product serviced by an authorised service centre only.
■Maintain the product with care and in good working
condition. Keep blades sharp and guards in place and
in working order. To prevent serious personal injury,
prevent damage to the product, and to maintain best
performance, replace damaged, bent, cracked, or
unevenly worn-out blades. An unbalanced blade causes
vibration that could damage the motor drive unit or could
cause personal injury.
■Turn off the product, engage the parking brake, and
remove the start key. Make sure that all moving parts
have come to a complete stop:
●before leaving the product unattended (including
disposal of grass clippings)
●before clearing blockages or unclogging the
discharge chute
●before checking, cleaning, or working on the product
●before removing the mulch cover
●before opening the grass discharge chute cover
●after striking a foreign object
–Thoroughly inspect the product for any damage.
–Replace the blade if it is damaged in any way.
–Repair any damage before restarting and
continuing to operate the product.
●whenever the product starts to vibrate abnormally
(check immediately)
–Inspect for damage, particularly the blades.
–Replace the blade if it is damaged in any way.
–Replace or repair any damaged parts.
–Check for and tighten any loose parts.
■The side discharge chute is a spring-loaded guard that
covers the side discharge opening on the cutting deck
and deflects grass clippings and debris away from the
operator. Always ensure that the motor is turned off
and the blades have stopped moving before inspecting,
moving, cleaning, or performing maintenance on the
side discharge chute.
■Replace damaged blades and bolts in sets to preserve
balance.
■Remove the start key from the product before storing,
servicing, or changing accessories. Such preventive
safety measures reduce the risk of starting the product
accidentally.

6
Original Instructions
■You may make adjustments and repairs described in this
manual. For other repairs, have the product serviced by
an authorised service centre only.
■Contact an authorised service centre to replace
damaged or unreadable labels.
■Check all nuts, bolts, and screws at frequent intervals
for proper tightness to ensure that the product is in safe
working condition.
■The blade bolts must be tightened to the recommended
torque.
■Check the brakes before each use and frequently during
use. Adjust and service the brakes as required.
■Be careful during adjustment of the product to prevent
entrapment of the fingers between moving blades and
fixed parts of the product.
■The cutting blades continue to rotate for a few seconds
after the motor is turned off. When servicing the blades,
be aware that even though the power source is turned
off, the blades can still be moved. Never place any part
of the body in the blade area until you are sure the
blades have stopped rotating.
■The blade on the product is sharp. Use extreme caution
and wear heavy-duty gloves when fitting, replacing,
cleaning, or checking bolt security.
■After each use, clean the plastic parts with a soft, dry
cloth. Any part that is damaged should be properly
repaired or replaced by an authorised service centre.
■Keep the product free of grass, leaves, or other debris
buildup.
■Do not use water to clean the product. Use an air moving
device, such as a compressor or leaf blower to clean
the product.
TYRE MAINTENANCE
The product is equipped with tubeless tyres. When tyres are
worn, the traction of the mower decreases, which increases
the chance of having an accident. Replace the tyres when
the depth on the tread is 4 mm or less, or anytime there is
damage to the tyre. Always use original replacement tyres.
Using incorrect tyres on the product could cause loss of
control, which could cause serious personal injury.
Have the tyres replaced by an authorised service centre
only.
TYRE AIR PRESSURE
Check the air pressure in all four tyres before each use.
Improper air pressure aects handling, steering response,
traction, tyre life, level cutting, and operator comfort.
Make sure that tyres are inated to the recommended air
pressure. Refer to the specications table for tyre pressure
requirements.
The tyre air pressure should only be measured or adjusted
when tyres are cold.
TYRE REPAIR
If a leak or at tyre occurs due to a puncture, the tyre may
be repaired using a plug-type patch. If the damage is from
a cut, or if the puncture cannot be repaired using a plug,
replace the tyre.
BRAKE ADJUSTMENT
See page 22.
If the mower travels further before stopping when stepping
on the brake pedal, the brakes need adjusting.
After nal adjustment, test the brakes by driving the mower
at normal speed on at ground to be sure that the mower
stops quickly when the brake pedal is stepped on.
CLEARING BLOCKAGES
■Turn off the product, engage the parking brake,
and remove the start key. Set the cutting deck to the
maximum height. Make sure that all moving parts have
come to a complete stop.
■Always wear heavy-duty gloves when checking or
clearing a blockage. The blades are sharp, and the
blockage itself could be a sharp object.
■Check and carefully clear the side discharge chute for
blockages. Remember that the blade may move during
cleaning.
KNOW YOUR PRODUCT
See page 12-13.
1. Blade engage knob
The blade engage knob activates or stops the cutting
blades.
2. Power switch with start key
The power switch turns the product on and off. The start
key must be inserted before the switch can be operated.
When the key is in the accessory position, the power
switch is also used to power optional manufacturer-
approved mower accessories.
3. USB port
The USB charging port provides charging power of 5
V dc at up to 2 A for your cell phone, MP3 player, or
other USB devices. Check the manual of your device for
specific charging requirements.
Connect one end of a USB cable (not provided) to your
device and the other end to the USB charging port on the
product to charge your device.
NOTE: The USB port is powered only when the start key
is in the ON position.
WARNING! Attempting to charge devices rated more
than 1 A could damage the USB charging port and the
mower. Always close the USB cover when not in use to
prevent trapping debris in the port.
WARNING! Never use headphones or any electronic
device, such as a smartphone or tablet, while operating
the product. A lapse in concentration while operating
the product may result in serious personal injury to the
operator or a bystander.
4. Charging port
The charging port connects the charger to recharge the
80 V battery packs in series followed by any 36 V battery
pack if installed.
5. Battery latch
6. Quick-connect plug
7. Primary 80V battery port
The battery bucket can store up to three 80 V battery
packs.
8. Headlights
The front LED headlights can be controlled from the LCD
interface.
9. Parking brake

7
Original Instructions
The parking brake locks the product in the brake position.
10. Brake pedal
The brake pedal slows down and stops the product.
11. Front tyre
The front tyres rotate 360 degrees for manoeuverability.
12. Auto-stop plug
13. Intelligent Drive System joystick
The intelligent drive system joystick automatically
returns to the neutral position for safety. The joystick
easily allows the user to operate the product with only
one hand. The software is designed to correct gradual
wheel turns to help eliminate divots in the lawn.
14. Seat (with operator presence safety interlock
system)
The seat has an interlock system that stops the blades if
the operator leaves while the mower is running.
Test the system before each use to ensure that it is
working correctly.
1. Stop the product on a level surface, and engage the
parking brake.
2. Set the joystick in the neutral position.
3. Insert the start key, and turn the key to the ON position.
4. Pull up the blade engage knob to activate the blades.
5. Briefly stand up but do not get off the mower.
The blades should stop within 5 seconds. If the blades
do not stop, contact an authorised service centre. Do not
operate the mower until the safety interlock system has
been repaired.
15. Storage / 36V battery pack bucket
16. Dust cover
17. Seat adjustment bar
18. Seat suspension knob
The seat suspension knob adjusts the softness or
firmness of the seat suspension.
19. Rear tyre
The rear tyres are powered by independent motors to
prevent any rear end movement while travelling over low
traction surfaces.
20. Deck height adjustment lever
The deck height adjustment lever raises or lowers the
cutting deck.
21. Deck wheels
22. Side discharge chute
23. Charger (80V)
The charger recharges the batteries of the mower.
24. Hitch plate
25. Battery pack (80V)
80 V battery packs must be used to power the product.
26. Operator’s manual
The operator’s manual provides important safety
warnings and instructions on how to properly and safely
operate and maintain the product.
27. Start key
The start key turns the power switch to the on, off, or
accessory position.
28. Battery pack (36V)
SYMBOLS ON THE PRODUCT
Safety alert
Read and understand all instructions
before operating the product. Follow
all warnings and safety instructions.
Wear eye protection.
Beware of thrown or ying objects.
Keep all bystanders, especially
children and pets, at least 30 m away
from the operating area.
Never carry children or anyone, even
when the blades are o.
Keep hands and feet away from the
blade and cutting area.
Beware of thrown or ying objects.
Always look down and behind you
before and during backing and make
sure children, bystanders, and pets
are clear of the area.
12
Do not operate the product on inclines
greater than 12°. Mow up and down
slopes, not across.
m
Stay at least two moving widths (2 m)
away from any ditches, drop-os, or
water. Front caster wheels can rotate
when the mower is stopped, even
with the brake applied, and can cause
mower to go over the edge or into
the water.
Keep hands and feet away from
rotating blades.
Do not expose the battery, battery
compartment, or electronic
components to rain, water, or liquids.
Do not charge the battery or
expose the product to rain or damp
conditions.
99
Guaranteed sound power level
Never carry children or anyone, even
when the blades are o.
Always look down and behind you
before and during reversing, and
make sure that children, bystanders,
and pets are clear of the area.

8
Original Instructions
Regulatory Compliance Mark (RCM).
Product meets applicable regulatory
requirements.
Waste electrical products should not
be disposed of with household waste.
Please recycle where facilities exist.
Check with your local authority or
retailer for recycling advice.
SYMBOLS IN THIS MANUAL
Parts or accessories sold separately
Note
Warning
PAIRING THE PRODUCT WITH THE MOBILE
APPLICATION
Perform the following steps to pair the product with the
mobile application:
1. Download the free RYOBI ride-on mower mobile
application from the Apple App store or the Google Play
store. Activate BLUETOOTH on your mobile phone.
From the home screen of your phone, launch the RYOBI
ride-on mower mobile application.
2. Tap the get started button in the welcome screen of the
mobile application.
3. At the bottom of the next screen, tap the add button to
pair the product. The mobile application will ask if you
would like to receive notifications. You can decline or
accept notifications and change this setting later.
4. Select your product model. Check the cutting deck size
and model number of your product. Select the same
cutting deck size and model number in the mobile
application screen and tap continue.
5. Turn on the product. Insert the start key, and turn the key
to the ON position. Once the product is on, tap continue
in the mobile application screen.
6. Press the BLUETOOTH button on the product, then
tap the pair to my ZTR button in the mobile application
screen.
7. The mobile application will search for the product. The
LCD on the product and the mobile application will notify
when the connection is succesful. If the connection fails,
make sure that the phone is within 15 m of the product
and try again.
CONTROL PANEL
MAIN DASHBOARD
MainDashboard_Battery%UPDATE_FullCharge
1 2 3 4
5
678910
11
12
13
1. Neutral indicator
2. Park indicator
3. Light indicator
4. BLUETOOTH indicator
5. Blade speed indicator
6. Blade speed
7. BLUETOOTH
8. Menu
9. Headlights on/off
10. Drive speed
11. Screen tabs
12. Battery level
13. Drive speed indicator
BATTERY MONITORING
21 3
1. Empty battery bay / dead battery
2. 80V battery indicator
3. MAXPOWER battery indicator

9
Original Instructions
BLADE CHECK
1 2
1. Blade check indicator
2. Hours remaining
BATTERY OVER TEMPERATURE RANGE
1
1. Battery over temperature
The battery packs are too hot. Allow the battery packs to
cool down before resuming operation.
BATTERY UNDER TEMPERATURE RANGE
1
1. Battery under temperature
The battery packs are too cold. Allow the battery packs to
warm up before resuming operation.
LOW BATTERY
The battery pack capacity is low. The product will turn off
soon.

10
12 mm
12 mm
12 mm 12 mm
12 mm
12 mm

11
x 2
x 2
x 2 x 4
12 mm/13 mm
6 mm

12
Know your product
R80XZTR54
Blade engage knob1
2
3
4
5
6
7
8
9
10
11
Power switch with
start key
Parking brake
Brake pedal
Front tyre
Headlights
USB port
Charging port
Battery latch
Quick-connect
plug
Primary 80 V
battery port

13
Know your product
x 3
x 3
x 3
Dust cover
Deck wheels
Side discharge
chute
Charger (80V)
Hitch plate
Battery pack (80V)
Operator's
manual
Start key
Auto-stop plug
Seat adjustment
bar
Seat
suspension
knob
Rear tyre
Deck height
adjustment
lever
Intelligent Drive
System joystick
Seat (with operator
presence safety
interlock system)
Storage / 36V
battery pack
bucket
Battery pack (36 V)
12
13
14
15
16
17
18
19
20
21
22
23
24
25
26
27
28

14
Getting started
1
1
3
2
3
Wear full eye protection, non-slip
heavy-duty gloves, substantial
footwear, and long trousers at all times
while operating the product. Do not
operate the product when barefoot or
wearing open sandals.
Insert the hex screws, and tighten them
securely with a hex key. Align the tabs
on the dust cover with the base and
press down to lock the dust cover into
place.
2
Insert the joystick through the dust
cover. Align the holes on the joystick
with the holes on the mounting shaft.
Attach the hitch plate to the rear side
of the product. Install and tighten the
bolts.
1
2
3
15mm 15mm
6
Open the cover.
7
Press the center edge on the battery
bucket cover to release the latch.
8
11
1
2
12
Remove the foam ring from the bottom
of the port.
Install the battery pack to the port.
Close the battery covers.
Lift the charging port cover, and connect
the charger cable to the charging port.
1
2
13

15
Getting started
Connect each battery pack’s quick-
connect plugs. These plugs connect
the battery packs to the product. Close
the cover.
NOTE: Lock each battery latch to
secure the battery packs in place.
1
2
9
1
2
10
Open the battery covers located on
each side of the mower. Raise the
battery pack from the port.
5
For side discharge chute configuration,
lower down the side discharge chute,
and make sure that it is properly closed.
6
11
14
Install the seat, aligning the mounting holes to the mounting bracket on the mower.
Install bolts on each side. Tighten the bolts to secure the seat.
1
2
3
M10x50
4
16
Set the cutting deck to the preferred
cutting height.
NOTE: When using the ride-on mower
for the first time, it is recommended to
mow the lawn at a higher cutting height
on the first pass and then gradually
lowering the cutting height by single
steps until the preferred lawn height is
achieved.
Connect the charger to an AC outlet. Disconnect the charger from the
AC outlet once it is fully charged.
Disconnect the charger cable from the
charging port. Close the charging port
cover.
17
1 2
3
1514

16
Getting started
Insert the start key, and turn the key
to the ON position. Pull up the blade
engage knob to activate the blades.
Step on the lower portion of the brake
pedal to disengage the parking brake.
To re-engage the parking brake, step
on the upper portion of the brake pedal.
1
2
3
17
2
1
18
NOTE: Scan the QR code for more
information.

17
p.30p.18
p.35
p.21
p.22
p.25p.28p.24p.33
p.34
p.20
Driving the
product
Storing the
product
Cleaning the
product
Transporting
the product
Levelling the
cutting deck
Charging the
product
Adjusting the cutting
deck wheels
Stopping/Parking
the product
Setting the
cutting height
Adjusting the
brake
Replacing the
blade

18
Operation
1
2
3
3
1
2
3
4
5
1
23
1
2
DRIVING THE PRODUCT
1. Pull the seat adjustment bar to unlock
the seat. Adjust the seat to the prefered
position. Push back the seat adjustment
bar to lock the seat.
2. Set the cutting deck to the preferred
cutting height.
WARNING: Before driving the product
to the mowing location or driving over
gravelly surfaces, set the cutting deck to
the maximum height. If the lawn grass
is taller than the cutting deck at the
maximum height, it is recommended to
pre-cut the lawn with a brush cutter first
and then gradually mow the lawn down
in stages until the preferred cutting height
is achieved.
3. Insert the start key, and turn the key to
the ON position. Pull up the blade engage
knob to activate the blades.
4. Step on the brake pedal to disengage the
parking brake. Pull up the joystick.
5. Drive the product using the Intelligent
Drive System joystick.

19
Operation
6
NOTE: Start mowing the lawn by turning
to the right so that the clippings discharge
away from shrubs, fences, driveways, etc.
After one or two rounds, mow back and forth
across the lawn, turning around the edges of
the already mowed grass.
NOTE: Pull the joystick backwards from
the neutral position to move the product in
reverse in a straight line.
WARNING: Make sure that the lawn is clear
of stones, sticks, wires, toys, tree nuts,
tree branches, and other objects that could
damage the mower blades or motor. Do not
mow over property stakes or other metal
posts. Such objects could damage the blade
or be accidentally thrown by the product in
any direction and cause serious personal
injury to the operator and others.
6. Step on the brake pedal to stop the
product.

20
Operation
3
2
1
2
1
3
1
2
3
STOPPING/PARKING THE PRODUCT
WARNING: Park the product on a level
surface only. Do not park the product on
slopes.
1. Step on the brake pedal, and engage the
parking brake.
2. Press the blade engage knob to stop the
blades. Turn the start key to the OFF
position, and remove the key.
NOTE: Always remove the start key
when leaving the product unattended,
even if for just a brief period.
3. Push down the joystick.
NOTE: Step on the brake pedal to stop the
product.
Table of contents
Other Ryobi Lawn Mower manuals

Ryobi
Ryobi RYAC130 User manual

Ryobi
Ryobi RLM3640Li User manual

Ryobi
Ryobi RM480e Series User manual

Ryobi
Ryobi RLM1956MEB User manual

Ryobi
Ryobi 4000475152 User manual

Ryobi
Ryobi RY48130 User manual

Ryobi
Ryobi RLM36X46H5P User manual

Ryobi
Ryobi RM-65SD Operation manual

Ryobi
Ryobi R18XLMW40 User manual

Ryobi
Ryobi RY36LMXSP46 User manual

Ryobi
Ryobi HM-3400 Operation manual

Ryobi
Ryobi Roboyagi User manual

Ryobi
Ryobi 11A-545D034 User manual

Ryobi
Ryobi RY401016 User manual

Ryobi
Ryobi RLM36X40S240 User manual

Ryobi
Ryobi RY401012 User manual

Ryobi
Ryobi OLM1833B User manual

Ryobi
Ryobi RY401026 User manual

Ryobi
Ryobi RY401022 User manual

Ryobi
Ryobi LE720r User manual