Saelig QianLi LC-IRP01 User manual

Launch user's guidance
PCB Thermal Camera Quick
Guide User Guide

1

Launch user's guidance
table of Contents
1、Product composition......................................................................................................... 3
2、Basic operating instructions............................................................................................. 3
3、Client software instructions.............................................................................................. 4
4、Parameter Description...................................................................................................... 4
5、Packing List........................................................................................................................5
6、Precautions........................................................................................................................ 6
7、FAQ....................................................................................................................................6
2

Launch user's guidance
1、Product composition
Image 1 LC-IRP01 PCB Thermal Camera
Numbering
description
1
Base
2
Bracket
3
Host
2、Basic operating instructions
1. The PCB quick-diagnosis instrument consists of a front-end mainframe, a bracket and a base. The host, the
bracket and the base are first used.
Assemble
2, through the power cord connected to the device power supply, network cable connection equipment and
computer through the computer PCB rapid diagnosis
Client software operation
3, go to the official website of Langchi http://www.launchdigital.net/, download in the smart infrared panel
Client software installation
3

Launch user's guidance
4. During the software installation process, follow the instructions to perform the next step. All prompts
are allowed to modify the operation.
Select Allow modification. After the installation is complete, there will be a black page upgrade box to
automatically add the device IP address network segment.
After the installation is complete, it can be used normally.
3、Client software instructions
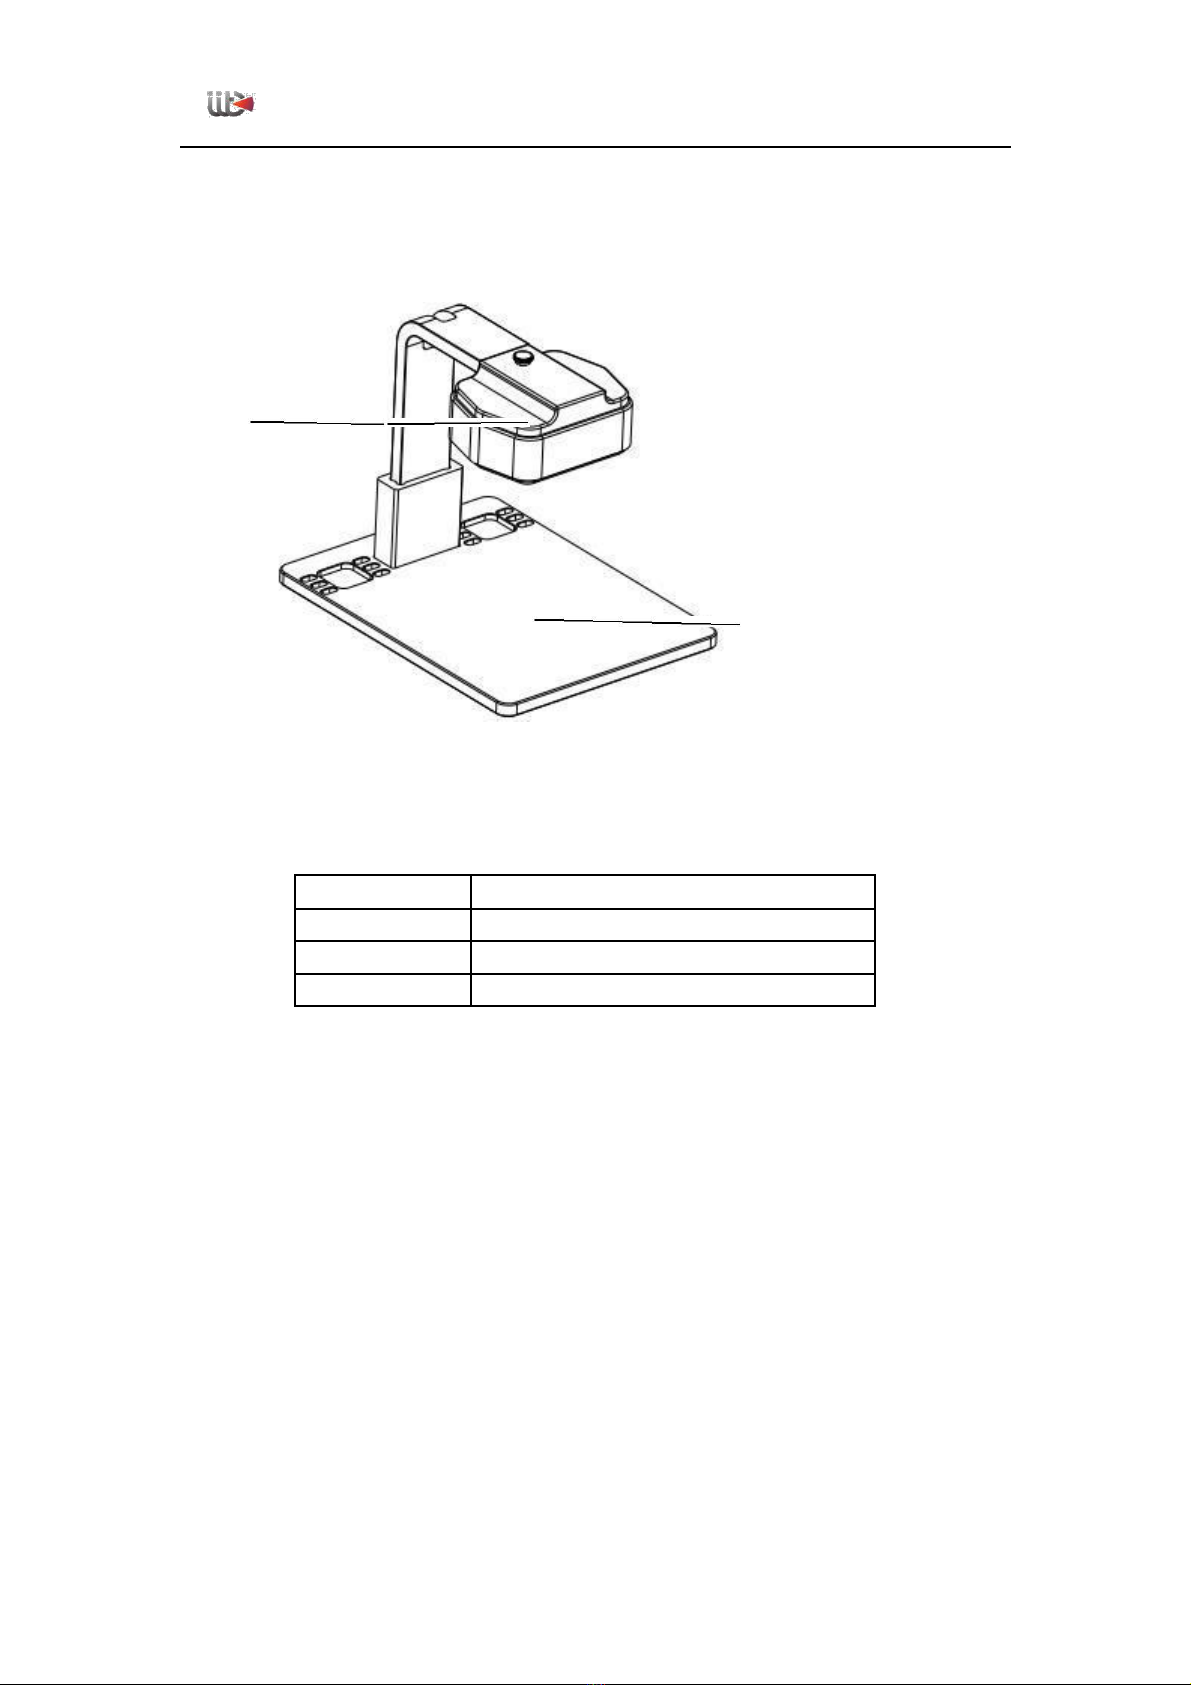
1. Open the client software and select the visible light to observe the display screen through the space
button or the screen mode. If the picture is not clear, you can manually adjust the visible light lens under
the front-end host and fine-tune the picture to clear.
2、
Remove the shield from the mobile phone motherboard that needs to be repaired, and
then put it on the base. Click the spike shortcut button to locate the hot spot. Press the space bar to
switch to the visible light mode to clearly view the highest-temperature position just positioned. After
the shortcut key is pressed, there are many high temperature points on the screen. You can pull the
lower temperature bar to filter out the hottest point.
3、The software can monitor the operation of the entire mobile phone motherboard, and the
temperature of each point of the mobile mouse can be displayed, and the temperature data is used
to determine whether it is running normally.
4、The round button on the right side of the software, the left and right buttons adjust the
image fusion degree, and the inner button displays the 100% image blending intensity, which can be
fine-tuned according to the actual situation.
5、The software can capture the current detection of the motherboard picture, retain the maintenance
data for future maintenance reference
6、The picture display color can be switched through the debug board. There are white hot
color, iron red color, and rainbow color.

Launch
user's guidance
Lens angle
57°×44°
Visible light parameter
Resolution
1920×1080
Interface and display function
Display mode
Visible/infrared thermal imaging/double optical
interlacing
Video output
RJ45
Picture storage format
JPEG
Physical characteristics
Bracket size
19cm
×
24.5cm
×
21mm
Gross Weight
4kg
Installation
Removable installation
power supply
Input supply voltage
5-26 V DC
Power consumption
2.2W (MAX 3W
)
Use environment
Storage temperature range
-20
°
~ 60
°
C
humidity
95% Relative humidity
Temperature measurement
performance
Temperature measurement
function
Full temperature measurement
Temperature measurement
accuracy
±2°C
Temperature range
-10
°
C-150
°
C
5、Packing List
Number
Nmae
Quantity
1
Host
1
2
Bracket
1
3
Bracket base
1
4
Small knob
3
5
Anti-static mat
1
6
power supply
1
7
cable
1
8
Warranty Card
1
9
Certificate
1
10
Instruction manual
1

5

Launch user's guidance
6、Precautions
1、PCB quick-diagnosis software has certain requirements for running computer
configuration. It is recommended to use processor I3 and above, memory.
Computers with 2G and above can operate normally.
2、The computer and PCB quick-access device can be connected by USB to the RJ45
network interface. The software may not be recognized automatically.
There is no image phenomenon when adding the IP address of the PCB quick-up
device. You need to manually set the IP address of the computer to use it normally.
For details, see "Product Q & A 1"
7、FAQ
1. What is the delay in the software image?
A: The software has certain requirements for the computer configuration. It is necessary to configure the
processor I3 or above and the memory above 2G to run normally. If the computer configuration is low,
the delay will occur.
2. What if the software does not have an image?
A: First check whether the device is powered on properly and the network cable is connected. If the two
are normal, check whether the firmware version number in the System Configuration > About menu is
displayed. If there is no display, the device IP address fails to be added. Cause, you need to manually
configure the computer IP address, the specific operation is as follows:
Windows 7 operating system computer settings: Click on the network in the lower right corner of the
computer Click "Open Network and Sharing Center" Click "Change Network Adapter Settings" Double-
click "Local Area Connection" or click
Right click on the right button in the pop up menu bar and double click on "Internet Protocol Version"
(TCP/IPV4)”Click “Advanced”IP address (R) and click “Add”as follows IP address: 192.168.2.99
Sub net mask: 255.255.255.0
Click "Add" and always click "Confirm" as prompted until the setting is completed.
Windows 10 Operating Computer System Computer Settings: Click on the network in the lower right
corner of the computer Click on "Network Settings"

Double-click "Change Network Adapter Options" Double-click the currently connected "Ethernet"
network or click the right mouse button and click "Properties" in the pop-up menu bar. Double-click
"Internet Protocol Version (TCP/IPV4)" and click on "Advanced" IP Address (R) Click "Add" as follows.
6

Launch user's guidance
IP address: 192.168.2.99
Subnet mask: 255.255.255.0
Click "Add" and always click "Confirm" as prompted until the setting is completed.
3, the software installation process prompts to install NET Framework 4.0 how to operate?
A: The PCB quick-diagnosis software runs with the NET Framework 4.0 operating environment. If
prompted to install, follow the prompts to install it step by step. After installation, the software can be
used normally.
4. What should I do if the software image has a ghost image?
A: Image ghosting is due to the fact that the position between the dual-lens lens and the detection board
may not be the lowest due to the mounting position of the bracket.
Factors such as the thickness of the board cause the optimal interlaced imaging distance to change. The
image needs to be fine-tuned by the software button, and it can be used normally without any ghosting.
5. Does the software support for the PCB quick-up instrument be upgraded online?
A: Support, if the software of the later version is updated, the user software will receive an automatic
push notification notification.
To upgrade, the user can upgrade the software according to the prompts.
Pls use a power supply, change to 3.8-4.2V.
How to use it? Pls have a look a tthe video on Youtube:
https://www.youtube.com/watch?v=76SPQ3M6kI4&t=113s
https://www.youtube.com/watch?v=E9RbsmScRoU
https://www.youtube.com/watch?v=V7geANCxktQ
https://www.youtube.com/watch?v=MBWvfmqPzJQ
https://www.youtube.com/watch?v=RNHBZRQhl4c

Software download address: http://www.launchirview.com/technology.html
(1)change to English page, pls click “ English” button in the pink circle
(2) Click “fuwuzhichi”, and download, in the pink circle

(3) Pls download the last one to downlaod the newest desktop software

How to change language to English:
1. Click here
2. Choose English
3. Done

How to change the shot and no shadow? Press “Space” button to change normal image and infared
image.
1. Turn around the shot here until clear when normal image
2. Click here to change the direction to remove shadow when infrared image
Table of contents