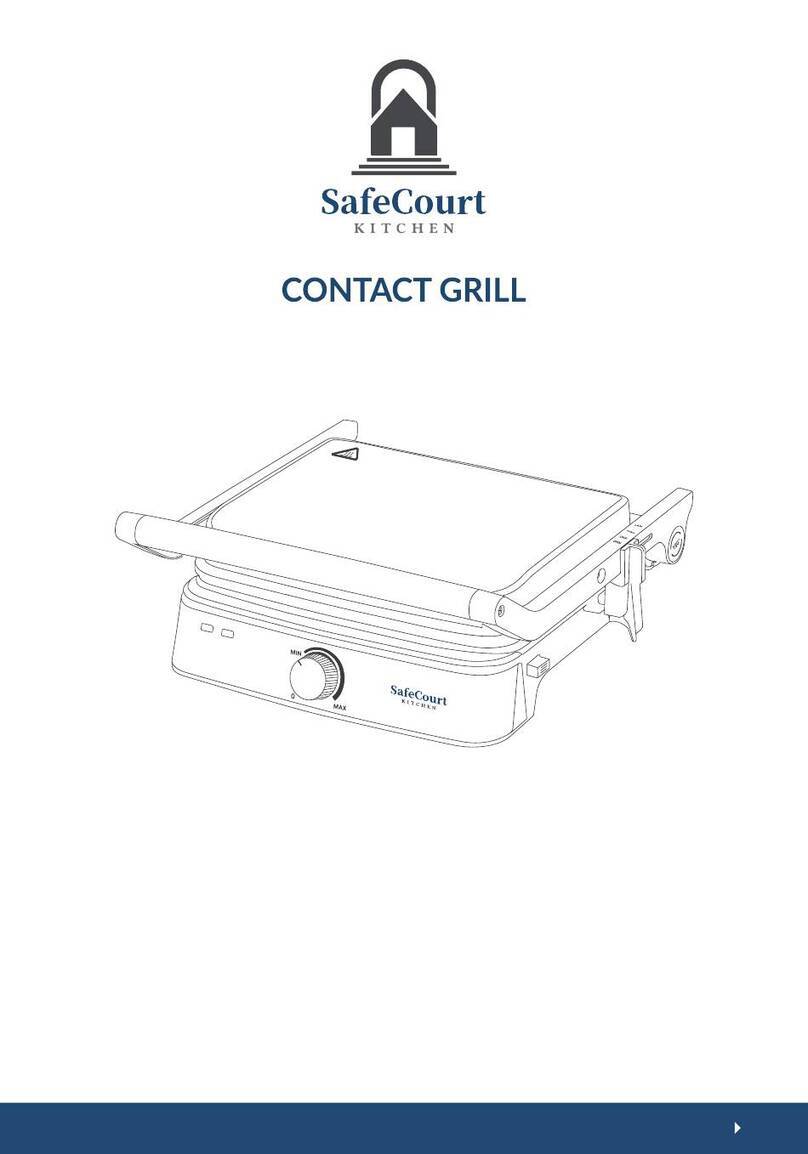
SafeCourt CG100 User manual

CG100 | Contact Grill
USER MANUAL

- FOR HOUSEHOLD USE ONLY –
IMPORTANT SAFEGUARDS
Read all Instructions Before Use.
Denitions
Whenever used, the following identify safety and property damage messages
and designate a level of hazard seriousness.
- This is the safety alert symbol. It alerts you to potential personal injury
hazards. Obey all safety messages that follow this symbol to avoid
possible injury or death.
DANGER - Indicates a hazardous situation, which, if not avoided, will
result in death or serious injury. Usage of this signal word is limited to
the most extreme situations.
WARNING - Indicates a hazardous situation, which, if not avoided,
could result in death or serious injury.
CAUTION - Indicates a hazardous situation, which, if not avoided, may
result in minor/moderate injury.
NOTICE - Addresses practices not related to personal injury, such as
product and/or property damage.
WARNING — To reduce the risk of re, electric shock, or serious
personal injury:
• Do not touch hot surfaces. Use the Handle.
When using electrical products, always follow basic safety precautions, including
the following:
2

• Do not immerse the Power Cord, Plug, or Base in water/liquid.
• Unplug the Power Cord from the electrical outlet when the product is
not in use and before cleaning it. Allow to cool before putting on or
taking off parts.
• Do not use attachments not recommended for use with this product by
the product manufacturer. Attachments may become hot during use,
so allow them to cool before handling.
• Do not place the product on or near a hot gas or electric burner, or in a
heated oven.
• Use extreme caution when moving a product containing hot oil or other
hot liquids.
• Do not leave unattended while in use.
• Do not plug or unplug the product into/from an electrical outlet with a
wet hand.
• Take proper precautions to prevent the risk of burns, re, or other personal
or property damage, as this product generates heat during use.
• If the product falls into water, immediately unplug it from the electrical
outlet. Do not touch or reach into the water.
• Use in a well-ventilated area. Keep at least 4-6 inches of space on all
sides to allow adequate air circulation.
• If the supply cord is damaged, it must be replaced by the manufacturer,
its service agent or similarly qualied persons in order to avoid a hazard.
• This product has no user-serviceable parts. Do not attempt to examine
or repair it yourself. Only qualied service personnel should perform any
servicing; take the product to the appliance repair shop of your choice
for inspection and repair.
• This appliance can be used by children aged from 8 years and above
and persons with reduced physical, sensory or mental capabilities or lack
of experience and knowledge if they have been given supervision or
instruction concerning use of the appliance in a safe way and understand
the hazards involved. Children shall not play with the appliance. Cleaning
and user maintenance shall not be made by children unless they are
older than 8 and supervised.
• Keep the appliance and its cord out of reach of children less than 8
years.
• This appliance is not intended to be operated by means of external
3

CAUTION — To reduce the risk of personal injury:
• This product is intended solely for indoor, non-commercial, non-industrial,
household use in cooking/heating food for human consumption. Do not use
the product outdoors or for any other purpose.
• Do not allow the Power Cord to hang where it may be tripped over or
pulled(e.g., over the edge of a table or counter), and do not allow the Cord to
touch hot surfaces.
• Always wear protective oven mitts or heat-resistant gloves when using this
product and use utensils.
• To disconnect from the electrical outlet, pull directly on the Plug; do not pull
on the Power Cord.
• Always use the product on a at, stable, heat-resistant surface.
Special Instructions:
A short power-supply cord is provided to reduce the risk resulting from becoming
entangled in or tripping over a longer cord. Extension cords are available and
may be used if care is exercised in their use. If an extension cord is used:
• The marked electrical rating of the extension cord must be at least as great
as that of the product;
• The cord should be arranged so that it will not drape over the countertop or
tabletop where it can be pulled on by children or tripped overunintentionally;
• The extension cord must be a grounding-type 3-wire cord.
4
timer or separate remote-control system.
• [symbol IEC 60417-5041(2002-10)] Caution, hot surface.
• This appliance is intended to be used in household and similar
applications such as:
– Staff kitchen areas in shops, ofces and other working environments;
– Farm houses;
– By clients in hotels, motels and other residential type environments;
– Bed and breakfast type environments.

SAVE THESE INSTRUCTIONS
FOR FUTURE REFERENCE
- -
Parts
1. Handle
2. Upper cover
3. Handle cover plate
4. Base
5. Knob
6. Button for upper cover
7. Grill
8. Button for base
9. Oil plate
10. Spatula
11. Red light cover
12. Green light cover
5

Before First Use
To Assemble
Press the Upper Plate Release Button to remove the upper Grill Plate and then press the
Lower Plate Release Button to remove the lower Grill Plate. Clean the Grill Plates, the Drip
Cups, and the Scraper/Cleaning Tool in warm, soapy water; rinse and let dry. These parts
may also be washed in an automatic dishwasher. NEVER IMMERSE THE BASE INTO OR
EXPOSE IT TO WATER.
Reinsert the upper and lower Grill Plates into their respective positions before use. See
the “Inserting/Changing Plates” subsection below for detailed instructions.
Place the product on a clean, at, level, stable, heat-resistant surface with at least 4-6
inches of space on all sides to allow adequate air circulation.
Positioning the Upper Housing:
1. Closed/Heating Position: The Upper Housing
is closed and rests on the Base. Use this
position when starting/heating the product
and when grilling most foods.
2. Open Position: The Upper Housing is open.
Place the Product in this position when starting
to use the Grill function, and when grilling
certain foods in which the upper Grill Plate is
not appropriate, such as pizza or sh. Lift the
Handle until the Upper Housing is at about a
90°angle.
NOTE: When using the Grill Plates for the rst time, spray or apply a thin layer of
cooking oil onto the nonstick surfaces of the Plates with a paper towel in order
to season the nonstick surface. As necessary, reapply a thin layer of cooking oil
throughout the life of the Plates to maintain best nonstick performance.
6

3. Flat Position: The Upper
Housing is open and level with
the Base, creating two cooking
surfaces. Use the product in
this position when grilling larger amounts of food. To atten, pull up on the Hinge
Release and push the Handle down.
Inserting/Changing Plates:
1. Slide the notches in the rear of the lower Grill Plate into the retaining hooks, then
press down on the front of the plate to snap it into place. Repeat to attach the
upper Grill Plate.
To Use
WARNING: The Grill Plates and metal surfaces of the Upper Housing and Handle
will become very hot during use. To avoid a burn hazard, wear protective oven
mitts or heat-resistant gloves when using and touch only the black portion of the
Handle.
NOTICE: Use only heat-resistant wooden, plastic, or silicone utensils to add/
remove food. Do not use a metal utensil as it may scratch the surface of the item.
NOTE: During the initial use this item may emit some light smoke. This is normal
and will subside with further use.
Contact Grill:
Use to cook burgers, boneless or thin pieces of meat and sh, and vegetables. In the
“Closed” position, food will cook quickly since both sides cook at the same time.
1. Set the product to the “Closed” position and plug the power cord into a standard
electrical outlet. The Power Indicator will illuminate red, indicating power is on.
2. Place a Drip Cup below the drip spout.
7

3. Turn the Temperature Control to the desired setting, as listed below:
NOTE: It may take up to seven minutes to reach the selected cooking temperature.
The Ready Indicator will illuminate green when the product is ready for cooking
and will alternate on and off during cooking, indicating the product is maintaining
the selected cooking temperature.
NOTE: If cooking more than one piece of food at a time, food items should be
similar in thickness to ensure the upper Grill Plate rests evenly on the food for
even cooking.
NOTE: If cooking more than one piece of food at a time, food items should be
similar in thickness to ensure the upper Grill Plate rests evenly on the food for even
cooking.
CAUTION: Always unplug the product from the electrical outlet when cooking is
complete and when the product is not in use.
4. Place food onto the lower Grill Plate and lower the upper Grill Plate onto the food
(the “Closed” position). The upper Grill Plate will self-adjust to the thickness of the
food. If cooking items in which the upper Grill Plate is not needed, such as kebabs
or sh, leave the product in the “Open” position.
5. When cooking is completed, remove food, unplug the product from the electrical
outlet, and allow the product to cool (at least 30 minutes) before moving,
disassembling, or cleaning it.
Panini Press:
Use upper and lower Grill Plates in the “Closed” position to grill any combination of
ingredients (for example, vegetables, meats, and cheeses) layered between two pieces
of bread or a folded tortilla/pita.
1. Follow steps 1 through 3 in the “Contact Grill” section, above.
2. Place food on the Lower Grill Plate and lower the upper Grill Plate onto the food. The
Upper Housing will self-adjust to the thickness of the food.
Setting Temperature
min close
max 425ºF (230ºC)
8

3. When cooking is completed, remove food, unplug the product from the
electrical outlet, and allow the product to cool(about 30 minutes) before moving,
disassembling, or cleaning it.
NOTE: Always unplug the product from the electrical outlet when cooking is
complete and when the product is not in use.
Flat Grill:
Using the product in the “Flat” position doubles the cooking surface area and allows
cooking of items with different thicknesses simultaneously, or cooking foods on
different plates to avoid combining avors. Use for cooking French toast, hash browns,
open face sandwiches, and kebabs.
1. Set the product to the “Flat” position and plug the power cord into a standard
electrical outlet. The Power Indicator will illuminate red, indicating power is on.
2. Use both Drip Cups when cooking in the Flat position.
NOTE: It may take up to eight minutes to reach the selected cooking temperature.
The Ready indicator will illuminate green when the product is ready for cooking.
The Ready indicator will alternate on and off during cooking, indicating the
product is heating to maintain the selected cooking temperature.
CAUTION: Always unplug the product from the electrical outlet when cooking is
complete and when the product is not in use.
3. Turn the Temperature Control to the desired setting.
4. Place food onto the Grill Plates.
5. When cooking is completed, remove food, unplug the product from the
electrical outlet, and allow the product to cool (about 30 minutes) before
moving, disassembling, or cleaning it.
9

Care and Maintenance
Electrical Specications
WARNING: Always make sure the product is unplugged from the electrical outlet
and allowed to completely cool before relocating, disassembling, or cleaning it.
NOTICE: Do not use harsh or abrasive cleaners or pads to clean the product.
WARNING: Do not immerse the Base into or expose it to water or other liquids.
1. After completely cooling, gently remove the Drip Cups and discard contents.
2. Remove any leftover food from the Grill Plates using the Scraper/Cleaning Tool.
3. Clean the Grill Plates, Drip Cups, and Scraper/Cleaning Too in warm, soapy water;
rinse and let dry. These parts may also be washed in an automatic dishwasher.
4. Wipe the Upper Housing and Base with a water-dampened sponge and dry with a
soft cloth or paper towel.
5. Store the product in a cool, dry location.
Voltage Frequency Wattage
220-240VAC 50-60Hz 2000W
This marking indicates that this product should not be
disposed with other household wastes throughout the EU. To
prevent possible harm to the environment or human health
from uncontrolled waste disposal, recycle it responsibly to
promote the sustainable reuse of material resources. To return
your used device, please use the return and collection systems
or contact the retailer where the product was purchased. They
can take this product for environmental safe recycling.
10

CG100 | Contact Grill
BEDIENINGS- EN VEILIGHEIDSINSTRUCTIES
Nederlands

- ALLEEN VOOR HUISHOUDELIJK GEBRUIK –
BELANGRIJKE VEILIGHEIDSMAATREGELEN
Lees Alle Instructies Voor Gebruik
Denities
Wanneer u het apparaat gebruikt en u identiceert één van de volgende
berichten over veiligheid en schade aan eigendommen. Ook geven ze een
mate van ernst van het gevaar aan.
- Dit is het veiligheidswaarschuwingssymbool. Het waarschuwt u
voor mogelijke gevaren voor persoonlijk letsel. Houd u aan alle
veiligheidsberichten die op dit symbool volgen om mogelijk letsel of
overlijden te voorkomen..
GEVAAR - Geeft een gevaarlijke situatie aan die, indien niet vermeden,
zal leiden tot de dood of ernstig letsel. Het gebruik van dit signaalwoord
is beperkt tot de meest extreme situaties.
WAARSCHUWING - Geeft een gevaarlijke situatie aan die, indien niet
vermeden, kan leiden tot de dood of ernstig letsel.
VOORZICHTIG - Geeft een gevaarlijke situatie aan die, indien niet
vermeden, kan leiden tot licht/matig letsel.
KENNISGEVING - Pakt praktijken aan die geen verband houden met
persoonlijk letsel, zoals schade aan producten en/of eigendommen.
WAARSCHUWING — Om het risico op brand, elektrische schokken of
ernstig persoonlijk letsel te verminderen:
• Raak hete oppervlakken niet aan. Gebruik het handvat.
• Dompel het netsnoer, de stekker of de basis niet onder in water/vloeistof.
• Haal de stekker uit het stopcontact als het product niet in gebruik is en
Volg bij het gebruik van elektrische producten altijd de elementaire
veiligheidsmaatregelen, waaronder de volgende:
12

voordat u het schoonmaakt. Laat afkoelen voordat u onderdelen aan-
of uittrekt.
• Gebruik geen hulpstukken die niet door de fabrikant van het product
worden aanbevolen voor gebruik met dit product. Hulpstukken kunnen
tijdens gebruik heet worden, dus laat ze afkoelen voordat u ze aanraakt.
• Plaats het product niet op of in de buurt van een hete gas- of elektrische
brander, of in een verwarmde oven.
• Wees uiterst voorzichtig bij het verplaatsen van een product dat hete
olie of andere hete vloeistoffen bevat.
• Laat het niet onbeheerd achter tijdens gebruik.
• Steek de stekker van het product niet in of uit een stopcontact met een
natte hand.
• Neem de juiste voorzorgsmaatregelen om het risico op brandwonden,
brand of andere persoonlijke of eigendomsschade te voorkomen,
aangezien dit product tijdens het gebruik warmte genereert.
• Als het product in het water valt, trek dan onmiddellijk de stekker uit het
stopcontact. Raak het water niet aan en reik er niet in.
• Gebruik in een goed geventileerde ruimte. Houd aan alle kanten ten
minste 4-6 inch ruimte om voldoende luchtcirculatie mogelijk te
maken.
• Als het netsnoer beschadigd is, moet het worden vervangen door de
fabrikant, zijn servicevertegenwoordiger of gelijkaardig gekwaliceerde
personen om gevaar te voorkomen.
• Dit product heeft geen onderdelen die door de gebruiker kunnen
worden onderhouden. Probeer het niet zelf te onderzoeken of
te repareren. Alleen gekwaliceerd onderhoudspersoneel mag
onderhoud uitvoeren; breng het product naar de reparatiewerkplaats
van uw keuze voor inspectie en reparatie.
• Dit apparaat kan worden gebruikt door kinderen van 8 jaar en ouder en
personen met verminderde fysieke, zintuiglijke of mentale vermogens
of gebrek aan ervaring en kennis als ze onder toezicht staan of instructies
hebben gekregen over het veilige gebruik van het apparaat en de
gevaren betrokken. Kinderen mogen niet met het apparaat spelen.
Reiniging en gebruikersonderhoud mogen niet door kinderen worden
uitgevoerd, tenzij ze ouder zijn dan 8 jaar en onder toezicht staan.
• Houd het apparaat en het snoer buiten het bereik van kinderen jonger
dan 8 jaar.
13

LET OP — Om het risico op persoonlijk letsel te verminderen:
• Dit product is uitsluitend bedoeldvoorgebruik binnenshuis,niet-commercieel,
niet-industrieel, huishoudelijk gebruik bij het koken/verwarmen van voedsel
voor menselijke consumptie. Gebruik het product niet buitenshuis of voor
enig ander doel.
• Laat het netsnoer niet hangen waar men erover kan struikelen of eraan kan
trekken (bijvoorbeeld over de rand van een tafel of aanrecht), en laat het
snoer niet in aanraking komen met hete oppervlakken.
• Draag altijd beschermende ovenwanten of hittebestendige handschoenen
bij het gebruik van dit product en gebruik keukengerei.
• Om de stekker uit het stopcontact te halen, trekt u direct aan de stekker; trek
niet aan het netsnoer.
• Gebruik het product altijd op een vlakke, stabiele en hittebestendige
ondergrond.
Speciale Instructies:
Er wordt een kort netsnoer meegeleverd om het risico te verkleinen dat uverstrikt
raakt in of struikelt over een langer snoer. Verlengsnoeren zijn beschikbaar
en kunnen worden gebruikt als er voorzichtig mee wordt omgegaan. Als een
verlengsnoer wordt gebruikt:
• Het gemarkeerde elektrische vermogen van het verlengsnoer moet
minstens zo groot zijn als dat van het product;
• Het snoer moet zo worden geplaatst dat het niet over het aanrecht of
tafelblad valt waar kinderen aan kunnen trekken of onbedoeld over kunnen
struikelen;
• Het verlengsnoer moet een geaard 3-aderig snoer zijn..
• Dit apparaat is niet bedoeld om te worden bediend door middel van
een externe timer of een afzonderlijk afstandsbedieningssysteem.
• [symbool IEC 60417-5041(2002-10)] Let op, heet oppervlak.
• Dit apparaat is bedoeld voor gebruik in huishoudelijke en soortgelijke
toepassingen zoals:
• Personeelskeukens in winkels, kantoren en andere werkomgevingen;
• Boerderijen;
• Door klanten in hotels, motels en andere woonachtige omgevingen;
• Omgevingen van het type bed en breakfast.
14

BEWAAR DEZE INSTRUCTIES VOOR
TOEKOMSTIGE REFERENTIE!
- -
Onderdelen
1. Handvat
2. Bovendeksel
3. Afdekplaat handvat
4. Basis
5. Knop
6. Knopvoorbovenklep
7. Grill
8. Knop voor basis
9. Olieplaat
10. Spatel
11. Rood licht deksel
12. Afdekking groen licht
15

Voor het eerste gebruik
Verzamelen
Druk op de ontgrendelknop van de bovenste plaat om de bovenste grillplaat te
verwijderen en druk vervolgens op de ontgrendelknop van de onderste plaat om de
onderste grillplaat te verwijderen. Reinig de grillplaten, de lekbekers en de schraper/
reinigingstool in warm zeepsop; afspoelen en laten drogen. Deze onderdelen kunnen
ook in een automatische vaatwasser worden gewassen. DOMPEL DE BASIS NOOIT IN OF
STEL DEZE NOOIT BLOOT AAN WATER.
Plaats de bovenste en onderste grillplaten terug in hun respectievelijke posities voor
gebruik. Zie de subsectie “Plaatsen verwisselen” hieronder voor gedetailleerde instructies.
Plaats het product op een schoon, vlak, stabiel, hittebestendig oppervlak met aan alle
kanten ten minste 10 tot 15 cm ruimte om voldoende luchtcirculatie mogelijk te maken.
Plaatsing van de bovenste behuizing:
1. Gesloten/Verwarmingsstand: De bovenste
behuizing is: gesloten en rust op de basis.
Gebruik deze positie bij het starten/verwarmen
van het product en bij het grillen van de
meeste voedingsmiddelen.
2. Open positie: de bovenste behuizing is open.
Plaats het product in deze positie wanneer u
het begint te gebruiken de grillfunctie, en bij het
grillen van bepaalde voedingsmiddelenwaarbij
de bovenste grillplaat niet geschikt is, zoals
pizza of vis. Til de handgreep op totdat de
Bovenste behuizing staat in een hoek van
ongeveer 90°.
OPMERKING: Wanneer u de grillplaten voor de eerste keer gebruikt, spuit of
brengt u een dunne laag bakolie aan op de antiaanbaklaag van de platen met
keukenpapier om de antiaanbaklaag te kruiden. Breng indien nodig opnieuw een
dunne laag bakolie aan gedurende de levensduur van de platen om de beste
anti-aanbakprestaties te behouden.
16

Platen plaatsen/wisselen:
1. Schuif de inkepingen aan de achterkant van de onderste grillplaat in de
bevestigingshaken en druk vervolgens op de voorkant van de plaat om deze op
zijn plaats te klikken. Herhaal dit om de bovenste grillplaat te bevestigen.
Gebruiken
WAARSCHUWING: De grillplaten en metalen oppervlakken van de bovenste
behuizing en het handvat zullen tijdens gebruik erg heet worden. Om brandwonden
te voorkomen, dient u tijdens het gebruik beschermende ovenwanten of
hittebestendige handschoenen te dragen en raakt u alleen het zwarte gedeelte
van de handgreep aan.
KENNISGEVING: Gebruik alleen hittebestendig houten, plastic of siliconen
keukengerei om voedsel toe te voegen/te verwijderen. Gebruik geen metalen
keukengerei, omdat dit krassen op het oppervlak van het item kan veroorzaken.
OPMERKING: Tijdens het eerste gebruik kan dit item wat lichte rook afgeven. Dit
is normaal en zal verdwijnen bij verder gebruik.
Contactgrill:
Gebruik voor het bereiden van hamburgers, vlees en vis zonder bot of dunne stukken,
en groenten. In de “Gesloten” positie zal het voedsel snel koken omdat beide kanten
tegelijkertijd koken.
1. Zet het product in de “Gesloten” positie en steek het netsnoer in een standaard
stopcontact. De voedingsindicator zal rood oplichten om aan te geven dat de
stroom is ingeschakeld.
2. Plaats een druppelbeker onder de lektuit.
3. Vlakke positie: de Bovenste
behuizing is open en gelijk met
de basis, het creëren van twee
kook oppervlakken. Gebruik
het product in deze positie bij:
grotere hoeveelheden grillen Van voedsel. Om af te vlakken, omhoog trekken op
de scharnierontgrendeling en duw de hendel naar beneden.
17

3. Draai de temperatuurregelaar naar de gewenste instelling, zoals hieronder vermeld:
OPMERKING: Het kan tot zeven minuten duren voordat de geselecteerde
kooktemperatuur is bereikt. De Klaar-indicator licht groen op wanneer het product
klaar is om te koken en zal afwisselend aan en uit gaan tijdens het koken, om aan te
geven dat het product de geselecteerde kooktemperatuur handhaaft.
OPMERKING: Als u meer dan één stuk voedsel tegelijk kookt, moeten de
voedselitems dezelfde dikte hebben om ervoor te zorgen dat de bovenste
grillplaat gelijkmatig op het voedsel rust voor een gelijkmatige bereiding.
OPMERKING: Als u meer dan één stuk voedsel tegelijk kookt, moeten de
voedselitems dezelfde dikte hebben om ervoor te zorgen dat de bovenste
grillplaat gelijkmatig op het voedsel rust voor een gelijkmatige bereiding.
LET OP: Haal de stekker van het product altijd uit het stopcontact wanneer
het koken klaar is en wanneer het product niet in gebruik is.
4. Plaats voedsel op de onderste grillplaat en laat de bovenste grillplaat op het voedsel
zakken (de “Gesloten” positie). De bovenste grillplaat past zich automatisch aan de
dikte van het voedsel aan. Als u gerechten kookt waarbij de bovenste grillplaat niet
nodig is, zoals spiesjes of vis, laat u het product in de “Open”-stand staan.
5. Wanneer het koken is voltooid, verwijdert u het voedsel, haalt u de stekker uit het
stopcontact en laat u het product afkoelen (ten minste 30 minuten) voordat u het
verplaatst, uit elkaar haalt of schoonmaakt.
Panini-pers:
Gebruik de bovenste en onderste grillplaten in de “Gesloten” stand om elke combinatie
van ingrediënten (bijvoorbeeld groenten, vlees en kaas) tussen twee stukken brood of
een opgevouwen tortilla/pitabroodje te grillen.
1. Volg stap 1 t/m 3 in het gedeelte ‘Contactgrill’ hierboven.
2. Plaats voedsel op de onderste grillplaat en laat de bovenste grillplaat op het voedsel
zakken. De bovenste behuizing past zich automatisch aan de dikte van het voedsel
aan.
Instelling Temperatuur
min Dicht (0ºC)
max 425ºF (230ºC)
18

3. Wanneer het koken is voltooid, verwijdert u het voedsel, haalt u de stekker uit het
stopcontact en laat u het product afkoelen (ongeveer 30 minuten) voordat u het
verplaatst, uit elkaar haalt of schoonmaakt.
LET OP: Haal de stekker van het product altijd uit het stopcontact wanneer het
koken klaar is en wanneer het product niet in gebruik is.
Platte grill:
Door het product in de “platte” positie te gebruiken, wordt het kookoppervlak
verdubbeld en kunnen items met verschillende diktes tegelijkertijd worden gekookt
of voedsel op verschillende borden worden bereid om combinaties van smaken te
voorkomen. Gebruik voor het bereiden van wentelteefjes, hash browns, sandwiches
met open gezicht en kebabs.
1. Zet het product in de “platte” positie en steek het netsnoer in een standaard
stopcontact. De voedingsindicator zal rood oplichten om aan te geven dat de
stroom is ingeschakeld.
2. Gebruik beide druppelbekers bij het koken in de vlakke stand.
3. Draai de temperatuurregelaar naar de gewenste instelling.
OPMERKING: Het kan tot acht minuten duren voordat de geselecteerde
kooktemperatuur is bereikt. De Klaar-indicator licht groen op wanneer het
product klaar is om te koken. De Klaar-indicator zal tijdens het koken afwisselend
aan en uit gaan om aan te geven dat het product aan het opwarmen is om de
geselecteerde kooktemperatuur te behouden.
LET OP: Haal de stekker van het product altijd uit het stopcontact wanneer
het koken klaar is en wanneer het product niet in gebruik is.
4. Plaats voedsel op de grillplaten.
5. Wanneer het koken is voltooid, verwijdert u het voedsel, haalt u de stekker uit het
stopcontact en laat u het product afkoelen (ongeveer 30 minuten) voordat u het
verplaatst, uit elkaar haalt of schoonmaak.
19

Verzorging en onderhoud
Elektrische specicaties
Milieu
WAARSCHUWING: Zorg er altijd voor dat het product uit het stopcontact is gehaald
en volledig is afgekoeld voordat u het verplaatst, uit elkaar haalt of schoonmaakt.
KENNISGEVING: Gebruik geen agressieve of schurende reinigingsmiddelen of
pads om het product schoon te maken.
WAARSCHUWING: Dompel de basis niet onderin of stel deze niet bloot
aan water of andere vloeistoffen.
1. Nadat ze volledig zijn afgekoeld, verwijdert u voorzichtig de druppelbekers en gooit
u de inhoud weg.
2. Verwijder alle etensresten van de grillplaten met behulp van de schraper/
reinigingstool.
3. Reinig de grillplaten, lekbekers en schraper/reiniging ook in warm zeepsop;
afspoelen en laten drogen. Deze onderdelen kunnen ook in een automatische
vaatwasser worden gewassen.
4. Veeg de bovenste behuizing en basis af met een water bevochtigde spons en
droog ze af met een zachte doek of keukenpapier.
5. Bewaar het product op een koele, droge plaats.
Voltage Frequentie Wattage
220-240VAC 50-60Hz 2000W
Deze markering geeft aan dat dit product in de hele EU niet
met ander huishoudelijk afval mag worden weggegooid. Om
mogelijke schade aan het milieu of de menselijke gezondheid
door ongecontroleerde afvalverwijdering te voorkomen, moet u
het op verantwoorde wijze recyclen om duurzaam hergebruik van
materiële hulpbronnen te bevorderen. Gebruikvoor het retourneren
van uw gebruikte apparaat de retour- en ophaalsystemen of neem
contact op met de winkel waar het product is gekocht. Zij kunnen
dit product meenemen voor milieuvriendelijke recycling.
20
Table of contents
Languages:
Other SafeCourt Grill manuals