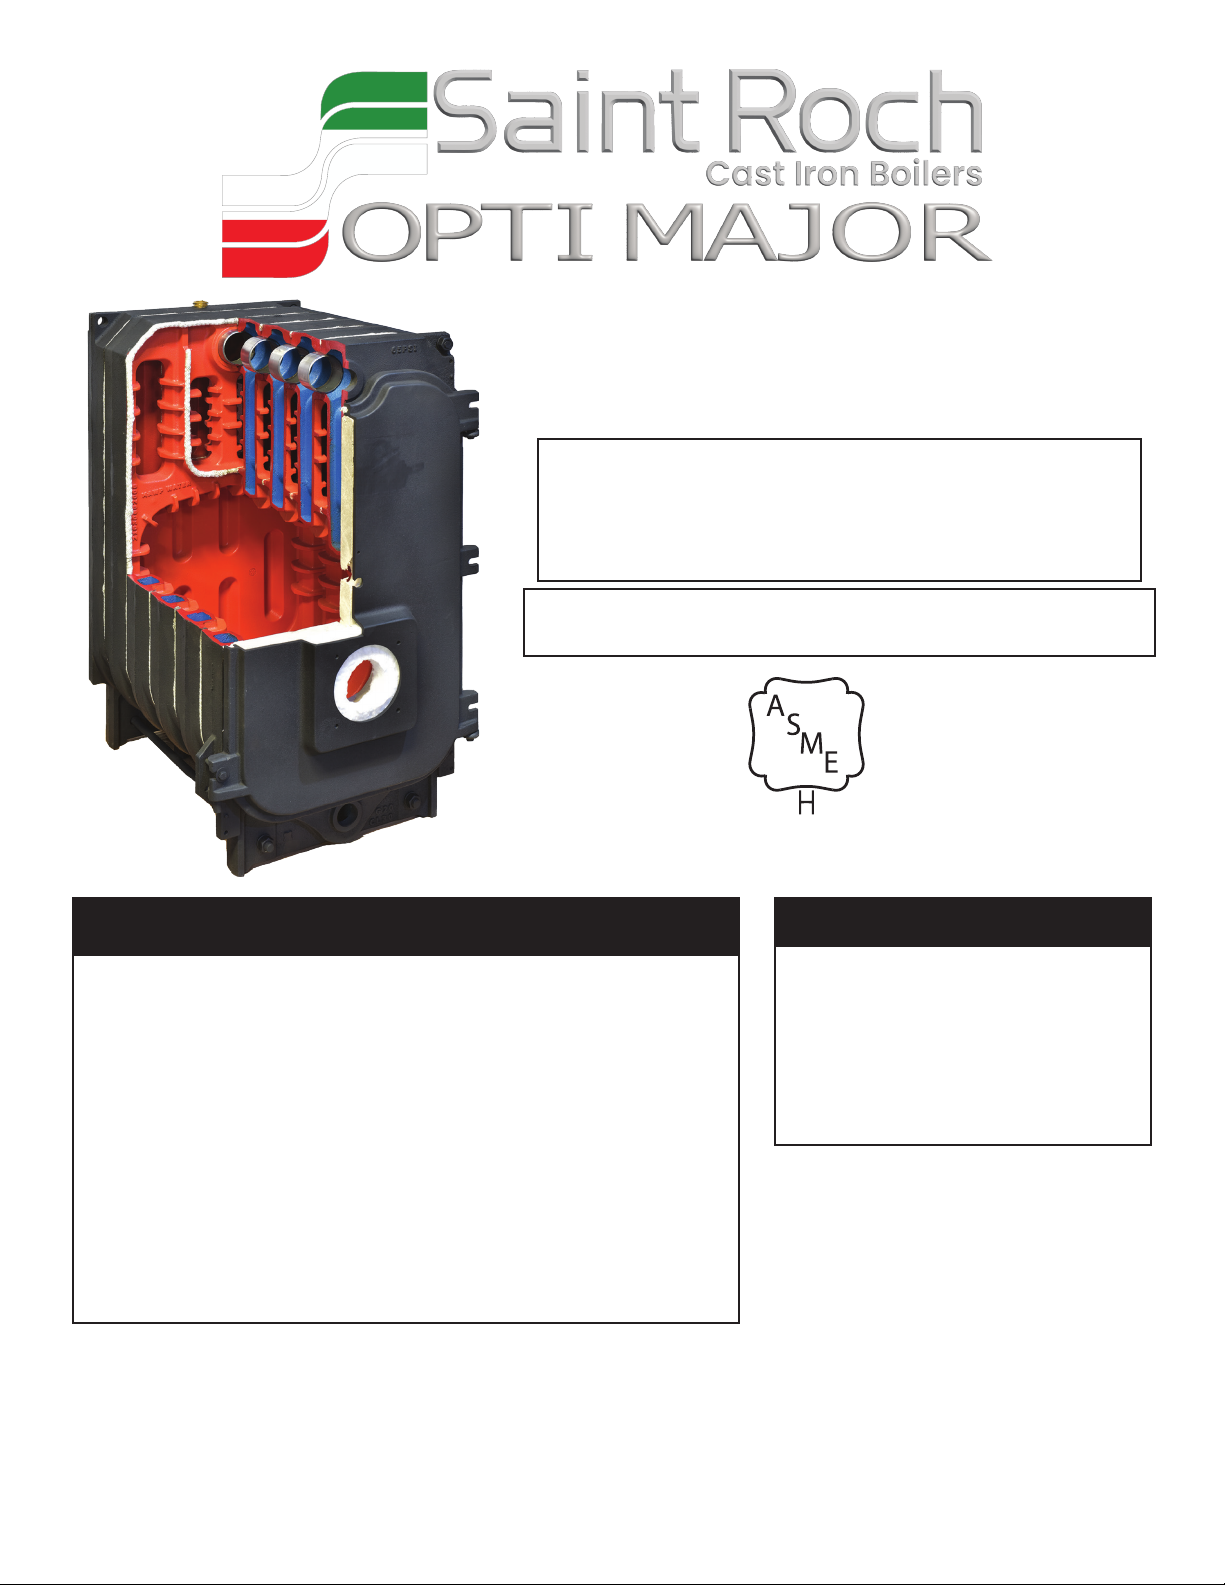
Saint Roch Optimajor OPTI GLP 6 Specification sheet

Boiler Manual And Installation
Instructions for Atmospheric
Venting
Please Read Instructions Carefully
Save for Future Reference
WARNING
If the information in this
manual is not followed
exactly, a fire or explosion
may result causing property
damage, personal injury or
loss of life.
WHAT TO DO IF YOU SMELL GAS:
• Do not try to light any appliance
• Do not touch any electric switch; do not use any
phone in your building
• Immediately call your gas supplier from a
neighbor’s phone. Follow the gas supplier’s
instructions.
• If you can not reach your gas supplier call the fire
department
• Installation and service must be performed by a
qualified licensed installer, service agency or the
gas supplier.
Danger
Distributed By:
QHT, INC.
3560 LAFAYETTE ROAD
BLDG. 2, UNIT A
PORTSMOUTH, NH 03801
PHONE: 603-334-6400 FAX: 603-334-6401
Manufactured by:
SAINT ROCH S.R.L
ITALY REV. 522
Saint Roch Optimajor
6,8,10,12,14 Section Boilers
Conforms to UL Std. 726

2
Dear Customer:
Thank you for buying a Saint Roch Optimajor Commercial Boiler.
The Optimajor is a cast iron, oil or gas fired hot water boiler, using the famous 3-pass
design. The boiler is simple, rugged and engineered for maximum heating efficiency.
We realize that it is not possible to answer all questions about the Linear series boiler
in this manual. Reading this installation manual does not make the reader an expert in
all aspects of installation and operation, and does not replace the need for a qualified,
licensed heating contractor. We urge you to contact your installing contractor or
distributor if you are in question about any aspect of your boiler’s performance. Our main
concern is that you are satisfied with your boiler and its performance. We require that
your contractor complete efficiency tests using instruments.
The controls and accessories listed in this manual are intended to serve as guidelines
rather than specific recommendations. We realize that other makes and models of such
devices are available and can be used as successfully as those we specify. The installing
contractor is the best judge of a system’s specific requirements, as well as the local
availability of certain makes and models of controls and accessories. The preceding does
not apply, however, to the equipment that comes with every boiler, such as the overheat
control and pressure relief valve.
The installation of the specific devices supplied with every boiler is absolutely necessary
to the safe operation of the boiler and protection of the heating system.
This Linear boiler has a limited warranty, a copy of which is provided with the boiler. Please
be sure to return the warranty registration card as the warranty will be void without your
boiler’s serial numbers, date of installation and the name of your installer being on record
in our files.
Thank you for purchasing our Saint Roch Optimajor boiler. If you have questions or
comments, please don’t hesitate to contact us immediately. Our goal is 100% customer
satisfaction.
Sincerely,
Jim Quincy
President
QHT Inc.

3
www.saintroch.us
Important Information and Warnings 4,5
General Information 1 6
Boiler Block Assembly & Explosion
Diagram 2 7
Boiler Location 3 8
Installation of Boiler Trim Kit
Components 4 9,10
Piping of the Boiler 5 11
Intake Venting 6 12,13
Exhaust Venting 7 14
Blocked Flue Switch 7.1 14
Common Exhaust Venting 7.2 15
Gas Venting 7.3 15
Burner Setup 8 16
Oil Burner Setup 8.1 16
Gas Burner Setup 8.2 17
Gas Line Piping 9 18
Boiler Jacket Assembly 10 19,20,21
Baffle Installation 11 22
Wiring 12 22
Wiring Hydrostat Control 12.1 23
Oil Diagrams 12.2 24
Gas Diagrams 12.3 25
Commissioning the Boiler 13 26
Maintenance 14 26
Installer Notes 15 26
Warranty 27
Table of Contents
Section Page

4
United States installations must comply
with:
• State and local plumbing, heating and
electrical codes.
• National codes where applicable.
• Standard for Controls and Safety Devices
for Automatically Fired Boilers, ANSI/ASME
CSD-1, – latest edition, when required.
• National Electrical Code, ANSI/NFPA 70, –
latest edition and any additional national,
state or local codes.
IMPORTANT INFORMATION
Please read this page carefully.
WARNING
!
Homeowner:
• For homeowner or person responsible
for simple start-up and routine
maintenance of the system. Instructions
must be followed to assure proper
operation of your boiler.
In addition, it is your responsibility to:
• Have boiler and burner installed by a
qualified installer.
• Have boiler and burner serviced annually
by a qualified service technician.
• Review and understand start-up and
routine maintenance procedures with
qualified service technician.
• Perform routine maintenance as
described on page ?
Service Technician:
• For a qualified service technician who
has the necessary equipment to check
the boiler and system performance, and
is responsible for start-up and service of
boiler and system.
• All instructions in this manual must be
followed to assure proper operation of
this boiler.
• Annually service boiler and burner to
assure proper operation. See page ?for
service record.
• Review and explain start-up and
routine maintenance procedures with
homeowner.
• Fire, explosion, asphyxiation and electrical shock hazard. Improper installation could result in
death or serious injury. Read this manual and understand all requirements before beginning
installation.
• Modification, substitution or elimination of factory equipped, supplied or specified
components could result in death or serious injury.
• Installation or venting a boiler or any other oil appliance with improper methods or materials
mayresult in serious injury or death due to fire or to asphyxiation from poisonous gases such
as carbon monoxide which is odorless and invisible.
• Fire, Explosion, Asphyxiation, Electrical shock hazard, Flooding will result in damages such as
electrical problems, corrosion, inoperative parts, mold and other unforeseen issues which
can occur over time. Any equipment determined by a professional as damaged by a flood,
defined as excess of water or other liquid, shall be replaced. Failure to follow these directions
will result in a Hazardous Situation.
WARNING
!
WARNING
!
WARNING
!
• dizziness
• vision problems
• shortness of breath
• headache
• loss of muscle
control
• unclear thinking
• nausea
• weakness
• unconsciousness
Symptoms of CO poisoning include the following:
WARNING
!
IF ANY OF THE SYMPTOMS OCCUR, VACATE THE
PREMISES IMMEDIATELY AND CONTACT A QUALIFIED
HEATING SERVICE COMPANY, THE GAS COMPANY OR
THE FIRE DEPARTMENT.

5
www.saintroch.us
HOMEOWNER INFORMATION FOR GAS
TO START UP THE APPLIANCE
1. STOP! Read the safety information on the side of the boiler. DO NOT START THE BOILER
UNLESS ALL CLEANOUT DOORS ARE SECURED AND SEALED. (Skip to step 9 for oil burning
boilers)
2. Set thermostat to lowest setting
3. Turn off all electric power to the appliance
4. Do not attempt to light the burner by hand
5. Turn the manual shut off on the combination gas valve clockwise to
the off position.
6. Wait five minutes to clear out any gas. Then smell for gas, including
near the floor.
If you smell gas, STOP!
• Do not try to light any appliance
• Do not touch any electric switch; do not use any phone in your building
• Immediately call your gas supplier from a neighbor’s phone. Follow the gas supplier’s
instructions.
• If you can not reach your gas supplier call the fire department
7. If you don’t smell gas, go to the next step.
8. Return the manual valve on the combination gas valve to the on position by reversing
step “5”.
9. Turn on all electric power to the appliance.
10. Set thermostat to the desired setting.
11. If the burner fails to light you may press the reset button once. If the appliance will not
operate, follow the instructions “To Turn Off Gas To Appliance” and call your service technician
or gas supplier. DO NOT ATTEMPT TO START THE BURNER WHEN EXCESS GAS HAS ACCUMULATED,
WHEN THE UNIT IS FULL OF VAPOR, OR WHEN THE COMBUSTION CHAMBER IS VERY HOT.
NOTE: ALWAYS KEEP THE MANUAL FUEL SUPPLY VALVE SHUT OFF IF THE BURNER IS SHUT DOWN FOR
AN EXTENDED PERIOD OF TIME.
TO TURN OFF GAS APPLIANCE
Set the thermostat to the lowest setting.
Turn off electric power to the appliance if service is to be performed.
Turn the gas control valve to the off position.

6
1. General Information
732.8 *
W
39.75”
Burner
opening
Ø 5”
Drain cock
Ø 3/4"
Supply
Ø2"
Flue Collar
Ø
Return
Ø2"
24.5”
12.25”
13”
8”
26
1/4
”33
1/2
”
12.25”
2
1/2
”
The St. Roch Optimajor series boilers are wet base design, sectional, cast-iron boilers for forced
hot water heating systems. The Optimajor boilers are designed for firing with oil and deliver high
efficiencies through unique design and construction.
The Optimajor series boilers are shipped from the factory in assembled blocks and each boiler
can range from 6 to 14 sections. The sections can then be disassembled before delivery to the
jobsite by QHT and then field assembled. The boiler jacket, burner and controls are packed
separately for shipping.
Note: All equipment should be inspected upon delivery, and any damage or shortage should be
reported immediately.
Product
Code
# of
Sections
Heating
Capacity
(BTU/HR)
Net
Output
(BTU/HR)
Length
(Inch)
Width
(Inch)
Height
(Inch)
Water
Content
(gal)
Pressure
Drop
(in. w.c.)
Weight
(Lbs)
Efficiency
(%)
OPTI GLP 6 6 267,000 232,000 29” 24.5” 39.75” 13 1.09 871 87
OPTI GLP 8 8 377,000 328,000 37” 24.5” 39.75” 17 2.14 1091 87
OPTI GLP 10 10 479,000 417,000 45” 24.5” 39.75” 20 3.51 1312 87
OPTI GLP 12 12 588,000 512,000 53” 24.5” 39.75” 25 5.20 1532 87
OPTI GLP 14 14 667,000 580,000 61” 24.5” 39.75” 29 7.22 1752 87
L

7
www.saintroch.us
All OPTIMAJOR series boilers are shipped from the factory in assembled boiler blocks. If,
however, the block needs to be split into sections for ease of delivery, please read the
following:
To assemble split blocks, move sections into parallel and facing each other.
Sections may be slid along boards placed underneath the sections. Inspect nipple
ports for damage or burrs. Remove any burrs by sanding the port very lightly. Wipe the
push nipples and nipple ports with a clean cloth. Apply a film of nipple compound to
both the nipple and port. Install the nipple in the port and then seal by tapping with a
hammer cushioned with a block of wood. Apply adhesive to ribs of one section only and
slide sections together. Install the four draw rods and draw the sections together evenly
(measure with yardstick). Draw the sections together until sections make gasket-to-iron
contact at a point around the top and bottom ports of each section.
DO NOT OVER TIGHTEN TIE RODS
2. Boiler Block Assembly
Boiler Block Assembly:
1. Rear Section
2. Intermediate Section
3. Front Section
4.
5. Rear Cleanout Bolt
6. Rear Cleanout Nut
7. Exhaust Collar
8. Rear Cleanout Plate
9. Front Door Insulation Bolt
10.
11. Boiler Door Insulation
12. Sight Hole Plug
13.
14. Baffles
15. Rear Firing Wall
16. Upper Bushing Gasket
17. Burner Door Insulation
18. 1/4” X 1 1/4” Bushing
19. 1 1/4” Plug
20. Front Door Hinge (3)
21. 1/4” X 1 1/4” Bushing
22. Front Door Hinge Fork
23. Nuts (Qty 2)
24. Draw Rod Nuts(Qty 4)
25. Stud (Qty 2)
26. Stud Washers(Qty 2)
27. Draw Rod Washers(Qty4)
28. Boiler Door Bolt(Qty4)
29.
30.
31.
32. Eye Hook

8
24”
FRONT
9” TOP
9”
SIDE 9”
REAR
3. Boiler Location
1. 9” from the top, sides, and rear of the boiler.
2. 18” from the flue pipe in any direction.
3. 24” from the front of the boiler.
The following are the minimum clearances to construction or combustible materials:
DANGER
The boiler must be located on a non-combustible floor. A smooth, level concrete floor
is recommended. Locate the boiler as close as possible to the chimney. If the boiler
is installed on combustible flooring, consult local authorities for proper method of
covering floor. The boiler must not be installed on carpeting.
Caution: Do not store or use flammable materials, chemicals or flammable liquids,
especially gasoline, in the vicinity of this heating appliance.
WARNING
Boiler is certified as an indoor appliance. Do not install boiler outdoors or locate where it
will be exposed to freezing temperatures.
PROVISIONS FOR COMBUSTION AIR AND VENTILATION AIR MUST BE IN ACCORDANCE WITH
SECTION 5.3, “AIR FOR COMBUSTION AND VENTILATION”, OF THE NATIONAL FUEL GAS CODE,
ANSI Z223.1, OR APPLICABLE PROVISIONS OF THE LOCAL BUILDING CODES.
DO NOT INSTALL THE BOILER UNTIL PROPER COMBUSTION AIR HAS BEEN ARRANGED.
The boiler should be installed on a level, flat concrete floor or pad that is structurally sound and
will support the combined weight of the boiler when filled with water. This boiler is designed to
be installed on a noncombustible flooring only. The boiler should be installed as close to the
chimney as possible. Locate the boiler in an area that gives easy access to the rear of the boiler.
To provide good serviceability, the boiler should be installed using minimum recommended
service and accessibility clearances as previously listed in the manual. Under no circumstances
should the unit be installed next to combustible materials with clearances less than listed in
installation clearances in the install manual.
To assemble the two section sets into a boiler block, you will need the tool kit, two clamping
threaded rods, pry bar, a plastic or wooden mallet, nipples, pipe dope and tubes of sealant.

9
www.saintroch.us
732.8 *
W
39.75”
Burner
opening
Ø 5”
Drain cock
Ø 3/4"
Supply
Ø2"
Flue Collar
Ø
Return
Ø2"
24.5”
12.25”
13”
8”
26
1/4
”33
1/2
”
12.25”
2
1/2
”
4. Installation of Boiler Trim Components
Boiler Tapping Diagram:
1. Install limit control sensor in rear section TOP using 3/4” immersion well. All tapings
and joints should be sealed with piping compound. The limit can be adjusted up to
220oF, and should be set to the desired temperature by the installer. The differential is
also adjustable between 5 and 30 degrees. It should be set as close to 30 degrees as
possible to prevent short cycling of the boiler. Run the sensor from behind the control
to the immersion well and fix it according to manufacturer’s instructions.
2. Install Pressure Relief Valve in opposite, manifold using 3” nipple and 3/4” elbow, Pipe
must discharge to the floor.
3. Install 3/4” boiler drain in lower right rear tapping.
4. Install combination pressure/temperature gauge in the manifold. The gauge must be
tightened using a wrench and not your hand.
5. Place the 14” x 24” Cera-fiber blanket on the floor of the combustion chamber of the
boiler
Trim Kit Components:
1 – Tridicator pressure/temp gauge
1 – ¾” X 3” Nipple
1 – 30 PSI pressure relief valve
1 – ¾” Boiler drain
1 – Cera-fiber Pad for bottom of the combustion chamber
1 – ¾” Plugs
1 – ¾” 90° Elbow
1 – ¾” Electrowell
(Gas systems only)
1-Double acting barometric damper with manual reset spill switch
SAFETY RELIEF VALVE
1. The safety relief valve should be piped into one of the tapings on manifold in the
rear of the boiler
2. The relief valve should be installed using the hardware supplied in the trim kit
without valving between the PRV and the boiler.
3. Pipe the discharge for the safety relief valve with copper tube to the floor and
make sure installation of the pipe conforms to local codes.

10
4. Installation of Boiler Trim Components (Continued....)
All piping must conform to state and local codes.
The supply and return for Optimajor boilers 2” NPT. Be sure to provide unions and
isolation valves at the manifold inlet and outlet of the boiler, so the boiler may be readily
isolated for service.
Each Optimajor boiler will come with a 4 port supply manifold. This manifold
is used to install the Tridicator, PRV, and Manual Reset LWC. The manifold is pictured
below.
Install the provided pressure relief valve vertically in the manifold. Pipe the discharge
directly to a drain, if possible. If not, the discharge should be piped to the floor. In either
case, the discharge pipe should be of the same diameter as the outlet of the relief valve,
with no valves or obstructions to impede overflow from the boiler. Install the Tridicator
in another port so that it can easily be read. Lastly install the Manual Reset LWC in the
header so that it can easily be reached for service.
Install manual and/or automatic air venting devices at the high points in the
system to eliminate trapped air.
The weight of all piping should be supported by suitable hangars and floor stands,
not by the boiler.
It is recommended that the make-up water line have a backflow preventer and a
pressure-reducing valve to reduce line pressure to 10 to 15 psi installed adjacent to the
boiler.
NOTE: If the heating system is to be filled with antifreeze, use only formulations expressly
made for hydronic heating systems (such as propylene glycol). Do not use automotive
types of antifreeze (ethylene glycol). Use of antifreeze will alter system output and
characteristics. Consult factory rep's for details or assistance.
Clearance for hot water pipes are 1 inch to combustibles.

11
www.saintroch.us
5. Piping The Boiler
All piping must conform to state and local codes. Page 11 shows the location
and size of the boiler tappings. It is recommended to install unions and gate valves at
the inlet and outlet of the boiler, so it may be readily isolated for service.
For Canadian installations, a low water cut off is required if the boiler is installed
above the level of radiation. Even if the boiler is installed below the level of radiation it
is strongly recommended that a low water cut off be installed. Install manual and/or
automatic air venting devices at the high points in the system to eliminate trapped air.
The weight of all piping should be supported by suitable hangers and floor stands, not
by the boiler’s purging/expansion station. Clearance for hot water pipes are 1 inch to
combustibles. The make-up water line must be piped into the boiler and be fitted with
a backflow preventer and a pressure reducing valve to reduce line pressure to 10 to 15
psi.
In the case of a gas installation, the boiler should be installed such that the gas
ignition system components are protected from water (dripping, spraying, etc.) during
appliance operation and service (circulator replacement, condensate trap, control
replacement, etc.).
If the boiler is to be used in conjunction with a chilled water system, it must be
piped with the appropriate valves to ensure the chilled medium does not enter the
boiler. If the boiler is connected to heating coils in an air handling system, where the
coils could be exposed to cold air circulation, provisions for freeze protection control
must be installed. The boiler must have flow control valves or other automatic means
to prevent gravity circulation of the boiler water during the cooling cycle.
NOTE: If the heating system is to be filled with antifreeze, use only formulations
expressly made for hydronic heating systems (such as propylene glycol). Do not use
automotive types of antifreeze (ethylene glycol). Use of antifreeze will alter system
output and characteristics. Consult a factory representative for details or assistance.

12
6. Intake Venting
1. Be certain adequate air is available for combustion and ventilation.
a.) Boiler located in unconfined space:
Installation in large areas, such as basements, can usually be assumed to
provide sufficient air.
b.) Boiler located in confined space : (See Figure A. on page 14)
If all air for combustion and ventilation is to come from within the building:
Two (2) openings shall be provided with one (1) opening commencing within 12
inches of the ceiling and one (1) opening commencing within 12 inches of the floor of
the enclosure. These openings shall not be located closer than 3 inches from either
the top or bottom of the enclosure and shall be open to areas connecting freely
with the outdoors. The area of each opening shall not be less than one square inch
per 1000 BTU/HR. of total input rating of all appliances within the enclosure; with a
minimum of 100 square inches for each opening.
If all the air for combustion and ventilation is to come from outside the building:
Two (2) openings shall be provided with one opening commencing within 12
inches of the top and an opening commencing within 12 inches of the bottom of
the enclosure. These openings shall not be located closer than 3 inches from either
the top or bottom of the enclosure, and shall connect directly or by ducts too the
outdoors. The area of each opening shall be equal to one square inch per 4000 BTU/
HR of total input rating. If ducts are used to convey the air, vertical ducts require
areas of one square inch per 4000 BTU/HR. Horizontal ducts require one square inch
per 2000 BTU/HR. Ducts shall have the same cross sectional area as the full area of
the louver openings.
The upper opening is essential for maintenance of proper air circulation with
the boiler and to maintain proper control temperatures. When a duct is used for
ventilation, check for louver free net area and correct for screen resistance to ensure
that the sufficient ventilation area has been satisfied. DO NOT INSTALL THE BOILER
UNTIL PROPER COMBUSTION AIR HAS BEEN ARRANGED.

13
www.saintroch.us
6. Intake Venting (Continued...)
c.) Boiler located in a room under negative pressure:
If the boiler is to be installed within a home where the operation of exhaust fans,
attic fans, kitchen ventilation systems, clothes dryers or fireplaces may create
severe negative vent pressures causing unsatisfactory combustion and venting,
special provisions should be made for additional make-up air to supply the other
air requirements. If building is of tight construction, combustion air requirements
may not be met and combustion air ducts from outside may be necessary. Please
refer to NFPA No. 31.
Tight Construction (as defined by ANSI Z223.1):
1. Walls and ceilings exposed to the outside atmosphere have a continuous water
vapor retarder with a rating of 1 perm or less with openings sealed with gaskets,
etc..
2. Weather-stripping has been added on open able windows and doors, and
caulking or sealants are applied to areas such as: joints around windows and
door frames, between sole plates and floors, between wall ceiling joints, between
wall panels, at penetrations for plumbing, electrical, and gas lines, and in other
openings.
If the building is of tight construction, air openings must be provided from the
outside, with appropriate sizing depending on amount of BTU/HR as shown in
Figure A. The boiler room must never be under a negative pressure, even if the
appliance is installed as direct vent. Always provide air openings sized not only to
the dimensions required for the firing rate of all appliances, but also to handle the
air movement rate of the exhaust fans or air movers using air from the building or
boiler room.
4,000
Figure A.

14
7. Exhaust Venting
The Optimajor boiler is a high efficiency unit that requires proper venting. The boiler must
be vented to the outdoors by means of a tile lined masonry or an approved pre-fabricated
chimney of the size and height recommended by the manufacturer or by a listed “power
venting” unit which provides draft by mechanical venting .
The chimney discharge opening must be located at least 24 inches above any part
of the building structure within 10 feet of the chimney. Be sure the chimney and smoke pipe
don’t become obstructed by squirrels, bird nests, soot buildup, chimney liner deterioration, etc.
The “power ventor” system should be installed on the leeward side of the building. Very specific
requirements must be met concerning clearances from combustibles and distances from doors
and windows. Please consult with manufacturer of “power ventor” for this information. In any
case, the “ventor” must be installed by a licensed burner mechanic and done in accordance
with local codes. The B-40 boiler is a very low stack temperature boiler (between 320 and 400F
gross stack temp.) so caution should be used when connecting to an outside built chimney.
Should you have concern that the flue gases could condense, then you should consider using
a listed, “power venting” unit. If “power venting” is used to discharge flue gases, then the power
vent unit should be equipped with a postpurge control as well as delay-off, timing control to
prevent problems with fogging and nozzle post drip.
Note: 88% steady state efficiency is achieved when flue gas contains over 12.5% CO2 and the
gross stack temp. is below 350F.
The smoke-pipe connection from the boiler to the chimney should be as short as
possible, with a minimum number of elbows. The vent pipe must have a vertical rise of at least
1/4 inch per foot of horizontal run. The vent pipe must be of the same diameter as the flue outlet
on the boiler. The chimney connector should have a minimum thickness of 24 gauge, corrosion
resistant (galvanized) steel, assembled with a minimum of three (3) sheet-metal screws, and
sealed with high temperature silicon at each joint. In most cases a barometric draft control isn’t
recommended as the B-40 is designed to be pressure-fired. However, one may be needed if
the boiler is being used in a high draft situation.
7.1 Blocked Flue Switch (Canadian Installations Only)
1. Pierce a 5/8” hole into the vent pipe near the appliance outlet. Remove one of the
securing nuts from the pipe of the safety switch. Tighten the other securing nut onto
the pipe as far as possible.
2. Insert the threaded pipe end into the pierced hole, then install the securing nut, then
install the securing nut, which was removed in step 1, and tighten securely.
3. Please consult the wiring section of this manual for the wiring of the blocked flue
switch.

15
www.saintroch.us
7.2 Common Exhaust Venting
Common Vent Exhaust:
If this boiler is replacing one which was part of a common venting system, it
is likely that the vent is to large to vent the appliances still attached to it. To prevent
this, at the time of removal, the following steps shall be followed with each appliance
remaining connected to the common venting system. Place each appliance in
operation, while the other appliances remaining connected to the common venting
system are not in operation.
1. Seal any unused openings in the common venting system.
2. Visually inspect the venting system for proper size and horizontal pitch and
determine there is no blockage or restriction, leakage, corrosion or other deficiencies
which could cause an unsafe condition.
3. Insofar as practical, close all building doors and windows and all doors between the
space in which the appliance remaining connected to the common venting system
is located and other spaces of the building . Turn on any appliance not connected
to the common vent system. Turn on all exhaust fans except for summer exhaust
fans. Close the fireplace damper if applicable.
4. Place in operation the appliance being inspected. Follow the lighting instructions.
Adjust thermostat so appliance will operate continuously.
5. Test for spillage at the barometric damper opening after 5 minutes of main burner
operation. Use the flame of a match or candle, or smoke from a cigarette, cigar or
pipe.
6. After it has been determined that each appliance remaining connected to the
common venting system properly vents when tested as outlined above, return
the doors, windows, exhaust fans, fireplace dampers and any other gas-burning
appliance to their previous condition of use.
7. Any improper operation of the common venting system should be corrected so the
installation conforms with the National Fuel Gas Code, ANSI Z223.1 and/or CAN/CGA
B149, Installation Codes. When resizing any portion of the common venting system,
the common venting system should be resized to approach the minimum size as
determined using the appropriate tables in Part 11 of the National Fuel Gas Code,
ANSI Z223.1, and/or CAN/CGA B149, Installation Codes.
For boilers connected to gas vents or chimneys, vent installations shall be in
accordance with part 7, Venting of Equipment, of the National Fuel Gas Code, ANSI
Z223.1 or Section 7, Venting Systems and Air Supply for Appliances, of the CAN/CGA B149,
Installation Codes, or applicable provisions of the local building codes.
Vent connectors serving appliances vented by natural draft shall not be
connected into any portion of mechanical draft systems operating under positive
pressure.
7.3 Exhaust Venting With Gas

16
8. Burner Setup
Good, reliable operation with a minimum of service, starts with attention to the small
details: Please review burner manufacturer manuals for proper install guidelines!
Oil:
1. Setting the nozzle position and electrodes to the manufactures specs using the
manufacturer's gauges.
2. Installing a quality micron filter at the burner.(replace old oil lines and clear sludge)
3. Making careful/tight flare connections, without couplings, on oil suction line.
4. Checking fuel pump pressure is set to specs on following page.
5. Checking draft at the breeching to insure it is adequate to overcome flue gas
resistance. (-.02 to –.04 in. w.c.)
6. Setting the air band properly with well maintained instruments. A good target is 12%
to 12.5% of (CO2).
7. To achieve the rated efficiency level the CO2 should be set to 12.5% CO2.
To ensure proper burner setup, gauges should be used to check things such as the
pump pressure, CO2 levels, CO levels, etc…
Gas:
1. Checking the electrode, orifice size, and flame rod settings against manufacturer’s
specs to insure proper operation.
2. Installing properly sized gas piping according to BTU input required and length of gas
line run.
3. Making sure there is proper manifold pressure before and after the gas valve using
a calibrated manometer.
4. Checking draft at the breeching to insure it is adequate to overcome flue gas
resistance. (-.02 to –.04 in. w.c.)
5. Setting the air band properly with well maintained instruments. A good target is 9.5%
to 10.0% of (CO2) for natural gas, or 11.0% to 11.5% of (CO2) for LP gas.
8.1 Oil Burner Setup
BURNER MANUFACTURER: RIELLO
Boiler Model: OPTI GLP
6OPTI GLP
8OPTI GLP
10 OPTI GLP
12 OPTI GLP
14
Burner Model: 40 F10 40 F20 40 F20 40 F20 40 F20
Firing Rate (GPH): 2.23 3.13 4.00 4.90 5.54
Insertion Depth: 3.5” 5” 5” 5” 5”
Nozzle: 1.75X60 2.50X60 3.00X60 3.50X60 4.00X60
Spray Pattern: B B B W W
Pump Pressure: 190 psi 175 psi 190 psi 205 psi 205 psi
Turbulator: 4 0 1 3 5
Air Gate: 4.00 2.75 3.50 4.50 5.25
This page is only for boilers using an oil burner. If a gas burner is being used,
please refer to page 17 for the proper setup of the burner and gas lines.
NOTE: Elevated CO during combustion analysis for the first few hours of operation from
off gassing due to insulation in the combustion chamber.

17
www.saintroch.us
8.2 Gas Burner Setup
This page is only for boilers using a gas burner. If an oil burner is being used,
please refer to page 16 for the proper setup of the burner.
BURNER MANUFACTURER: RIELLO
Boiler Model: OPTI GLP 6 OPTI GLP 8 OPTI GLP
10 OPTI GLP
12 OPTI GLP
14
Burner Model: 40 G400 40 G900 40 G900 40 G900 40 G900
Input (MBH): 306 430 550 675 775
Fuel Type: Nat LP Nat LP Nat LP Nat LP Nat LP
Orifice: C4 C15 N/A N/A N/A N/A N/A N/A N/A N/A
Manifold Pressure: 4.46” 3.72” 1.5” 1.5” 1.4” 2.1” 1.8” 2.6” 2.2” 3.2”
Head Setting: 3 3 1 1 2 2 3 3 4 4
Air Gate: 3.4 3.4 1.8 3 2.2 3.2 2.8 3.7 3.5 4.1
Note: Consult burner manufacturers literature for
gas manifold diagram and controls.
To determine how much gas is coming into the
burner, or to set the gas meter correctly, the
following formula can be used.
The chart to the right can be used to determine
the flow rate depending upon the time per
revolution and the size of the gas meter dial.
Ft3/hr = [3600/(sec. Per rev.)]*(Size of gas meter)
Seconds Per
Revolution
Size of Gas Meter Dial
(Cubic Foot)
.5 1 2
20 90 180 360
25 72 144 288
30 60 120 240
35 51 103 206
40 45 90 180
45 40 80 160
50 36 72 144
55 33 65 131
60 30 60 120

18
9. Gas Line Piping
Gas supply piping is to be sized and installed properly in order to provide a supply of
gas sufficient to meet the maximum demand without undue loss of pressure between
the meter and the boiler. Consult with the National Fuel Gas Code ANSI Z223.1 for
proper sizing of gas piping for various lengths and diameters.
Locate a drop pipe adjacent to, but not in front of the boiler. Locate a tee in the drop
pipe at the same elevation as the gas inlet connection to the boiler. Extend the drop line
with a nipple towards the floor and cap to form a sediment trap. Install a shut off valve
before the tee with sediment trap and a union after the tee before the combination gas
valve.
When installing the boiler, make sure a pipe compound resistant to the action of
liquefied petroleum is used. Check piping for leaks. Always check leaks with a water
and soap solution. DO NOT USE A FLAME FOR CHECKING GAS LEAKS
The boiler and its individual shut-off valve must be disconnected from the gas supply
piping during any pressure testing of that piping at test pressures in excess of 1/2 psi.

19
www.saintroch.us
10. Boiler Jacket Assembly
NOTE: All piping, boiler controls, gauges and valves must be installed before the jacket has been assembled
on the boiler. Refer to the following page to clarify these boiler jacket assembly instructions.
Boiler Jacket Assembly:
1 Top Casing Rail (R)
2 Top Casing Rail (L)
3 Bottom Casing Rail (R)
4 Bottom Casing Rail (L)
5 Upper Brackets
6 Lower Bracket Front
13 Upper Plate (Rear)
14 Block Insulation
15 Insulation (Rear)
18 Ext. 3 Side Panel (R)
19 Ext. 3 Side Panel (L)
20 Ext. 3 Panel (Top)
7 Lower Bracket Rear
8 Common Panel (R)
9 Common Panel (L)
10 Common Panel (Top)
11 Insulated Front Panel
12 Lower Plate (Rear)
23 Ext. 2 Side Panel (R)
24 Ext. 2 Side Panel (L)
25 Ext. 2 Panel (Top)
26 Front Panel (Top)

20
10. Boiler Casing Continued
STEP 1
Install top and bottom brackets on fron and back tie-rods as shown below.
STEP 2
Wrap boiler block with insulation material and strap it as shown.
STEP 3
Install side rails to each top and bottom brackett from front to back. Attach with
supplied screws
** MAKE SURE SHELF OF BRACKETS
FACE IN TOWARDS EACH OTHER ON
ALL 4 BRACKETS
This manual suits for next models
4
Table of contents
Other Saint Roch Boiler manuals
Popular Boiler manuals by other brands

Buderus
Buderus Logano G124X II/SP user guide

gledhill
gledhill BMA 200 SP-SOL Installation & servicing instructions

Trinity
Trinity T150 instructions

Crown Boiler
Crown Boiler BWF Series installation instructions

Buderus
Buderus Logano plus GB312 Repair instructions

Mikrofill
Mikrofill Ethos 24cc Maintenance instructions