INSTRUCTIONS
This User Manual must
be
kept for future
reference and use by
someone who
is
not familiar with
the appliance.
Before using the oven, carefully clean the inside with
a
non-abrasive detergent and warm water. Introduce the grill
and tray in their respective runners. Once the operation is
complete,
turn the oven on to the
maximum
temperature for
approximately 20 minutes
to
remove
any traces
of
manufactu-
ring
grease,
oil
or resins
which may
cause unpleasant odours
when
cooking.
WARNING
:
During this first heating some smoke
or unpleasant
odours may
appear.
Should this happen ventilate
the
room
sui-
tably until
the
first operation
isfinalised.
Once this
simple
operation has been carried out the oven is
ready
touse
for
cooking.
Thisappliance
is
exclusively for domestic
use.
Use
the
oven
to
cook food
only.
USING THE
OVEN
The oven
is
controlled by
a
thermostat
between
50 ºC
and 250
ºC,
depending
on the
temperature required. The thermostat
pi-
lot
light
turns on and off to indicate the temperature control
during
use.
The required cooking mode
is selected
using
the
multi-functio
-
nal control button. The functions
that
may
be selected are:
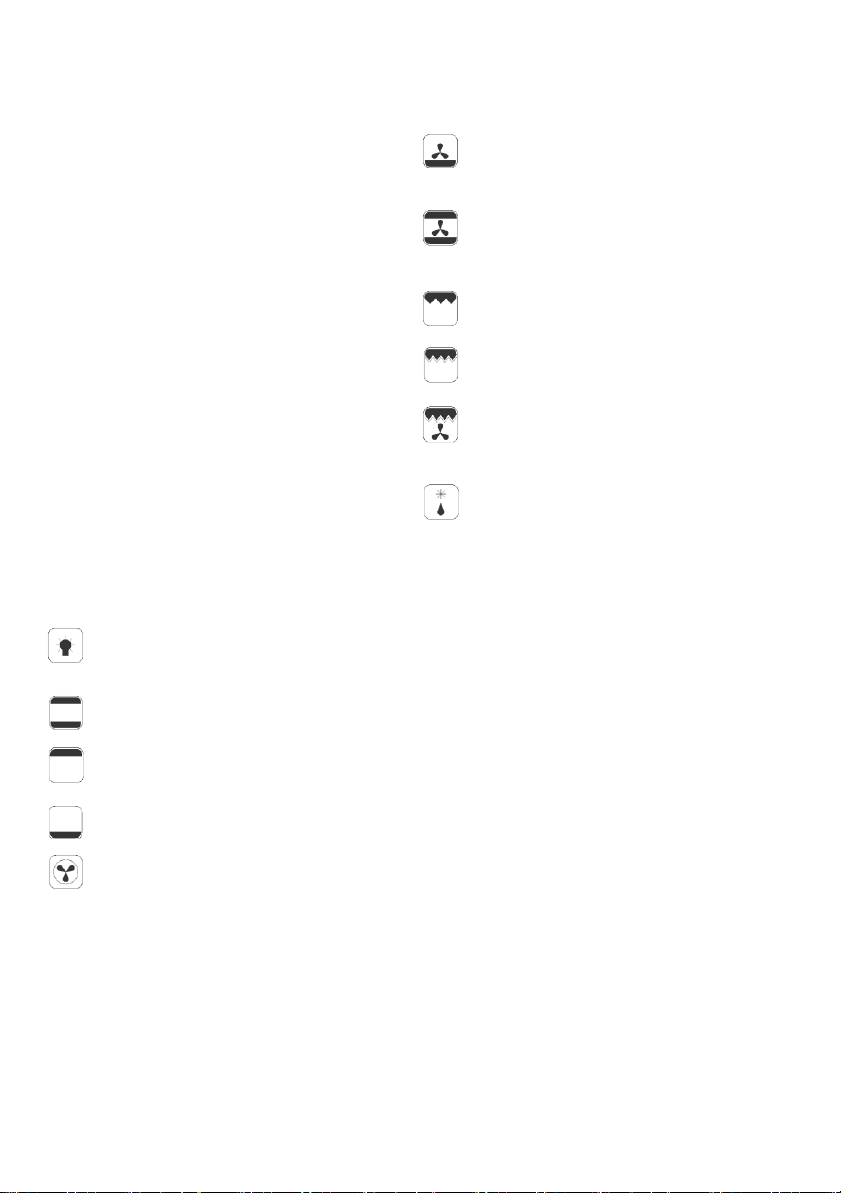
A. OVEN LIGHT
.
Automatic
when selecting the cooking
mode for all models. The oven light remains on when
using
the oven.
B.
CONVECTION MODE.
Provides traditional cooking
with
heat
from
the
upper
and
lower
elements.
C. UPPER ELEMENT MODE.
For
gentle
cooking,
browning
or
keeping cooked
dishes warm.
D. LOWER ELEMENT MODE.
For slow cooking
and heating
food.
E. FAN-ASSISTED
CIRCULAR ELEMENT
MODE.
Provides uniform heating with
the
fan
and
allows different
dishes tobe
cooked
at the same
time
on
different
levels.
F. FAN–ASSISTED LOWER ELEMENT MODE
. This
provi-
des heatingby
semi-convection
withthe lower element
for delicate
dishes.
G. FAN-ASSISTED CONVECTION MODE
.
This provides
convection
heatingof the upper and lowerelements for
uniform
cooking.
H. GRILL.
For gratinating
and
browning
food.
I. MAXI-GRILL
.
As above,
butthe
grillelement provides
a
larger
area
for
roasting.
J.
FAN-ASSISTED
GRILL.
This provides
fast
browning
so
that
food remains juicy. For convection baking, this
isthe
most energy-efficient
function.
K.
THAWING MODE.
Thefan works
without
heat to reduce the
thawing
time
for frozen
food.
USEFUL ADVICE
•
Before cooking, make
sure
all oven
accessories that are not
required
are
removed from
the oven.
•Pre-heatthe
oven
tothe
cookingtemperature before using
it.
•Place the
cooking
trays in the centre of the oven and leave
space in between when using more than one, so that the air
can circulate.
•
Do
not
fill
the tray to
full
when
preparing
a
juicy, fruit
cake.
Any fruit
juice that drips
from
the tray
will
produce stains that
cannotbe removed.
•
Do
not
put oven
trays on the base
of
the
oven
or
cover it
with
aluminium foil. This will
cause
thermal accumulation. The
co-
oking
and
roasting times will
not
coincide
and the
enamel
may
be damaged.
•
Try
toopenthe
oven door
as
little
as
possible
tosee the food
(the oven lightremains
on
during cooking).
•
Take
care when
opening
the door to
avoid
contact
with
hot
parts and steam.