Sakar 15490 User manual

2.4” Digital Photo Frame
Owner’s Manual
© 2007 Sakar International, Inc. All rights reserved.
Windows and the Windows logo are registered trade arks of Microsoft Corporation.
All other trade arks are the property of their respective co panies.
- 1 -

Table of Contents
Introduction ....................................................................................................3
What your Digital Photo Fra e includes: .......................................................3
Co puter Syste Require ents.....................................................................3
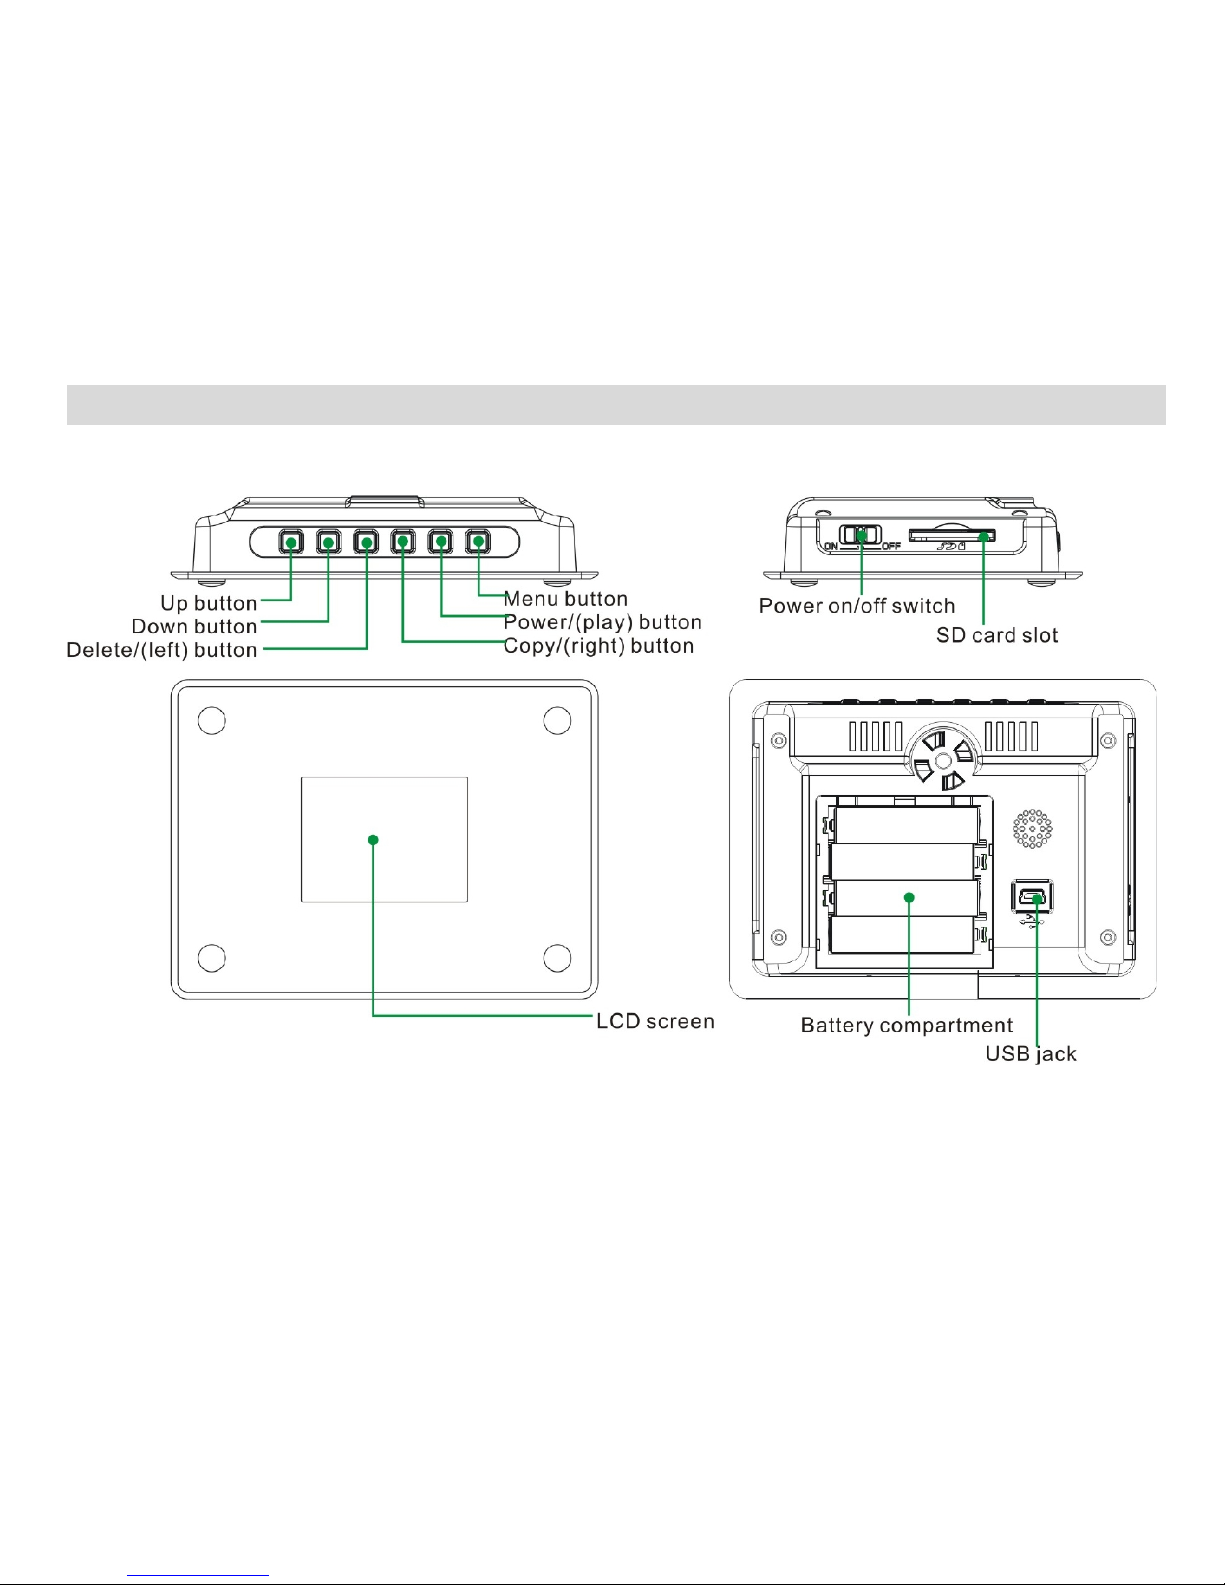
A Quick Look at Your Photo Fra e ................................................................4
Preparing Your Photo Fra e for Use..............................................................5
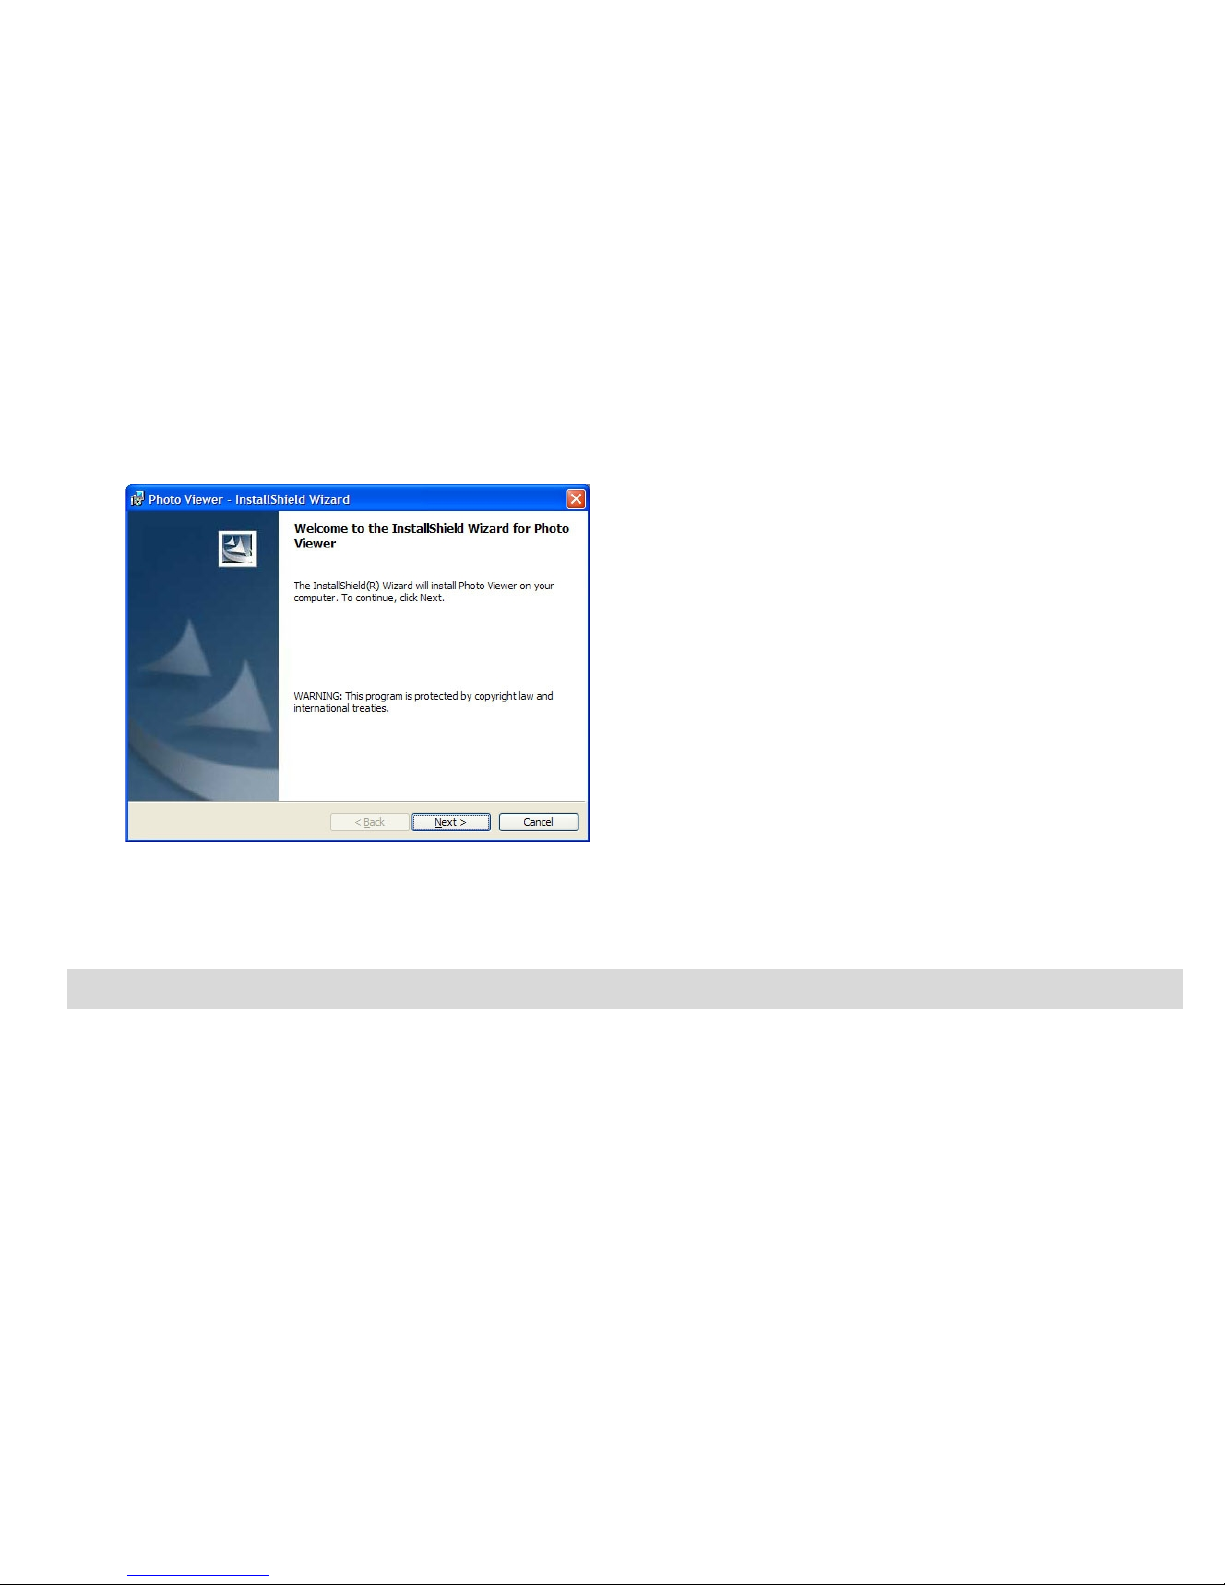
Software & Device Driver Installation ............................................................... 6
Send Photos to Fra e.....................................................................................9
Everything you need to get the ost of your photos and MORE...................17
Safely Re oving Your Photo Fra e Device ..............................................18
Installing a SD Me ory Card.........................................................................20
Attaching Stand to Digital Photo Fra e.........................................................21
Starting Your Digital Photo Fra e.................................................................22
Digital Photo Fra e Maintenance ...............................................................26
Technical Support..........................................................................................26
Sakar Warranty Card.....................................................................................26
Appendix A: Technical Specifications............................................................28
Appendix B: Troubleshooting........................................................................28
- 2 -

Introduction
Thank you for purchasing the Digital Photo Fra e. Please read this anual carefully FIRST in order to get
the ost out of your digital photo fra e.
What your Digital Photo Frame includes:
Photo Fra e
My Digital Brag Book Photags Express Software
USB cable
User’s Manual
Stand
AC adaptor
Computer System Requirements
To be able to upload photos fro your PC you will need the following ini u configuration:
Windows 2000/XP
Pentiu -based PC (or equivalent)
80 MB hard disk free space and 128 MB or ore RAM
Available USB Interface
CD-ROM Drive
Color display (16 bit or higher reco ended)
Screen resolution 1024 X 768
- 3 -

Quick Look at Your Photo Frame
- 4 -

Preparing Your Photo Frame for Use
Battery Installation
Your Photo Fra e requires four AAA alkaline batteries, which ust be inserted as follows:
1. Slide the battery co part ent open on the back of the photo fra e in the direction
indicated by the arrow.
2. Insert the batteries in accordance with the polarity (+/-) shown inside the co part ent.
3. Close the battery co part ent.
When the battery power is low, the LCD display will show the
red icon and flash. When a flashing “Low Battery”
essage appears the device will auto atically switch off after
15 seconds. You need to change the batteries in order to
continue using the Photo Fra e. You also can draw power
fro the power adaptor by USB cable.
Note: If you do not intend to use your Photo Frame
for an extended period, remove the batteries to avoid
leakage and corrosion.
Noted: The photo frame can not power off automatically
on Slide Show Mode/Clock Mode/System Set up.
- 5 -

Installing “My Digital Brag Book PhoTags Express” Software
Before atte pting to install the software, ake sure that you do not have the device or the USB
cable attached to your co puter. This ay cause your installation to fail. Do not connect the cable
to the co puter until the entire installation process has been co pleted. We suggest you follow the
step by step instructions that will appear on your screen during the installation process.
Software & Device Driver Installation
1. Insert the CD into your CD-ROM drive. Make sure that your device is not connected to the
co puter.
2. On the “Photo Fra e" screen that appears, click the “Next” button.
- 6 -

3. Please review the license ter s and click the “ gree” button to continue.
4. Let the installer create the folder where the progra will be installed to, and then click “Install”.
- 7 -

5. Click “Finish” to let the installer finish the installation progra .
- 8 -

6. This will auto atically launch the Install shield for the device driver. Click “Next” to continue.
7. Once the device driver has finished installing it is reco ended to restart your co puter.
Congratulations!! You have successfully installed the software and the Device driver.
Send Photos to Frame
In order to send photos fro your co puter to the Photo Fra e, you are required to connect the Digital
Photo Fra e to your co puter with the USB cable provided.
Note: 1. Please ake sure that your Digital Photo Fra e is connected to the co puter.
2. This kind of Photo Fra e can only support photo files in “JPEG” for at.
- 9 -

3. Your Digital Photo Fra e supports 128MB flash e ory to store photos. You can download photos
where the total capacity does not exceed 128MB.
After you have connected the USB cable, the LCD screen will show “Please don’t disconnect the USB
cable when the unit is working.” It indicates that your Digital Photo Fra e is connected and ready for
downloading. You cannot operate the Photo Fra e at this o ent.
1. Make sure that your Photo Fra e is turned on.
2. In Windows XP the following activation screens ay appear:
Select the “Yes, this ti e only” option and then click “Next”.
- 10 -

Fro the next screen that appears, select the “Install the software auto atically (Reco ended)” option
and then click “Next”.
Wait while the Wizard installs the Software.
Fro the next screen that appears click the “Continue Anyway” button, to continue installing the hardware
- 11 -

drivers.
Click the “Finish” button. The hardware drivers have now been installed.
3. Be sure to wait until the Photo Fra e device is recognized by your co puter.
Important: For WinXP users - Do not open the software until you see the “Your new hardware is
installed and ready to use” pop-up box on the toolbar. If you do not see this message before you plug in
your camera, the camera will not function properly.
- 12 -

4. Double-click on the “My Digital Brag Book Photags Express” icon on your desktop to launch the
Brag Book progra .
5. The application opens. Click the “Send Photos to Photo Fra e” button on the "Main Menu".
Alternatively, click the” Send" button on the toolbar on the "Select Photos", “Enhance Photos", “Add
Captions", “Share Photos" and “Workshop" windows.
- 13 -

6. If you see this essage: “A Photo Fra e device has been detected on your USB port”, you are ready
to receive photos. Select the “Next” button.
The infor ation below gives you the status of your device.
a. “Total nu ber of photos this ‘Photo fra e’ supports”- the axi u nu ber of photos you
can upload to your device.
b. “Total nu ber of photos currently on the photo fra e”- the exact nu ber of photos on the
device. This nu ber tells you how any photos you can upload to your device.
c. “Nu ber of photos available to upload”
d. To clear all the photos on your Photo Fra e device before uploading new photos, click the
“Clear Photos on Your Photo Fra e” button.
- 14 -

7. If you see this essage: “No Photo Fra e has been detected on your co puter”, please connect
your device and click the “Refresh” button.
8. The next step is to select the photos for your “Photo Fra e” device by dragging the exact nu ber of
pictures that are available to upload into the “Send” list window and select the “Next” button.
9. Review, add or re ove Active Captions added to your photos before sending photos and click “Next”.
- 15 -

10. Fro the Next screen that appears, click the “Send” button to start sending the photos to your device.
All the pictures you uploaded are now sent to the “Photo Fra e” to be viewed.
Tip:
1. You can click the “Crop Photo” enhance photos option to select your favorite picture area, and then
upload the saved photo to the photo fra e.
2. Please do not pull out the USB cable fro the photo fra e while downloading.
- 16 -

Everything you need to get the most of your photos and MORE
Upload photos instantly fro your co puter to your Photo Fra e device.
Manage your photos by creating countless unique photo collections without duplicating any photos. Burn
CD’s of any folders for backup and storage.
Enhance your photos; Auto Enhance, Crop and Correct Red Eye.
dd ctive Captions- add text captions, sound, fra es, shapes, keywords, clip art… and ore that can be
viewed or hidden any ti e.
Locate and Organize your photos and collections- Search by Captions, Category, Keyword or Date -
directly fro the operating syste of your co puter.
Share your photos via E- ail, Local Printing and Create HTML web pages for uploading online.
Create Calendars, two-sided Greeting Cards and Postcards on standard photo paper. Compose
Photos within frames. Create Photo Albums and Slide Shows on CDs that can be viewed on your PC
and VCD’s for viewing on your TV using your DVD player.
- 17 -

Safely Removing Your Photo Frame Device
Your Photo Fra e is a Mass Storage device. In order to successfully re ove your Photo Fra e device
please don’t disconnect the USB cable directly, this ay result in the photos not being displayed in the Photo
Fra e.
.
1. Double click the “Safely Re ove Hardware” icon that appears on the Task Bar to securely disconnect
the device.
- 18 -

2. Select the “Safely Re ove Hardware” pop-up that appears.
3. The “Safely Re ove Hardware” essage box will appear.
4. Select the “USB Mass Storage Device” fro the list of devices that appear.
5. lick the “Stop” button.
- 19 -

6. Please wait until Windows notifies you that it is now safe to unplug the device fro your co puter.
Installing a SD Memory Card
Your Digital Photo Fra e has a SD card slot which supports SD e ory cards. A SD e ory card can store
ore photos than the flash e ory of the Photo Fra e itself. It depends on your SD card capacity. It is
reco ended to download your photos fro PC to the Photo Fra e. SD e ory cards aybe used however
due to e ory size difference on different ca eras, so e photos ay not appear. In addition the upload ti e
between the SD card and photo fra e will take longer. To use the SD card Insert it into the SD card slot on the
side of the device. Install the SD card as shown in the diagra below:
Note:
1. Once the SD e ory card is installed, an icon will appear on the top left of the LCD screen.
2. If there are photos both in the flash e ory and SD card, the Photo Fra e will first read the photos fro
the SD e ory card.
- 20 -
Table of contents