Salton ST201 Installation guide

INSTRUCTIONS AND WARRANTY
MODEL NO. ST201
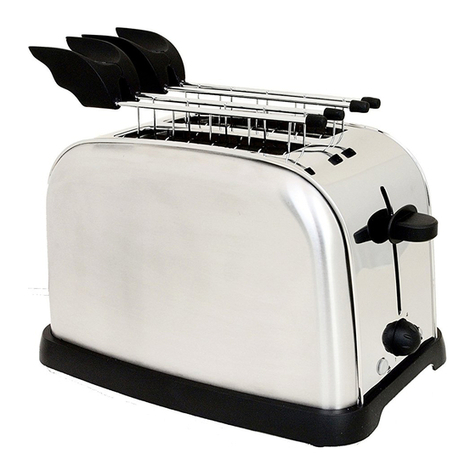
SALTON 2 SLICE TOASTER

Congratulations on purchasing our Salton 2 Slice Toaster. Each unit is manufactured to
ensure safety and reliability. Before using this appliance for the first time, please read the
instruction manual carefully and keep it for future reference.
IMPORTANT SAFEGUARDS
When using any electrical appliance, basic safety precautions should always be followed
including the following:
1. Please read the instructions carefully before using any appliance.
2. Always ensure that the voltage on the rating label corresponds to the mains voltage
in your home.
3. Incorrect operation and improper use can damage the appliance and cause injury to
the user.
4. The appliance is intended for household use only. Commercial use invalids the
warranty and the supplier can not be held responsible for injury or damage caused
when using the appliance for any other purpose than that intended.
5. Do not use this appliance outdoors.
6. Avoid any contact with moving parts.
7. Close supervision is required when any appliance is used near or by children or
invalids.
8. Check the power cord and plug regularly for any damage. If the cord or the plug is
damaged, it must be replaced by the manufacturer or a qualified person in order to
avoid an electrical hazard.
9. Do not use the appliance if it has been dropped or damaged in any way. In case of
damage, take the unit in for examination and/or repair by an authorised service
agent
10.To reduce the risk of electric shock, do not immerse or expose the motor assembly,
plug or the power cord to water or any other liquid.
11.Never immerse the unit in water or any other liquid for cleaning purposes.
12.Do not use harsh abrasives, caustic cleaners or oven cleaners when cleaning this
appliance.
13.Remove the plug from the socket by holding the plug, when pulling it out from the
socket. Do not pull on the cord to disconnect the appliance from the mains. Always
unplug the unit when not in use, before cleaning or when adding or removing parts.

14.The use of accessory attachments that are not recommended or supplied by the
manufacturer may result in injuries, fire or electric shock.
15.A short cord is provided to reduce the hazards resulting from becoming entangled in
or tripping over a longer cord.
16.Do not let the cord hang over the edge of a table or counter. Ensure that the cord is
not in a position where it can be pulled on inadvertently.
17.Do not allow the cord to touch hot surfaces and do not place on or near hot gas or
electric burner or in a heated oven.
18.Allow the unit to cool down properly before wrapping cord around base for storage.
19.Do not cover or store the unit until it has cooled down sufficiently.
20.Caution –bread may burn. When using this appliance, allow adequate air space
above and on all sides for air circulation. Do not leave the appliance unattended
while in use.
21.Do not allow this appliance to touch curtains, wall coverings, clothing, dishtowels or
other flammable materials during use. Caution is required on surfaces where heat
may cause damage -an insulated heat pad is recommended.
22.Do not use this appliance with any foodstuffs/ food preparation containing sugar,
jam or preserves.
23.Do not insert any objects in the toaster. Never attempt to extract jammed toast,
muffins, bagels or any other item with a knife or any other object, as contact with
live elements may cause electrocution and/or damage the elements. Allow the
appliance to cool down, unplug and carefully remove the bread.
24.Do not use the appliance on a gas or electric cooking top or over or near an open
flame.
25.Use of an extension cord with this appliance is not recommended. However, if it is
necessary to use an extension lead, ensure that the lead is suited to the power
consumption of the appliance to avoid overheating of the extension cord, appliance
or plug point. Do not place the extension cord in a position where it can be pulled on
by children or animals or tripped over.
26.DO NOT carry the appliance by the power cord.
27.Do not leave this appliance unattended during use. Always unplug the unit when not
in use or before cleaning.
28.Always operate the appliance on a smooth, even, stable surface. Do not place the
unit on a hot surface.
29.Ensure that the switch is in the “Off” or “O” position after each use.

30.The manufacturer does not accept responsibility for any damage or injury caused
by improper or incorrect use, or for repairs carried out by unauthorised personnel.
31.In case of technical problems, switch off the machine and do not attempt to repair it
yourself. Return the appliance to an authorised service facility for examination,
adjustment or repair. Always insist on the use of original spare parts. Failure to
comply with the above mentioned pre-cautions and instructions, could affect the
safe operation of this machine.
ADDITIONAL IMPORTANT SAFEGUARDS
1. This appliance generates heat and escaping steam during use. Proper precautions
must be taken to prevent the risk of burns, fires, or other injury to persons or
damage to property.
2. A person who has not read and understood all operating, toasting, and safety
instructions is not qualified to operate this appliance. All users of this appliance
must read and understand this instruction manual before operating or cleaning this
appliance.
3. If this appliance falls or accidentally becomes immersed in water, unplug it from the
wall outlet immediately. Ensure that it does not get in contact with water!
4. When using this appliance, provide adequate air space above and on all sides for
air circulation. Do not operate this appliance while it is touching or near curtains,
wall coverings, clothing, dishtowels or other flammable materials.
5. To reduce the risk of fire, do not leave this appliance unattended during use.
6. If this appliance begins to malfunction during use, immediately turn the browning
selector knob to STOP and unplug the cord. Do not use or attempt to repair a
malfunctioning appliance!
7. The cord to this appliance should only be plugged directly into a 220-240V electrical
wall outlet.
8. Do not use this appliance on an unstable position. Use the toaster on a firm, flat
surface. Do not place it near a flame or heat or on a soft surface (such as carpet).
Avoid placing it where it may tip over during use. Dropping the toaster could cause
it to malfunction.
9. WARNING: Electric Shock Hazard. Never attempt to dislodge food inside the
toaster while the toaster is plugged in. Doing so could cause an electrical shock
hazard or a risk of fire.

10. This appliance is hot during operation and retains heat for some time after turning
off. Always use oven mitts when handling hot materials and allow metal parts to
cool before cleaning. Do not place anything on top of the Toaster while it is
operating or while it is hot.
11.Do not toast pastries with runny fillings or frosting. Do not toast torn slices of bread.
12.Do not place buttered bread or wrapped food into the toaster. Do not toast small-
size breads, mini-baguettes, breadsticks, etc.
13.Notes on the cord: The provided short power-supply cord (or detachable power-
supply cord) should be used to reduce the risk resulting from becoming entangled in
or tripping over a longer cord. Do not use an extension cord with this product.
14.Always plug directly into a wall outlet/receptacle.
15.Notes on the plug: This appliance has a polarized plug (one blade is wider than the
other). To reduce the risk of electric shock, this plug will fit in a polarized outlet only
one way. If the plug does not fit fully into the outlet, reverse the plug. If it still does
not fit, contact a qualified electrician.
16.Do not modify the plug in any way.
17.Electric Power: If the electrical circuit is overloaded with other appliances, your
appliance may not operate properly. It should be operated on a separate electrical
circuit from other appliances.

PARTS DESCRIPTION
BEFORE USING FOR THE FIRST TIME
Remove all packaging materials including those that may be inside the toasting slots or
toasting lever slot.
Wipe the exterior with a damp cloth. Dry thoroughly.
Do not use abrasive cleaners.
Do not put the toaster, cord or plug in water.
Make sure the crumb tray is locked in position on the bottom of the toaster and the
toasting lever is in the UP position.
A
Toasting Slots
Automatic
Centering Guides
Body
High-Lift Toasting Lever
Toasting Lever Slot
Browning Selector Knob
Non-Marking
Rubber Feet

Unwrap power cord from cord storage area on underside of toaster and plug into a 220-
240V electrical outlet.
Turn the browning selector knob to 1, the lightest setting.
Lower the toasting lever until it locks in place. Operate without bread once or twice to burn
off any manufacturing residue. You may notice a slight amount of smoke - this is normal
and will stop as the heating elements continue to heat.
AUTOMATIC CENTERING GUIDES
Lowering the toasting lever closes the centering guides, and holds the bread or toaster
food centrally in the toasting slots.
NOTE: The toasting lever will not lock down unless the toaster is plugged into a 220-240V
electrical outlet.
TOASTING INSTRUCTIONS
1. Make sure the crumb tray is locked in position on the bottom of the toaster and the
toasting lever is in the UP position.
2. Make sure no bread or other objects are inside the toasting slots.
3. Place toaster on a flat, level, heat resistant surface.
4. Plug the power cord into a 220-240V electrical outlet.
5. Position the browning selector knob to the desired setting. To test toasting times for
browning, it is best to use both toasting slots - position the browning selector knob
between 3 and 4 medium and then adjust each subsequent toasting to your
preference.
6. Remove all protective wrappings from food before placing into the toasting slots.
7. Avoid toasting torn bread slices or small pieces of toaster food that may get lodged
in toasting slots.
8. Insert bread into the toasting slots. Lower the toasting lever until locked into place.
The automatic centering guides hold food upright for uniform side-to-side toasting.
When the bread is lowered into position, toasting will begin.
9. The toasting lever will not lock into position unless the toaster is plugged into a 220-
240V electrical outlet.
10.When toasting a single slice, the bread may be placed in any toasting slot.

11.To prevent a fire hazard, never place bread over the opening of the toaster; always
place bread into the slots.
12.Do not change the browning selector knob selection during the toasting cycle. First
turn the browning selector knob to STOP, then turn the browning selector knob to
adjust the browning level.
13.Lower the toasting lever and toast until the desired toast color is achieved.
14.When the toast reaches the selected browning level, it will pop up automatically.
15.Use the high-lift lever to make it easier to remove smaller toasted items.
16.Remove bread from toasting slots. Use care when removing bread as the bread
and the top of the toaster will still be hot.
17.IMPORTANT: Never use a fork or sharp-edged utensil to remove toast, because
that may damage the heating element or cause injury.
18.To interrupt toasting, turn the browning selector knob to STOP.
19.Unplug cord from wall outlet when not in use.
STOP TOASTING
1. When the toasting lever is lowered, toasting will begin.
2. To stop or interrupt any toasting cycle, turn the browning selector knob to STOP.
3. The bread will automatically rise when toasting has completed - the toaster will turn
OFF.
4. Unplug cord from wall outlet when not in use.
CONVENIENCE FOOD TOASTING
1. Because of the wide variety of packaged convenience foods available, both frozen
and unfrozen, it is difficult to recommend exact browning selector knob settings.
2. However, after a little experimentation with the toaster, you will discover the best
setting for your needs. You may also wish to refer to the heating instructions on
convenience food packaging.
PASTRY
1. For best results, follow the instructions printed on the pastry package.

2. If the package does not have instructions, position the browning selector knob to
medium, between 3 and 4.
3. Some pastries may require a second toasting cycle.
4. NOTE: Do not use this toaster for toasting pastry items with runny-type frosting or
open fillings.
NON-FROZEN SHELF PASTRY
1. Turn the browning selector knob to a lighter setting. For thicker convenience foods,
it may be necessary to adjust the browning selector knob to a higher setting and a
longer toasting cycle.
REMOVING LODGED FOODS
1. Use the high-lift lever to make it easier to remove smaller toasted items.
2. If, after toasting, a piece of bread or any other toaster food becomes lodged in any
of the toasting slots, unplug the toaster and allow it to cool.
3. Hold the toasting lever down. Turn the toaster upside down and shake the food
loose.
4. IMPORTANT: Never use a fork or sharp-edged utensil to remove toast, because
that may damage the heating element or cause injury.
IMPORTANT POINTS
1. Remove all protective wrappings from food before placing into the toasting slots.
2. For best results, clean the crumb tray frequently.
3. Different breads require different colour settings. Turn the browning selector knob to
the STOP button at any time to check the toast colour.
4. Do not block the top opening and do not place any object over the top opening.
5. Do not toast buttered bread or buttered pita bread. Melted butter will cause fire.
6. When toasting more than one slice of bread, use slices of similar size, thickness
and freshness.
7. Stale, thin or sweet bread products, such as tea, cakes and fruit loaf brown much
more quickly than ordinary bread –therefore should be toasted on the lighter
settings.

8. Never immerse the toaster, cord or plug in water or other liquid.
9. Never use a fork or sharp-edged utensil to remove the toast, because that may
damage the heating element or cause injury.
MAINTENANCE AND CLEANING
Do not immerse the unit, power cord or plug into water or any other liquids.
To clean, unplug the toaster and allow it to cool.
To remove any crumbs from the toaster, unhinge the crumb tray underneath the
toaster, empty and ensure it is properly clipped into place before using it again. The
crumb tray should be cleaned regularly. Do not allow breadcrumbs to accumulate
in the bottom of the toaster.
To clean the interior, turn the toaster upside down and lightly shake the crumbs free.
Wipe the outside of the toaster with a slightly dampened cloth and polish with a soft
dry cloth. Never use abrasive cleaning agents on the body of the toaster.
Do not insert any objects in the toaster.
STORING THE APPLIANCE
Unplug the unit from the wall outlet and clean all the parts as instructed above.
Ensure that all parts are dry before storing.
Store the appliance in its box or in a clean, dry place.
Never store the appliance while it is still wet or dirty.
Never wrap the power cord around the appliance.
SERVICING THE APPLIANCE
There are no user serviceable parts in this appliance. If the unit is not operating correctly,
please check the following:
You have followed the instructions correctly
That the unit has been wired correctly and that the wall socket is switched on.
That the mains power supply is ON.
That the plug is firmly in the mains socket.
If the appliance still does not work after checking the above:

- Consult the retailer for possible repair or replacement. If the retailer fails to resolve the
problem and you need to return the appliance, make sure that:
The unit is packed carefully back into its original packaging.
Proof of purchase is attached.
A reason is provided for why it is being returned.
If the supply cord is damaged, it must be replaced by the manufacturer or an authorised
service agent, in order to avoid any hazard. If service becomes necessary within the
warranty period, the appliance should be returned to an approved Home of Living Brands
(Pty) Limited service centre. Servicing outside the warranty period is still available, but will,
however, be chargeable.
CHANGING THE PLUG
Should the need arise to change the fitted plug, follow the instructions below.
This unit is designed to operate on the advertised current. Connecting to other
power sources may damage the appliance. Connect a three-pin plug as follows:
The wires in this mains lead are coloured in accordance with the following code:
Green/Yellow = Earth
Blue = Neutral
Brown = Live

PLEASE AFFIX YOUR PROOF OF PURCHASE/RECEIPT HERE
IN THE EVENT OF A CLAIM UNDER WARRANTY THIS RECEIPT MUST BE PRODUCED.
W A R R A N T Y
1. Home of Living Brands (Pty) Limited (“Home of Living Brands”) warrants to the original purchaser of this
product (“the customer”) that this product will be free of defects in quality and workmanship which under
normal personal, family or household use and purpose may manifest within a period of 1 (one) year from the
date of purchase (“warranty period”).
2. Where the customer has purchased a product and it breaks, is defective or does not work properly for the
intended purpose, the customer must notify the supplier from whom the customer bought the product (“the
supplier”) thereof within the warranty period. Any claim in terms of this warranty must be supported by a proof
of purchase. If proof of purchase is not available, then repair, and/or service charges may be payable by the
customer to the supplier.
3. The faulty product must be taken to the supplier's service centre to exercise the warranty.
4. The supplier will refund, repair or exchange the product in terms of this warranty subject to legislative
requirements. This warranty shall be valid only where the customer has not broken the product himself, or
used the product for something that it is not supposed to be used for. The warranty does not include and will
not be construed to cover products damaged as a result of disaster, misuse, tamper, abuse or any
unauthorised modification or repair of the product.
5. This warranty will extend only to the product provided at the date of the purchase and not to any expendables
attached or installed by the customer.
6. If the customer requests that the supplier repairs the product and the product breaks or fails to work properly
within 3 (three) months of the repair and not as a result of misuse, tampering or modification by or on behalf of
the customer, then the supplier may replace the product or pay a refund to the customer.
7. The customer may be responsible for certain costs where products returned are not in the original packaging,
or if the packaging is damaged. This will be deducted from any refund paid to the customer.
HOME OF LIVING BRANDS (PTY) LTD
JOHANNESBURG TEL NO. +2711 490-9600
CAPE TOWN TEL NO. +2721 552-5161
DURBAN TEL NO. +2731 792-6000
www.homeoflivingbrands.com
www.salton.co.za
www.facebook.com/SaltonAppliances

Parabéns por ter comprado a nossa Torradeira para duas fatias da Salton. Cada unidade
é fabricada de forma a garantir segurança e fiabilidade. Antes de utilizar este aparelho
pela primeira vez, leia o manual de instruções atentamente e guarde-o para futura
referência.
SALVAGUARDAS IMPORTANTES:
Quando utilizar qualquer aparelho elétrico, deve seguir sempre as precauções de
segurança básicas, incluindo o seguinte:
1. Leia atentamente as instruções antes de utilizar qualquer aparelho.
2. Certifique-se sempre de que a tensão na etiqueta de classificação corresponde à
tensão da corrente elétrica na sua residência.
3. A operação incorreta e utilização imprópria podem danificar o aparelho e causar
lesões no utilizador.
4. O aparelho destina-se apenas a utilização doméstica. A utilização comercial
invalida a garantia e o fornecedor não pode ser responsabilizado por lesões ou
danos causados quando o aparelho for utilizado para qualquer outra finalidade
diferente da prevista.
5. Não utilize este aparelho no exterior.
6. Evite qualquer contacto com as peças em movimento.
7. É necessária uma supervisão de perto quando qualquer aparelho for utilizado perto
ou por crianças ou pessoas com incapacidades.
8. Verifique o cabo de alimentação e a ficha regularmente para verificar a existência
de quaisquer danos. Se o cabo ou a ficha estiverem danificados, devem ser
substituídos pelo fabricante ou por uma pessoa qualificada de forma a evitar um
perigo elétrico.
9. Não utilize o aparelho se este tiver sido deixado cair ou estiver danificado de
qualquer forma. Em caso de danos, devolva a unidade para verificação e/ou
reparação por parte de um agente de assistência autorizado
10.Para reduzir o risco de choque elétrico, não mergulhe ou exponha o conjunto do
motor, ficha ou cabo de alimentação em água ou em qualquer outro líquido.
11.Nunca coloque a unidade dentro de água ou qualquer outro líquido para fins de
limpeza.
12.Não utilize abrasivos ásperos, agente de limpeza cáusticos ou agentes de limpeza
para fornos quando limpar este aparelho.

13.Remova a ficha da tomada ao agarrar na ficha quando a retirar da tomada. Não
puxe pelo cabo para desligar o aparelho da corrente elétrica. Desligue sempre a
unidade quando esta não estiver a ser utilizada, antes de limpar ou quando
adicionar ou remover peças.
14.A utilização de acessórios não recomendados ou fornecidos pelo fabricante pode
resultar em lesões, incêndios ou choque elétrico.
15.É fornecido um cabo pequeno para reduzir os riscos resultantes de ficar preso ou
de tropeçar num cabo maior.
16.Não deixe o cabo suspenso pela extremidade de uma mesa ou balcão. Certifique-
se de que o cabo não se encontra numa posição em que possa ser puxado
inadvertidamente.
17.Não permita que o cabo toque em superfícies quentes e não o coloque sobre ou
perto de uma caldeira elétrica ou a gás quente ou num forno aquecido.
18.Deixe a unidade arrefecer devidamente antes de enrolar o cabo em redor da base
para guardar.
19.Não cubra nem armazene a unidade até que arrefeça o suficiente.
20.Cuidado - o pão pode queimar. Quando utilizar este aparelho, dê um espaço de ar
adequado acima e dos lados para a circulação de ar. Não deixar este aparelho não
supervisionado durante a utilização.
21.Não permita que este aparelho toque em cortinas, coberturas de parede, vestuário,
toalhas ou outros materiais inflamáveis durante a utilização. É necessário ter
cuidado em superfícies onde o calor pode causar danos –é recomendável colocar
uma base térmica isolada.
22.Não utilize este aparelho com quaisquer alimentos/preparação de alimentos que
contenham açúcar, compota ou conservantes.
23.Não insira nenhum objecto na torradeira. Nunca tente extrair torradas presas,
muffins, bagels ou qualquer outro item com uma faca ou qualquer outro objecto,
uma vez que o contacto com elementos condutores pode causar electrocussão
e/ou danos nos elementos. Deixe que o aparelho arrefeça, desligue a ficha e
remova cuidadosamente o pão.
24.Não utilize o aparelho sobre uma superfície de cozimento a gás ou elétrica ou
sobre ou perto de uma chama.
25.A utilização de uma extensão com este aparelho não é recomendada. No entanto,
caso seja necessário utilizar uma ficha de extensão, certifique-se de que a ficha é
adequada para o consumo de energia do aparelho para evitar o sobreaquecimento

do cabo da extensão, aparelho ou tomada. Não coloque o cabo da extensão numa
posição em que possa ser puxada por crianças ou animais ou que possibilite o
tropeçamento.
26.NÃO transporte o aparelho pelo cabo de alimentação.
27.Não deixar este aparelho não supervisionado durante a utilização. Desligue sempre
a unidade quando não estiver a ser utilizada ou antes de limpar.
28.Utilize sempre o aparelho numa superfície suave, uniforme e estável. Não coloque
a unidade numa superfície quente.
29.Certifique-se de que o interruptor está na posição "Off" (desligado) ou "0" após
cada utilização.
30.O fabricante não aceita responsabilidade por qualquer dano ou lesão causados
devido a uma utilização imprópria ou incorreta ou a reparações realizadas por
pessoal não autorizado.
31.Em caso de problemas técnicos, desligue a máquina e não tente repará-la você
próprio. Devolva o aparelho a um agente de assistência autorizado para verificação,
ajuste ou reparação. Insista sempre em utilizar peças sobresselentes originais. O
não cumprimento das precauções e instruções acima poderá afetar o
funcionamento seguro desta máquina.
SALVAGUARDAS IMPORTANTES ADICIONAIS
1. Este aparelho gera calor e a evacuação de vapor durante a utilização. Deverão ser
tomadas precauções adequadas para impedir o risco de queimaduras, incêndios
ou outras lesões em pessoas ou danos na propriedade.
2. Uma pessoa que não tenha lido e compreendido todas as instruções de
funcionamento, para tostar e de segurança não está qualificada para utilizar este
aparelho. Todos os utilizadores deste aparelho têm de ler e compreender este
manual de instruções antes de utilizar ou limpar este aparelho.
3. Se este aparelho cair ou ficar acidentalmente mergulhado em água, desligue-o da
tomada imediatamente. Certifique-se de que não entra em contacto com a água!
4. Quando utilizar este aparelho, dê um espaço de ar adequado acima e dos lados
para a circulação de ar. Não utilize este aparelho enquanto estiver em contacto
com ou próximo de cortinas, revestimentos de parede, vestuário, toalhas de mesa
ou outros materiais inflamáveis.

5. Para reduzir o risco de incêndio, não deixar este aparelho não supervisionado
durante a utilização.
6. Se este aparelho começar a funcionar incorrectamente durante a utilização,
desligue imediatamente o botão do selector de torrada (posição STOP [PARAR]) e
desligue o cabo. Não utilize nem tente reparar o aparelho avariado.
7. O cabo deste aparelho deve ser ligado apenas a uma tomada eléctrica de 220V-
240V directamente.
8. Não utilize este aparelho numa posição instável. Utilize a torradeira numa
superfície firme e plana. Não a coloque junto a uma chama ou calor ou numa
superfície mole (como uma carpete). Evite colocá-la num local em que possa cair
durante a utilização. Se a torradeira cair poderá causar a sua avaria.
9. ADVERTÊNCIA: Perigo de choque eléctrico. Nunca tente mover os alimentos
dentro da torradeira enquanto a torradeira estiver ligada. Se o fizer pode causar um
perigo de choque eléctrico ou um risco de incêndio.
10. Este aparelho está quente durante o funcionamento e retém o calor durante algum
tempo depois de se desligar. Utilize sempre luvas de forno quando manusear
materiais quentes e deixe as peças de metal arrefecerem antes de limpar. Não
coloque nada sobre a torradeira enquanto estiver em funcionamento ou enquanto
estiver quente.
11.Não torre doces com recheios ou coberturas. Não torre fatias esmigalhadas de pão.
12.Não coloque pão com manteiga ou alimentos enrolados na torradeira. Não torre
pães pequenos, mini-baguetes, palitos de pão, etc.
13.Notas sobre o cabo: O cabo de alimentação curto fornecido (ou cabo de
alimentação amovível) deve ser utilizado para reduzir o risco de ficar emaranhado
ou de tropeçar num cabo mais longo. Não utilize um cabo de extensão com este
produto.
14.Ligue sempre directamente a uma tomada de parede.
15.Notas sobre a ficha: Este aparelho tem uma ficha polarizada (um pino é mais largo
do que o outro). Para reduzir o risco de choque eléctrico, esta ficha encaixa numa
tomada polarizada apenas de uma forma. Se a ficha não encaixar completamente
na tomada, inverta a ficha. Se continuar a não encaixar, contacte um electricista
qualificado.
16.Não modifique a ficha de nenhum modo.

17.Alimentação eléctrica: Se o circuito eléctrico for sobrecarregado com outros
aparelhos, o seu aparelho poderá não funcionar devidamente. Deverá ser operado
num circuito eléctrico separado dos outros aparelhos.

DESCRIÇÃO DAS PEÇAS
ANTES DE UTILIZAR PELA PRIMEIRA VEZ
Remova todos os materiais da embalagem, incluindo os que se podem encontrar dentro
das ranhuras para torrar ou ranhura da alavanca para torrar.
Limpe o exterior com um pano humedecido. Seque minuciosamente.
Não utilize agentes de limpeza abrasivos.
Não coloque a torradeira, o cabo ou a ficha em água.
Certifique-se de que o tabuleiro de migalhas está bloqueado na posição no fundo da
torradeira e que a alavanca para torrar está na posição PARA CIMA.
A
Ranhuras de torragem
Guias de centragem
automática
Corpo
Alavanca para tostar de
elevação alta
Ranhura da alavanca
para tostar
Botão de selecção para torrar
Base de borracha que
não marca

Desenrole o cabo de alimentação da área de armazenamento do cabo por baixo da
torradeira e ligue-a a uma tomada eléctrica de 220-240V.
Rode o botão de selecção para torrar para 1, a definição mais ligeira.
Baixe a alavanca para torrar até ficar encaixada no devido lugar. Utilize sem pão uma ou
duas vezes para queimar, extraindo assim quaisquer resíduos de fabrico. Poderá
observar uma ligeira quantidade de fumo - isto é normal e irá parar à medida que os
elementos de aquecimento continuam a aquecer.
GUIAS DE CENTRAGEM AUTOMÁTICA
Baixar a alavanca para torrar fecha as guias de centragem e mantém o pão ou alimentos
da torradeira no centro das ranhuras para torrar.
NOTA: A alavanca para torrar não se bloqueia a não ser que a torradeira seja ligada a
uma tomada eléctrica de 220-240V.
INSTRUÇÕES PARA TORRAR
1. Certifique-se de que o tabuleiro de migalhas está bloqueado na posição no fundo
da torradeira e que a alavanca para torrar está na posição PARA CIMA.
2. Certifique-se de que nenhum pão ou outros objectos se encontram dentro das
ranhuras para torrar.
3. Coloque a torradeira numa superfície plana, nivelada e resistente ao calor.
4. Ligue o cabo de alimentação a uma tomada eléctrica de 220-240V.
5. Posicione o botão de selecção para torrar na definição desejada. Para testar os
tempos para torrar, é melhor utilizar ambas as ranhuras para torrar - posicione o
botão de selecção para torrar entre o 3 e 4 médio e ajuste cada torrada
subsequente à sua preferência.
6. Remova todos os invólucros de protecção dos alimentos antes de os colocar nas
ranhuras para torrar.
7. Evite torrar fatias de pão esmagadas ou pequenos pedaços de alimentos que
possam ficar presos nas ranhuras para torrar.
8. Coloque o pão nas ranhuras de torragem. Baixe a alavanca para torrar até ficar
encaixada no devido lugar. Os guias de centragem automática mantêm os
alimentos na vertical para obter uma torrada uniforme de um lado ao outro. Quando
o pão é baixado até à posição, o processo para torrar começa.

9. A alavanca para torrar não se bloqueia na posição a não ser que a torradeira seja
ligada a uma tomada eléctrica de 220-240V.
10.Quando torrar uma única fatia, o pão pode ser colocado em qualquer ranhura para
torrar.
11.Para evitar um risco de incêndio, nunca coloque o pão sobre a abertura da
torradeira; coloque sempre o pão nas ranhuras.
12.Não mude a selecção do botão de selecção para torrar durante o ciclo de torrar.
Em primeiro lugar, rode o botão de selecção para torrar em STOP (PARAR) e, em
seguida, rode o botão de selecção para torrar para ajustar o nível da torrada.
13.Baixe a alavanca para torrar e torre até obter a cor desejada da torrada.
14.Quando a torrada alcançar o nível de torrada seleccionado, sobre automaticamente.
15.Utilize a alavanca de elevação alta para facilitar a remoção dos itens torrados mais
pequenos.
16.Remova o pão das ranhuras para torrar. Tenha cuidado quando remover o pão,
uma vez que o pão e a parte superior da torradeira ainda estarão quentes.
17.IMPORTANTE: Nunca utilize um garfo ou utensílio de extremidade afiada para
remover a torrada, porque pode danificar o elemento de aquecimento ou causar
lesões.
18.Para interromper o ciclo de torrar, rode o botão de selecção para torrar para STOP
(PARAR).
19.Desligue o cabo da tomada de parede quando não estiver a ser utilizado.
PARAR DE TORRAR
1. Quando a alavanca para torrar é baixada, o processo para torrar começa.
2. Para parar ou interromper qualquer ciclo de torrar, rode o botão de selecção para
torrar para STOP (PARAR).
3. O pão sobe automaticamente quando a torrada estiver preparada - a torradeira
desliga-se.
4. Desligue o cabo da tomada de parede quando não estiver a ser utilizado.
Table of contents
Languages:
Other Salton Toaster manuals

Salton
Salton ET1816 User manual

Salton
Salton HD1911 User manual

Salton
Salton ET1817 User manual

Salton
Salton ET2072 User manual

Salton
Salton ET2084 User manual

Salton
Salton ST44 Installation guide

Salton
Salton Elite SST09E Installation guide

Salton
Salton SET004 User manual

Salton
Salton ET1404B User manual

Salton
Salton SST44E User manual