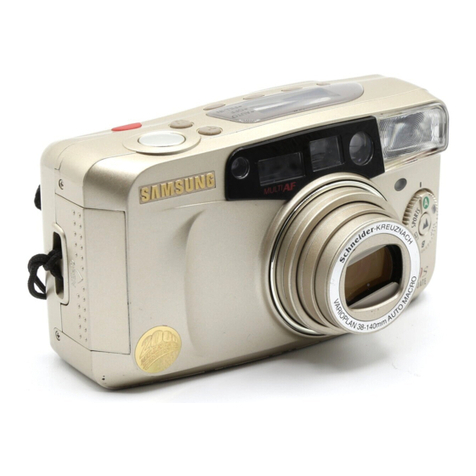
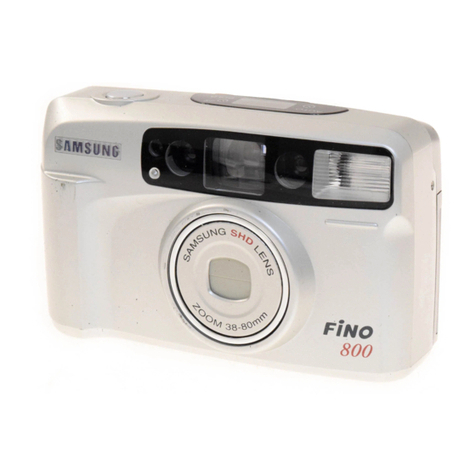
Samsung FINO 800 User manual

ENGLISH / DEUTSCH/ FRANÇAIS /
ESPAÑOL/ ITALIANO / DUTCH /

PART NAMES
Front / Top / Rear / Bottom
Shutter button
Autofocus window Power button
Mode button
Flash
Lens Viewfinder
Flash button
(Flash mode selection button)
Mid-roll rewind button
Exposure sensor
Self-timer lamp
Zoom button W(WIDE)
Zoom button T(TELE)
Strap eyelet
Tripod socket
Film check
window
Date selection button (Q.D. model only)
Date record window (Q.D. model only)
Viewfinder
LCD panel
Back cover
release knob
Autofocus
/Flash
(Green LED)
indicator

PART NAMES
LCD PANEL
Interior
Back cover
Film pressure plate
Film pressure roller
Film sensor
Spool
DX contacts
Flash modes
Battery condition indicator
Exposure counter
Film loading failure warning
indicator(E) Film rewinding indicator

LOADING THE BATTERY
2
1
En
Deu
1. Open the chamber cover by sliding the battery chamber cover.
2. Insert a new battery and ensure it is placed in the correct position.
3. Close the chamber cover.
The indicator will disappear on the LCD panel when the power is
turned off.
If the date or time is incorrect, please refer to page (16) and adjust
accordingly.
Fr 1. Ouvrez le compartiment de la pile en faisant glisser son couvercle.
2. Introduisez une nouvelle pile et assurez-vous que sa position est
correcte.
3. Remettez en place le couvercle.
L’indicateur disparaîtra du tableau d’affichage à cristaux liquides
quand le courant sera coupé.
Si la date ou l’heure ne sont pas correctes, reportez-vous à la page
(16) et effectuer le réglage approprié.
1. Öffnen Sie das Batteriefach, indem Sie den Deckel aufschieben.
2. Legen Sie eine neue Batterie ein und vergewissern Sie sich, daß
sie sich in der richtigen Position befindet.
3. Schließen Sie das Fach wieder.
Der Anzeiger wird von der LCD-Anzeige verschwinden, wenn das
Gerät abgeschaltet wird.
Falls Datum oder Uhrzeit nicht stimmen, neu einstellen, siehe Seite (16).

Es
It 1. Aprire il coperchio del vano batteria facendolo scorrere.
2. Inserire una batteria nuova ed accertarsi che sia posizionata
correttamente.
3. Chiudere il coperchio del vano batteria.
L’indicatore scomparirà dal pannello LCD quando l’apparecchio
verrà spento.
Se la data o l’ora sono errate, impostar le come indicato a
pagina(16).
1. Abra el compartimento de la pila deslizando su tapa.
2. Inserte una nueva pila y compruebe que esté colocada en la
posición correcta.
3. Cierre la tapa del compartimento de la pila.
El indicador desaparecerá de la pantalla LCD cuando esté
apagado.
Si la fecha o la hora son incorrectas, por favor consulte la página
(16)y ajústelas convenientemente.
Du 1. Open het batterijcompartiment door het deksel open te schuiven.
2. Zet een nieuwe batterij in de camera. Let daarbij vooral op de juiste
stand.
3. Sluit het deksel van het batterijcompartiment.
Het signaal zal verdwijnen op het LCD paneel wanneer het toestel
afgezet wordt.
Wijkt de datum af, raadpleeg dan bladzijde (16) en zet de datum
gelijk.

LOADING THE FILM
En 1. Open the back cover by sliding the release knob as shown above.
2. Insert a roll of film in the chamber. Do not force the film into position.
3. The film should lie flat.
4. Close the back cover. It will close with a “click”.
5. The film will automatically advance until the film counter reads “1”.
If a film is loaded incorrectly, the LCD panel will display an “E”
warning signal. Reload the film following the steps shown above.
Deu
1. Öffnen Sie die Rückwand, indem Sie den Entriegelungsknopf - wie oben
gezeigt - verschieben.
2. Legen Sie einen Film in die Kammer, ohne ihn mit Gewalt in die richtige
Position zu drücken.
3. Der Film muß flach aufliegen.
4. Schließen Sie die Rückwand. Sie rastet hörbar ein.
5. Der Film wird automatisch transportiert, bis das Zählwerk “1” anzeigt.
Wurde der Film falsch eingelegt, blinkt die Anzeige “E” im LCD-Display.
Legen Sie den Film gemäß den obigen Anweisungen noch einmal ein.
Fr 1. Ouvrez le dos de l’appareil en faisant glisser son poussoir de
déverrouillage comme indiqué ci-dessus.
2. Placez le rouleau de film dans son logement sans forcer.
3. Le film doit être plat et bien tendu.
4. Refermez le dos de l’appareil en appuyant dessus jusqu’ A ce que vous
entendiez un “clic”.
5. Le film avance automatiquement jusqu’ à ce que le compteur affiche “1”.
En cas de chargement incorrect, le signal d’erreur “E” apparaît sur
l’écran LCD. Recommencez le chargement du film en suivant les
étapes indiquées ci-dessus.

Es
1. Deslice la palanca de apertura del respaldo para abrirlo tal y como se muestra
en el dibujo sobre estas líneas.
2. Inserte un rollo de película en el compartimento de la película. No fuerce la
película al introducirla.
3. La película deberá permanecer plana, tal y como aparece en los dibujos de
más abajo.
4. Cierre el respaldo. Se cerrará con un “clic”.
5. La película avanzará automáticamente hasta que aparezca “1” en el contador.
Si la película se ha cargado incorrectamente, aparecerá la señal de
advertencia “E” en el panel informativo LCD. Vuelva a cargar la película
siguiendo los pasos mostrados anteriormente.
It
1. Aprire il coperchio posteriore facendo scorrere lo sblocco come suindicato.
2. Inserire il rullino nello scomparto. Non forzare il rullino durante l’inserimento.
3. La pellicola dovrà essere ben tesa.
4. Chiudere il coperchio posteriore finché non si sentirà il clic dello scatto.
5. La pellicola avanzerà automaticamente finché non comparirà un 1 sul
contafotogrammi.
In caso di errato inserimento della pellicola, sul pannello LCD appare il simbolo
E. Reinserire la pellicola procedendo come suindicato.
Du
1. Open de achterwand door de sluiting ervan als afgebeeld opzij te schuiven.
2. Leg de filmcassette in het filmcompartiment. Forceer daarbij niets.
3. Zorg ervoor dat de film vlak ligt.
4. Sluit de achterwand tot die hoorbaar dichtklikt.
5. Nu wordt automatisch de eerste opname van de film voorgedraaid en wordt
in de opnameteller het cijfer “1” zichtbaar.
Is de film verkeerd in de camera gezet, dan knippert in het LCD-venster de
letter “E”. In dat geval zet u de film opnieuw in de camera volgens de
bovenstaande procedure.

TAKING PICTURES
En Aim the Autofocus frame at a subject.
Press the Shutter button half way down. The lens is focused when
the green lamp turns on.
Press the Shutter button all the way down to take a picture.
The film will automatically advance after shooting and the frame
counter will advance.
Exposure range (WIDE) : 1m ~ , (TELE) : 1.2m ~
The quality of pictures is not guaranteed when the distance is less
than 1.0m (WIDE) or 1.2m (TELE).
Deu
Richten Sie den Autofokusrahmen auf ein Motiv
Drücken Sie den Auslöser halb herunter. Das Objektiv ist
scharfgestellt, wenn die grüne Lampe aufleuchtet.
Drücken Sie den Auslöser ganz herunter, um die Aufnahme zu
machen.
Der Film wird nach der Aufnahme automatisch weitertransportiert
und das Bildzählwerk zählt weiter.
Belichtung (WEITWINKEL) : 1,0m ~ , (TELE) : 1,2m ~
Die Schärfe der Aufnahmen kann bei Abständen unter 1,0m
(WIDE) bzw. unter 1,2m (TELE) nicht gewährleistet werden.
Fr Axez la mire autofocus sur le sujet.
Appuyez à demi sur le déclencheur. La mise au point est réalisée
lorsque le voyant vert s’allume.
Appuyez à fond sur le déclencheur pour prendre la photographie.
Après la photographie le film avance automatiquement d’une vue
ainsi que le compteur.
Exposition portée (GRAND ANGLE):1,0m ~ (TELE) : 1,2m ~
Nous ne garantissons pas la qualité de vos photos en cas de prise
de vue inférieure à 1m (en grand angle) ou 1,2m (en téléobjectif).

It Puntare la cornice autofocus sul soggetto.
Premere il pulsante di scatto a metà corsa. L'obiettivo è a fuoco
quando si accende la spia verde.
Premere a fondo il pulsante di scatto per scattare la fotografia.
Dopo aver scattato la fotografia, la pellicola ed il contafotogrammi
avanzano automaticamente.
Campo del esposizione (WIDE) : 1.0m ~ , (TELE) : 1.2m ~
La qualità delle immagine non viene garantita quando la distanza è
inferiore e 1m(WIDE) o 1.2m(TELE).
Du Richt het autofocuskader op uw onderwerp
Druk de ontspanknop half in. Als de groene LED brandt, heeft de
camera zich scherpgesteld.
Druk de ontspanknop helemaal in om een opname te maken.
Na de opname wordt de film automatisch getransporteerd en de
stand van de opnameteller met één verhoogd.
Belichtingsregeling bereik(GROOTHOEK) : 1.0m ~ (TELE) :
1.2m ~
De kwaliteit van foto's kan niet worden gegarandeerd als de
afstand minder dan 1m(GROOTHOEK) of 1.2m(TELE) bedraagt.
Es Sitúe el recuadro del autofoco sobre el sujeto.
Pulse el disparador hasta la mitad. Cuando el motivo se encuentre
correctamente enfocado, la lámpara verde se iluminará.
Presione el disparador hasta el fondo para tomar la fotografía.
La película avanzará automáticamente después de realizar la
fotografía y avanzará el contador de exposiciones.
Gama de exposición(ANGULAR) : 1m ~ , (TELE) : 1,2m ~
La calidad de las fotografias no esta garantizada cuando la
distancia es inferior a 1m (ANGULAR) o a 1,2m (TELE).
USING THE FOCUS LOCK
En If you want to focus on a subject that is not in the centre of your
picture, use the Focus Lock function described below.
1. Aim the camera with the autofocus frame superimposed over the
subject.
2. Press the shutter button half way down. (Green LED lights)
Be careful not to press the shutter button all the way down to avoid
taking an unwanted picture.
3. Keeping the shutter button depressed, recompose your picture as
desired. Hold the camera steadily and gently press the shutter
button completely down. The Focus Lock can be released at any
time by lifting your finger from the shutter button.
Deu
Wenn Sie auf ein Motivteil scharfstellen möchten, das sich nicht in
der Bildmitte befindet, verwenden Sie den Schärfespeicher wie
folgt.
1. Richten Sie die Kamera bzw. den Autofokus-Rahmen mittig auf den
gewünschten Motivteil.
2. Drücken Sie den Auslöser halb herunter (grüne LED leuchtet).
Achten Sie darauf, den Auslöser nicht ganz herunterzudrücken, um
ein ungewolltes Bild zu vermeiden.
3. Halten Sie den Auslöser leicht gedrückt und schwenken Sie wieder
zum gewünschten Bildausschnitt zurück. Halten Sie die Kamera
ruhig und drücken Sie dann den Auslöser ganz herunter. Sie
können die Fokusspeicherung jederzeit durch Loslassen des
Auslösers wieder aufheben.

Fr Pour faire la mise au point sur un sujet décentré dans votre
composition, bloquez la mise au point en procédant comme suit :
1. Axez la mire autofocus sur le sujet.
2. Appuyez à demi sur le déclencheur (témoin LED vert). Veillez à ne
pas appuyer sur le déclencheur à fond pour ne pas prendre de
photo involontaire.
3. Tout en maintenant le déclencheur à demi appuyé, recomposez
votre photographie. Tenez l’appareil de la façon la plus stable
possible et appuyez doucement et à fond sur le déclencheur. Vous
pouvez annuler la mémorisation de mise au point à tout moment en
relâchant le déclencheur.
Es Si desea enfocar un sujeto que no se encuentra en el centro de la
foto, utilice la función de bloqueo del enfoque tal y como se
describe a continuación.
1. Apunte la cámara con el recuadro del autofoco sobre el sujeto.
2. Pulse el disparador hasta la mitad (diodo verde encendido).
Tenga cuidado de no presionar el disparador hasta el fondo para
evitar tomar una fotografía involuntariamente.
3. Mantenga el disparador pulsado hasta la mitad y vuelva a
encuadrar la imagen de la forma deseada. Sostenga la cámara
firmemente y pulse suavemente el disparador hasta el fondo. El
bloqueo del enfoque podrá anularse en cualquier momento con
sólo levantar el dedo del disparador.
It Se si vuole mettere a fuoco un soggetto che non è al centro dell
immagine, si userà la funzione del Focus Lock descritta di seguito.
1. Puntare la macchina con la cornice autofocus sovrapposta al
soggetto.
2. Premere il pulsante di scatto fino a metà corsa (Il LED verde si
accende) Fare attenzione a non premere a fondo il pulsante di
scatto per evitare uno scatto indesiderato.
3. Tenendo premuto il pulsante di scatto, ricomporre l immagine come
desiderato. Tenere la macchina ben ferma e premere con
delicatezza fino in fondo il pulsante di scatto. Il Focus Lock può
essere sbloccato in qualsiasi momento togliendo il dito dal pulsante
di scatto.

Du Om scherp te stellen op een onderwerp dat niet in het midden van
het zoekerbeeld staat, gebruikt u het autofocusgeheugen, zoals
hieronder is beschreven.
1. Richt de camera zo dat het gewenste onderwerp in het
autofocuskader staat.
2. Druk de ontspanknop half in (Groene LED gaat branden). Druk niet
per ongeluk de ontspanknop helemaal in, want dat maakt u een
onbedoelde opname.
3. Houd de ontspanknop half ingedrukt en kader uw opname af. Houd
de camera goed stil en druk de ontspanknop helemaal in. U kunt
het autofocusgeheugen op elk gewenst moment uitschakelen door
de ontspanknop los te laten.

REWINDING THE FILM
En Mid-roll rewinding
To rewind the film in the middle of a roll,
press the Mid-roll rewind button. The
film will be completely rewound, ready
for processing. You will not be able to
reload the film.
If you press the Power button during
film rewinding, the rewinding is
interrupted until the Power button is released.
If the motor stops before the LCD shows “0”, replace the battery.
Do not open the back cover until the battery is replaced.
Mid-roll rewind button
Deu
Vorzeitiges Rückspulen
Um den Film vorzeitig zurückzuspulen, drücken Sie den
Rückspulknopf. Der Film wird komplett zurückgespult und ist fertig
zum Entwickeln. Sie können den Film nicht wieder einlegen.
Wenn Sie während des Rückspulens die Ein/Aus-Taste drücken,
wird die Rückspulung so lange unterbrochen, bis Sie diese Taste
wieder freigeben.
Wenn der Motor abschaltet, bevor das LCD-Display “0” anzeigt,
ersetzen Sie bitte die Batterie. Öffnen Sie keinesfalls die Rückwand
der Kamera, bevor die Batterie ersetzt und der Film vollständig
zurückgespult ist.
Fr Rembobinage à mi-film
Pour rembobiner un film en cours d’utilisation, appuyez sur la
touche de rembobinage à mi-film. Le film sera complètement
rembobiné, prêt pour le développement. Vous ne pourrez plus le
réinstaller.
Si vous appuyez sur la touche Arrêt/Marche en cours de
rembobinage, celui-ci s’interrompra. Il reprendra lorsque vous
aurez relâché cette touche.
Si le moteur s’arrête avant l’apparition de “0” sur l’écran LCD,
remplacez la pile. N’ouvrez pas l’appareil avant d’avoir remplacé la
pile.

It Riavvolgimento a metà rullino
Per riavvolgere la pellicola a metà rullino, premere il relativo
pulsante. La pellicola verrà riavvolta completamente e sarà pronta
per lo sviluppo. Questa pellicola non potrà più essere reinserita.
Premendo il pulsante Power durante il riavvolgimento della
pellicola, il riavvolgimento viene interrotto finché non viene rilasciato
il pulsante Power.
Se il motore si ferma prima che compaia 0 sul pannello LCD,
sostituire la batteria. Non aprire il coperchio posteriore finché non è
stata sostituita la batteria.
Du Gedeeltelijk belichte film terugwikkelen
Om een gedeeltelijk belichte film terug te wikkelen, drukt u knop
voor het terugwikkelen van gedeeltelijk belichte films in. De film
wordt dan volledig teruggewikkeld en is klaar voor verwerking.
U kunt de film niet opnieuw plaatsen.
Drukt u de cameraschakelaar in tijdens het terugwikkelen, dan
wordt het terugwikkelen onderbroken tot u de cameraschakelaar
weer loslaat.
Als de motor stopt voordat in het LCD-venster een “0” verschijnt,
moet u de batterij vervangen. Open de achterwand niet eerder dan
nadat u de batterij vervangen hebt.
Es Botó de rebobinado a mitad de rollo
Para rebobinar la película a la mitad, presione el botón de
rebobinado a mitad de rollo. La película se rebobinará totalmente,
lista para su revelado. No podrá volver a cargar la película.
Si presiona el botón de conexión/desconexión durante el
rebobinado de la película, el rebobinado se interrumpirá hasta que
deje de pulsarlo.
Si el motor se detiene antes de que aparezca “0” en el panel
informativo LCD, cambie la pila. No abra el respaldo de la cámara
hasta haber cambiado la pila


DATE IMPRINTING (Q.D.MODEL ONLY)
<No imprinting> <Month-Day-Year> <Day-Month-Year>
<Year-Month-Day><Day-Hour-Minute >
En 1. Changing Date format
Press the MODE button in the back cover to select the desired
format.
Deu
1. Ändern des Datumformats
Drücken Sie die MODE-Taste in der Rückwand, um das
gewünschte Format zu wählen.
Fr 1. Changement de format de date
Pressez la touche MODE se trouvant au dos pour sélectionner le
format désiré.
Es 1. Cómo cambiar el formato de la fecha
Presione el botón MODE (MODOS) situado en el respaldo para
seleccionar el formato deseado.
It 1. Modifica formato data
Premere il pulsante MODE nel coperchio posteriore per selezionare
il formato desiderato.
Du 1. Datumnotatie wijzigen
Druk op de MODE-knop op de achterwand om de gewenste notatie
te selecteren.

En 2. Setting the Date
Select the date mode by pressing the MODE button.
Press the SELECT button to access a day, month or year.
Adjust the date or time by pressing the SET button. (The date will
run through quickly if you press the SET button continuously.)
This camera will set the date automatically until 2049.
A year mark will be indicated by the last 2 digits on the Date
Record Window, which will be printed on the picture.
The 2049 date is subject to change without prior notice.
Deu
2. Einstellung des Datums
Wählen Sie den Datenmodus durch Drücken der MODE-Taste.
Drücken Sie die SELECT-Taste, um Zugriff auf Tag, Monat, Jahr zu
bekommen.
Verstellen Sie das Datum oder die Uhrzeit durch Drücken der Taste
SET. (Das Datum läuft kontinuierlich durch, wenn Sie die SET
Taste anhaltend drücken.)
Die Kamera kann das Datum automatisch bis 2049 einstellen.
Die Kennzeichnung des Jahres erfolgt durch die Anzeige der
letzten zwei Ziffern auf dem LCD-Display. Dies erscheint auf dem
Bild.
Änderung des 2049-er Datums ist ohne vorherige Ankündigung
möglich.

Es 2. Cómo ajustar la fecha
Seleccione el modo de la fecha presionando el botón MODE.
Presione el botón SELECT (Selección) para acceder a un día, mes
o año.
Ajuste la fecha o la hora presionando el botón SET (Ajuste). Las
fechas correrán rápidamente si mantiene pulsado el botón SET
ininterrum-pidamente.
Esta cámara ajustará automáticamente la fecha hasta el año 2049.
El año aparecerá indicado por las dos últimas cifras en el panel
informativo LCD, las cuales se imprimirán en la fotogtafía.
La fecha 2049 podría cambiar sin previo aviso.
It 2. Impostazione data
Selezionare il modo data premendo il pulsante MODE.
Premere il pulsante SELECT per accedere a giorno, mese o anno.
Impostare la data o l'ora premendo il pulsante SET (Tenendo
premuto il pulsante SET, la data avanza più velocemente).
La macchina regolerà la data automaticamente fino al 2049.
Comparirà il segno dell'anno nelle ultime due cifre sul pannello
LCD che verrà stampato sulla fotografia.
La data 2049 potrebbe cambiare senza preavviso.
Fr 2. Programmation de la date
Sélectionnez le mode date en pressant la touche MODE.
Pressez la touche SELECT pour choisir la section jour, mois ou
année.
Réglez la date ou l’heure avec la touche SET. (La date défilera
rapidement si vous pressez la touche SET en continu.)
Cet appareil réglera la date automatiquement jusqu’à 2049.
L’an apparaîtra dans les deux derniers chiffres à l’afficheur aux
cristaux liquides et sera imprimé sur la photo.
La date 2049 pourrait changer sens préavis.

Du 2. Datum instellen
Selecteer de datumfunctie door op de MODE-knop te drukken.
Druk op de SELECT-knop om een dag, maand of jaar te
selecteren.
Pas de datum of tijd aan door op de SET-knop te drukken. (Als u de
SET-knop continu indrukt, verandert de datum ook in snel tempo
continu.)
De camera stelt de datum automatisch in tot 2049.
Het jaar dat op de foto wordt afgedrukt wordt op het LCD-venster
aangegeven met de laatste twee cijfers.
De datum 2049 kan zonder aankondiging veranderen.

USING THE FLASH MODE
En You can select the flash mode by pressing the FLASH button.
The Flash Mode Order is subject to change without prior notice.
In case of the "Auto Flash" function, the camera will retain the
mode even though the camera is turned off. When you turn on the
camera, check the LCD panel. (but)When you change the battery,
the mode will be set to auto red-eye reduction.
Deu
Die Blitz-Betriebsart wählen Sie durch Drücken der FLASH-Taste.
Kann sich die Funktion “Blitzlich” auch ohne voranzeige ändern.
Die Funktion “Automatikblitz” bleibt erhalten, auch wenn Sie die
Kamera abschalten. Prüfen Sie das LCD-Display, wenn Sie die
Kamera wieder einschalten. Im Falle eines Batteriewechsels
allerdings stellt sich wieder die Rotaugeneffektreduzierung ein.
Fr Vous pouvez sélectionner le mode flash au moyen de la touche
FLASH.
La fonction de mode Flash peut varier sans préavis.
En cas de choix de la fonction “Flash auto”, l’appareil reste
sélectionné sur ce mode même si l’appareil est mis hors tension.
Lorsque vous mettez l’appareil sous tension, vérifiez l’écran
LCD.(mais) lors du changement de la pile, on reviendra à la
fonction de réduction Automatique de l’effet yeux rouges.
<Auto Red-eye
reduction> <Auto flash> <Fill-in flash> <Flash off>
Other manuals for FINO 800
1
Table of contents
Other Samsung Film Camera manuals

Samsung
Samsung FINO 30SE User manual

Samsung
Samsung VEGA 700 User manual

Samsung
Samsung VG-STC3000 Owner's manual

Samsung
Samsung PRONTA 1200 User manual

Samsung
Samsung FINO 140 SUPER User manual

Samsung
Samsung FINO 800 User manual

Samsung
Samsung FINO 170 SUPER User manual

Samsung
Samsung CY-STC1100 User manual

Samsung
Samsung VEGA 290W User manual

Samsung
Samsung FINO 120 SUPER User manual