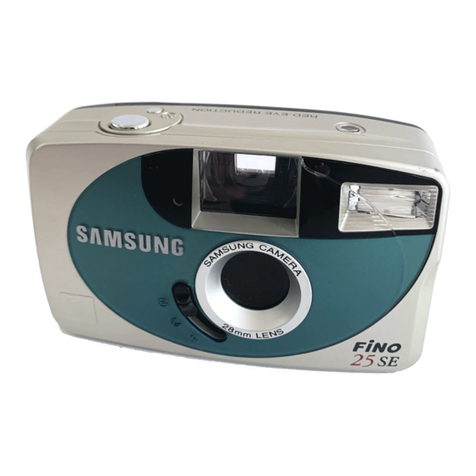
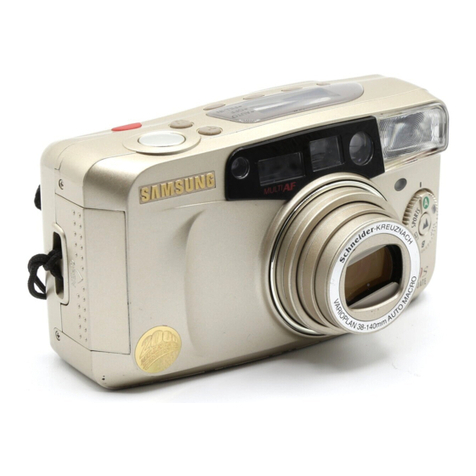
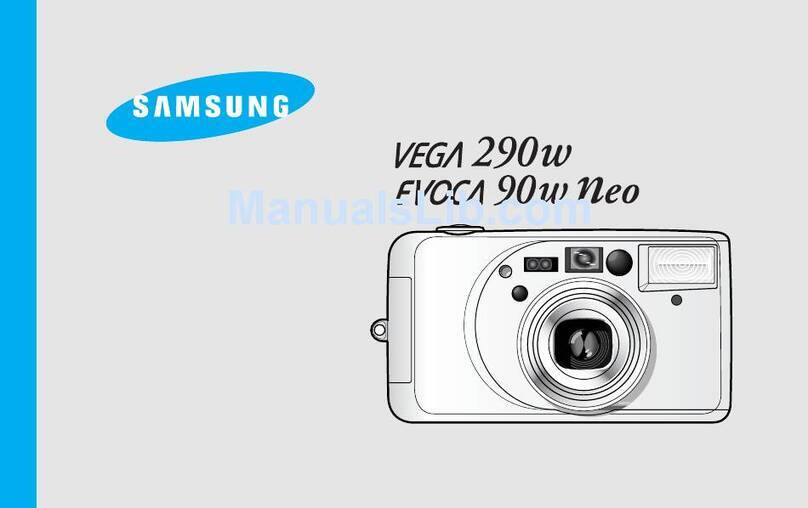
Samsung FINO 800 User manual

ENGLISH/ESPAÑOL

CONTENTS / ÍNDICE
Part Names / Nomenclatura 3
LCD panel / Panel informativo LCD 5
Loading the battery / Colocación de la pila 6
Checking the battery / Comprobación de la pila 7
Loading the film / Colocación de la película 7
Taking pictures / Cómo fotografiar 8
Using the focus lock / Utilización del bloqueo del enfoque 9
Rewinding the film / Cómo rebobinar la película 10
Date imprinting (Q.D. model only) /
Impresión de la fecha (sólo modelo Q.D.) 11
Using the Flash mode / Utilización de los modos del flash 12
Auto Red-eye Reduction / Reducción de ojos rojos automática 13
Auto flash / Flash automático 13
Fill-in flash / Flash de relleno 14
Flash off / Flash desconectado 14
Using the Shooting mode / Utilización del modo de exposición 15
Self-shooting / Autodisparador 16
Bulb shooting (B Shutter) / Posición B (exposición larga) 16
2 second delayed shutter release /
Autodisparador con 2 segundos de retardo 17
Care and storage / Cuidados y almacenamiento 18
Specification / Especificaciones 20

PART NAMES / NOMENCLATURA
Front / Top De frente/Parte superior
Shutter button
Disparador
Autofocus window
Ventanillas del autofoco
LCD panel
Ecran LCD
Power button
Botón de conexión/desconexión
Mode button
Bóton de Modos
Flash
Flash
Lens
Objetivo Viewfinder
Visor
Flash button (Flash mode selection button)
Botón del flash (botón de selección del modo
de flash)
Mid-roll rewind button
Botón de rebobinado a mitad
de rollo
Exposure sensor
Sensor de exposición
Self-timer lamp
Lámpara del autodisparador
En Es

Rear / Bottom Parte posterior/inferior
Autofocus
/Flash(Green LED)indicator
Indicador del
autofoco/Indicador del
flash(diodo verde)
Zoom button W(WIDE)
Botón del zoom W(ANGULAR)
Zoom button T(TELE)
Botón del zoom T(TELE)
Strap eyelet
Enganche de
la correae
Back cover
release knob
Botón de apertura
del respaldo
Tripod socket
Rosca para el trípode
Film check window
Ventanilla de
comprobación de la
película
Date selection button
(Q.D. model only)
Botón de selección de la fecha
(sólo modelo Q.D.)
Date record window
(Q.D. model only)
Ventanilla de registro de fechas
(sólo modelo Q.D.)
Viewfinder
Visor

LCD PANEL / PANEL INFORMATIVO LCD
Flash modes
Modos del flash
Battery condition indicator
Indicador de la carga de la pila
Exposure counter
Contador de exposiciones
Film loading failure warning indicator(E)
Indicador de aviso de fallo en la carga de la película (E)
Film rewinding indicator
Indicador de rebobinado de la película
Interior Interior
Back cover / Rerpaido
Film pressure plate
Placa de presión de la película
Film pressure roller
Rodillo de presión de la película
Film sensor / Sensor de la película
Spool / Bobina
DX contacts / Contactos DX
PART NAMES / NOMENCLATURA

LOADING THE BATTERY / COLOCACIÓN DE LA PILA
2
1
En
Es
1. Open the chamber cover by sliding the battery chamber cover.
2. Insert a new battery and ensure it is placed in the correct
position.
3. Close the chamber cover.
The indicator will disappear on the LCD panel when the power
is turned off.
If the date or time is incorrect, please refer to page (11) and
adjust accordingly.
1. Abra el compartimento de la pila deslizando su tapa.
2. Inserte una nueva pila y compruebe que esté colocada en la
posición correcta.
3. Cierre la tapa del compartimento de la pila.
El indicador desaparecerá de la pantalla LCD cuando esté
apagado.
Si la fecha o la hora son incorrectas, por favor consulte la
página (11)y ajústelas convenientemente.

LOADING THE FILM / COLOCACIÓN DE LA PELÍCULA
CHECKING THE BATTERY / COMPROBACIÓN DE LA PILA
You can check the battery life on the LCD panel.
Es posible comprobar la carga de la pila en el panel informativo LCD.
1. Normal operation
- The battery condition indicator
does not appear.
2. The indicator appears half way.
- The battery life is low and you
should ensure that a replacement
battery is available.
3. The indicator blinks.
- The battery is exhausted. Load a
new battery.
1. Funcionamiento normal
- No aparece el indicador de carga
de la pila.
2. El indicador aparece por la mitad.
- La carga de la pila está baja y
debe comprobar que dispone de
una pila de repuesto.
3. El indicador parpadea.
- La pila está agotada, cargue una
pila nueva.
EsEn
En
1. Open the back cover by sliding the release knob as shown above.
2. Insert a roll of film in the chamber.
Do not force the film into position.
3. The film should lie flat.
4. Close the back cover. It will close with a “click”.
5. The film will automatically advance until the film counter reads “1”.
If a film is loaded incorrectly, the LCD panel will display an “E”
warning signal. Reload the film following the steps shown above.

Es
1. Deslice la palanca de apertura del respaldo para abrirlo tal y como
se muestra en el dibujo sobre estas líneas.
2. Inserte un rollo de película en el compartimento de la película. No
fuerce la película al introducirla.
3. La película deberá permanecer plana, tal y como aparece en los
dibujos de más abajo.
4. Cierre el respaldo. Se cerrará con un “clic”.
5. La película avanzará automáticamente hasta que aparezca “1” en
el contador.
Si la película se ha cargado incorrectamente, aparecerá la señal
de advertencia “E” en el panel informativo LCD. Vuelva a cargar
la película siguiendo los pasos mostrados anteriormente.
TAKING PICTURES / CÓMO FOTOGRAFIAR
Aim the Autofocus frame at a subject.
Press the Shutter button half way down. The lens is focused when the green lamp
turns on.
Press the Shutter button all the way down to take a picture.
The film will automatically advance after shooting and the frame counter will advance.
Exposure range (WIDE) : 1m ~ , (TELE) : 1.2m ~
The quality of pictures is not guaranteed when the distance is less than 1.0m(WIDE)
or 1.2m(TELE).
Sitúe el recuadro del autofoco sobre el sujeto.
Pulse el disparador hasta la mitad. Cuando el motivo se encuentre correctamente
enfocado, la lámpara verde se iluminará.
Presione el disparador hasta el fondo para tomar la fotografía.
La película avanzará automáticamente después de realizar la fotografía y avanzará el
contador de exposiciones.
Gama de exposición(ANGULAR) : 1m ~ , (TELE) : 1,2m ~
La calidad de las fotografias no esta garantizada cuando la distancia es inferior a 1m
(ANGULAR) o a 1,2m (TELE).
En
Es
USING THE FOCUS LOCK /
UTILIZACIÓN DEL BLOQUEO DEL ENFOQUE
If you want to focus on a subject that is not in the centre of your
picture, use the Focus Lock function described below.
1. Aim the camera with the autofocus frame superimposed over
the subject.
2. Press the shutter button half way down. (Green LED lights)
Be careful not to press the shutter button all the way down to
avoid taking an unwanted picture.
3. Keeping the shutter button depressed, recompose your picture
as desired.
Hold the camera steadily and gently press the shutter button
completely down.
The Focus Lock can be released at any time by lifting your
finger from the shutter button.
Si desea enfocar un sujeto que no se encuentra en el centro
de la foto, utilice la función de bloqueo del enfoque tal y como
se describe a continuación.
1. Apunte la cámara con el recuadro del autofoco sobre el sujeto.
2. Pulse el disparador hasta la mitad (diodo verde encendido).
Tenga cuidado de no presionar el disparador hasta el fondo
para evitar tomar una fotografía involuntariamente.
3. Mantenga el disparador pulsado hasta la mitad y vuelva a
encuadrar la imagen de la forma deseada.
Sostenga la cámara firmemente y pulse suavemente el
disparador hasta el fondo.
El bloqueo del enfoque podrá anularse en cualquier momento
con sólo levantar el dedo del disparador.
En
Es

Mid-roll rewinding
To rewind the film in the middle of a roll, press the Mid-roll
rewind button. The film will be completely rewound, ready for
processing. You will not be able to reload the film.
If you press the Power button during film rewinding, the
rewinding is interrupted until the Power button is released.
If the motor stops before the LCD shows “0”, replace the
battery. Do not open the back cover until the battery is
replaced.
Botó de rebobinado a mitad de rollo
Para rebobinar la película a la mitad, presione el botón de
rebobinado a mitad de rollo. La película se rebobinará
totalmente, lista para su revelado. No podrá volver a cargar la
película.
Si presiona el botón de conexión/desconexión durante el
rebobinado de la película, el rebobinado se interrumpirá hasta
que deje de pulsarlo.
Si el motor se detiene antes de que aparezca “0” en el panel
informativo LCD, cambie la pila. No abra el respaldo de la
cámara hasta haber cambiado la pila
Mid-roll rewind button
REWINDING THE FILM /
CÓMO REBOBINAR LA PELÍCULA
En
Es

DATE IMPRINTING (Q.D.MODEL ONLY) /
IMPRESIÓN DE LA FECHA (SÓLO MODELO Q.D.)
Press the MODE button in the back cover to select the desired format.
Presione el botón MODE (MODOS) situado en el respaldo para seleccionar el formato deseado.
En
Es
<No imprinting/Sin impresión>
<Month-Day-Year / Mes-Día-Año>
<Day-Month-Year/ Día-Mes-Año>
<Year-Month-Day/ Año-Mes-Día>
<Day-Hour-Minute / Día-Hora-Minuto>
1. Changing Date format / Cómo cambiar el formato de la fecha
Select the date mode by pressing the MODE button.
Press the SELECT button to access a day, month or year.
Adjust the date or time by pressing the SET button. (The date will run
through quickly if you press the SET button continuously.)
This camera will set the date automatically until 2049.
A year mark will be indicated by the last 2 digits on the Date Record
Window, which will be printed on the picture.
The 2049 date is subject to change without prior notice.
Seleccione el modo de la fecha presionando el botón MODE.
Presione el botón SELECT (Selección) para acceder a un día, mes o año.
Ajuste la fecha o la hora presionando el botón SET (Ajuste). Las fechas
correrán rápidamente si mantiene pulsado el botón SET ininterrum-
pidamente.
Esta cámara ajustará automáticamente la fecha hasta el año 2049.
El año aparecerá indicado por las dos últimas cifras en el panel informativo
LCD, las cuales se imprimirán en la fotogtafía.
La fecha 2049 podría cambiar sin previo aviso.
En
Es
2. Setting the Date / Cómo ajustar la fecha

USING THE FLASH MODE
/ UTILIZACIÓN DE LOS MODOS DEL FLASH
<Auto Red-eye reduction>
<Reducción de ojos rojos
automática>
<Auto flash>
<Flash automático>
<Fill-in flash>
<Flash de relleno
reducción ojos rojos>
<Flash off>
<Flash
desconectado>
You can select the flash mode by pressing the FLASH button.
The Flash Mode Order is subject to change without prior
notice.
Podrá seleccionar el modo del flash que desee presionando el
botón FLASH.
La función del modo Flash puede variar sin previo aviso.
En
Es
In case of the "Auto Flash" function, the camera will retain the
mode even though the camera is turned off. When you turn on
the camera, check the LCD panel. (but)When you change the
battery, the mode will be set to auto red-eye reduction.
En caso de utilizar la función de Flash automático, la cámara
mantendrá dicho modo incluso al desconectarla. Cuando
vuelva a conectar la cámara, compruebe el panel informativo
LCD. (pero) cuando se cambia la batería, se volverá a la
función reducción efecto ojos rojos automático.
En
Es

AUTO RED-EYE REDUCTION /
REDUCCIÓN DE OJOS ROJOS AUTOMÁTICA
In low light conditions, the flash will automatically fire to obtain
a suitable exposure.
You can decrease the red-eye phenomenon automatically
when taking a portrait picture in low light.
En condiciones de escasa luminosidad, se disparará el flash
automáticamente para obtener una correcta exposición.
Podrá reducir el fenómeno de los ojos rojos automáticamente
cuando realice retratos en escasa luminosidad.
En
Es
Select the Auto flash mode by pressing the FLASH button 1 time.
Auto flash mode activates the flash by measuring the
brightness of the object.
Flash will not engage when the shooting object is too bright.
Seleccionar AUTO mode tocando el botón del FLASH 1 vez.
La Función Flash Automático activa el flash midiendo la
luminosidad del objeto.
El flash no se disparará cuando el objeto a fotografiar sea
demasiado luminoso.
En
Es
AUTO FLASH / FLASH AUTOMÁTICO

FILL-IN FLASH / FLASH DE RELLENO
Select this mode by pressing the FLASH button 2 times.
When the main subject is in shadow and the surrounding light
conditions are too strong for the auto-flash to engage, the fill-in
flash allows you to expose the subject correctly.
When using this mode, the flash fires regardless of the
brightness of the subject and background.
Seleccione este modo pulsando 2 veces el botón FLASH.
Cuando el sujeto principal se encuentre en sombra y la
luminosidad circundante sea demasiado fuerte para que
funcione el flash automático, el flash de relleno le permitirá
exponer el sujeto correctamente.
Cuando utilice este modo, el flash se disparará sin tener en
cuenta la luminosidad del sujeto y del fondo de la imagen.
En
Es
FLASH OFF / FLASH DESCONECTADO
Select this mode by pressing the FLASH button three times.
Use this mode when you want to take pictures without flash.
When using the Flash Off function, you may need to use a
tripod to avoid camera shake.
Seleccionar este mode tocando el botón del FLASH tres
veces.
Utilice este modo cuando desee realizar fotografías sin flash.
Cuando utilice la función Flash desconectado, es posible que
deba usar un trípode para evitar la trepidación de la cámara.
En
Es

USING THE SHOOTING MODE
UTILIZACIÓN DEL MODO DE EXPOSICIÓN
You can select the shooting mode by pressing the MODE
button.
Self-shooting and BULB-shooting will return to the default
mode after one shot.
Podrá seleccionar el modo del exposición que desee
presionando el botón MODE.
Autodisparador, la posición B volverá al modo por defecto tras
tirar una fotografía.
En
Es
<2 sec. Delayed shutter release>
<Autodisparador con dos segundos de retardo>
<Self-shooting>
<Autodisparador> <Bulb-shooting>
<Posición B>

SELF-SHOOTING / AUTODISPARADOR
You can take a picture of yourself by using this mode.
When pressing the shutter button, the self-timer lamp blinks
slowly for 7 seconds. Then the lamp blinks rapidly for 3
seconds and the picture is taken.
Con este modo podrá tomar una fotografía de sí mismo.
Cuando se aprieta el botón del obturador, la lámpara de
autocronometrado destella lentamente durante 7 segundos.
Luego, la lámpara destella rápidamente durante tres
segundos.
En
Es
BULB SHOOTING(B SHUTTER)
POSICIÓN B (EXPOSICIÓN LARGA)
Use this mode to shoot subjects that require an extended
shutter speed such as fireworks and night scenes.
The shutter remains open as long as the shutter button is
depressed. The time selected is shown on the LCD panel and
the maximum time is 60 seconds.
Use this mode only in low light.
To avoid camera shake, use a tripod.
Utilice este modo para fotografiar motivos que requieran
exposiciones largas, tales como fuegos artificiales o escenas
nocturnas.
El obturador permanecerá abierto mientras se mantenga
pulsado el disparador. El tiempo seleccionado se muestra en
el panel informativo LCD y podrá utilizarlo un máximo de 60
segundos.
Utilice este modo sólo en condiciones de escasa luminosidad.
Para evitar la trepidación de la cámara, utilice un trípode.
En
Es

2 SEC. DELAYED SHUTTER RELEASE
AUTODISPARADOR CON 2 SEGUNDOS DE RETARDO
Use this mode to avoid camera shake caused by camera
movement during hand held shots.
In this mode, a picture is taken 2 seconds after releasing the
shutter button.
Utilice este modo para evitar la trepidación de la cámara
producida al presionar el disparador.
En este modo, la fotografía se toma 2 segundos después de
haber pulsado el disparador.
En
Es

CARE AND STORAGE / CUIDADOS Y ALMACENAMIENTO
Do not try to disassemble the camera yourself.
Your camera contains high voltage circuitry and may cause
injury if interfered with.
The temperature range in which the camera operates is
between 50 and -10 (122 ~14 ).
The camera performance may be impaired when used in very
cold weather. If you plan to take pictures when the
temperature is below 7 (45 ), take care to keep your
camera and battery warm between shots. If your camera
becomes very cold, allow it to return to room temperature
slowly by keeping it in its case. Condensation can spoil
pictures and in extreme conditions can damage the electronic
components inside the camera.
If you have trouble with your camera, please return it to your
retailer for advice.
If your camera needs cleaning, wipe it with a soft, lintless cloth.
The lens should be cleaned only with special lens cleaning
tissue and fluid.(Consult your camera retailer.)
Do not allow your camera to come into contact with sand or
water.
Keep your camera in a dry, cool place that is free from high
humidity and dust.
Never leave your camera in hot places such as a parked car or
direct sunlight. Avoid sudden shocks or vibration. If you drop your
camera, it is a good idea to have it checked before using it.
En
Warning
!

Si la cámara necesita limpiarse, hágalo con un paño suave.
El objetivo sólo puede limpiarse con un papel limpiaobjetivos
empapado con líquido limpiaobjetivos especiales (acuda al
establecimiento donde adquirió su cámara).
No permita que la cámara entre en contacto con arena o
agua.
Guarde la cámara en un lugar seco y fresco, libre de
humedades y polvo.
Nunca la deje en lugares donde se alcancen temperaturas
muy elevadas, como puede ser un coche aparcado, ni nunca
la deje bajo la acción directa del sol.
Evite las vibraciones o golpes bruscos. Si la cámara cayera al
suelo, es recomendable que la lleve a revisar antes de volver
a usarla.
No intente desmontar la cámara usted mismo. La cámara
contiene circuitos de alto voltaje y puede causar lesiones si se
la manipula.
La escala de temperaturas indicada para que la cámara
funcione está entre 50 y -10 (122 ~14 ).
La utilización de la cámara a bajas temperaturas disminuye el
rendimiento de la misma. Si planea fotografiar a una
temperatura inferior a 7 (45 ), trate de mantener calientes
tanto la cámara como la pila.
Si la cámara se enfría demasiado, llévela a temperatura
ambiente lentamente guardándola en la funda. El vapor de
condensación puede estropear las fotografías y en
condiciones extremas puede dañar los componentes
electrónicos del interior de la cámara.
Si tuviese algún problema con la cámara, por favor llévela al
establecimiento donde la adquirió para que le asesoren sobre
ello.
Es
Atención
!

35mm fully automatic lens shutter camera.
35mm DX-coded film, 24x36mm.
Automatic setting with DX-coded film, ISO
50~1600.
Automatic advance to the first frame when the
back cover is closed.
Automatic advance.
Automatic rewinding, Mid-roll rewinding.
Samsung SHD lens, F6.3 ~ 12.3 / 38 ~ 80mm
(4 elements 4 groups).
Programmed AE electronic focusing
Shutter speed : 1/3 ~ 1/250 sec.
Bulb mode (B shutter) : 60 ~ 1 sec.
Programmed auto exposure
AE coupling range (ISO 200 film)
WIDE (38mm) : EV 7.2 ~ 16
TELE (80mm) : EV 8.9 ~ 16
Albada type bright frame viewfinder
Field of view : over 80%
Magnification : 0.32 ~ 0.64
Close range picture area mark
SPECIFICATIONS / ESPECIFICACIONES
TYPE
FILM Format
FILM Winding
FILM Rewinding
SHUTTER
LENS
EXPOSURE
VIEWFINDER
FILM Loading
FILM Speed
En
Other manuals for FINO 800
1
This manual suits for next models
1
Table of contents
Other Samsung Film Camera manuals

Samsung
Samsung FINO 120 SUPER User manual

Samsung
Samsung FINO 105 SUPER User manual

Samsung
Samsung VEGA 290W User manual

Samsung
Samsung FINO 15SE User manual

Samsung
Samsung VEGA 140S User manual

Samsung
Samsung FINO 800 User manual

Samsung
Samsung CY-STC1100 User manual

Samsung
Samsung PRONTA 1200 User manual

Samsung
Samsung FINO 80 SUPER User manual

Samsung
Samsung FINO 140 SUPER User manual