SANUPS D11A User manual

DC Input Small Capacity AC Power Supply
1kV
A
100 V Model
Instruction Manual
D11A
M0008922
Type R

Introduction
Thank you for choosing the SANUPS (D11A Type R).
SAVE THESE INSTRUCTIONS
This manual contains important instructions that should be followed during operation, installation, and
maintenance of the DC-AC Inverter to protect the safety of the service technician* and the customers. To use
the DC-AC Inverter correctly and safely, read this manual before using the DC-AC Inverter. After reading,
please keep it handy for convenient reference.
This DC-AC Inverter is intended for installation in a temperature-controlled indoor environment free of
conductive contaminants.
・Operating temperature: 5 to 40°C (41 to 104°F)
Table of Contents
§1. Safety Precautions .........................................................................................................1
§2. For Proper Operation ..................................................................................................... 4
§2.1 Input Power Supply ............................................................................................... 4
§2.2 Installation Precautions ......................................................................................... 5
§2.3 Usage Precautions................................................................................................ 6
§2.4 Troubleshooting..................................................................................................... 6
§2.5 Rack Mounting Precautions .................................................................................. 6
§3. Checking the Contents of the Package .......................................................................... 7
§4. External Dimensions and Part Names............................................................................ 9
§4.1 Unit........................................................................................................................ 9
§4.2 Parallel Operation Cabinet .................................................................................. 11
§4.3 Transfer Signal Terminal Block............................................................................ 13
§4.4 Alarm Test/Operation Selector............................................................................. 14
§5. Installing a Cabinet....................................................................................................... 15
§5.1 Checking the Installation Environment ................................................................ 15
§5.2 Checking the Input Power Supply ....................................................................... 15
§5.3 Checking the Installation Space .......................................................................... 15
§5.4 Transportation and Installation ............................................................................ 16
§6. Cabinet Wiring.............................................................................................................. 17
§6.1 Wiring the Input and Output Terminal Block ........................................................ 17
§6.2 Wiring the Transfer Signal Terminal Block........................................................... 20
§7. Procedure Until DC-AC Inverter Operation .................................................................. 21
§8. Preparations Before Installing Units ............................................................................. 22
§8.1 Checking Units .................................................................................................... 22
§8.2 Affixing Unit Number Labels ................................................................................ 22
§8.3 Checking the Dip Switch ..................................................................................... 23
§9. Installing Units .............................................................................................................. 24
§10. Preparations Before Operation................................................................................... 26
§10.1 Setting the Overload Alarm Level...................................................................... 26
This term is used to indicate service technicians from SANYO DENKI or entrusted from SANYO
DENKI with knowledge of this DC-AC Inverter.
Maintenance work must not be performed by other than a qualified service technician.
* Service technician

Models
This instruction manual is intended to be used for the following models. Check the model name of the DC-AC
Inverter before use.
§11. Operating Procedures ................................................................................................ 27
§11.1 D11A102B001US Operating Procedures .......................................................... 27
§11.2 D11A102B011US Operating Procedures........................................................... 28
§12. Operation and Protective Functions ........................................................................... 29
§12.1 D11A102B001US Basic Operation.................................................................... 29
§12.2 D11A102B011US Basic Operation .................................................................... 31
§12.3 D11A102B011US Special Function Operation .................................................. 33
§12.4 Protective Function Table.................................................................................. 34
§13. Inspection and Maintenance ...................................................................................... 36
§13.1 Routine Checks by Customer............................................................................ 36
§13.2 Maintenance by Service Technician .................................................................. 37
§13.2.1 Procedure to Remove the Unit .................................................................. 38
§13.2.2 Procedure to Install the Unit ...................................................................... 39
§13.2.3 Procedure to Install an Additional Unit....................................................... 40
§13.2.4 Procedure to Replace the Display Unit...................................................... 41
§13.2.5 Resetting the Bypass Breaker ................................................................... 43
§13.2.6 Procedure to Remove the Cabinet ............................................................ 44
§14. Wiring and Settings for Parallel and Standby Operation............................................. 46
§15. LCD Display and Operation........................................................................................ 47
§15.1 LCD Part Names ............................................................................................... 47
§15.2 Display Content List .......................................................................................... 47
§15.3 Operating the LCD ............................................................................................ 48
§16. Specifications ............................................................................................................. 49
§17. Warranty..................................................................................................................... 50
この装置は,クラスA情報技術装置です。この装置を家庭環境で使用すると電波妨害を引き起こすこと
があります。この場合には使用者が適切な対策を講ずるよう要求されることがあります。
VCCI-A
Translation:
This is a Class A product based on the standard of the VCCI Council. If this equipment is used in a
domestic environment, radio interference may occur, in which case, the user may be required to take
corrective actions.
VCCI-A
Inverter Unit Model Name Parallel Operation Cabinet Model Name Number of Installable
Units Bypass Circuit
PD-D11AB03US 3
PD-D11AB05US 5
D11A102B001US
PD-D11AB06US 6
Unavailable
PD-D11AB13US 3
PD-D11AB15US 5
D11A102B011US
PD-D11AB16US 6
Available

Safety Precautions
1
§
§1
1.
.
S
Sa
af
fe
et
ty
y
P
Pr
re
ec
ca
au
ut
ti
io
on
ns
s
PRECAUTIONS
(IMPORTANT SAFETY INSTRUCTIONS)
This Manual contains important instructions for operating and maintaining the DC-AC Inverter to protect the safety
of the service technician and the customers.
Before installing, operating, performing maintenance or inspecting the DC-AC Inverter, be sure to read this manual
and accompanying documents carefully to obtain a clear understanding of the information related to its operation,
safety and important precautions.
This manual described two warning levels, WARNING and CAUTION, as described below.
Label Explanation
WARNING
!
Denotes immediate hazards which WILL probably cause severe bodily injury or
death, as a result incorrect operation.
CAUTION
!
Denotes hazards which COULD cause bodily injury and product or property
damage, as a result incorrect operation.
Additionally, even those hazards denoted by △
!CAUTION could lead to a serious accident, so the instructions
should be strictly followed.
The following labels indicate particularly important instructions which must be carefully followed. The graphic
symbols indicate prohibited and mandatory actions.
Symbol Explanation
Indicates actions that must not be allowed to occur (prohibited actions).
Indicates actions that must be taken (mandatory actions).
!: This example signifies the mandatory actions.
: This example signifies that the equipment must be securely grounded.
Indicates CAUTION (including WARNING).
Specific information appears within the graphic symbol or in an explanation nearby.
!: This example signifies the general caution.
: This example signifies that there is danger of electric shock.
: This example signifies that there is danger of a fire or smoke generation.

Safety Precautions
2
1. Relocation and Transportation Precautions
CAUTION
Be careful to avoid falling or dropping the DC-AC Inverter during relocation or transportation, as bodily injury could
result.
Be careful to avoid back strain when handling the DC-AC Inverter.
2. Installation Precautions
CAUTION
The DC-AC Inverter should be installed only by a service technician. Furthermore, it should be
installed in accordance with the instructions in the instruction manual.
Improper installation can result in electric shock, bodily injury, and/ or fire.
Never operate or store the DC-AC Inverter in the following environmental conditions.
Doing so may cause the DC-AC Inverter to malfunction, sustain damage or deteriorate,
which could result in a fire.
a. In ambient environmental conditions other than those specified in the product brochure and instruction manual
(temperature 5 to 40C (41 to 104゚F), relative humidity 5 to 85%), such as in extremely high or low
temperature and high humidity.
b. Where the DC-AC Inverter is exposed to direct sunlight.
c. Where the DC-AC Inverter is directly exposed to the heat from a heat source, such as a stove.
d. Where the DC-AC Inverter may be subject to vibration or physical shock.
e. Near a device that may emit sparks.
f. In the presence of dust, salt or corrosive or flammable gas.
g. Outdoors
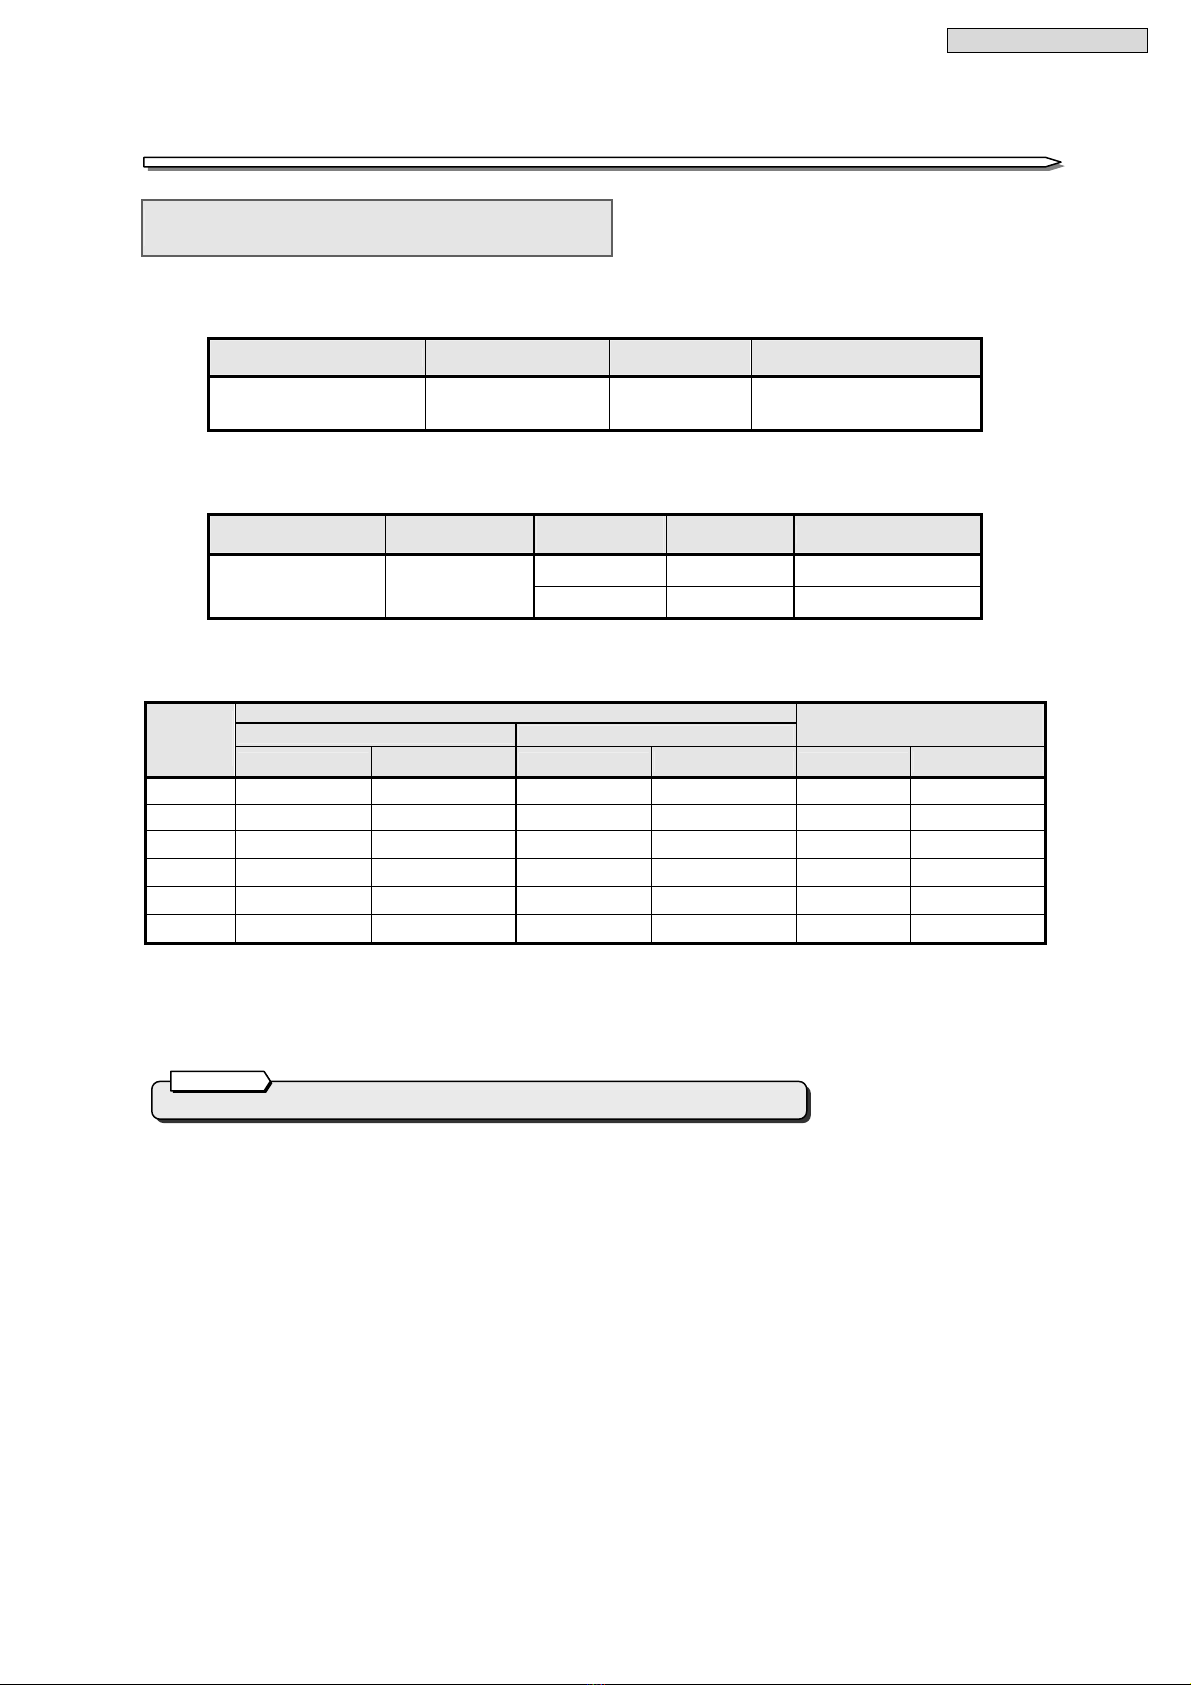
This DC-AC Inverter is for rack-mounted use only. Please consult our sale office or your distributor
when the device needs to be removed from the rack.
Be careful not to block the air intake and exhaust vents of the DC-AC Inverter.
Mount the DC-AC Inverter in a rack that can be well ventilated, and keep the front and back of the DC-AC
Inverter at least 20 cm (7.9 inches) away from the wall. Be careful not to block the air intake and exhaust
vents of the rack and DC-AC Inverter. If the air intake or exhaust vent is blocked, the internal temperature
of the DC-AC Inverter will rise, which may cause a fire. For maintenance, the DC-AC Inverter requires at
least 1 m (39.4 inches) of space at the front, and at least 50 cm (20 inches) at the back.
The space around the DC-AC Inverter must be ventilated.
In accordance with the instructions in the manual, install the DC-AC Inverter on a stable surface capable
of bearing the weight (approximately 8 kg (17.6 lbs) for one unit, approximately 10 kg (22.1 lbs) for a
parallel operation cabinet for 3 units, approximately 12 kg (26.5 lbs) for a parallel operation cabinet for 5
units, and approximately 13 kg (28.7 lbs) for a parallel operation cabinet for 6 units).
If the DC-AC Inverter is installed incorrectly, it may fall or move inadvertently, resulting in bodily injury. Be
careful to avoid back strain when handling the DC-AC Inverter.
3. Wiring Precautions
CAUTION
Wiring should be performed only by technically qualified personnel. Furthermore, it should be
performed in accordance with the instructions in the manual.
Incorrect wiring can result in electric shock and/or fire.
A readily accessible disconnect device shall be incorporated external to the equipment.
Protection in primary circuits against over currents, short circuits and earth faults is not provided
inside this DC-AC Inverter. Protection in primary circuit against over currents short circuits and
earth faults shall be provided as part of the building installation.
Connect the grounding cable securely in the manner specified.
This DC-AC Inverter requires class D grounding work.
Failure to connect the grounding cable may result in electric shock.
The grounding cables of all load devices connected to the output of the DC-AC Inverter must be
securely connected to the grounding terminal. Failure to connect the grounding cables correctly may
result in electric shock.
Install the disconnect device whose contact gap is 2 mm (0.08 inches) or more in DC Input.
Install the disconnect device whose contact gap is 3 mm (0.12 inches) or more in AC Input.
(In the case of the PD-D11AB13US, PD-D11AB15US and PD-D11AB16US model.)
!
!
!
!
!
!

Safety Precautions
3
4. Operating Precautions
WARNING
Immediately shut the DC-AC Inverter off if it malfunctions, or if an unusual odor or noise is
observed. Failure to do so may result in a fire.
Do not open the cover of the DC-AC Inverter. There is danger of electric shock and equipment damage.
PROHIBITED
Never use the DC-AC Inverter for the following types of loads:
a. Medical instruments used for life support.
b. Control units for trains or elevators, failure of which could cause bodily injury.
c. Computer systems upon which social or public infrastructure depends.
d. Devices which serve applications related to the above.
Contact your sales representative if you need to use the DC-AC Inverter in an application like the above. Special
equipment, such as redundant devices or an emergency generator must be incorporated when operating,
maintaining and controlling systems in which a DC-AC Inverter is used with loads affecting life-support or public
infrastructure-dependent applications.
This DC-AC Inverter must be installed, operated and maintained by technically qualified personnel with expertise in
an industrial environment.
Do not smoke or use an open flame near the DC-AC Inverter, as it could cause the DC-AC Inverter to explode or
rupture, resulting in injury or fire.
Do not place containers of liquid, such as a flower vase, on the DC-AC Inverter. If the container was
to spill, the liquid could cause a short circuit, resulting in sparks or fire inside the DC-AC Inverter.
Do not sit, step or lean on the DC-AC Inverter, as bodily injury could result if the DC-AC Inverter was to fall.
Do not operate the switches with wet hands. There is danger of electric shock.
All repairs and modifications to the DC-AC Inverter are prohibited. The DC-AC Inverter contains high
voltage and no user serviceable parts. Opening the cover, parts exchange, and repair can result in electric
shock and damage to the DC-AC Inverter when performed by anyone other than qualified service personnel. All
such repairs and modifications will void the warranty.
CAUTION
Before starting the DC-AC Inverter, check the load-side safety, and operate the DC-AC Inverter in
accordance with the instructions in the manual. If power is supplied incorrectly, an electric shock or bodily
injury could result.
Avoid inserting sharp objects or fingers into the fan. Doing so may result in bodily injury.
Do not touch the DC-AC Inverter, including the cables, if you hear thunder nearby. There is danger of
electric shock from a lightning strike.
When disposing of this DC-AC Inverter, dispose of it as industrial waste.
5. Maintenance and Inspection Precautions
CAUTION
Maintenance and repair of the inside of the DC-AC Inverter should be performed only by technically qualified
personnel. Electric shock, bodily injury and burns, fuming, or fire could otherwise result.
Do not insert a metal object or fingers into the input and output terminal block of the DC-AC Inverter. There is danger
of electric shock.
Contact your supplier or Sanyo Denki to have the DC-AC Inverter repaired or to replace defective parts.
Opening the cover carelessly can result in an electric shock or burn.
!
!
!
!

Operating Precautions
4
§
§2
2.
.
F
Fo
or
r
P
Pr
ro
op
pe
er
r
O
Op
pe
er
ra
at
ti
io
on
n
§
§2
2.
.1
1
I
In
np
pu
ut
t
P
Po
ow
we
er
r
S
Su
up
pp
pl
ly
y
(1) DC Input Power Supply
The following table shows the DC input power supply for this DC-AC Inverter. Use the DC-AC Inverter
according to its rated voltage.
Cabinet Model Name Unit Model Name Rated Voltage Voltage Range
PD-D11AB*3US
PD-D11AB*5US
PD-D11AB*6US
D11A102B001US
D11A102B011US -48 V -40.5 V to -57 V
(2) AC Input Power Supply
The following table shows the AC input power supply for this DC-AC Inverter. Adjust the output voltage of the
DC-AC Inverter to the AC input power supply in the place where you use the DC-AC Inverter.
Cabinet Model Name Unit Model Name Output Voltage
Setting AC Input Voltage AC Input Frequency
100 V 100 V (±15%) 50 or 60 Hz (±5%)
PD-D11AB13US
PD-D11AB15US
PD-D11AB16US
D11A102B011US
120 V 120 V (±15%) 50 or 60 Hz (±5%)
(3) Input Power Supply Capacity
The following table shows the input currency for this DC-AC Inverter. The input power supply capacity must
be larger than the input currency shown in the table below.
Max. Input Current
Increased Capacity Operation (N units) Redundant Operation (N + 1 units)
Recommended capacity of
Breaker (UL or IEC standard)
Number of
Connected
Units DC Input (A) AC Input (A) ※1DC Input (A) AC Input (A) ※1DC Input (A) AC Input (A) ※1
1 30.0 12.5 --40 20
2 62.3 25.0 31.7 12.5 80 40
3 93.5 37.5 63.4 25.0 125 50
4 125.6 50.0 94.6 37.5 175 70
5 155.8 62.5 126.7 50.0 200 80
6 187.0 75.0 156.9 62.5 250 100
If you schedule the number of inverter units to be increased later, install the breaker (UL489 (For use in
North America) or IEC 60947-2 (For Use Overseas) approval) of the capacity in which the unmber of
inverter units is increased.
Protect branch circuit by using the beacker (UL489 (For use in North America) or IEC 60947-2 (For Use
Overseas) approval) of the specified capacity on distribution panels.To meet the requirement of UL
standards, always protect both polarities.
Items indicated with “※1” apply only to the D11A102B011US model. They do not apply to the D11A102B001US model.
※1 Note

Operating Precautions
5
(1) Installation must be in accordance with National Electric Code, Articles 110-16, 110-17 and 110-18.
(2) This DC-AC Inverter is designed to permit the connection of the earthed conductor of the DC supply
circuit to the earthing conductor at the equipment only use by restricted access locations. ※2
※2 RESTRICTED ACCESS LOCATION shows a location for equipment where both of the following
paragraphs apply.
・Access can only be gained by service technician or by users who have been instructed about the
resons for the restrictions applied to the location and about any precautions that shall be taken.
・Access is through the use of a tool or lock and key, or other means of security, and is controlled by the
authority responsible for the location.
(3) When you connect the DC input cables (to the cabinet terminal block: + (0 V) and - (-48 V)), check the
polarity (+/-) and make sure you connect the cables to the correct terminals.
(4) When the DC-AC Inverter receives DC input power, an inrush current of approximately 28 A (approximately
100 msec) flows for each unit and the DC-AC Inverter automatically enters the standby state.
When you perform a test using a fuse for the DC input to check the equipment, be sure to use a fuse
capable of withstanding this inrush current.
(5) High leakage current. Connect the grounding line before connecting the power supply.
When you install a leakage-current breaker for the power receiving circuit of the AC input terminal, be sure
to use a breaker capable of protecting both the poles. Also, consider the leakage current. The maximum
leakage current of the DC-AC Inverter is 3.5 mA per unit.※1
(6) Keep the DC-AC Inverter at least 1 m (approximately 40 inches) away from CRT displays.
Other devices which may be sensitive to magnetic flux should be kept away from the DC-AC Inverter.
(7) The DC-AC Inverter employs a fan for forced-air cooling. Provide the clearances specified in §5.3 "Checking
the Installation Space” at the front and back of the DC-AC Inverter to permit air to flow freely at the air intake
and exhaust vents.
(8) When the AC input power is single-wire grounded, always connect the ground phase to the S terminal side
of the AC input terminal block.※1
(9) Connect the grounding cables of load devices to the E terminal (earth terminal) of the DC-AC Inverter.
If you must make a single-wire grounded connection on the input side of a load device, always connect the
ground phase to the V terminal side of the AC output terminal block to prevent a power supply short circuit
caused by grounding.
§
§2
2.
.2
2
I
In
ns
st
ta
al
ll
la
at
ti
io
on
n
P
Pr
re
ec
ca
au
ut
ti
io
on
ns
s
Items indicated with “※1” apply only to the D11A102B011US model. They do not apply to the D11A102B001US model.
※1 Note

Operating Precautions
6
§
§2
2.
.3
3
U
Us
sa
ag
ge
e
P
Pr
re
ec
ca
au
ut
ti
io
on
ns
s
(1) Never short-circuit the output terminals or connect a load with a short-circuit current.
Doing so will cause the protective functions to activate or the breaker to trip, preventing output.
(2) Unsuitable load devices
Do not connect laser printers, plain paper fax machines, copy machines, overhead projectors, vacuum
cleaners, construction drills, or dryers as load devices.
Such devices typically include heating elements that draw high current such as the starting current, so the
DC-AC Inverter may be overloaded.
As a result, the output voltage becomes unstable, which may adversely affect other connected devices.
(3) Insulation testing
Before testing the indoor wiring insulation, shut down the DC-AC Inverter and disconnect the input and
output cables.
Conducting an insulation test with the DC-AC Inverter connected may damage electronic components such
as the built-in arrester.
§
§2
2.
.4
4
T
Tr
ro
ou
ub
bl
le
es
sh
ho
oo
ot
ti
in
ng
g
If any of the failures described below occurs, contact your supplier or Sanyo Denki.
①When the INVERTER LED (blue) on the front panel of the unit does not turn on ※1.
②When the ALARM LED (red) on the front panel of the unit turns on.
When other events that are regarded as failures (unusual odor, noise, etc.) occur.
③For details, see § 12.1 (3) or 12.2 (4) “When one unit fails.”
§
§2
2.
.5
5
R
Ra
ac
ck
k
M
Mo
ou
un
nt
ti
in
ng
g
P
Pr
re
ec
ca
au
ut
ti
io
on
ns
s
When you mount the cabinet and units on a 19-inch rack, you need to obtain support rails capable of bearing
the weight of the units and parallel operation cabinet. The following table shows the weight of the cabinet and
units.
Rack mounting support rails are not supplied with the DC-AC Inverter, as the dimensions of the support rails
vary depending on the rack.
Contact your rack manufacturer for further information.
The following table shows the weight of the units and parallel operation cabinet.
Check the weight of your DC-AC Inverter configuration.
Parallel Operation Cabinet
DC-AC Inverter Unit
(Weight per unit) For 3 units For 5 units For 6 units Total Weight
Single article Approx. 8 kg (17.6lbs)
Approx.
10 kg
(22.1 lbs)
Approx.
12 kg
(26.5 lbs)
Approx.
13 kg
(28.7 lbs)
-
When 3 units are mounted in a
parallel operation cabinet for 3
units
Approx. 24 kg (52.9 lbs)
(8 kg (17.6 lbs) x 3 units)
Approx.
10 kg
(22.1 lbs)
- - Approx.
34 kg
(75 lbs)
When 5 units are mounted in a
parallel operation cabinet for 5
units
Approx. 40 kg (88.2 lbs)
(8 kg (17.6 lbs) x 5 units) - Approx.
12 kg
(26.5 lbs)
- Approx.
52 kg
(114.7 lbs)
When 6 units are mounted in a
parallel operation cabinet for 6
units
Approx. 48 kg (105.8 lbs)
(8 kg (17.6 lbs) x 6 units) - - Approx.
13 kg
(28.7 lbs)
Approx.
61 kg
(134.5 lbs)
Weight of units and parallel operation cabinet
If DC power is not received, or
the DC input voltage is
insufficient, the LED does not
turn on.
※1 Note

Operating Precautions
7
When you transfer or sell the DC-AC Inverter to a third party, transfer or sell all the accessories supplied with the DC-AC
Inverter.
§
§3
3.
.
C
Ch
he
ec
ck
ki
in
ng
g
t
th
he
e
C
Co
on
nt
te
en
nt
ts
s
o
of
f
t
th
he
e
P
Pa
ac
ck
ka
ag
ge
e
After you open the package, check to make sure that it contains all of the following items.
Does it contain the DC-AC Inverter and all accessories?
Is the exterior of the DC-AC Inverter damaged or unusual?
Check and place a mark in □.
If any item is missing or unusual, contact your supplier or Sanyo Denki.
(1) Parallel operation cabinet
□Parallel operation cabinet 1
Model name: PD-D11AB*3US (for 3 units)
Model name: PD-D11AB*5US (for 5 units)
Model name: PD-D11AB*6US (for 6 units)
□Instruction manual (this manual) 1
□Unit number label sheet 1
□Warrantycard 1
(2) Unit (the following items are included in each unit)
□Unit (D11A102B001US or D11A102B011US) 1
□Instruction manual (this manual) 1
□Warrantycard 1
Note on transferring or selling the DC- AC Inverter

Part Names
8
Blank page

Operating Precautions
9
§
§4
4.
.
E
Ex
xt
te
er
rn
na
al
l
D
Di
im
me
en
ns
si
io
on
ns
s
a
an
nd
d
P
Pa
ar
rt
t
N
Na
am
me
es
s
§
§4
4.
.1
1
U
Un
ni
it
t
(21)
[0.83]
[1.57] [1.57]
(40)(40)
[13.41]340.6
(15)
[0.59]
480±3
465±3
43.5
[1.71]
[18.90±0.12]
[18.31±0.12]
Unit: mm [inch]
Weight: Approx. 8 kg (17.6 lbs)
⑧
⑦
⑤
③
①
①
⑨
②
⑥
③④
D11A102B011US
②
D11A102B001US
③
③
③
⑦
⑥
⑩
⑩
Left side
⑤
⑩
⑩
Back
Front
Front
Back
Left side
④
③

Part Names
10
※1:This function is available only for the D11A102B011US model. It is not available for the D11A102B001US model.
※2:If you want to operate the DC-AC Inverter in parallel and standby mode, set the Master/Slave setting to ON. To operate the DC-AC Inverter in
parallel and standby mode, you need to change the power line for the cabinet and restart the power. In cases other than this, leave the
setting set to OFF and never change the setting.
For details, see
§
14 “Wirin
g
and Settin
g
s for Parallel and Standb
y
O
p
eration.”
No. Name Label Function
① Start/Stop Switch POWER
ON/OFF Switch for starting and stopping the unit (with a switch cover)
INVERTER Lit (blue) during output by inverter power supply
BYPASS Lit (yellow) during output by bypass power supply ※1
50 Hz 60 Hz Output frequency lit (green)
UNIT-OC Lit (red) while the unit is overloaded
② LED Display
ALARM Lit (red) when the unit fails
③ Air Intake Vent - For cooling. Secure enough space for ventilation.
④ Screws for Fixing to Cabinet - For fixing to a cabinet,
For pulling the unit out of a cabinet
⑤ Connector for Connecting to
Cabinet - Plug-in connector for connecting to a cabinet
1
Setting of output frequency
ON: 50 Hz
OFF: 60 Hz★
2
Setting of output voltage
ON: 120 V
OFF: 100 V★
⑥
Unit Setting DIP Switch
3
Setting of master/slave ※2
ON: Slave
OFF: Master★
Note: Do not change this switch.
The factory default
setting is the value
indicated by the★
mark.
⑦ Cooling Fan - For cooling the inside of the unit
⑧ Bypass Breaker BYPASS OC 20A Bypass circuit protection ※1
⑨ Mode Select Switch MODE SELECT
INV/BYPASS
For switching between the inverter power supply and bypass
power supply ※1
⑩ Guide Bar - For preventing the incorrect insertion of the unit
Functions indicated with ※

Operating Precautions
11
§
§4
4.
.2
2
P
Pa
ar
ra
al
ll
le
el
l
O
Op
pe
er
ra
at
ti
io
on
n
C
Ca
ab
bi
in
ne
et
t
②
(34)
[1.34]
U4U3U2U1 LV0CU6U5
and
STANDBY
ALL
PARALLEL
PARALLEL
EIA standard
410.6 [16.18]
[1.34]
(34)
177.5 [6.99] dimension
⑦ Front
Unit: mm [inch]
Weight: Approx. 10 kg (22.1 lbs)
Unit; mm [inch]
Weight: Approx. 12kg (26.5 lbs)
⑩ ⑨
①
⑤
⑭
⑬
⑫
Left side
⑥
⑮
⑧
Parallel operation cabinet for 5 units: PD-D11AB*5US
Parallel operation cabinet for 3 units: PD-D11AB*3US
(Inside cover)
・EIA standard compliant.
・The figure shows the PD-D11AB15US model.
・EIA standard compliant
・The figure shows the PD-D11AB13US model.
⑰
Back
⑯
⑪
⑦ Front
⑩ ⑨
⑤
⑭
⑬
⑫
Left side
⑥
⑧
(Inside cover)
⑰
Back
⑯
⑪
⑮
④
④
③
② ③①
②

Part Names
12
This function is only available for the PD-D11AB1*US model. It is not available for the PD-D11AB0*US model.
No. Name Label Function
①DC Input Terminal Block +(0V), -(-48V) DC input connection: Two + (0V) positive and two - (-48V) negative
terminals
②AC Output Terminal Block U (L), V (N), G Load device connection: 1 terminal each
③ AC Input Terminal Block ※1 R (L), S (N), G AC input connection: 1 terminal each
④ Ground Terminal G Ground cable connection
⑤ Transfer Signal Terminal
Block - For contact signals. See §4.3 “Transfer Signal Terminal Block.”
⑥ Display Unit - Displays common information on the LCD/alarm test terminal
⑦ Alarm Test Terminal ALARM TEST SIG For simulated failure and overload alarm testing
See §4.4 “Alarm Test/Operation Selector.”
⑧Operation Selector
ALL PARALLEL/
PARALLEL and
STANDBY
Redundant operation/parallel and standby operation selector
See §4.4 “Alarm Test/Operation Selector.”
⑨ LCD Display
Display Select Button
MODE SELECT
UP/DOWN/SET
Sets each unit’s status display, total output voltage and current display, and
total output current overload warning level
⑩ Overload Display (LED) OVERLOAD Lit (red) when the total output current is larger than the overload warning
level
⑪ Utility Bypass (LED) *1 BYPASS
STANDBY
Lit (green) while the AC input is synchronized with the inverter AC output of
each unit
⑫ Guide Rail - Unit guide rail
⑬ Holes for Fixing Unit - Holes for fixing unit
⑭ Holes for Mounting to Rack - Holes for mounting to a 19-inch rack (EIA Standard)
⑮ Blank Panel -
Install a blank panel in a place where the unit is not inserted.
Located in the following places at the time of shipment from the factory.
PD-D11AB*3US (for 3 units): 3rd shelf
PD-D11AB*5US (for 5 units): 3rd and 5th shelves
PD-D11AB*6US (for 6 units): 3rd and 6th shelves
⑯ Cover for Preventing
Incorrect Insertion - For preventing the incorrect insertion of D11A102B001US and
D11A102B011US units
⑰ Protective Cover - For protecting the copper bar inside the cabinet
[1.34]
(34)
※1 Note
Parallel operation cabinet for 6 units: PD-D11AB*6US
・EIA standard compliant
・The figure shows the PD-D11AB16US model.
⑦ Front
②
⑩ ⑨
③ ①
⑤
⑭
⑬
⑫
Left side
⑥
⑮
⑧
⑰
Back
⑯
⑪
Unit: mm [inch]
Weight: Approx. 13 kg (28.7 lbs)
(Inside cover)
④
To set PARALLEL and STANDBY to ON, you need to change the power line
for the cabinet and restart the power. So leave this switch set to ALL
PARALLEL and never change this setting. For details, see §14 “Wiring and
Settings for Parallel and Standby Operation.”
Note

Operating Precautions
13
§
§4
4.
.3
3
T
Tr
ra
an
ns
sf
fe
er
r
S
Si
ig
gn
na
al
l
T
Te
er
rm
mi
in
na
al
l
B
Bl
lo
oc
ck
k
No. Signal Name Label Connection Definition
① Bypass Output BYPASS OUT
When the DC-AC Inverter supplies AC output power
from the bypass power supply, BYPASS OUT and
COMMON SIGNAL GROUND “G” (COM) become
short-circuited. ※4
② Output Fail AC OUT FAIL
When the total output voltage drops, AC OUT FAIL
and Common Signal Ground “G” (COM) become
short-circuited. Normally open. ※2
③ Failure ALARM1 to 6
When any of units 1 to 6 fails, the corresponding
ALARM 1 to 6 and COMMON SIGNAL GROUND “G”
(COM) become short-circuited. Normally open.
(Only valid when the DC input is normal.) ※2
④ AC Output AC OUT
When any of units 1 to 6 operates normally and
supplies AC output power, AC OUT and COMMON
SIGNAL GROUND “G” (COM) become short-circuited.
⑤ DC Input Error DCIN-ALM
When DC input voltage is abnormal, DCIN-ALM and
COMMON SIGNAL GROUND “G” (COM) become
short-circuited. However, this signal is not sent until
the power supply in unit and cabinet starts.
Normally open.
⑥ Overload OVER LOAD
When the total output current is overloaded, OVER
LOAD and COMMON SIGNAL GROUND “G” (COM)
become short-circuited. Normally open. ※2
⑦ Cabinet
Failure CABINET-ALM
When a cabinet failure occurs, CABINET-ALM and
COMMON SIGNAL GROUND “G” (COM) become
short-circuited. Normally open. ※2
⑧
Ground Terminal
for External
Transfer Signal
COMMON
SIGNAL GROUND “G”
(COM)
- Common signal ground
⑨ Total Current TOTAL CURRENT
(100 A/5 V) -Outputs the output current value (AC 100 A/5 V) of the
DC-AC Inverter. ※3
※1.Contact capacity is DC 60 V/0.3 A.
※2.Setting the ALARM TEST terminal of the cabinet to ON sends alarm signals AC OUT FAIL, ALARM 1 to 6, OVER LOAD, and
CABINET-ALM in a pseudo fashion. Normally set the ALARM TEST terminal to OFF.
See §4.4 “Alarm Test/Operation Selector.”
※3.When performing monitoring with a transducer or the like, do so via the high impedance buffer circuit with the 0 V – 5 V setting.
※4.This function is only available for the PD-D11AB13US, 15US and 16US model. It is not available for the PD-D11AB03US, 05US
and 06US model.
Notes
COM (Common Signal Ground “G”)
A
LRM (Failure/error)
A
C OUT (Output)
DC IN-ALM (DC input error)
OVERLOAD (Overload)
(100A/5V) ⑨
⑧
⑦
⑥
②
④
③
①
⑤
Unit status signals

Part Names
14
§
§4
4.
.4
4
A
Al
la
ar
rm
m
T
Te
es
st
t/
/O
Op
pe
er
ra
at
ti
io
on
n
S
Se
el
le
ec
ct
to
or
r
No. Signal Name Label Definition
① Failure Test ALARM U1 to U6
Switch for alarm testing of units 1 to 6 failure
Setting the switch to ON sends the alarm signal in a pseudo
fashion.
Normally set the switch for all units to OFF.
② Cabinet Failure Test ALARM COM
Switch for alarm testing of cabinet failure
Setting the switch to ON sends the alarm signal in a pseudo
fashion.
Normally set the switch to OFF.
③ Overload Test OC
Switch for alarm testing of overload
Setting the switch to ON sends the alarm signal in a pseudo
fashion.
Normally set the switch to OFF.
④ Output Fail Test LV
Switch for alarm testing of output failure
Setting the switch to ON sends the alarm signal in a pseudo
fashion.
Normally set the switch to OFF.
⑤
Parallel Redundant
Operation/
Parallel and Standby
Operation
Selector
ALL PARALLEL/
PARALLEL and
STANDBY
Selector for switching between parallel redundant operation and
parallel and standby operation.
Set to ALL PARALLEL when shipped from the factory.
312 45678 9
①
OFF
ON
③
②④⑤
To set PARALLEL and STANDBY to ON, you need to change the
power line for the cabinet and restart the power.
So leave this switch set to ALL PARALLEL and never change this
setting. For details, see §14 “Wiring and Settings for Parallel and
Standby Operation.”
Note

Installing a Cabinet
15
For maintenance of the DC-AC Inverter, provide space
of at least 1 meter (40 inches) at the front and at least
50 cm (approx. 20 inches) at the back.
§
§5
5.
.
I
In
ns
st
ta
al
ll
li
in
ng
g
a
a
C
Ca
ab
bi
in
ne
et
t
CAUTION
!
When installing a cabinet and units, carefully follow the instructions in this instruction
manual. Improper installation may result in electric shock, bodily injury, and/or fire.
In accordance with the instruction manual, install the cabinet on a stable surface
capable of bearing the weight (approximately 8 kg (17.6 lbs) for one unit,
approximately 10 kg (22.1 lbs) for a parallel operation cabinet for 3 units,
approximately 12 kg (26.5 lbs) for a parallel operation cabinet for 5 units, and
approximately 13 kg (28.7 lbs) for a parallel operation cabinet for 6 units) that is flat
so that the cabinet cannot fall, and subject to minimal vibration and shock.
Failure to do so may cause a fall, resulting in bodily injury.
For safety, put on protective shoes. All work that involves lifting the cabinet, such as mounting it in a
rack, should be carried out by at least 2 persons.Failure to do so may cause the cabinet and units to
fall, resulting in bodily injury.Be careful to avoid straining your lower back.
There is a danger that the cabinet and units may fall or be dropped during relocation or installation.
Always hold the bottom side of a unit firmly with both hands. Failure to do so may result in bodily
injury or damage to the unit.
§
§5
5.
.1
1
C
Ch
he
ec
ck
ki
in
ng
g
t
th
he
e
I
In
ns
st
ta
al
ll
la
at
ti
io
on
n
E
En
nv
vi
ir
ro
on
nm
me
en
nt
t
Suitable installation environment: Ambient temperature of 5 to 40°C (41 to 104°F) and relative
humidity of 5 to 85%
Do not install the DC-AC Inverter in the following locations: Doing so may result in a failure.
Where grounding is not possible.
Where the ambient temperature exceeds 40°C (104°F).
Where high humidity may occur.
Where corrosive gas or salt spray may be present.
Where it may be subject to vibration and shock.
Where dust may accumulate.
In a poorly ventilated rack.
§
§5
5.
.2
2
C
Ch
he
ec
ck
ki
in
ng
g
t
th
he
e
I
In
np
pu
ut
t
P
Po
ow
we
er
r
S
Su
up
pp
pl
ly
y
Check the input power supply in the place where the unit is to be installed.
Power Supply Voltage Frequency Notes
DC Input DC power supply DC-48 V -
When the output voltage is set to 100 V: AC power
supply AC 100 V ±15% 50/60 Hz
AC Input When the output voltage is set to 120 V: AC power
supply AC 120 V ±15% 50/60 Hz
Cabinet PD-D11AB1*US
Only when installed in
combination with unit
D11A102B011US
§
§5
5.
.3
3
C
Ch
he
ec
ck
ki
in
ng
g
t
th
he
e
I
In
ns
st
ta
al
ll
la
at
ti
io
on
n
S
Sp
pa
ac
ce
e
During installation, provide the following space around the cabinet.
At least 20 cm (approximately 8 inches) at the front and back:
As air intake or exhaust space for the cooling fan
At least 1 meter (approximately 40 inches) from CRT displays:
To allow for slight leakage of magnetic flux.
Allow some space from devices which might be affected by magnetic flux.
Note on installation
At least 1 meter
(approx.
40 inches)
Air exhaust space of at least
20 cm (approx. 8 inches)
Note: The air intake vent is here.
19-inch rack
Cabinet
Maintenance space
of at least 50 cm
(approx. 20 inches)
Maintenance
space of at least
1 meter (approx.
40 inches)
△
Front Air intake space
of at least 20
cm (approx.
8 inches)
Note: The air intake vent is here.

Installing a Cabinet
16
§
§5
5.
.4
4
T
Tr
ra
an
ns
sp
po
or
rt
ta
at
ti
io
on
n
a
an
nd
d
I
In
ns
st
ta
al
ll
la
at
ti
io
on
n
CAUTION
!
In accordance with this instruction manual, install the cabinet on a stable surface capable of bearing
the weight (approximately 8 kg (17.6 lbs) for one unit, approximately 10 kg (22.1 lbs) for a parallel
operation cabinet for 3 units, approximately 12 kg (26.5 lbs) for a parallel operation cabinet for 5
units, and approximately 13 kg (28.7 lbs) for a parallel operation cabinet for 6 units) that is flat so that
the cabinet cannot fall, and subject to minimal vibration and shock. Failure to do so may cause the
cabinet to fall, resulting in bodily injury.
There is a danger that the DC-AC Inverter may fall or be dropped during relocation or installation.
Always hold the bottom of the DC-AC Inverter firmly with both hands. Failure to do so may result in
bodily injury or damage to the unit.
Be careful not to get your hands caught when mounting the DC-AC Inverter to the rack.
(1) Transportation of the DC-AC Inverter should be performed only by a service technician.
(2) The DC-AC Inverter should be transported while it is in the package.
(3) Open the package near the installation location of the DC-AC Inverter.
(4) Follow the procedure below to mount the cabinet to the 19-inch rack.
①Attach the support rails to the 19-inch rack.
②Mount the parallel operation cabinet to the 19-inch rack. Do not remove the blank panel.
③Fix the cabinet to the 19-inch rack at the front.
・Fix the 3-unit cabinet (PD-D11AB*3US) at 6 points with screws.
・Fix the 5-unit cabinet (PD-D11AB*5US) at 10 points with screws.
・Fix the 6-unit cabinet (PD-D11AB*6US) at 10 points with screws.
This completes the transportation and installation work.
Support rails
Cabinet
Fix with screw. The figure shows a 6-unit cabinet.
Mount it to the 19-inch rack. Do not remove the
blank panel.
For details on how to handle the blank panel,
see §9 “Installing Unit.”
Blank panel
19-inch rack mounting support rails are not supplied
with the DC-AC Inverter, as the dimensions of the
support rails vary depending on the rack.
Note
Note
This DC-AC Inverter is compliant with the
EIA standard.
However, it is not comliant with the JIS standard.
Note

Wiring
17
§
§6
6.
.
C
Ca
ab
bi
in
ne
et
t
W
Wi
ir
ri
in
ng
g
§
§6
6.
.1
1
W
Wi
ir
ri
in
ng
g
t
th
he
e
I
In
np
pu
ut
t
a
an
nd
d
O
Ou
ut
tp
pu
ut
t
T
Te
er
rm
mi
in
na
al
l
B
Bl
lo
oc
ck
k
CAUTION
!
Wiring should be performed only by a service technician.
Incorrect wiring may result in electric shock and/or fire.
A readily accessible disconnect device shall be incorporated external to the equipment.
Make sure that the polarity is correct when wiring the DC input terminal block.
Failure to do so may cause damage to the DC-AC Inverter.
Make sure that the connections to the terminal block are not loose. Failure to do so may result in a
failure or cause electric shock.
This DC-AC Inverter requires class D grounding work.
Failure to connect the grounding cable in accordance with the specified grounding class
may result in electric shock.
The grounding cables of all load devices connected to the output of the DC-AC Inverter
must be securely connected to the G terminal (earth terminal). Failure to connect the
grounding cables of the load devices correctly may result in electric shock.
Install the disconnect device whose contact gap is 2 mm (0.08 inches) or more in DC input.
Install the disconnect device whose contact gap is 3 mm (0.12 inches) or more in AC input.
(In the case of the PD-D11AB13US, PD-D11AB15US and PD-D11AB16US model.)
Install the back-feed protection device in AC input.
(In the case of the PD-D11AB13US, PD-D11AB15US and PD-D11AB16US model.)
① Remove the protective cover of DC input terminal block.
② Wire the input and output terminal block
Securely connect the input plug of a load device to the AC output terminal block.
Securely connect the input distribution board breaker to the AC input terminal block.
Securely connect the DC input power supply plug to the DC input terminal block.
AC input terminal block DC input terminal block
AC output terminal block
Load device
input
Load device
ground
Input
distribution
board breaker
AC input power
supply ground
DC input power
supply - (negative
terminal)
The AC input terminal block is not available for the PD-D11AB0*US model.
When the AC input power is single-wire grounded, connect the ground phase to the S (N) terminal side.
When the load device input needs to be single-wire grounded, connect the ground phase to the V (N) terminal side.
Notes on wiring
DC input power
supply + (positive
terminal)
Grounding
Cabinet Top
Cabinet Back
DC input power
supply ground
M8
This manual suits for next models
2
Table of contents
Popular Inverter manuals by other brands

Westinghouse
Westinghouse WH7500v quick start guide

Ingeteam
Ingeteam Ingecon Sun 3.6TL U installation manual

STROETER
STROETER SC 750/5 user guide

Briggs & Stratton
Briggs & Stratton 076000NG Service & troubleshooting guide

Ellumiglow
Ellumiglow Mega 100 Classic user manual

Schumacher Electric
Schumacher Electric XI41DU owner's manual