manuals.online logo
Brands
  1. Home
  2. •
  3. Brands
  4. •
  5. Sanyo
  6. •
  7. Microwave Oven
  8. •
  9. Sanyo EM870FS User manual

Sanyo EM870FS User manual

Other Sanyo Microwave Oven manuals

Sanyo EM-D9950ECO User manual

Sanyo

Sanyo EM-D9950ECO User manual

Sanyo EMC 1900M User manual

Sanyo

Sanyo EMC 1900M User manual

Sanyo EM-S355A User manual

Sanyo

Sanyo EM-S355A User manual

Sanyo EMS6588S - USA Countertop Microwave Oven 1.0 cu.ft. Capacity... User manual

Sanyo

Sanyo EMS6588S - USA Countertop Microwave Oven 1.0 cu.ft. Capacity... User manual

Sanyo EM-S7720B User manual

Sanyo

Sanyo EM-S7720B User manual

Sanyo EM704TS User manual

Sanyo

Sanyo EM704TS User manual

Sanyo EMX-412 User manual

Sanyo

Sanyo EMX-412 User manual

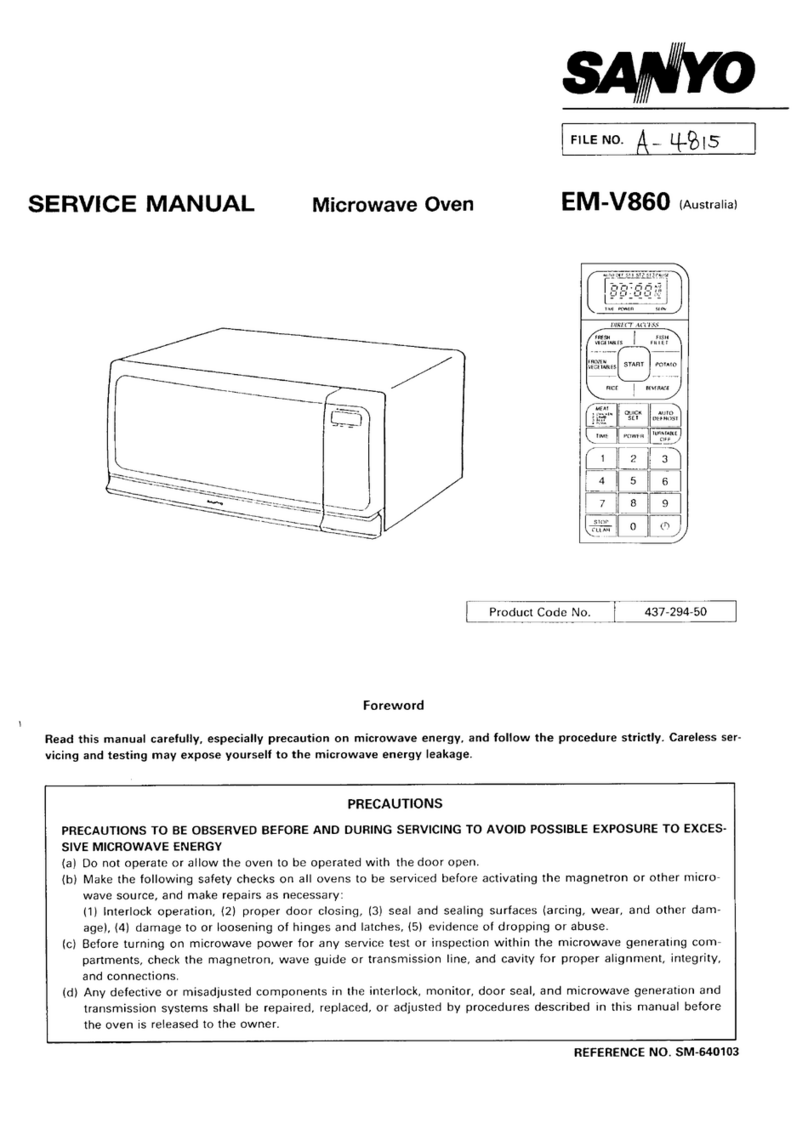
Sanyo EM-V860 User manual

Sanyo

Sanyo EM-V860 User manual

Sanyo EM-A5410 Use and care manual

Sanyo

Sanyo EM-A5410 Use and care manual

Sanyo EM-G4750EES User manual

Sanyo

Sanyo EM-G4750EES User manual

Sanyo EMS9515W User manual

Sanyo

Sanyo EMS9515W User manual

Sanyo EM810FS User manual

Sanyo

Sanyo EM810FS User manual

Sanyo EM-G454EUK User manual

Sanyo

Sanyo EM-G454EUK User manual

Sanyo EMS9515W - 1.4 Cubic Foot Capacity Countertop Microwave... Use and care manual

Sanyo

Sanyo EMS9515W - 1.4 Cubic Foot Capacity Countertop Microwave... Use and care manual

Sanyo EM-SL100NUK User manual

Sanyo

Sanyo EM-SL100NUK User manual

Sanyo EM-G475AS User manual

Sanyo

Sanyo EM-G475AS User manual

Sanyo EM-S9000S User manual

Sanyo

Sanyo EM-S9000S User manual

Sanyo EM-S8586V User manual

Sanyo

Sanyo EM-S8586V User manual

Sanyo EM-V5405SW User manual

Sanyo

Sanyo EM-V5405SW User manual

Sanyo EM-S156AW User manual

Sanyo

Sanyo EM-S156AW User manual

Sanyo EMS5595S - Microwave 0.9 Cubic Feet User manual

Sanyo

Sanyo EMS5595S - Microwave 0.9 Cubic Feet User manual

Sanyo EM-G450 User manual

Sanyo

Sanyo EM-G450 User manual

Sanyo EMS5120W - 1.2 Cubic Foot Capacity 1000 Watt Countertop... User manual

Sanyo

Sanyo EMS5120W - 1.2 Cubic Foot Capacity 1000 Watt Countertop... User manual

Sanyo EM-S2585V Use and care manual

Sanyo

Sanyo EM-S2585V Use and care manual

Popular Microwave Oven manuals by other brands

Sharp R-390D manual

Sharp

Sharp R-390D manual

PROFILO MD1000 instruction manual

PROFILO

PROFILO MD1000 instruction manual

Candy MIC 201 EX User instructions

Candy

Candy MIC 201 EX User instructions

PITSOS GMW3101B user manual

PITSOS

PITSOS GMW3101B user manual

Sears 5648744780 Use & care manual

Sears

Sears 5648744780 Use & care manual

BOMANN CB 1272 Instruction manual & guarantee

BOMANN

BOMANN CB 1272 Instruction manual & guarantee

Conrad Electronic 2372935 operating instructions

Conrad Electronic

Conrad Electronic 2372935 operating instructions

GE Spacemaker JVM1440BH datasheet

GE

GE Spacemaker JVM1440BH datasheet

DAEWOO ELECTRONICS KOR-6L8K5S83 Operating instructions & cook book

DAEWOO ELECTRONICS

DAEWOO ELECTRONICS KOR-6L8K5S83 Operating instructions & cook book

DAEWOO ELECTRONICS KOR-1N5A9S Operating instructions & cook book

DAEWOO ELECTRONICS

DAEWOO ELECTRONICS KOR-1N5A9S Operating instructions & cook book

Daewoo KQG-6617G Operating instructions & cook book

Daewoo

Daewoo KQG-6617G Operating instructions & cook book

Samsung M1779 Owner's instructions

Samsung

Samsung M1779 Owner's instructions

GE JES1143 Use and care & cooking guide

GE

GE JES1143 Use and care & cooking guide

Miele H6200BM(TB) Operating and installation instructions

Miele

Miele H6200BM(TB) Operating and installation instructions

Jocel JMO011480 instruction manual

Jocel

Jocel JMO011480 instruction manual

Sharp R-752M Operation manual with cookbook

Sharp

Sharp R-752M Operation manual with cookbook

Electrolux EVL8E00X user manual

Electrolux

Electrolux EVL8E00X user manual

STOVES Q900GRF DO User, installation & servicing instructions

STOVES

STOVES Q900GRF DO User, installation & servicing instructions

manuals.online logo
manuals.online logoBrands
  • About & Mission
  • Contact us
  • Privacy Policy
  • Terms and Conditions

Copyright 2025 Manuals.Online. All Rights Reserved.

..
.>.
,,. ii
SERVICE MANUAL Microwave Oven
Sio
EM870FS (Nevuealand)
Jan 221992
/
/
Product Code No. 432-328-51
Foreword
Read this manual carefully, especially precaution on microwave energy, and follow the procedure strictly. Careless servicing and
testing may expose yourself to the microwave energy leakage.
PRECAUTIONS
PRECAUTIONS TO BE OBSERVED BEFORE AND DURING SERVICING TO AVOID POSSIBLE EXPOSURE TO EX-
CESSIVE MICROWAVE ENERGY
(a) Do not operate or allow the oven to be operated with the door open.
(b) Make the following safety checks on all ovens to be serviced before activating the magnetron or other microwave source,
and make repairs as necessary:
(1) Interlock operation, (2) proper door closing, (3) seal and sealing surfaces (arcing, wear, and other damage), (4)
damage to or loosening of hinges and latches, (5) evidence of dropping or abuse.
(cl Before turning on microwave power for any service test or inspection within the microwave generating compartnlents.
check the magnetron, wave guide or transmission line, and cavity ‘for proper alignment, integrity, and connections.
(d) Any defective or misadjusted components in the interlock, monitor, door seal, and microwave generation and trans.
mission systems shall be repaired, replaced. or adjusted by procedures described in this manual before the oven is released
to the owner,
REFERENCE NO. WM-fMo 208
P.,., ,
–TABLE OF CONTENTS -
Adjustment Procedures . . . . . . . . . . . . . . . . . . . . . . 1Automatic Reheat Operation ...0. . 0. . . . . . , 4-7
Specifications . . . . . . . . . . . . . . . . . . . . . . . . . ...2 Test Procedures and Troubleshooting ,.........8-14
Power Output Measurement . . . . . . . . . . . . . . . . . . . 2Disassembly Instructions ..................15-18
Precautions and Repair Service Tips . . . . . . . . . . . . . . 2Exploded View and Parts List ...............19-24
Circuit Diagram . . . . . . . . . . . . . . . . . . . . . . . . ...3 Overall Circuit Diagram ................... 25
CAUTION
MICROWAVE RADIATION
PERSONNEL SHOULD NOT BE EXPOSED TO THE
MICROWAVE ENERGY WHICH MAY RADIATE
FROM THE MAGNETRON OR OTHER MICRO-
WAVE GENERATING DEVICE IF IT IS impro-
perly USED OR CONNECTED. ALL INPUT AND
OUTPUT MICROWAVE CONNECTIONS, WAVE-
GUIDES FLANGES, AND GASKETS MUST BE
sECURE. NEVER OPERATE THE DEVICE WITH-
OUT AMICROWAVE ENERGY ABSORBING
LOAD ATTACHED. NEVER LOOK INTO AN
OPEN WAVEGUIDE OR ANTENNA WHILE THE
DEVICE IS ENERGIZED.
1. ADJUSTMENT PROCEDURES
TO AVOID POSSIBLE EXPOSURE TO MICROWAVE
ENERGY LEAKAGE, THE FOLLOWING ADJUSTM-
ENTS OF THE INTERLOCK SWITCHES SHOULD
BE MADE ONLY BY AUTHORIZED SERVICE
PERSONNEL.
PRIMARY INTERLOCK SWITCH, INTERLOCK
MONITOR SWITCH AND DOOR SENSING SWITCH
ADJUSTMENT
(Figure 1)
[1)
(2)
\
(3)
(4)
(5)
(6)
Loosen 2screws securing the lever stopper.
Adjust the lever stopper position so that it is pushed
forward and pull backward until thele is about zero
gap between the latch lever and the switch body
On the primary interlock switch and at the same
time there is about zero gap between the door latch
and the switch body on the door sensing switch
when the door latch is securely locked.
Tighten the lever stopper screws securely.
Make sure the interlock monitor switch closes after
the primary interlock switch opens when the door
is opened very slowly, according to “CHECKOUT
PROCEDURE FOR SWITCHES” on page 6.
Make sure the interlock monitor switch opens
before the primary interlock switch closes when the
door is closed very slowly, according to “CHECK-
OUT PROCEDURE FOR SWITCHES” on page 6.
Make sure the microwave energy leakage is below
the limit of the regulation (5 mW/cm2 )when
measured with adetector.
(AI{ service adjustments must be made for minimum
micro wave energy leakage readings. )
NOTE:
-1
/
,rews
/=--
--
If the interlock monitor circuit operates
arsd at the same time the fuse blows with
the door opened, be sure to replace the
control circuit board because relay 2on
the control circuit board, the door sensing
switch and the electric circuit related on
the door sensing switch, which act as
Secondary Interlock Switch.
Door
Latch
‘1 /!-ever Stopper
Fj’”/
x
Door
Sensing
\,Switch
‘w
~= Swich
Interlock
Monitor
/) Latch Lever Primary
Interlock
Switch
Figure 1
–l–
2. SPECIFICATIONS
Rated Power Consumption . . .
Microwave Output . . . . . . .
Frequency ..............
Power Supply ...........
Rated Current ...........
Safety Devices ...........
Timer .................
Overall Dimensions ........
Oven Cavity Size . . . . . . . . .
Turn Table Diameter . . . . . . .
Effective Capacity of
Oven Cavity ...........
Net Weight . . . . . . . . . . . . .
1400W
700W
(Adjustable 155W through
700W)
2,450 MHz f50 MHz
230- 240V50HZ
6.0 Amp.
Thermal Protector, Open
at 135°C for Magnetron
Fuse (Cartridge Type 8A)
Primary Interlock Switch
Door Sensing Switch and
Relay 2
Interlock Monitor Switch
Electronic Digital, up to
99 min. 99 sec.
550(W) x453(D) x309(H) mm
375(W)X 404(D) x237(D) mm
360 mm
31 liter
Approx. 20 kg
3. POWER OUTPUT MEASUREMENT
(1) Fill two beakers (glass or plastic) with each one liter
of taP water (about 20° C) and measure the water
temperature. (Use athermometer with a1/10
degree gauge. )
(2) Place the beakers side by side in the center of the
glass tray.
(3) Close the door, set the “TIME” for two minutes.
(.,2 O(y? in the display window. )Touch the
“START” key and heat the water exactlv for two
minutes.
(4) Take the beakers out, immediately stir the water
and measure the water temperature respectively.
(5) Calculate the temperature rise of water in each
beaker. Then calculate the average value of two
temperature rises.
Output power can be calculated by the equation;
Power output (W) =70 x At
Where At is an average temperature rise in degrees
Centigrade.
(6) Output shall be in the following range:
Average temperature rise Power output
Minimum 9.O”C 630W
Maximum 11.5°c 805W
(7) Power output is affected by the line voltage under
load. For correct power output measurement, the
line voltage under load must be 240t 1volts.
4. PRECAUTIONS
PRELIMINARY
A. SINCE NEARLY
AND REPAIR SERVICE TIPS
4,OOO VOLTS EXISTS IN SOME
CIRCUITS OF THIS MICROWAVE OVEN, REPAIRs
SHOULD BE CARRIED OUT WITH GREAT CARE.
B. TO AVOID POSSIBLE EXPOSURE TO MlCROWAVE
ENERGY LEAKAGE, THE FOLLOWING PRE-
CAUTIONS MUST BE TAKEN BEFORE SERVICING.
(1) Before the power is applied:
(a) Open and close door serveral times to make sure the
primary interlock switch, the interlock monitor
switch and the door sensing switch operate proper-
ly. (Listen for the clicking sound from the switches. )
Make sure the interlock monitor switch closes after
the primary interlock switch is opens when the door
is opened.
(Seepages 1and 6)
(b) Make sure the perforated screen and the choke di-
electric of the door are correctly mounted.
(2)
(a)
(b)
(3)
(a)
(b)
(c)
(d)
(e)
(f)
(4)
(a)
(b)
(c)
(d)
(e)
The
After the power IS applied:
Open and close the door to see if the interlock
mechanism operates properly.
Check microwave energy leakage with aleakage
detector and confirm the energy leakage is below 5
mW/cm2.
Do not operate the unit until it is completely re-
paired, if any of the following conditions exists.
Door does not close firmly against the cavity front.
The hinge is broken.
The choke dielectric or the door seal is damaged.
The door is bent or warped, or there is any other
visible damage to the oven that may cause micro-
wave energy leakage.
NOTE: Always keep the seal clean.
Make sure that there are no defective parts in the
interlock mechanism.
Make sure that there are no defective parts in we
microwave generating and transmission assembly.
(especially waveguide)
The following items should be checked after the
unit is repaired:
The interlock monitor switch is connected correctly
and firmly.
The magnetron gasket on the magnetron is properly
positioned.
Waveguide and oven cavity are intact (no leakage of
microwave energy).
The door can be properly closed and the safety
switches work properly.
The oven must be stopped when the door is opened
or the time is up.
oven must not be operated with any of the above
components removed or bypassed.
–2–
,,!
5. CIRCUIT DIAGRAM PoWER SUPPLY
9=
-$l!
-1 [-
FUSE III
8A(T) IL–=–-J 1
I
I
i
7t5”c
I
ICAVITY LAMP
wBK f
I I
I
I
w
THERMAL PROTECTOR
5
FOR MAGNETRON OPEN
J“ {‘C*’
GEAR MOTOR
GM BK \
r-
W
~.__——-—
\~~NNECTOR
.—-— ———-
12
@LwTr’&k?K \
SWITCH @!’fwwci
oSWITCH
NC
4+
BLOWER MOTOR
CONNECTOR HIGH VOLTAGE TRANSFORMER
f————-—— —- —____ __m
S201 wi
A.+
iBK
-—— . ..
I[
J-- I
El I
I
i
:OM
\
NO
.) RELAY 2(
I
I3
ICONNECTOR L—-—— ——
--i
——- ——— <)- J
I5S102
. I
iRELAY 1●R
STEP 00WN FUSE DIOOE
ITRANSFORMER
~——–_T
I10 IDOOR
‘c.
,SENSING DIODE
I
0.97MF0
ICONTROL ISWITCH
ICIRCUIT
/BOARD I
I10MEG.OHM
I/
I
I
,\ c
CONNECTOR
IIJSlol
I
I
1- L———— -J
-—— ———— ———— ——— —
1BK I
WIRING COLOR Notas: Th.sign @-Th. parts markad with ❑ar. s.rw,i.d
high voltage which is ●xcaadad 250V.
BK :BLACK BR :BROWN Tha sign @-The Patts markad with @hava special
w:WHITE GY :GRAY charactcristia important for microwav-
o:ORANGE BL :BLUE Ioakage. When replacing sny of thase parts
R:RED use only manufactur,’s spacifiad parts.
Figure 2
–3-
6. AUTOMATIC REHEAT OPERATION
Automatic reheat is controlled by ahumidity sensor.
Power level, reheating time, doneness temperature and
quantity of food donot need to beset.
The humidity sensor detects moisture asit escapes from
the food being reheated.
The microprocessor on the circuit board receives the
signals from the sensor and controls the power level and
the reheatng time automatically.
A. HOW THE HUMIDITY SENSOR WORKS FOR “AUTO-
MATIC REHEAT”
The humidity sensor is located on the left rear of
Oven Cavitv. (Figure 5)
This sensor detects an amount of moisture as it escapes
from the food and the amount of moisture is closely
related to the doneness of the food being reheated.
The sensor is composed of two thermistors. One is
sealed in adry air compartment and the other is in an
open compartment. (Figure 4)
The both thermistors are heated by themselves at about
200°C when the oven is plugged in. The thermistor in
adry air compartment is cooled by the influence of air
temperature and the thermistor in an open compartment
is cooled by not only the air temperature but also evapo-
ration of the moisture in the air around the sensor.
If the sensor is in adry air, the both thermistors in the
sensor have the same resistance value, regardless of the
air temperature.
But if it is in amoist air, the thermistor in an open com-
partment will be cooled more by evaporation of the
moisture and the resistance value will increase, compared
with the thermistor in adry air compartment.
This develops adifference between both thermistors in
resistance value.
The sensor sends that information to the micro com-
puter, which calculates and automatically adjusts the
power level and remaining operating time.
J=ii3=
-o---
==0:=
-=- _-0.
Q
Outside of
Humidity Sensor
Figure 3
Thermistor Thermistor
\Moist Air /
Dry Air- Open’
Compartment Compartment
Inside of
Humidity Sensor
Figure 4
–4–
.
B.EASY USE CHART 2DONENESS KEYS
1. Touch CLEAR
2. Touch aCategcxy Key
REHEAT l(for A1) mREHEAT2(fof A2)
3. Touch aDcneness Key
LOW MHIGH if desired
4. Touch START
Note: About 5minutes after the oven is first Plugg-
ed for stable operation of ahumidity sensor.
Use ‘Automatic Reheat- after waiting 5minutes.
-CATEGORY
8AUTOMATIC SENSOR COOKING COURSES ‘
a) 2COURSES OF AUTOMATIC SENSOR REHEA -
-.
TING fcr heating pecooked focds.
~
REHEAT 1:Preccoked Rcorn Temperature
and Refrigerated Temperature Food..
REHEAT 2:Preccmked Frozen Dense Fo-
A2 ~s
b) 6COURSES OF AUTOMATIC SENSOR COOKl-
NG for cooking fresh or frozen fcxxk.
couRsE# lFOOD CATEGORy ]COURSE#l FOOD CATEGORY
The oven automatically sets to medium if no selec-
ticm is made.
If you prefer to have your food reheated or cooked
moore or less than the preset medium setting, touch
cne of the two DONENESS keys befcx tcuching START.
When adifferent doneness is chosen from the pres-
et medium (2), it is confirmed with anumber(l to 3)
in the course indication display.
The indication ‘Al -2-for-REHEAT 1- changes as a
different doneness is entered.
Dcmeness Setting Ccurse Indication
LOW -Al-l-
medium ‘Al -2-
(preset position)
HIGH ‘Al -3-
The indication ‘C4-2”for-Rl CE- changes as a dif -
ferent doneness is entered.
1Doneness Setting Course Indication
t
LOW -C4-1 “
medium ‘C4-2-
(preset position)
HIGH “c4-3-
Imml
–5–
C. POINT TO REMEMBER
●Before using Auhxnatic Sensw Programs...
The oven should be plugged into power supply for
more than five minutes.
Wipe off any noticeable moisture or spillovers fr-
om the wen.
If the inside of the oven is very warm, wait until
it cools down.
Automatic Sensor may not operate properly if the
room temperature is higher than 95”F(35°C ).
●Do not touch STOP/CLEAR, once cooking starts.
This will void the Automatic.
Sensor program and the food will need to be finis-
hed by using regular micrcwave operation.
●Make sure to use the correct food category or reh-
eat course for the food that is to be reheated or
cooked.
.The oven door must remain closed while display sh-
ows course indication (- C1-2-, -C2-2., -A1 -2-
and so cm) unless ‘PAUSE- appears in the display.
If the door is opened, -Err- (error) will flash in
the display. This indicates the operation must be r-
reprogrammed into the oven. NOTE: The oven door may
be opened when time countdown appears in the disp-
lay.
.Automatic sensor cannot be used with other functi-
ons such as Time, temperature probe, Auto Defrost.
When the Temperature Probe is plugged in and Auto-
matic Sensor Cooking is started, the word ‘Probe”
will flash and the oven will not work.
–6–
7. INTERNAL AIR FLOW
The blower motor always runs during cooking or reheating. The air from the blower divides into two ways as shown in
Figure 5. This prevents the sensor from being affected by the warm air which has no relation with the doneness of food
being reheated.
(1) Air flow for rotating the stirrer fan
Air flow is shown by solid arrows in Figure 5.
The air from the blower cools the magnetron and
becomes warm. The warm air goes into astirrer
compartment to rotate the stirrer fan.
(2) Air flow for carrying the moisture escaping from
food to the sensor
Air flow is shown by shaded arrows in Figure 5.
The air from the blower motor goes into cavity
inside and carries the moisture escaping from the
food being reheated to the sensor.
CAUTIONS:
-The stirrer cover inside of the oven cavity acts asan air
partition between the air for rotating the stirrer fan and
the air for carrying the moisture escaping from food to
the sensor. The stirrer cover must be secured p,”operly.
—The oven cabinet (outer wrap) acts asan air wide. The
stirrer fan may not rotate properly and the sensor may
not detect the moisture escaping from the food properly
while the oven cabinet is removed.
Air Humidity Sensor
Exhaust /
Figure 5
–7–
Air
Intake
IBlower
?\, ,R
Filament Windings
8.TEST PROCEDURES AND TROUBLESHOOTING /“1
rc””’’””~
DISCONNECT THE POWER SUPPLY CORD
FROM THE WALL OUTLET WHENEVER RE-
MOVING THE CABINET FROM THE UNiT, PRO-
CEED WITH THE TESTS ONLY AFTER DIS-
CHARGING THE HIGH VOLTAGE CAPACITOR
AND REMOVING THE LEAD WIRES FROM THE
PRIMARY WINDING OF THE HIGH VOLTAGE
TRANSFORMER. (SEE FIGuRE 6)
A. TEST PROCEDURES
COMPONENT
MAGNETRON
HIGH-VOLTAGE
TRANSFORMER
s
CHECKOUT PROCEDURE
1)Check for resistance: Across the filament
terminals of the magnetron with an ohmm-
eter on Rxiscale.
1r
ohm-meter
w
2) Check for resistance: Between each fila-
ment terminal of the magnetron and the
chassis ground with an ohm-meter on
highest scale.
ohm-meter
G
Q
Figure 8
1)Measure the resistance:
With an ohm-meter on Rx 1 scale.
a. Primary winding;
b. Filament winding;
c. Secondary winding;
2) Measure the resistance:
With an ohm-meter on highest scale.
a. Primary winding to ground;
b.
ohm-
Note:
measured point.
Figure 6
RESULT
Normal reading:
Less than 1ohm.
Normal reading:
Infinite ohms.
Normal readings:
Approximately 1.4 ohms.
Less than 1ohm.
Approximately 87 ohms.
Normal readings:
Infinite ohms.
Infinite ohms.
–8–
‘COMPONENT
HIGH-VOLTAGE
CAPACITOR
including
BLEEDER
RESISTOR
HIGH-VOLTAGE
DIODE
t-
FUSE DIODE
CONTROL
CIRCUIT BOARD
CHECKOUT PROCEDURE
Measure theresistance: Across two terminals
with an ohm-meteron highest scale.
Figure 10
Measure the resistance. Across two terminals
with an ohm-meter on highest scale.
ohm-meter na
b
Figure 11
Measure the resistance: Across two terminals
with an ohm-meter on highest scale.
Ohm-meter n
Measure the voltage: Between test points
TP-1, TP-2, or TP.3 and ground between TP-
4, TP-5 and TP-6 (See control circuit bo-
ard on page 24)
NOTE
Proceed with the check of the step-down
transformer, to see if any one of the measur-
ed values is different from the specified
values.
RESULT
Normal reading:
Momentarily indicates several ohms, and
gradually returns to 10 meg-ohms.
Abnormal reading:
Indicates continuity or 10 megohms from
the beginning.
Normal reading:
Indicates about the middle position in one
direction (forward direction) and infinite
ohms in the reverse direction, using meter
which is provided with a9-volt battery.
NOTE
–Some digital meter may show over even
in aforward direction because low measur-
ing voltage of meter does not allow the
meter current to pass through the high
voltage diode.
Abnormal reading:
Indicates continuity or infinite ohms in both
directions.
Normal reading:
Indicates infinite ohms in both directions.
Abnormal reading:
Indicates continuity in both directions or
continuity in one direction and infinite
ohms in reversed direction.
Test
Point ‘P-4’ TP-6
‘p” ‘‘P-2 ‘P.3 TP-5
–5V –12V –30V 2.OV +1.5V
Voltage Dc DC Dc Ac Dc
–9-