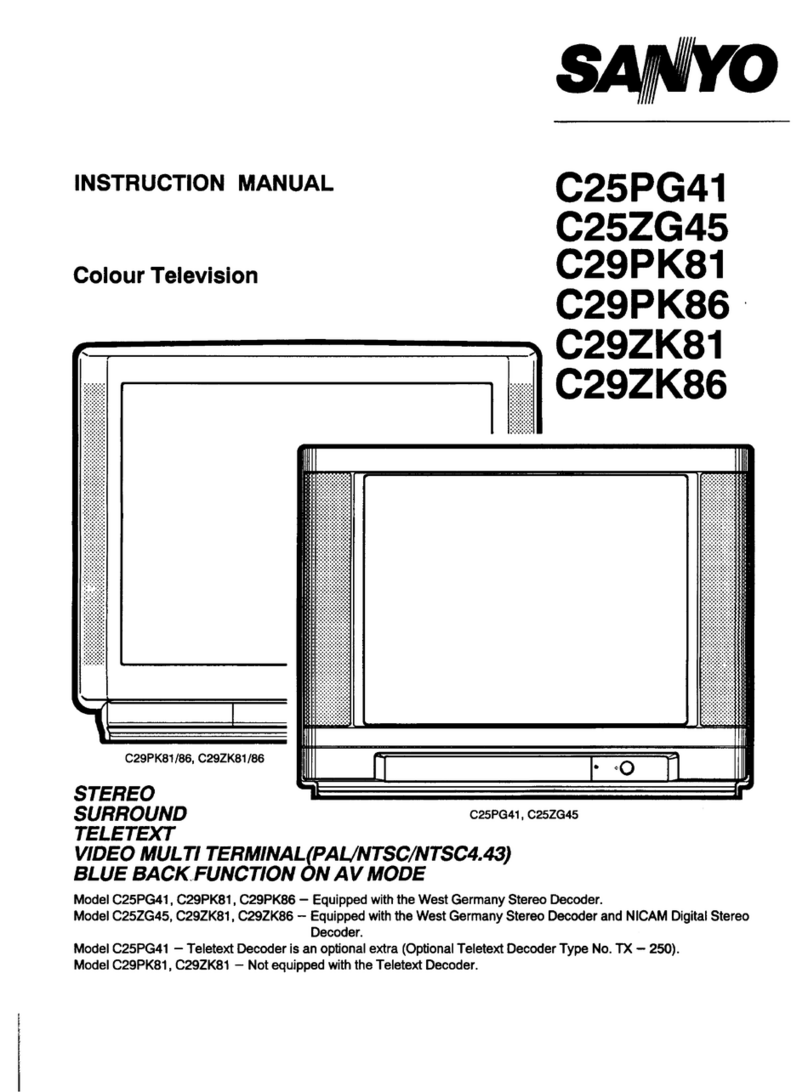
Sanyo 14MT1 User manual

21EF90B)
-(C21EF95B)

2
Safety
Precautions
Installation
Installation
Mains
Supply
Aerial
&
Scart
Cable
Connection
Remote
Control
Battery
Installation
General
Operation
Controls
Auto
Shut
Off
Programme
Selection
Sound
&
Picture
Settings
Sound
Mute
Memory
&
Normalisation
TV/AV
Switching
Presetting
Auto
Presetting
Semi-Automatic
Presetting
Manual
Presetting
Clock
Functions
Time
display”
Auto
Clock
Setting”
Manual
Clock
Setting
*
Sleep
Timer
Setting
On-Timer
Setting
*
Other
Functions
Time
call
Alternative
Programme...............6
Recall
SANYO
Operating
Instruction
Manual
Teletext
Use
*
Teletext
Controls*
Switching
to
Teletext
Mode”
Page
Selection”
Double
Letter
Height*
Teletext
Function
Button*
Viewing
TV
while
searching
for
Revealing
Concealed
Information”
Updated
Pages”
Connection
of
AV
Equipment
Connection
via
SCART
Terminal
Connection
via
Aerial
Socket
Special
Functions
Setting
Proceedure
Specifications
TV
Specification
SCART
Specification
Servicing
Helpful
Hints
Warranty
to
Customer
*
Not
available
on
model
21M1
(C21EF90B)

CAUTION:
Please
read
and
retain
for
your
safety.
This
unit
has
been
engineered
and
manufactured
to
assure
your
personal
safety,
but
improper
use
can
result
in
potential
electrical
shock
or
fire
hazards.
In
order
not
to
defeat
the
safeguards
incorporated
in
this
receiver
observe
the
following
basic
rules
for
its
installation,
use
and
servicing.
MINIMUM
DISTANCES:
INSTALLATION
Do
not
allow
anything
to
rest
on
the
power
cord.
Do
not
locate
this
television
receiver
where
the
cord
will
be
damaged
by
people
walking
on
it.
Do
not
overload
wall
outlets
and
extension
cords
as
this
can
result
in
fire
or
electric
shock.
Slots
and
openings
in
the
cabinet
and
in
the
back
or
bottom
are
provided
for
ventilation
to
ensure
reliable
operation
and
to
protect
it
from
overheating.
These
openings
must
not
be
blocked
or
covered.
The
opening
should
never
be
covered
with
a
cloth
or
other
material,
and
the
bottom
openings
should
not
be
bloc-
ked
by
placing
the
television
receiver
on
a
bed,
sofa,
rug,
or
other
similar
surface.
This
television
receiver
should
never
be
placed
near
or
over
a
radiator
or
heater.
Do
not
place
your
television
receiver
on
an
unstable
stand,
shelf
or
table.
Serious
injury
to
an
individual,
and
damage
to
the
television
may
result
if
it
should
fall.
Your
dealer
can
recommend
approved
stands,
shelves
and
wall
mounting
instructions.
If
the
television
is
to
built
into
a
unit,
or
enclosed,
the
minimum
distances
for
ventilation
must
be
maintained.
Heat
build
up
can
reduce
the
life
of
your
television,
and
can
be
dang-
erous.
SANYO
Operating
Instruction
Manual
USE
This
television
receiver
should
be
operated
only
from
the
type
of
power
source
indicated
on
the
television
or
as
indicated
in
the
Operating
Instructions.
If
you
are
not
sure
of
the
type
of
power
supply
in
your
home,
consult
your
sales
person
or
your
local
power
company.
Never
add
accessories
that
have
not
been
specifically
designed
for
this
television.
Do
not
drop
or
push
objects
into
the
television
cabinet
slots
or
openings.
Some
internal
parts
carry
hazardous
voltages
and
contact
may
result
in
an
electrical
shock.
Never
spill
liquids
of
any
kind
on
the
television
receiver.
Do
not
expose
the
television
receiver
to
rain
or
use
near
water.
For
example,
near
a
bathtub,
kitchen
sink,
in
a
wet
basement,
etc.
Before
cleaning,
unplug
the
television
receiver
from
the
wall
socket.
Never
stand
on,
lean
on
or
push
suddenly
the
television
or
its
stand.
You
pay
particular
attention
to
children.
Serious
injury
may
result
if
the
TV
set
should
fall.
Do
not
apply
liquid
cleaners
or
aerosol
cleaners
directly
onto
the
television
receiver.
Use
a
damp
cloth
for
cleaning.

The
TV
set
is
prepared
for
a
mains
voltage
AC220~240V
50Hz.
Connect
the
power
cord
of
the
TV
set
to
a
wall
outlet.
When
the
TV
set
is
not
to
be
used
for
an
extended
period
of
time,
it
is
advisable
to
disconnect
the
power
cord
from
the
power
outlet.
WARNING!
High
voltages
are
used
in
the
operation
of
this
set.
Refer
service
to
qualified
service
personnel.
|
important:
|
This
equipment
is
fitted
with
an
approved
non
|
rewireable
UK
mains
plug.
|
To
change
a
fuse
in
this
type
of
plug
proceed
as
|
follows:
|
1.
Remove
the
fuse
cover
and
fuse.
|2.
Fix
a
new
fuse
which
should
be
a
BS1362
5
Amp
|
A.S.T.A.
or
BSI
approved
type.
|
3.
Refit
the
fuse
cover.
|
lf
the
fitted
plug
is
not
suitable
for
your
socket
outlets,
it
|
should
be
cut
off
and
an
appropriate
plug
fitted
in
its
|
place.
If
the
mains
plug
contains
a
fuse,
this
should
|
have
a
rating
of
5
Amp.
If
a
plug
without
a
fuse
is
used,
|
the
fuse
at
the
distribution
board
should
not
be
greater
|
Note:
The
severed
plug
must
be
destroyed
to
avoid
a
possible
shock
hazard
should
it
be
inserted
into
a
13
Amp
socket
elsewhere.
4
SANYO
Operating
Instruction
Manual
The
wires
in
this
mains
lead
are
coloured
in
accordance
with
the
following
code:
.
The
Blue
wire
must
be
connected
to
the
terminal
|
.
The
Brown
wire
must
be
connected
to
the
terminal
|
.
Do
not
connect
either
wire
to
the
earth
terminal
in
|
simply
over
the
wires.
Blue
-------
>
Neutral
Brown
---->
Live
which
is
marked
with
the
letter
“N”
or
coloured
|
BLACK.
with
the
letter
“L”
or
coloured
RED.
the
plug
which
is
marked
with
the
letter
“E”
or
by
the
|
earth
symbol
or
coloured
GREEN
or
GREEN
and
|
YELLOW.
|

Supplied
(14MT1
only)
A:
Loop
Aerial
B:
Loop
Aerial
feeder
C:
Antenna
matching
box
Not
Supplied
D:
Aerial
Cable
(to
roof
aerial)
E:
Aerial
Cable
(VCR
to
TV)
Pe
ee
°
-
y
sE
gy
|
F-
of
pin
Scart
lead
(es
aul
ela
:
q
G:
Vv
CR
@
The
aerial
socket
is
located
on
the
back
of
TV
set.
@
A
colour
picture
of
good
quality
requires
a
higher
aerial
signal
than
a
black/white
picture.
If
you
tune
your
set
to
a
station
with
a
weak
colour
signal,
the
TV
set
automatically
changes
to
a
black/white
picture.
@
For
all
aerial
problems
please
consult
your
local
dealer.
@
For
the
best
signal
quality,
the
use
of
a
well
shielded
antenna
cable
is
recommended.
1.
Remove
the
battery
cover
by
sliding
it
in
direction
of
the
arrow.
1
2.
Install
two
“AA”
1.5
volt
batteries
so
that
the
“+“
and
“.”"
marks
on
the
batteries
match
the
“+”
and
“-”
marks
inside
the
unit.
3.
Close
the
battery
cover.
Note:
Replace
the
batteries
when
the
TV
set
is
showing
the
following
symptoms:
Operation
is
unsteady
or
erratic,
sometimes
the
TV
does
not
work
with
the
transmitter.
Discharged
batteries
3
may
leak
and
damage
the
unit.
The
normal
life
of
batteries
should
be
from
nine
to
ten
months.
SANYO
Operating
Instruction
Manual
5

21M1/21MT1
Symbol
—
Function
Page
CO)
Mains
On/Off
7
PA
Programme
Up
7,8
wp
Programme
Down
7,8
«@+/AS
Level
Up
/
Auto
preset
start
8,10
—-
«fi
Level
Down
8
Fl:J/
M
Function
/
Preset
memory
8
©
/
PT
Memory
/
Preset
mode
selector
9,10,11,20
Symbol
—
Function
Page
(!)
Standby
power
On/Off
7
VPA
Programme
Up/Down
7,8
0-9
0
-9
Numeric
buttons
8
-/--7
Digit
8
—
«i+
Level
Up/Down
8,10
FO.)
Function
8
aK
Sound
Mute
9
oe
Normalisation
9
TV/C
+
TV
/
AV
mode
switch
9
=P
Programme
alternation
14
eo
Time
mode
12,13
CI)
Recall
(on
screen
display)
14,21
6
SANYO
Operating
Instruction
Manual

@
To
turn
the
TV
set
ON,
press
the
Mains
ON/OFF
switch.
The
power
indicator
illuminates
to
show
the
power
is
on.
@
To
turn
the
TV
set
OFF,
press
it
again.
@
To
turn
the
TV
set
into
standby
mode,
press
the
Standby
button
(/).
The
power
indicator
illuminates
more
brightly.
21M1/21MT1/25MT
1
14MT1
™@
To
turn
the
TV
set
ON
from
standby
mode,
Press
any
l
of
the
following
buttons;
(©)
Standby
button
('),
Programme
Selector
PA/P
¥
,
Numeric
buttons
(0
to
9).
In
the
Standby
mode
the
TV
set
is
still
partially
powered,
this
is
denoted
by
the
red
Standby/Power
indicator
illuminating
more
brightly
than
in
Power
This
TV
set
will
automatically
switch
into
the
standby
mode,
10
minutes
after
a
signal
is
no
longer
received.
ST
ETale
ley]
ine
ume
until
the
set
will
switch
off
is
displayed
on
the
SANYO
Operating
Instruction
Manual
7

|
-
|
2-
|
|
23
|
@
Direct
Programme
Selection
For
selection
of
programme
position
0
to
9,
press
the
corresponding
numeric
button
(0-9).
If
the
required
programme
is
equal
or
more
than
10,
for
example
23,
first
press
the
-/--*
button
and
enter
2
then
3.
@
Up/Down
Programme
Selection
Press
the
PA
button
to
select
the
next
programme
position.
Press
the
PWV
button
to
select
the
previous
programme
position.
Soueeeenes
@
Volume
control
«4
SOUND
To
adjust
the
sound
volume,
press
the
—
—s/
+
IHII------------
button.
@
Picture
controls
Select
from
the
following
functions:
Colour,
Brightness,
Contrast,
Sharpness,
Fine
tuning
by
pressing
the
FC.)
button
.
Each
time
the
FC)
button
is
pressed,
the
function
display
changes
as
illustrated.
BCOLOUR
THOM
------
®
Colour
:
To
adjust
the
picture
colour.
<
Bright
:
To
adjust
the
picture
brightness.
®
Contrast
:
To
adjust
the
picture
contrast.
Sharpness
:
To
adjust
the
picture
sharpness.
<>
Fine
tuning
:
To
make
fine
adjustments
to
tuning.
BRIGHT
HHT
------
(contrast
To
adjust
the
level
of
the
selected
function,
press
the
TUITE.
-
-
=
=
-
-
—
a
+
button.
[1]
SHARPNESS
TUITTEHN-
-
se
ee
8
SANYO
Operating
Instruction
Manual

ee
©
o>
«4SOUND
MUTE
HL
@
Sound
Mute
Should
you
wish
to
mute
the
sound
(Eg.
while
talking
on
the
telephone),
press
the
4K
button
once.
To
switch
the
sound
back
on,
press
it
again.
MEMORY
o--
>
eee
oc
NORMAL
---><---
Mm
Memory
Present
Sound
volume,
Colour,
Brightness,
and
Contrast
can
be
set
into
the
memory
by
pressing
the
©/PT
button.
This
must
be
done
while
the
Function
on
screen
display
is
still
on
the
screen,
(approx
5
seconds).
M@
Normalisation
Press
the
>*<
button
to
recall
the
picture
and
sound
settings
stored
in
the
memory.
a
You
can
select
a
playback
from
the
AV
terminal
by
pressing
the
TV/&)
button
and
the
mode
changes
as
illustrated.
When
the
programme
number
is
entered
in
the
AV
mode,
the
TV
set
switches
to
the
entered
programme
position
directly.
@
AV
Input
mode
Selection
The
input
signal
from
the
AV
equipment
which
is
connected
to
the
21
pin
terminal
is
selected
by
pressing
the
©/PT
button
in
the
AV
mode.
Each
time
the
/PT
button
is
pressed,
the
input
mode
change
as
follows:
AV:
Video
input
mode
AV
S-VIDEO:
S-Video
input
mode*
AV
RGB:
RGB
input
mode
SANYO
Operating
Instruction
Manual
9

Up
to
60
broadcast
stations
in
your
reception
area
can
be
stored
in
the
electronic
memory.
There
are
three
ways
of
pre-setting
modes:
@
Automatic
presetting
All
receivable
channels
are
automatically
tuned
in
and
memorised
as
they
are
found
in
consecutive
programme
positions.
@
Semi-automatic
presetting
Use
to
preset
a
receivable
channel
in
any
desired
programme
position,
e.g.
BBC1
at
position
1.
MANUAL
11
@
Manual
presetting
Manually
tune
a
channel
if
it
cannot
be
automatically
tuned,
such
as
when
the
signal
is
poor.
To
select
the
presetting
mode,
press
and
hold
the
©/PT
button
for
more
than
2
seconds.
Each
time
the
¢/PT
button
is
pressed,
the
tuning
mode
changes
as
illustrated.
Press
and
hold
the
</PT
for
more
than
2
seconds,
until
the
AUTO-tuning
display
appears.
Press
the
«<_<
-+
(AS)
button
to
start
automatic
presetting
start.
The
channels
are
stored
in
consecutive
positions
beginning
at
programme
position
"1".
After
all
receivable
channels
have
been
found
and
stored,
the
TV
set
returns
to
the
position
"1".
Note:
To
cancel
searching
midway,
press
the
/PT
button.
“t---
0
<€---
1p
7
0
SANYO
Operating
Instruction
Manual

Press
and
hold
the
©/PT
button
for
more
than
2
seconds
until
the
AUTO-tuning
display
appears.
Press
the
©/PT
button
again
to
select
SEMI-
automatic
presetting
mode.
Press
the
—
—-<
-+
button
to
start
searching,
when
a
station
is
found,
searching
stops
automatically.
Select
the
programme
position
where
you
wish
to
store
the
channel
using
the
PA,V
buttons
or
Numeric
buttons
(0-9).
Press
the
FZ.)
button
on
the
TV
set
to
store
in
the
memory.
Repeat
steps
2
to
4
for
other
desired
channels
Press
the
©/PT
button
twice
to
return
to
normal
TV
mode.
This
completes
the
presetting.
Press
and
hold
the
©/PT
button
for
more
than
2
seconds
until
the
AUTO-tuning
display
appears.
Press
the
©/PT
button
twice
to
select
MANUAL
presetting
mode.
Press
and
hold
the
Level
(+)
or
(-)
button
until
the
desired
station
appears.
“7
MANUAL
10
...-1...
Select
the
programme
position
where
you
wish
to
_
All
]-->--2--2--2-
oo
f-
store
the
channel
using
the
PAY
buttons
or
OF
PAA
Numeric
buttons.
Press
the
FE)
button
on
the
TV
set
to
store
in
the
memory.
Repeat
steps
2
to
4
for
other
desired
channels
Press
the
©>/PT
button
once
to
return
to
the
normal
TV
mode.
This
completes
the
presetting.
SANYO
Operating
Instruction
Manual
7
7

SET
4
+44
-
SET
4+
4-
CLOCK--:--
12
SANYO
Operating
Instruction
Manual
This
TV
has
a
clock
function
which
can
be
displayed
on
the
screen,
to
switch
on
the
TV
set
at
a
desired
time
and
to
switch
off
into
standby
mode
after
a
preset
period
of
time.
;
To
select
the
different
clock
functions,
press
the
@
Button,
each
time
it
is
pressed
the
display
changes
as
follows.
@
Sleep
timer
display/setting
mode
@
Clock
display/setting
mode
@
On-timer
display/setting
mode
@
No
time
display
on
the
screen
This
TV
set
will
automatically
set
the
clock
by
using
the
teletext
service.
Therefore,
you
do
not
need
to
set
the
clock
time.
The
clock
setting
is
performed
when
turning
on
with
the
mains
switch
and
selecting
a
programme
position
with
teletext.
SETTING
PROCEDURE
For
example:
Set
clock
at
PM
6:25.
Press
the
@
button
twice
to
select
the
clock
display/setting
mode.
Set
hours
"18"(24
hours
clock)
by
pressing
the
—#-+
button.
It
changes
as
follows:
00->01-+02------22->23->00----
Set
minutes
"25"
by
pressing
the
——«/
button.
It
changes
as
follows:
00->01-02-------58->59->00->01----
Note:
The
clock
timer
starts
after
releasing
the
—
-.-/7
button.

You
can
select
a
time
period
from
which
the
set
will
switch
into
stand-by
mode.
Press
the
@
button
once
to
select
the
sleep
timer
display/setting
mode.
Press
the
—«l+
button,
repeatedly
to
select
the
time
period
which
changes
as
follows:
-30(minutes)
>
-60
>
-90
>
-120
>
-00
>
-30—
-60
>
To
cancel
the
Sleep
timer,
select
"-00"
using
the
above
SETTING
PROCEDURE
For
example:
Set
switch
on-time
for
7:10.
AM.
The
time
is
set
from
the
Teletext
service
and
for
some
'
!
'
1
'
!
i
i]
i
SET
satellite
or
cable
programmes
this
may
be
European
time.
iCLOCK15:48
}
Press
the
@
button
twice
to
select
the
set
clock
©
Lnnnnmenenapanenncnereeen
4
mode.
Check
to
see
if
the
displayed
time
is
GMT
or
European
time
zone,
if it
is
European
time
press
the
—<a
+
button
to
select
the
correct
hour
for
UK
time.
Press
the
@
button
again
to
select
the
on-time
display/setting
mode.
SET.
+-4-
ON
--:
Set
hours
"07"(24
hours
clock)
by
pressing
the
—<
+
button.
It
changes
as
follows:
00>01>02>>—>2223-00->—>
Set
minutes
"10"
by
pressing
the
—
—«
button.
It
changes
as
follows:
00-01>02>~>—>-—>58->59>00>01>>>->
To
cancel
the
set
on-time,
press
the
-/--*
button.
The
Minutes
"ON
--:--"
will
appear
on
the
screen.
SET
4
+4
-
ON
07:10
SET
4
+
-4-
Switch
into
the
standby
mode
by
pressing
the
(4
button.
The
red
power
indicator
illuminates
to
show
you
have
set
the
on-timer
and
the
set
switches
into
Standby
mode.
When
the
set
on-time
time
is
reached,
the
TV
set
will
switch
on
automatically.
@
If
the
TV
set
is
switched
off
using
the
Mains
On/Off
Switch
or
a
power
failure
occurs,
the
On-Timer
set,
the
Sleep
Timer
set
and
the
manual
clock
settings
will
be
cancelled.
@
The
TV
set
switches
on
by
the
On-timer
at
the
programme
position
determined
by
Special
Function
\|tem2,
see
page
21.
@
When
the
TV
set
is
switched
on
by
using
the
on-timer
function,
the
TV
set
will
automatically
switch
into
standby
mode
in
2
hours
if
no
key
control
is
input.
@
If
the
clock
time
has
not
been
set,
the
on-timer
function
will
be
skipped.
SANYO
Operating
Instruction
Manual
13

14
SANYO
Operating
Instruction
Manual
m@
Time
Call
In
the
TV
mode,
if
the
receiving
programme
has
a
teletext
service
when
the
£3)
button
is
pressed,
the
present
time
will
be
displayed
on
the
screen
for
5
seconds.
@
Alternative
Programme
Press
the
P=P
button
and
the
TV
set
will
alternately
select
the
current
programme
position
and
the
previous
programme
position
is
viewed.
M@
Recall
To
display
the
on-screen
indications,
press
the
C4
button.
The
display
disappears
after
five
seconds.
m@
VCR
Use
(Not
available
14MT1)
This
remote
control
transmitter
has
been
designed
to
be
used
in
conjunction
with
selected
SANYO
VCR
s.
Some
SANYO
VCR
s
may
have
their
own
functions,
so
please
refer
to
the
individual
instruction
booklet
when
using
this
remote
control
to
ensure
compatibility.
POWER
On/oft:
Use
to
turn
VCR
power
on
and
off.
PLAY:
Use
to
playback
the
tape.
STOP
:
Use
to
stop
the
movement
of
the
tape.
FAST/CUE:
Use
to
advance
the
tape
at
fast
speed,
or
in
order
to
playback
the
tape
at
fast
speed.
REWIND/REVIEW:
Use
to
rewind
the
tape
or
in
order
to
playback
the
tape
in
reverse
at
fast
speed.
RECORD:
Use
to
record
on
the
tape.
Press
both
of
the
RECORD
buttons
at
the
same
time.

05
Oi
3G
4
u
Uv
0500
<
Button
symbol
Function
Page
OES
TEXT/MIX/TV
SWITCH
15,16,17,18
0-9
0
-
9
Numeric
Buttons
15,18
VPA
Page
Up/Down
16,18
Index
page
selection
16
Hold
16
Size
17
-/--*
Text
function
18,19
*K
(EX
Cancel
18,19
*
Sub
page
button
18
KE?
Reveal
19
Red
16
oe:
Green
16
Yellow
16
ee.
Blue
16
Press
the
&{4C)
button
once
to
select
Text
only,
press
again
to
select
Text
over
the
TV
picture
and
press
again
to
return
to
the
TV
mode.
@
Direct
page
selection
Enter
a
page
number
directly
using
Numeric
buttons
(0-9)
eg.
To
select
page
301,
press
3
then
0
and
then
1.
It
will
take
a
while
to
search
for
the
page,
once
it
is
found
it
will
be
displayed
on
the
screen.
SANYO
Operating
Instruction
Manual
7
5

TEXT
INDEX
OlOME-7:VGue
mm
0)
51
(01,4
a8
ROWING
Red
Green
Yellow’
Blue
P351
FOOTBALL
CONTENTS
DV1
DV2
PRE
SCOTT
HOLD
P351
P3/8
WORLD
NEWS
7
6
SANYO
Operating
Instruction
Manual
@
Up/down
page
access
Press
the
PA
or
PY
button
to
select
the
next
or
previous
page
number.
PA
:
P301
>
P302
>
P303
....
P399
>
P300
....
PV
:
P301
>
P300
>
P399
>
P398
....P301
....
Hold
the
button
for
rapid
page
change.
m@
Coloured
button
page
access
Press
one
of
the
4
coloured
buttons
to
select
the
topics
shown
at
the
bottom
of
the
text
screen.
For
example
the
Red
topic
can
be
selected
by
pressing
the
Red
button,
the
Blue
topic
by
the
Blue
button,
and
so
forth
with
the
other
colours.
@
Index
page
selection
Press
the
button
to
select
one
of
the
teletext
index
pages.
Press
the
ES}
button
to
prevent
sub
pages
changing.
Some
teletext
pages
are
made
up
of
several
sub
pages.
These
sub
pages
are
automatically
changed.
Sub
page
is
shown
as
P2/4
(sub
page
2
of
4
pages)
the
location
on
the
text
page
depends
on
the
text
service.

Either
the
top
half
or
the
bottom
half
of
the
page
can
be
expanded
to
fill
the
whole
screen
by
pressing
the
button.
Each
time
the
button
is
pressed,
the
display
changes
as
illustrated.
To
use
the
+x,
+E
or
+8)
button
in
teletext
mode,
press
the
-/--«
button
first,
then
press
required
button.
TEXT
PAGE
TEXT
PAGE
NEWS
SPORTS
CITY
TIME
When
the
-/--«
button
is
pressed,
the
display
on
the
screen
changes
as
illustrated.
Press
the
+x),
*E
or
Gs)
button
as
required,
or
return
to
the
normal
text
display,
by
pressing
it
again.
<X>
<?>
Gxkxkx
P320
P351
sy
Sometimes
the
page
access
can
take
some
time.
Wasi:
a
While
waiting
you
can
view
the
TV
picture
by
pressing
,
se
the
*&
button.
i
to
Enter
the
new
page
number.
Press
the
-/--
button
and
then
press
the
+)
button.
When
the
page
is
found,
the
page
number
will
appear
over
the
TV
picture.
3
Press
the
GIt4C)
button
to
view
the
teletext
page.
|
P320
]
ORES)
SANYO
Operating
Instruction
Manual
7
7

?
KKKK
.
With
a
text
page
selected
which
has sub
pages,
you
may
wish
to
read
a
Known
sub
page
number.
'
ale
7
os
Press
the
-/--*
button
followed
by
the
:£a)
button.
The
characters
“S****”
will
be
displayed
on
the
top
left
corner
of
the
screen.
S**
P351
P1/8
Enter
the
sub
page
number
by
using
the
Numeric
NEWS
(0-9)
buttons
or
use
the
PAY
buttons.
For
example,
to
enter
the
sub
page
4,
press
buttons
0,
0,
0
and
4.
$0004
P351
P1/8
Press
the
+)
button
to
return
the
normal
TV
NEWS
picture.
The
cancel
symbol
will
appear
over
the
TV
_
Immediately
the
requested
sub-coded
page
is
found,
the
page
number
will
appear
over
the
TV
picture.
5
Press
the
E4C)
button
to
view
the
sub-coded
page.
To
clear
the
sub-coded
page
you
must
enter
a
new
page
number,
because
sub
page
rotation
has
been
stopped.
1
>
TV
Select
a
news
flash
teletext
page.
HK
Press
the
-/--*
button
followed
by
the
>G
button
to
re
return
to
the
normal
TV
picture.
clas
ae
Immediately
any
news
comes
in,
the
word
eg
"News
Flash"
and
the
news
will
appear
over
the
normal
TV
picture.
TV
Picture
NEWS
FLASH
~<a
e
ee
TV
If
you
want
to
make
the
news
disappear,
press
the
.
Function
button
and
the
Gx
button.
Picture
To
cancel
the
news
flash
page
enter
a
new
page
number
or
return
to
TV
mode.
18
SANYO
Operating
Instruction
Manual

<X>
<?>
Seane
When
a
relevant
teletext
page
is
selected,
eg.
a
quiz
with
questions
and
answers,
you
can
find
out
the
correct
answer.
[
alp
afm
nae
1
Press
-/--*
button
followed
by
the
:*E3
button.
To
make
the
answers
disappear,
press
the
*E2
button.
Note:
You
may
have
to
press
and
hold
the
+2
button.(This
depends
upon
the
individual
teletext
service).
P320
There
are
teletext
pages
which
are
updated
as
events
tae
|
<X>
<2>
Sanne
progress,
such
as
sports
scores,
news
reports
or
traffic
Sour
|
<X>
<?>
Stn
|
information.
Select
a
page
which
will
be
updated.
Press
the
-/--*
button
and
the
«Ex
button
to
return
to
the
normal
TV
picture.
2]
|
pe
> >
|
|
Immediately
the
selected
page
is
updated,
the
page
~<qe
ee
number
will
appear
over
the
normal
TV
picture.
TV
TV
3
Press
the
&(4C)
button
to
view
the
updated
page.
NOTE:
If
the
teletext
page
is
made
up
of
sub
pages
the
page
number
will
appear
over
the
TV
picture
every
time
the
a
sub
page
is
rotated.
aazo
SPORTS
laxete)dey-1
I,
SANYO
Operating
Instruction
Manual
7
9

@
Connect
a
VCR
(normal
or
S-VHS
type),
a
Video
disc
player,
RGB
equipment
or
Pay
TV
decoder
using
a
21
pin
Scart
lead
to
the
AV
terminal.
oooooadddo
@
Press
the
PLAY
button
on
your
AV
equipment.
Most
AV
equipment
has
automatic
switching
to
the
AV
mode
(8-pin
function
signal).
@
If
the
AV
picture
does
not
appear
your
equipment
may
not
have
this
signal.
Select
AV
mode
by
pressing
the
TV/&)
button.
(See
TV/AV
switching
page
9)
@
Select
the
input
mode
to
match
the
connected
equipment
by
pressing
the
©/PT
button
on
the
TV
set.
(See
AV
Input
mode
selection
page
9)
oes
rhea
acct
If
you
do
not
have
a
21
pin
Scart
lead
or
your
AV
equipment
does
not
have
a
scart
socket
you
can
connect
your
VCR
or
other
AV
equipment
via
the
aerial
socket.
The
VCR
should
be
tuned
to
programme
position
0
(PO),
this
has
been
especially
designed
for
VCR
use.
2
O
SANYO
Operating
Instruction
Manual
This manual suits for next models
7
Table of contents
Other Sanyo TV manuals

Sanyo
Sanyo CE-25D3-C User manual

Sanyo
Sanyo CE21B2-C User manual

Sanyo
Sanyo FW32R19F User manual

Sanyo
Sanyo DS20930 User manual

Sanyo
Sanyo CP29SV2Z User manual

Sanyo
Sanyo CPP3024W User manual

Sanyo
Sanyo CE20WLD25-B User manual

Sanyo
Sanyo LCD-39XR12F User manual

Sanyo
Sanyo AVM-3650G User manual

Sanyo
Sanyo CM21AF8 User manual

Sanyo
Sanyo DS24205 Owner's manual

Sanyo
Sanyo CE27LC6BK-c User manual

Sanyo
Sanyo CE29FFV1-F User manual

Sanyo
Sanyo CP28WF1 User manual

Sanyo
Sanyo C20LB18S User manual

Sanyo
Sanyo DP50843 User manual

Sanyo
Sanyo CP21SE1K User manual

Sanyo
Sanyo CE25DN4-C User manual

Sanyo
Sanyo C29LK39S User manual

Sanyo
Sanyo C21ZM15 User manual