midrange. This has been the standard approach for guitar equalizer circuits as there is seldom
any need for boosting this range.
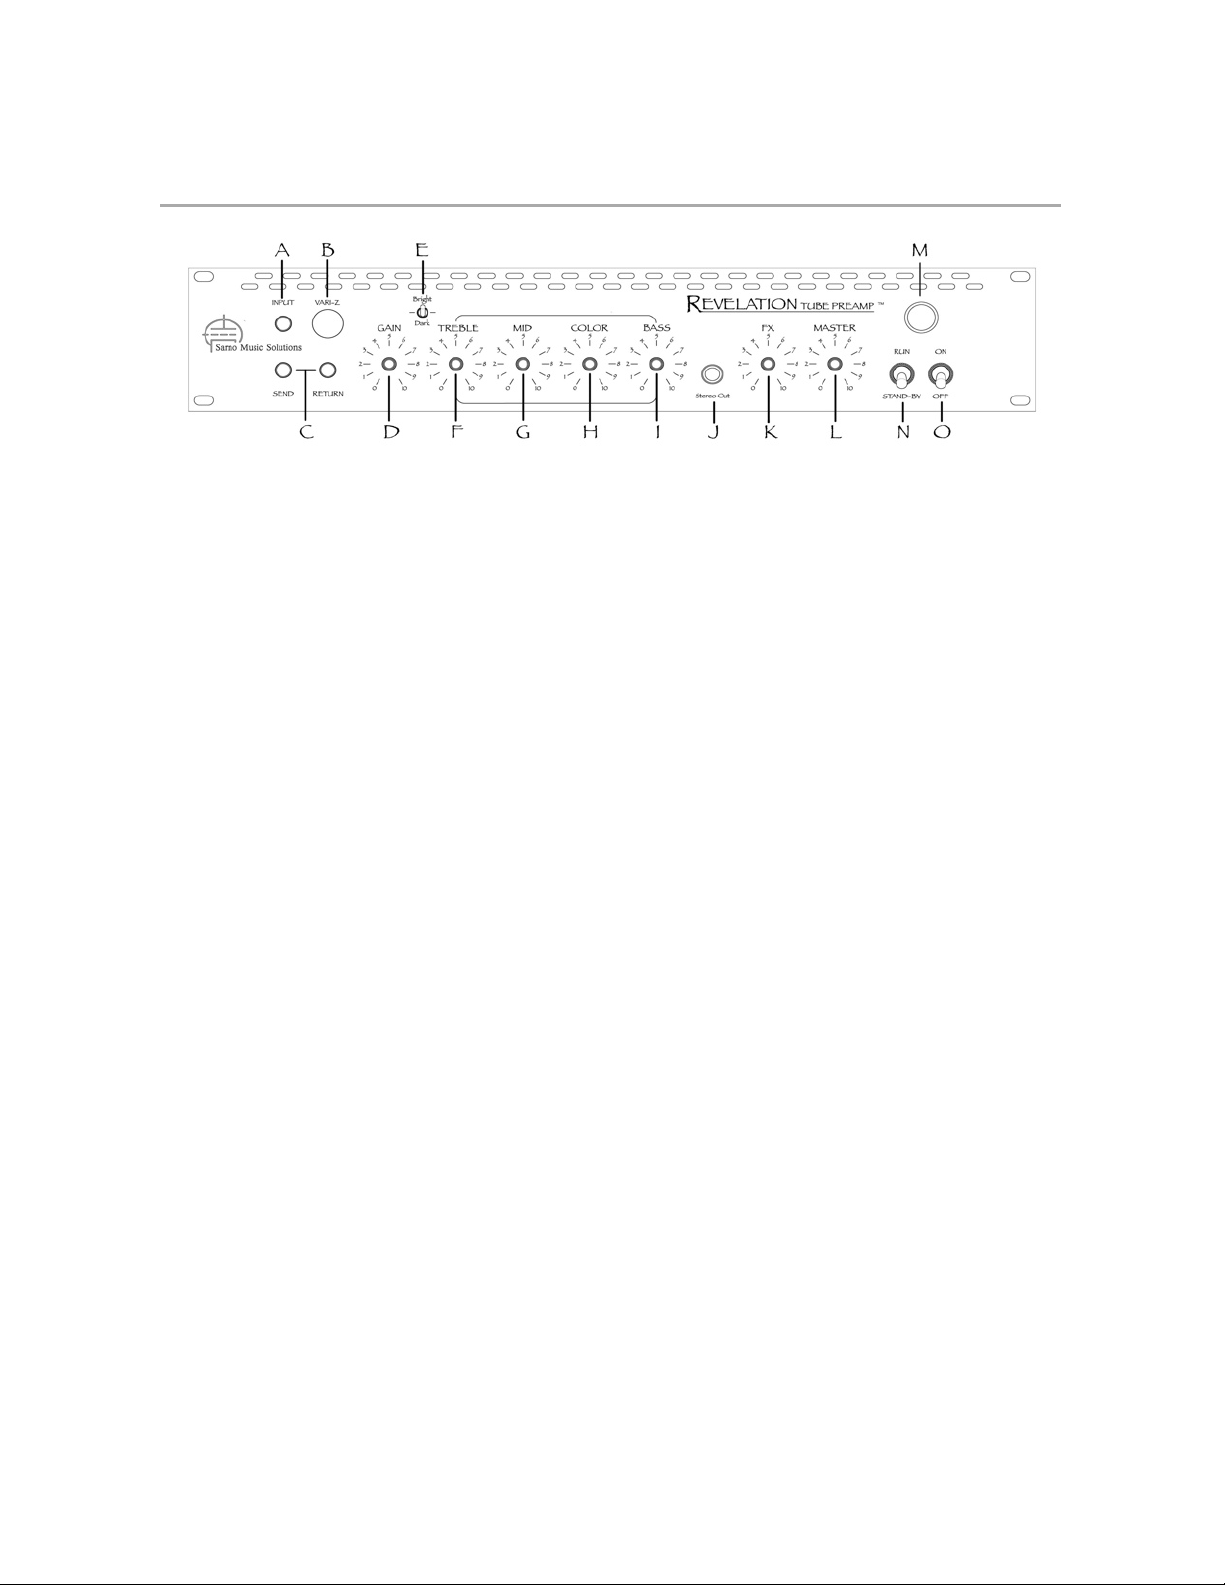
H Color – this new control hasn’t been seen before in conjunction with this classic tone circuit
design. It’s potentially the most confusing and most useful control on the RTP so a little
explanation is necessary. This type of equalizer circuit in the RTP is “interactive”. The term
interactive is used because the midrange dip frequency moves around in response to changes
in the “Treble” setting. With high “Treble” settings, the midrange dip sweeps lower giving a
more clear and defined midrange. With low “Treble” settings, the midrange dip sweeps higher
giving a thicker, warmer midrange. For years people have found with the classic amp designs
that a high treble setting may also bring along with it too much upper midrange bark. Now
with the added “Color” control, you can add as much or as little treble as you’d like and then
dial in the exact desired midrange coloration. So use the “Color” control in conjunction with
the “Treble” control. As a general rule of thumb, higher “Treble” settings will want higher
“Color” settings, and vice-versa. But there are no rules. Go nuts. A good starting point is to set
“Color” at 5, make general tone adjustments, and then go from there.
I Bass – this controls the level of the lowest or bass band of frequencies.
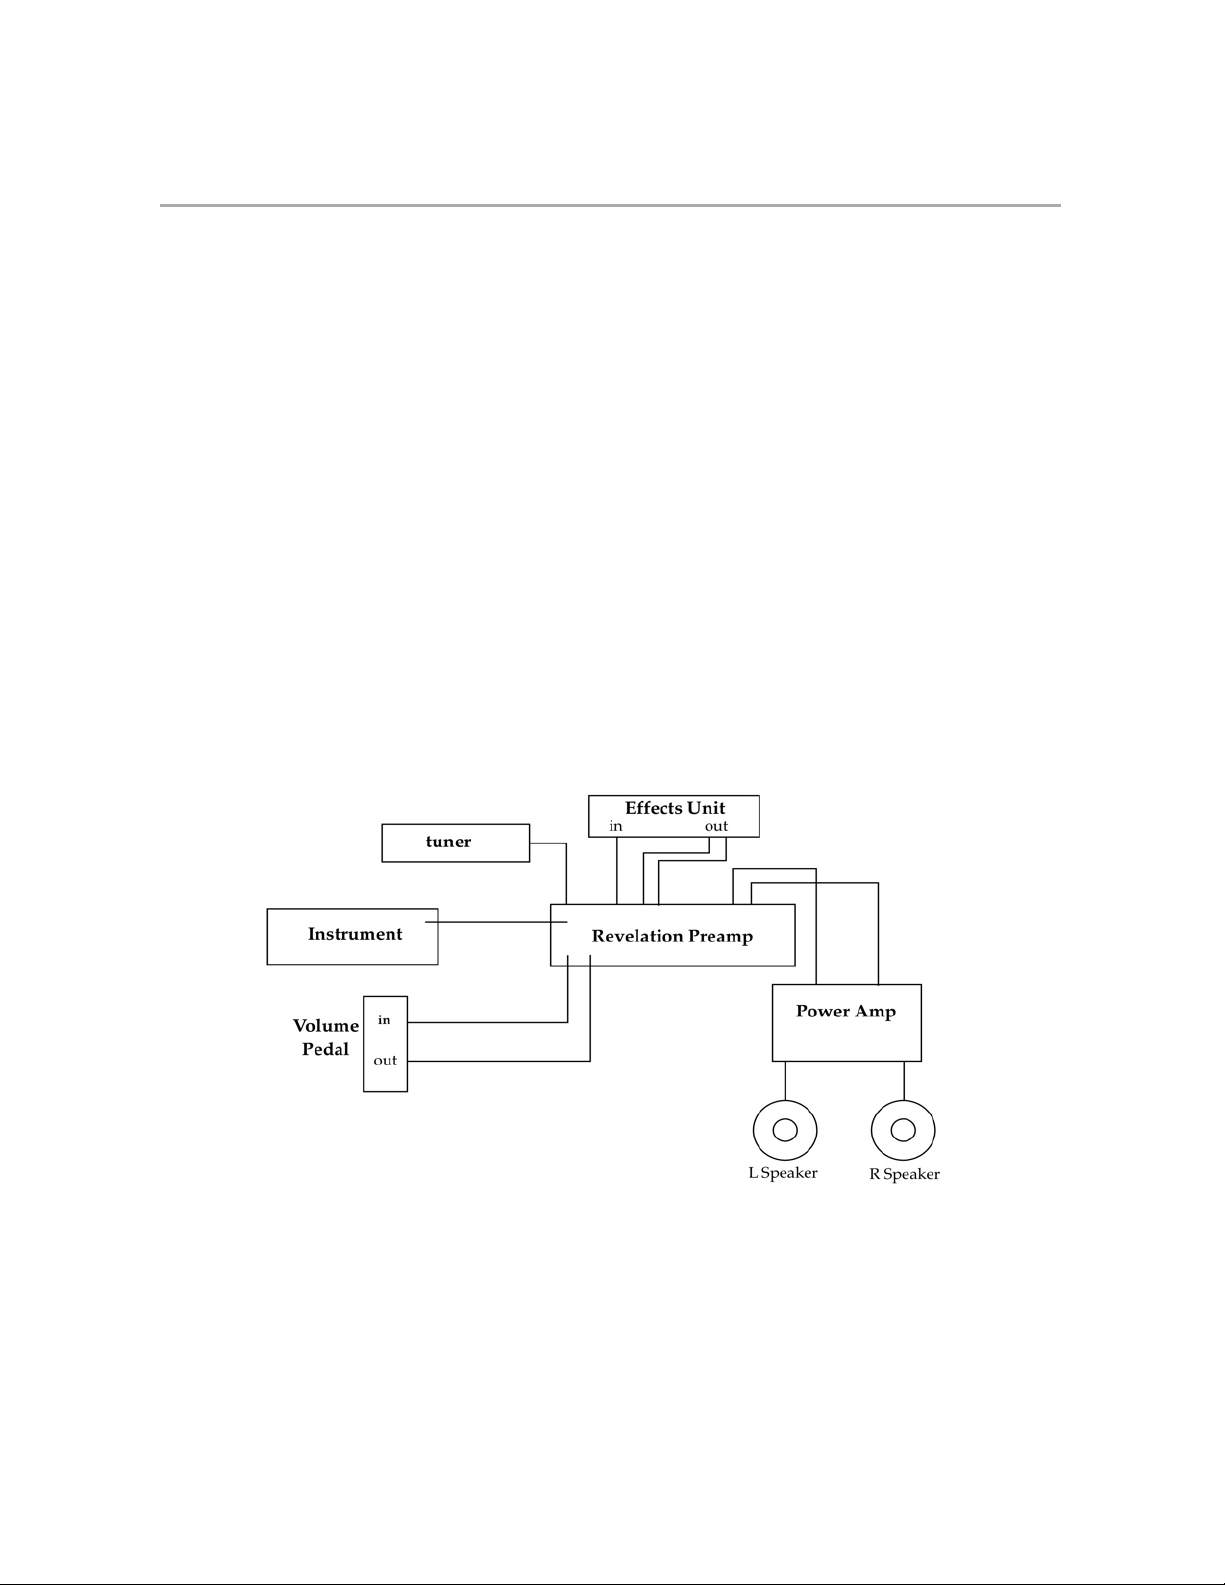
J Aux In – this jack is a standard, unbalanced, stereo TRS (Tip, Ring, Sleeve) type Auxiliary input
for connecting an amp modeler, CD player, keyboard/drum machine, iPod™, computer, or
whatever to mix along with the instrument. The Aux input is “post-EQ” so the tone controls of
the Preamp will not affect it.
K FX – This knob is actually a stereo effects blend control. Since the effects loop in the RTP is
parallel and not series, the FX knob acts as a mix control that blends in the returns from your
effects unit along with your pure-tube dry signal. This also means that your FX unit needs to be
set at 100% effect or else you may experience some unpleasant comb-filtering or phasing
sounds. If you have both delay and reverb used simultaneously in your effects unit, be sure to
configure the effects unit to route the two effects in parallel, not in series, and set the effect mix
to 100% effect and no dry signal.
L Master – this controls the final master output level for both left and right channels. You’ll find
with high “Gain” settings that you may need to back the Master down, and vice-versa.
M Pilot Lamp – this indicates that the unit is powered up, but does NOT indicated whether it is in
“Run” or “Stand-By” mode.
NStand-By – this switch places the RTP in stand-by mode. It should always be in the down
position when powering up the unit. This is mainly to help prolong tube life. After the unit has
been powered on, you should wait at least 15 seconds before putting the stand-by switch in
the up or “Run” position. When powering down it doesn’t really matter where the “Stand-By”
switch it set, but it’s a good habit to pit it in the down position and ready to power up from the
safe, stand-by position. * Note: When on set breaks the best way to mute your rig is to turn
the master all the way down, leaving the Stand-By switch in the “Run” position.
OPower – this is the main power switch for the RTP. The pilot lamp will glow when this switch is
in the up or on position.