THE V DOUBLE / TOOL TIPS
8
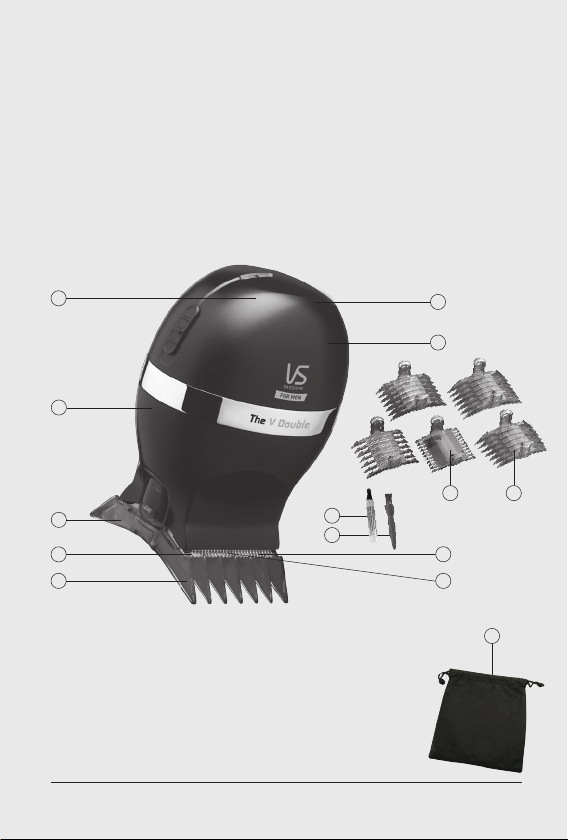
GETTING TO KNOW
YOUR NEW TOOL
The V Double has an ergonomically designed head to fit in the palm of your
hand for an easy ‘DIY’ hair cut. It is similar to a traditional clipper, but with the
convenience of 2 blade sets, instead of 1.
The V Double allows you to keep it long on top & faded on the sides or short
all-over. You decide.
A MODERN TAKE ON THE TRADITIONAL CLIPPER
Just like riding a bike, new things can take some practice, and The V Double Cut
is no different. The more you use it, the more comfortable you become.
This clipper has been designed with a dual blade system, so its quite similar
to how to use a traditional clipper to self-cut, but its made even easier with
additional of the dual blade system.
FOR AN ALL-OVER SHORT CUT
Start cutting at the back of the head, near the nape of the neck. Hold your new
tool with the teeth of the clipper pointing upwards, so that the comb guide is flat
on the head. Slowly move the clipper upwards through the hair and towards the
front of the head in a forwards sweeping motion. Once at the front of the head,
engage the opposite blade in a backward sweeping motion to move from the
front of the head, to the nape of the neck.
Continue with this sweeping cutting motion, running from the nape of the neck to
the front of the head until you reach an all-over same length.