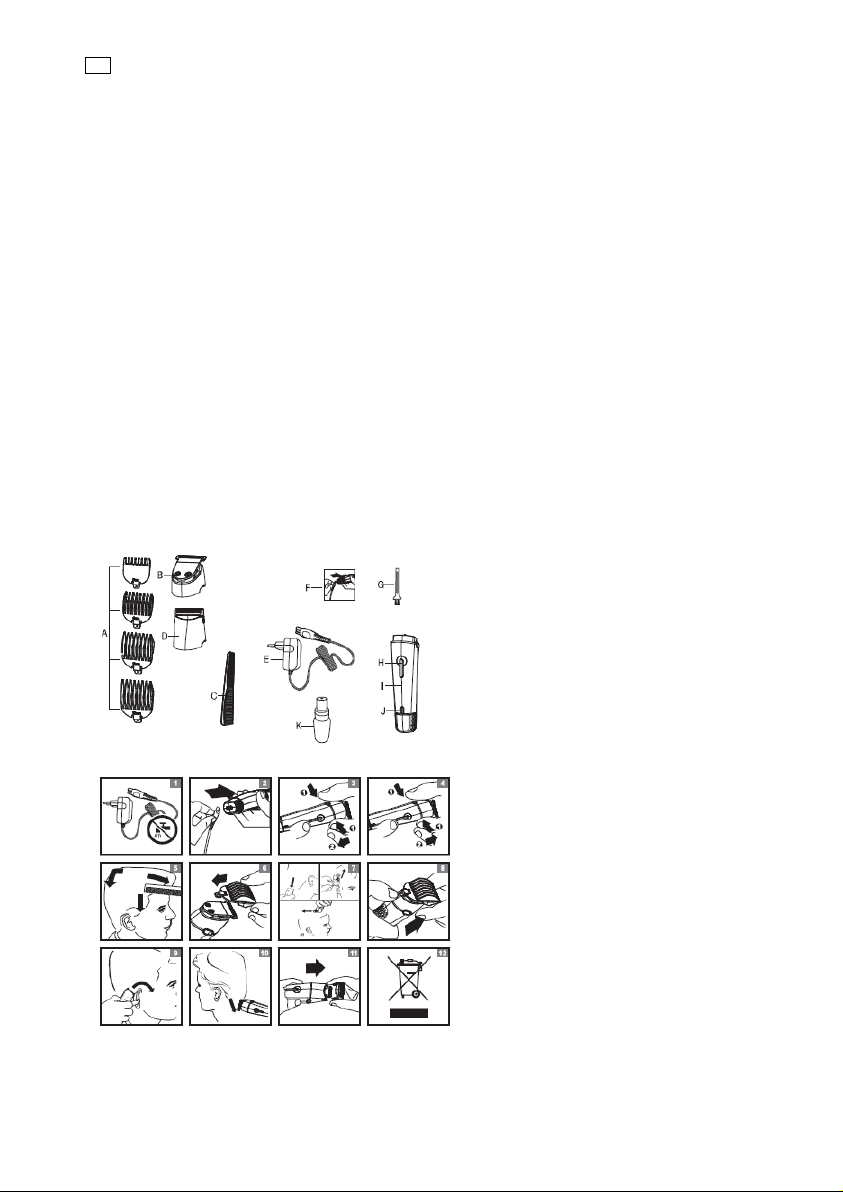
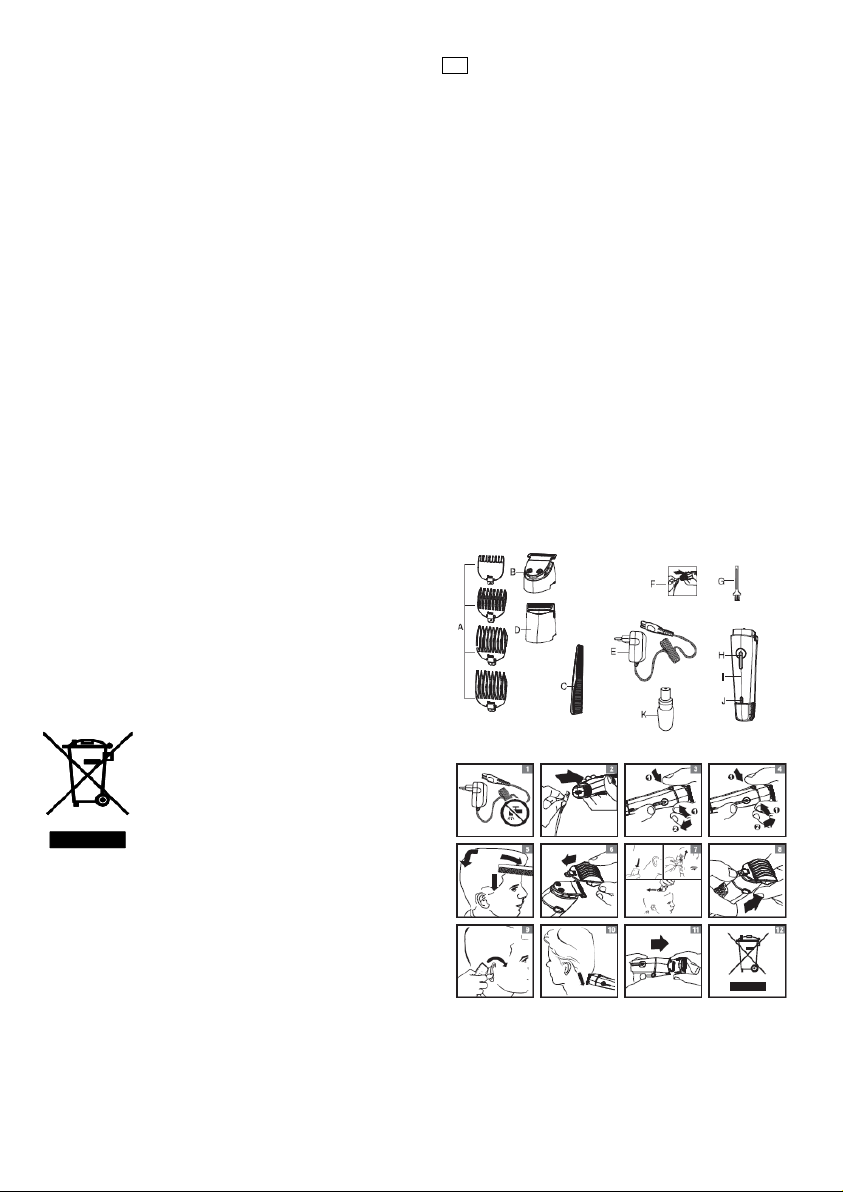
1. Press the setting selector upwards
and pull the comb off the trim parts.
(Fig. 8).
2.Before you start to contour the hair-
line round the ears, comb the hair
ends over the ears.
3. Tilt the appliance in such a way that
only one edge of the cutting element
touches the hair ends when you shape
the contours round the ears (Fig. 9).
Only cut the hair ends. The hairline
should be close to the ear.
4. To contour the neckline and side-
burns, turn the appliance and make
downward strokes (Fig. 10). Move the
appliance slowly and smoothly. Follow
the natural hairline.
Shaving.
Shaving with the micro shaver
Use the micro shaver to create
smooth, well-defined contours.
Before you use the micro shaver, al-
ways check it for damage or wear.
If the foil or cutter is damaged or
worn, do not use the micro shaver, as
injury may occur. If the foil is dam-
aged, replace the top part of the micro
shaver and if the cutter is damaged,
replace the whole attachment before
you use the micro shaver again.
1. Pre-trim the contours you want to
shave with the cutting element with-
out comb or the precision trimmer.
2. Put the micro shaver on the handle
гseeЫsectionЫ‘ьttachingкdetachingЫatи
tachmentsвЫinЫchapterЫ‘PreparingЫforЫ
use).
3. Gently press the micro shaver onto
the skin and shave along contoured
edges to remove any stubble.
Do not press too hard.
Cleaning
For you convenience and rapid use of
the appliance, we recommend clean
the shaver with water and liquid soap.
Regular cleaning guarantees better
performance prevents odor and bacte-
ria and keeps the blade sharp. Never
use compressed air, scouring pads,
abrasive cleaning agents or aggressive
liquids such as petrol or acetone to
clean the appliance.
Note: be careful with hot water. Al-
ways check if the water is not too hot,
to prevent your hands from getting
burnt.
Micro shaver, cutting element,
nose/ear hair trimmer, precision
trimmer and lettering head use some
lubricating oil. The result is better.
Note: Clean the appliance every time
you have used it.
1. Make sure the appliance is switched
off and disconnected from the socket.
2. Remove any comb and/or attach-
ment from the appliance.
3. If you have used the micro shaver,
separate its top part from its body
(Fig. 11).
The shaving foil is very delicate. Han-
dle it carefully. Replace the top part of
the micro shaver if the shaving foil is
damaged.
Do not clean the shaving foil with the
brush, as this may cause damage.
4. Blow and/or shake out any hair that
has accumulated in the attachments
and/or combs.
5. Clean the attachments and the
combs with lukewarm water or with
the cleaning brush.
6. Clean the adapter with the cleaning
brush or a dry cloth.
Keep the appliance and adapter dry.
Storage
Store the appliance and attachments
in the charging stand to prevent dam-
age.
Replacement
If the adapter is damaged, always
have it replaced with one of the origi-
nal type in order to avoid a hazard.
Only replace damaged or worn at-
tachments or combs with original re-
placement attachments or combs
Replacement attachments, combs and
adapters are available from your deal-
er and authorized service centers.
If you have any difficulties obtaining
an adapter or replacement attach-
ments and combs for the appliance,
contact the Customer Service Center.
Environment
Do not throw away the appliance with
the normal household waste at the
end of its life, but hand it in at an offi-
cial collection point for recycling. By
doing this, you help to preserve the
environment. (Fig. 12).
The built-in rechargeable battery con-
tains substances that may pollute the
environment. Always remove the bat-
tery before you discard and hand in
the appliance at an official collection
point. Dispose of the battery at an
official collection point for batteries. If
you have trouble removing the bat-
tery, you can also take the appliance
to a service center. The staff of this
centre will remove the battery for you
and will dispose of it in an environ-
mentally safe way.