SBI AC02737 User manual

2016-09
ENGLISH
SEAL TIGHT
CHIMNEY DAMPER
AC02737, AC02738, AC02739
Opera or’s Manual
Original Opera ing Ins ruc ions
THANK YOU AND CONGRATULATIONS...
For purchasing an SBI Hea ing Accessories,
Seal Tigh Chimney Damper. Made in he USA
of durable cas aluminum, i is designed o
help save in hea ing and cooling bills; o help
preven downdraf s and odors; o keep ou
rain, snow, birds, and pes s; and o help
reduce ou side noise.
LIMITED LIFETIME WARRANTY
SBI Hea ing accessories warran s for he purchaser’s life ime ha our Seal Tigh Chimney Damper, when reasonably main ained and used on
solid fuel burning chimneys, shall be free from any defec s in ma erial; or manufac urer’s workmanship. Proof of purchase will be required o
save your receip . A Re urn Goods Au horiza ion Number need o be re urned o our facili y, prepaid, a 250 rue de Copenhague Sain -
Augus in-de-Desmaures, Québec, Canada, G3A 2H3. SBIHA shall no be liable for any consequen ial or iden ical damages resul ing in loss from
he use of his produc .
In no case will SBIHA’s liabili y exceed he cus omer’s purchase cos
.
SBI Heating Accesso ies
250 rue de Copenhague |
Sain -Augus in-de-Desmaures
Québec, Canada G3A 2H3
Fax number: 888-355-5067
Email us a service@sbi-in erna ional.com
Specifica ions subjec o change wi hou no ice.
NOTICE: WE ARE NOT RESPONSIBLE FOR TYPOGRAPHICAL ERRORS.
PROFESSIONAL INSTALLATION............................2
SAFETY PRECAUTION..........................................2
TOOLS NEEDED FOR INSTALLATION....................2
INSTALLATION INSTRUCTIONS............................5
OPERATION INSTRUCTIONS................................5
SEAL TIGHT
CHIMINEY DAMPER

2
WARNING
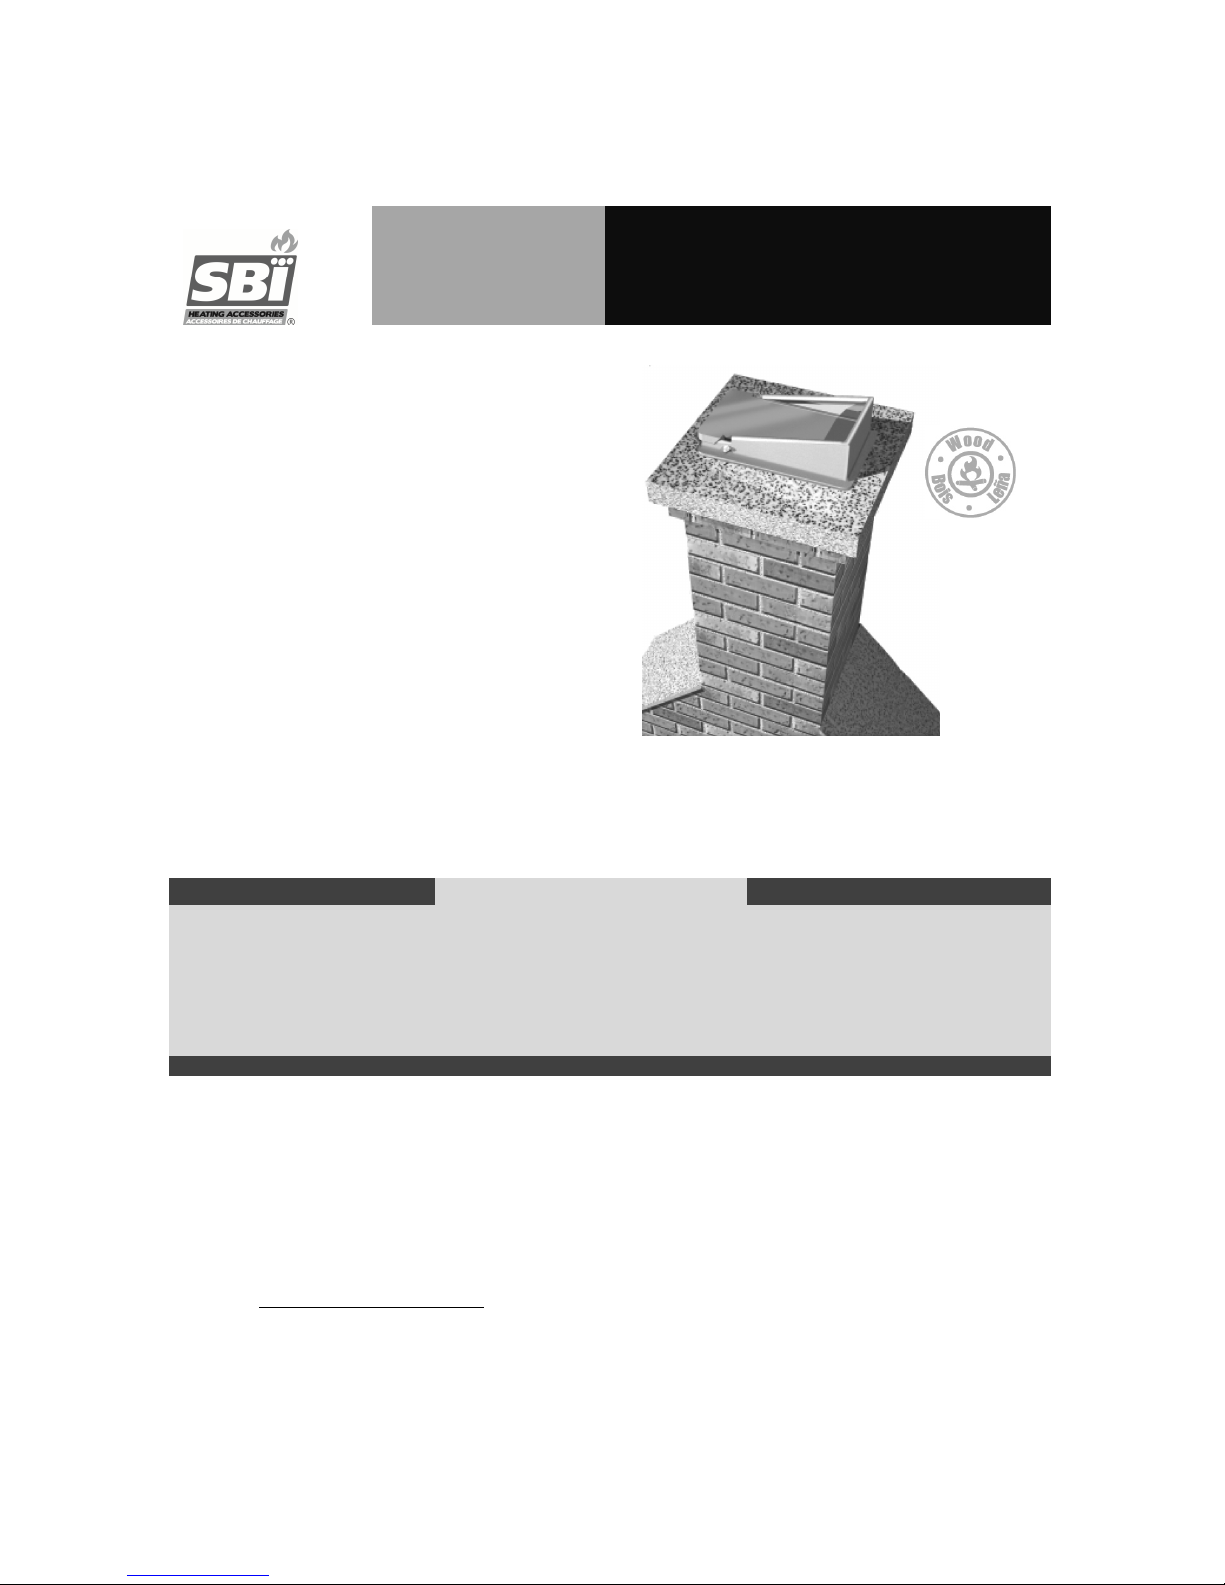
The Seal Tight Chimney Damper is made for use only with open woodburning masonry
fireplace chimneys and are NOT suitable for use in these installations:
•
Don’t use on chimneys serving vented gas logs. Vented gas logs require the
fireplace damper to be removed completely or fixed to a permanently open
position; this is to assure that soot, fumes and carbon monoxide do not enter
your home.
•
Use only on vent-free gas logs if approved by the appliance manufacturer and
the local authority having jurisdiction. However, we don’t recommend it because
the moisture generated from the gas logs could damage the chimney structure.
•
Don’t use on chimneys serving other fuels, wood stoves or other appliances such
as inserts, furnaces, etc.
PROFESSIONAL INSTALLATION RECOMMENDED
Some chimneys are difficult to access. SBI Heating Accessories recommends that you
call your local CSIA or WETT certified chimney sweep to install your new damper and
clean your chimney at the same time. This will not only help with the installation, but will
help ensure that your flue is in good working condition.
SAFETY PRECAUTIONS
As with any product you install, especially on your roof, there are safety precautions,
including:
• Using a ladder and working on your roof in a safe manner;
• Working on roof only in good weather, not in rain, ice, snow, or lightning;
• Making sure the damper will open properly before starting a fire;
• Using safety glasses when drilling;
• Using a masonry bit when drilling into masonry;
• Using only the adhesive provided.
In addition, be sure to check local codes and the appliance manufacturer before
installing on flues venting gas fireplaces or gas appliances.
TOOLS NEEDED FOR INSTALLATION
Hammer, power drill, 1/4” masonry drill bit, safety glasses, wire cutters, and ladder.

3
INSTALLATION INSTRUCTIONS
STEP 1: BEFORE GOING ON THE ROOF
Check that all parts are present
• Damper assembly: damper, cable, cable
spring
• Adhesive tube (1)
• Allen wrench (1)
• Bracket (1)
• Chain assembly: chain, brass lug, handle (1)
• Nail anchors (2)
If any parts are missing, call SBI Heating Accessories:
418-908-8002
STEP 2: ON THE ROOF
A. Carry damper and adhesive to roof
B. Prep flue liner and damper
• Make certain top of flue liner is dry and clean.
• Install damper on flue so that high side of damper
is against prevailing (most frequent) wind (see
illustration).
• Be certain 4 inch spring will hang freely from lid
when damper is closed.
• Lower unattached end of cable to fireplace
opening below.
C. Adhere damper to the flue liner
• Use the adhesive cap to open the tube.
• Apply adhesive to top of flue liner all the way
around the opening.
Important: Use only the adhesive furnished.
Caution: Direct contact with adhesive will irritate eyes
or skin. Read directions on tube carefully. Keep
adhesive out of reach of children.
• Press the damper onto the flue liner. Allow 24
hours to set before using fireplace.

4
STEP 3: AT THE FIREPLACE
A. Mount bracket in fireplace
• Using 1/4” masonry drill bit, drill one hole about 1” deep into firebrick towards
the front of the fireplace and about 20” off the firebox floor (see illustration).
Important: If brick is loose, first repair it with refractory
mortar or call local mason.
Caution: Wear safety glasses when drilling. Use only
masonry drill bit. Failure to do so can cause cracks in the
firebox wall.
• Insert nail anchor in top hole of bracket and secure
to firebox wall with hammer.
• Drill second hole after bracket is attached to
firebox wall. Add second nail anchor and secure.
[Illustration Call Outs: Placement of Bracket in
Firebox]
B. Install cable handle
• Pull cable through bracket until a slight tension
can be felt. Damper should now be closed.
• Slide brass lug onto cable 1/2” above bracket (see
illustration).
• Close damper by pulling cable down and placing
lug under bracket.
[Illustration Call Outs: Cable, Lug, Bracket, Handle,
Bracket and Handle Assembly]
C. Check and adjust operation
• Return to the roof and check that the damper is tightly sealed. If it is not, adjust lug
upward for better seal. Do not overdo it – if lug is raised too far, this may activate the
cable leg and actually open the damper.
• Cut off excess cable.

5
OPERATION INSTRUCTIONS
Opening and closing the damper
A. Open the damper before starting a fire.
• Pull handle down slightly and release, allowing lug to
pull up and hang freely about 4” above the bracket.
(see illustration). If lug only hangs 1” to 2” above
bracket, damper may not be open.
Warning: Do not start a fire if damper is not clearly
open. Failure to follow this rule may cause smoke
damage.
B. Close the damper after the fire
is completely out.
• Pull handle down until lug is below bracket. Move
cable into any notch in bracket and release handle.
C. If damper does not open
• This may occur due to heavy snow, ice, or improper
installation.
• Pull the handle down sharply 3” to 4” below the
bracket. This pulls down the extra cable leg to pull the
lid open.
• Release the lug up past the bracket.
• If necessary, inspect the damper on your roof to
determine how to get it open, or call your local CSIA or
WETT certified chimney sweep to do the inspection.
Energy saving note: Closing the damper when
fireplace is not in use will prevent heated or air
conditioned air from escaping out the chimney
Fire prevention warning: Remember to have your flue checked annually for creosote
buildup by your local CSIA or WETT certified chimney sweep.
This manual suits for next models
2
Table of contents
Other SBI Ventilation Hood manuals
Popular Ventilation Hood manuals by other brands

Zanussi
Zanussi ZHS92450XA user manual

Caple
Caple CE902SS instruction manual

KitchenAid
KitchenAid KWCU300WSS0 Installation & use manual

Lacanche
Lacanche CAFE MODERNE Installation, operation and maintenance instructions

Proline
Proline Hurricane PLJW installation guide

Broan
Broan Elite E6042TSS Specification sheet