Connections
DVD Player Video Output
TV/Monitor Video Input
VIDEO SYSTEM CONNECTION
Notes:
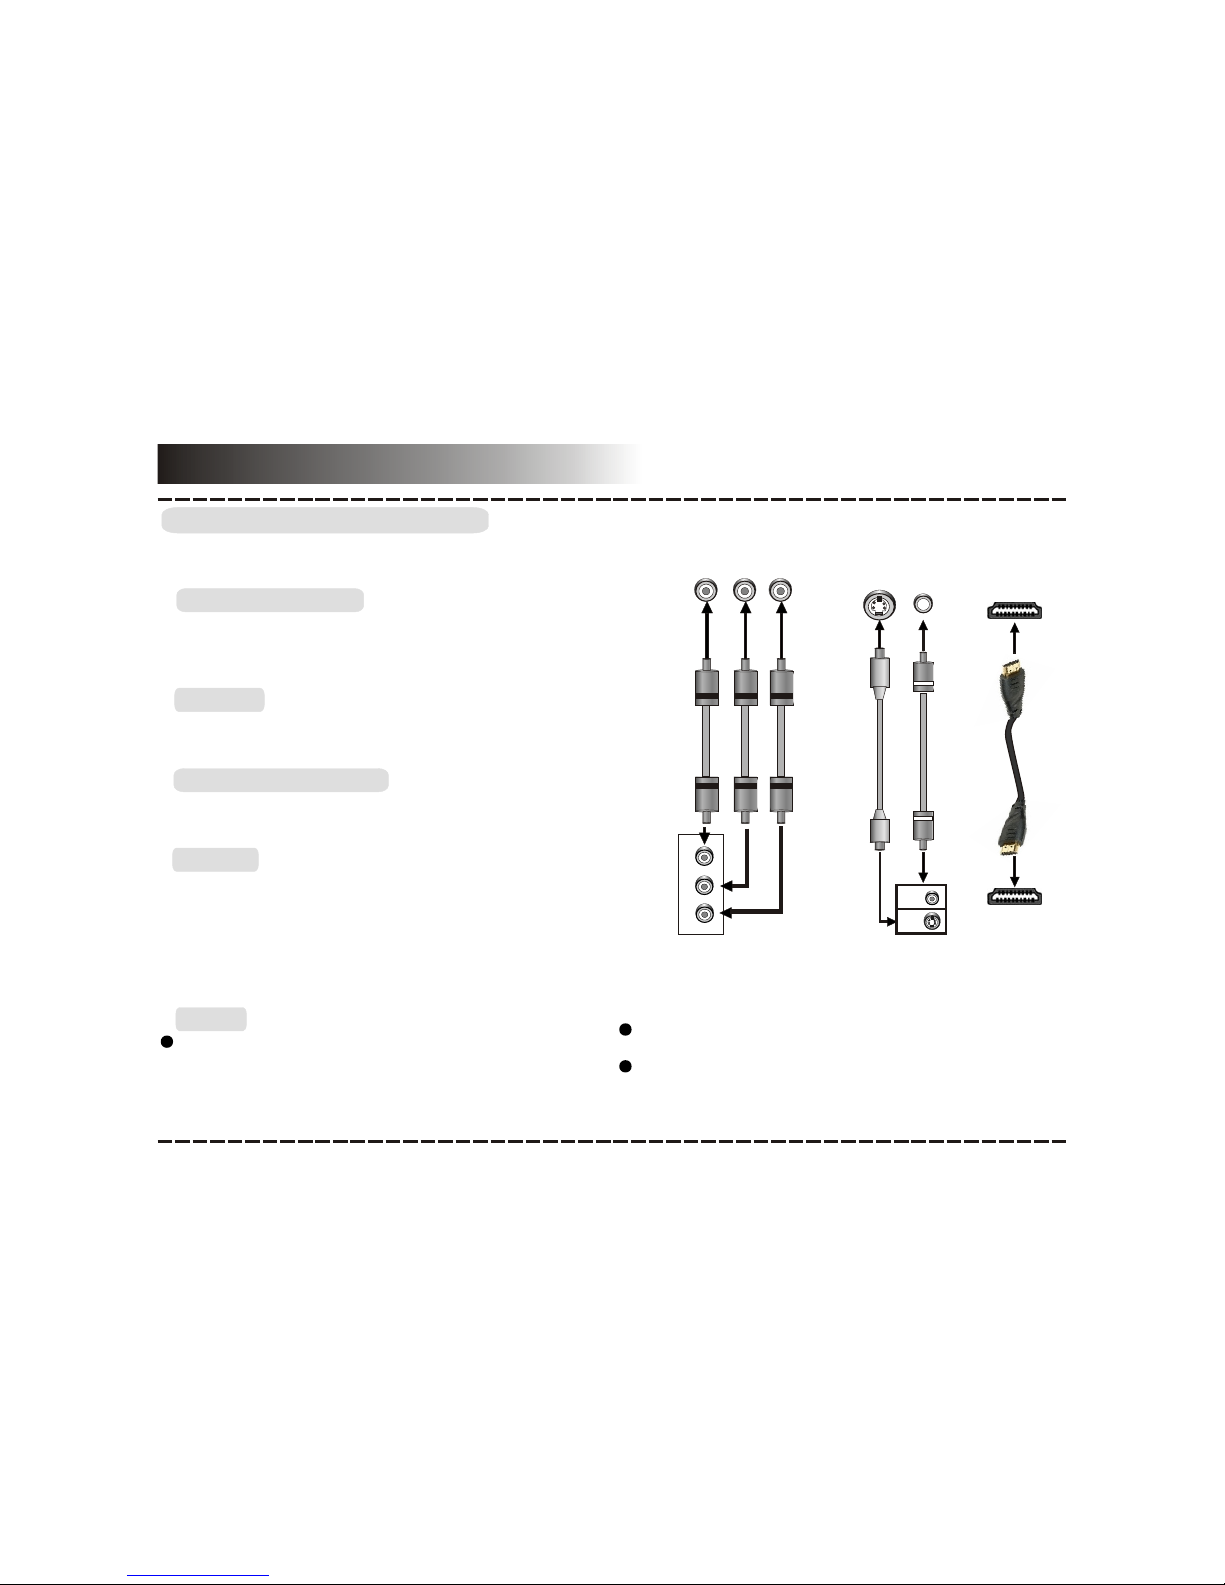
The following videooutputs are availablefor this unit.
S-Video
Use an S-Video cable to connect the S-Video output of
this unit tothe S-Video input of a TV/monitor.
Component Video
Use a 3-core AV cable to connect the component outputs
of this unitto the correspondinginputs of aTV/monitor.
Composite Video
Use the yellow plug of an AV cable to connect the
composite video output of this unit to the video input of a
TV/monitor.
Use the best available
video connection.
Of the video output above, the HDMI is the best,
component is the second best, S-Video is good and the
composite video is standard.
Component Video Input
Connections
DVD Player Video Output
TV/Monitor Video Input
VIDEO SYSTEM CONNECTION
Notes:
The following videooutputs are availablefor this unit.
S-Video
Use an S-Video cable to connect the S-Video output of
this unit tothe S-Video input of a TV/monitor.
Component Video
Use a 3-core AV cable to connect the component outputs
of this unitto the correspondinginputs of aTV/monitor.
Composite Video
Use the yellow plug of an AV cable to connect the
composite video output of this unit to the video input of a
TV/monitor.
Use the best available
video connection.
Of the video output above, the HDMI is the best,
component is the second best, S-Video is good and the
composite video is standard.
Component Video Input
Y
U/Pb
V/Pr
YU/Pb V/Pr
Component Video Output
-6-
HDMI Input
HDMIOutput
HDMI
HDMI can transmitboth audio andvideo signals over a
single cable. HDMI output presents the highest possible
resolutions and videoquality. If an HDMI input is present
on your television,use it.
Use a HDMI cable to connect the HDMI output of this unit
to the HDMIinput of aTV/monitor.
VIDEO
S-VIDEO
VIDEO
S-VIDEO
Composite Video and
S-Video Input
Composite Video and
S-Video Output
Don’t make all the connections above at one time, otherwise
the produced pictureswill be affected.
Only when the video settings conform to the actual video
system connections does the player produce the
corresponding video output.(Please refer to the Video Setup
in System Setup chapter).