SBP Imperial User manual

Assembly Instructions - the Imperial page: 1
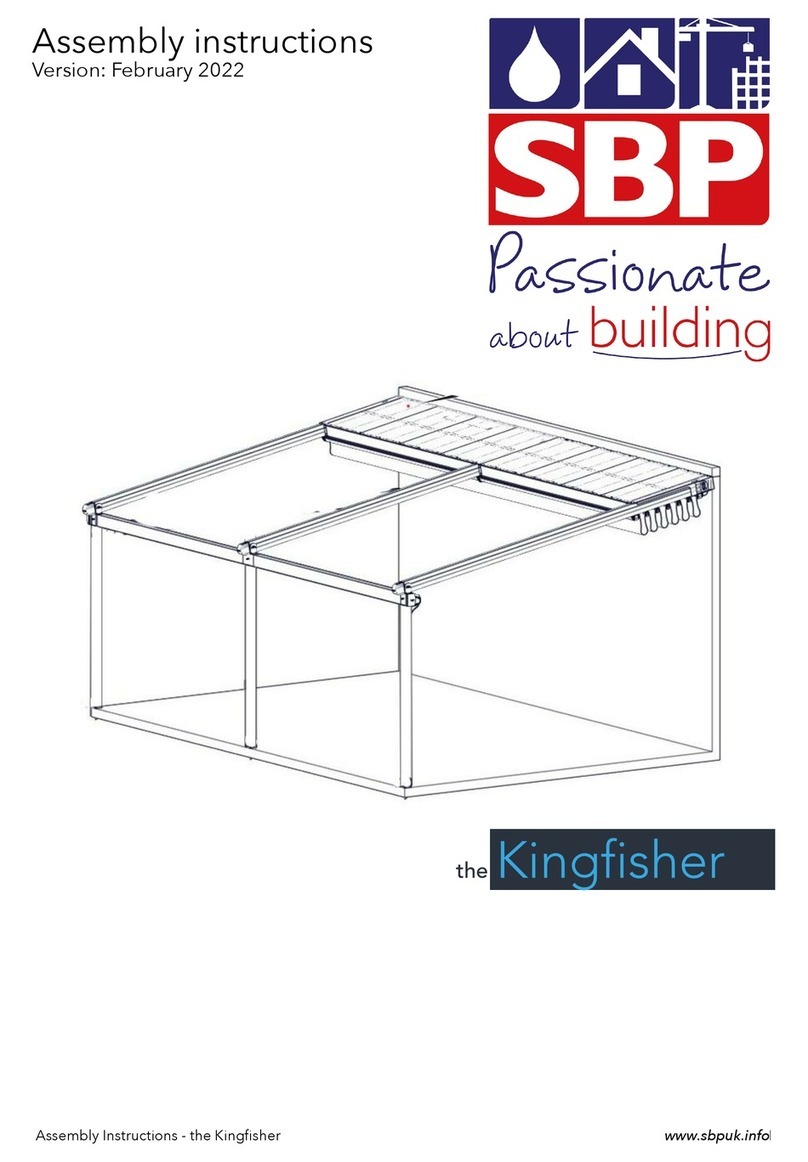
Assembly instructions
Version: February 2022
User manual / Assembly instructions
Deponti Louvered Pergola
Type Pinela
Version: EN –Februari 2022
www.deponti.com
www.sbpuk.info

Assembly Instructions - the Imperial page: 2
Contents
1. Introduction 3
2. Safety precautions and warnings 3
3. Product description 5
4. Parts overview 7
4.1 Terminology 7
4.4 Delivery Inspection 8
5. Preparation for assembly 9
5.1 Conditions for assembly 9
6. Assembly 10
6.1 Mountingthewallprole(incaseofwallinstallation) 10
6.2 Post and integrated gutter connection 12
6.3 Panel installation 14
6.4 Rear mechanism house placing 17
6.5 Place the tube-motor set 18
6.6 Rail belt installation 18
6.7 Finishing 20
6.8 Middlepillarconnection(optional) 22
6.9 Perimeterlightninginstallation(optional) 23
7. Programming instructions 25
7.1 Remote control 25
7.2 Programming of the panels 26
7.3 Programmingofthelights(optional) 27
8. FAQ 28
9. Maintenance 28
10. Warranty conditions 28
KEEP THIS MANUAL IN A SAFE PLACE FOR FUTURE USE!
We also refer you to our General Terms and Conditions of Sale and Delivery which are available on request.
We accept no liability for any damage or injury resulting from a failure to carefully follow the instructions in this
manual or exercise due caution during transport, assembly, use and maintenance of the canopy. As a result of
our policy of continuous product improvement, certain product details may differ from what is described in this
manual. For this reason the instructions provided only serve as a guideline for installation of the product this
manual describes. This manual has been compiled with the utmost care, but we cannot be held responsible for
any errors in this manual or the consequences thereof. Furthermore, all rights are reserved and no part of this
manual may be reproduced in any way whatsoever.
Contents

Assembly Instructions - the Imperial page: 3
Congratulations on the purchase of your canopy!
Before you can start enjoying your canopy it must be assembled properly. This manual provides clear instructions
for all the steps you must complete for correct assembly of your canopy. We recommend that you take the time
to read the entire manual before you begin assembly. Check whether you have received all the necessary parts
before you begin assembly. For your safety, follow all the applicable instructions. This also guarantees the safety
of the installed roof. If you should have any questions, please feel free to contact us.
This manual should be kept in a safe, dry and shady place. In the event of damage or loss, the user should obtain
another copy.
Important:
Please read the safety precautions and warnings before assembling the canopy.
• During assembly, carefully follow the instructions and guidelines as described in this
manual. Never change the order of the steps to be performed. If any aspect of the
assembly procedure is unclear, please contact us. We reserve the right to make technical
changes without written notice.
• We normally recommend that the canopy must be assembled by at least two people
(qualiedtechnicians/authorizedinstallers)workingtogether.
• Check the delivery immediately upon receipt. In the event of damage or an incomplete
delivery please contact us immediately.
• The materials must be stored in a dry, ventilated area, not exposed to direct sunlight.
• Open the packaging carefully. Make sure that you do not damage the product.
• To prevent damage to your canopy, place the parts on a smooth, clean surface. Place the
prolesonaatsurface,protectedfromsunandrain.
• Adding or removing parts, the use or installation of materials other than described in
this manual, may adversely affect the safety of the canopy and is therefore strongly
discouraged!
• Cordon off the assembly location so that others are kept at a safe distance.
• Alwaysplacealadderonarm,stablesurface.
• Alwayswearthecorrectprotectiveclothing(workgloves,dustmask,safetyglasses,shoes
withnon-slipsoles,etc.)duringinstallationorservicing.
• Mountthesystemagainstarm,atwallandonaatandstablefoundation.Ensurethat
the wall and the ground are clean and dry.
1 Introduction
2. Safety precautions and warnings
!
!
Assembly Instructions - the Imperial page: 4
• Mountthesystemagainstarm,atwallandonaatandstablefoundation.Ensurethat
the wall and the ground are clean and dry.
• Ensurethatyouconsultasuitablyqualiedgasengineerifyouareplacingthecanopynear
oraboveaboileruepoint.
• Never step or walk on the panel system.
• You must maintain and clean your canopy at least once a year. During this yearly
maintenance make sure all fasteners are properly tightened.
• When safety regulations and instructions are not followed correctly, we will not accept
responsibilityfordamage(s)andinjuries.
2. Safety precautions and warnings
!

Assembly Instructions - the Imperial page: 5
TheImperialisapergola/gazebosystemwhichfeaturesremotecontrolled,retractableroofpanelswhichcanbe
opened to reveal approximately 80% of the covered area.
Whenclosed,thepanelswillprotectyoufromthesunandrain.TheImperialcanalsocarrylimitedanddened
snowloads(seebelow).
Available dimensions of the Imperial:
Width(mm): 3000/3500/4000
Projection(mm): 3014/3571/4128/4964/6078*
* AdditionalcentrepostscanbeaddedtotheImperialtocoverlocalsnow
load requirements.
NOTE: Allpostscomeatastandardlength/heightof3500mm.Themaximumrecommendedheightfromoorto
underside of the gutter is 2500mm so posts will need to be cut down accordingly.
Optional additions:
• Perimeter lighting system
3. Product description

Assembly Instructions - the Imperial page: 6
Snow load & Wind resistance
The snow load and wind resistance is adaptable to the steel construction according to the statically calculated
prolesectionandconnectiontype.
Snowload[kg/m2]:
No. panels: Projections [mm]: Width [mm]:
3000 3500 4000
10 3014 245
229
190
98
243*
223
195
156
78
221*
195
173
132
68
193*
12 3571
14 4128
17 4964
21 6078
*Basedonadditionalcentrepost
Wind resistance:
Max.windresistanceforallavailabledimensions:24.7m/s(10Beaufort/0.38kN/m2)inopenposition.
Placement options:
It is possible to place the Imperial canopy freestanding or mounted to a wall.
www.deponti.com Assembly Manual –Pinela Deluxe Pergola page
6
Snow load & Wind resistance
The snow load and wind resistance is adaptable to the steel construction according to the statically
calculated profile section and connection type.
Snow load [kg/m
2
]:
No.
panels:
Projections
[mm]:
Width [mm]:
3000
3500
4000
10
3014
245
223
195
12
3571
229
195
173
14
4128
190
156
132
17
4964
98
78
68
21
6078
243*
221*
193*
* Based on additional centre pillar(s)
Wind resistance:
Max. wind resistance for all available dimensions: 24.7 m/s (10 Beaufort / 0.38 kN/m2) in open
position.
Placement options:
It is possible to place the Pinela Deluxe freestanding or mounted to a wall.

Assembly Instructions - the Imperial page: 7
Themotorrequires230V/50Hz.IfyouhaveaddedaLEDlightingstriptoyourImperial,youmustusethelighting
controlbox.Thecontrolboxrequires230V/50-60Hzaswell.
4. Parts Overview
4.1 Terminology
www.deponti.com Assembly Manual –Pinela Deluxe Pergola page
7
4. Parts Overview
4.1 Terminology
The motor requires 230V / 50Hz. If you have added a LED lighting strip to your Pinela Deluxe, you
must use the lighting control box. The control box requires 230V / 50-60Hz as well.
www.deponti.com Assembly Manual –Pinela Deluxe Pergola page
7
4. Parts Overview
4.1 Terminology
The motor requires 230V / 50Hz. If you have added a LED lighting strip to your Pinela Deluxe, you
must use the lighting control box. The control box requires 230V / 50-60Hz as well.
Panels
Post
Motor
Integrated
Gutter

Assembly Instructions - the Imperial page: 8
The canopy shown is an example. The type and number of components supplied depends on your order.
Note:
• Boxes with red label: Electronic parts like Control Unit Box. Remote Controls.
• Boxes with blue label: Metal parts like U Brackets. Mounting brackets. Pillar caps.
4.2 Delivery Inspection

Assembly Instructions - the Imperial page: 9
Ground & wall
• Agoodatstablesurfaceisrequiredforconstructionofthecanopy.
• Thelocationwherethesystemisplacedmustbeconstruction-readyandfreeofobstacles(garden
furniture,owerboxes.etc.)soinstallerscanperformtheirworkwithouthindrance.
• Anyobstaclesincludingutilitylines(suchaspowercables.etc.).rootsanddebrismusthavebeen
removed from the ground.
• The façade must be free of sun shades. etc.
• Theareawherethewallprolewillbeplacedmustbermevenandat.
Attachments at walls
• Due to expansion of the materials the pergola may not be placed tightly between two walls; there must
be a gap of 1.5 mm per metre of width of the pergola.
Rubber seals
• The Imperial is equipped with pre-assembled rubber seals.
• If the rubber seals are deformed they can be straightened with a little heat from a hot air heater or hair
dryer for example.
Warranty is void if the Imperial is not assembled and installed in accordance with the instructions.
5.1 Conditions for assembly
5. Preparation for assembly

Assembly Instructions - the Imperial page: 10
Determine which post will be used as the rainwater discharge post. An rainwater discharge hole has to be
drilled in this post.
1. Determinethemountingbracketpositiononthewallandxusingsuitablexingsforyourwall.Wesuggesta
minimumsizeofM12xingsbutthesearenotsuppliedasneedtobechosendependinguponyourwall.
2. Mount the back length of integrated gutter on the
wallmountbrackets&xinplace(thereargutter
will house the control box and manual override
buttons)
www.deponti.com Assembly Manual –Pinela Pergola page
13
6. Assembly
6.1 Mounting the wall profile (in case of wall installation)
Determine which post will be used as the rainwater discharge post. An rainwater discharge hole
has to be drilled in this post.
1. Define the mounting bracket position on the wall. Decide which way the panels will open, they
only open one way.
2. Fasten the brackets to the wall with the correct hardware for your situation. We suggest a
minimum size of M12.
3. Place the integrated gutter on the wall mounting bracket
www.deponti.com Assembly Manual –Pinela Deluxe Pergola page
8
4.2 Hardware details
Integrated gutter –Pillar connection (Freestanding)
a. M10 nut Stainless Steel
b. M10 washer Stainless Steel
Integrated gutter –Wall bracket (Wall mounting)
a. M8x25mm Bolt
b. M4,8x25mm self-drilling screw
www.deponti.com Assembly Manual –Pinela Pergola page
13
6. Assembly
6.1 Mounting the wall profile (in case of wall installation)
Determine which post will be used as the rainwater discharge post. An rainwater discharge hole
has to be drilled in this post.
1. Define the mounting bracket position on the wall. Decide which way the panels will open, they
only open one way.
2. Fasten the brackets to the wall with the correct hardware for your situation. We suggest a
minimum size of M12.
3. Place the integrated gutter on the wall mounting bracket
6.1 Mounting the wall prole (in case of wall installation)
6. Assembly
www.deponti.com Assembly Manual –Pinela Pergola page
14
4. Fasten the wall mounting bracket cover on top and tighten it with a M8x25mm bolt.
5. Fix the (M4) self-drilling screw in the integrated gutter and wall mounting bracket.
www.deponti.com Assembly Manual –Pinela Pergola page
14
4. Fasten the wall mounting bracket cover on top and tighten it with a M8x25mm bolt.
5. Fix the (M4) self-drilling screw in the integrated gutter and wall mounting bracket.

Assembly Instructions - the Imperial page: 11
3. Fix the 2 wall-corner pieces in place:
4. Now continue to section 6.2
Sealed Nut M10 Stainless Steel
Nut M6
Washer M10 Stainless Steel
Washer M6
Add silicone sealant to
edge face before pressing
to corner piece to ensure a
watertight seal

Assembly Instructions - the Imperial page: 12
www.deponti.com Assembly Manual –Pinela Deluxe Pergola page
15
5. Fix the self-drilling screws to the integrated gutter and wall mounting bracket.
6.2 Pillar and integrated gutter connection
1. Determine which post will be used as the rainwater discharge post. An rainwater discharge hole
has to be drilled in this post. Place this upright on a flat, solid surface and determine the location for
the hole. Now drill a hole in the post. Although the diameter of the hole is flexible, we recommend a
diameter of 60mm.
2. Fix the aluminium pillar and rear integrated gutter on both sides on the ground with M10 Sealed
Nuts as shown at below figure.
NOTE:
1. Determine how rainwater will be discharged from the gutter. A post can be used for simple discharge by
drilling in a hole in the gutter above a post and at the bottom of the post so the water can drain out. A 60mm
hole is recommended.
For more effective rainwater discharge a downpipe can be attached
usingadownpipeoutletrunningthroughthegutter(aholewillneedto
bedrilledinthegutter)andrainwaterthenfedintoadownpipewhich
can be run to a suitable location.
Ifttingusingadownpipeoutletthenitshouldbeplacedthrougha
hole cut for it in the gutter and it should be sealed to the inside of the
gutter. Note the top will need to be trimmed off as the available height
in the gutter below the panels is very limited:
Theoutletshouldthenbepushedthroughtheholesotheangesits
atagainstthebottomofthegutterandissealedtoit
2. Measure and trim the posts to the required length by cutting off at
thebottom.Themaximumoortoundersidegutterheightshouldbe
2500mmsotrimaccordinglydependinguponwhetherxingintothe
groundusingasuitablecement-basedfoundationmixorxingtoasolidsurfaceusingtheoormounting
brackets.AlsoconsiderwhetherthegroundisatasthePhoenixmustbettedwithnogreaterthana5mm
difference in height across the full width or height to enable proper drainage.
3. **Ifyouhaveawallmountedoptionthengotostep5***
Laythebackintegratedreargutterproleonthegroundandxthetwopoststoitaddingsiliconesealant
where indicated to ensure a watertight seal.
6.2 Post and integrated gutter connection
M10 Stainless Steel DO NOT mount this nut
M10 Stainless Steel Add silicone sealant where indicated to
ensure a watertight seal

Assembly Instructions - the Imperial page: 13
4. Liftuptherearframeandxinplaceensuringitislevel.
5. Laythefrontgutteronthegroundandattachthepostsasshowninpoint3butxingallnutsontothebolts.
6. Liftupthefrontframeandxinplaceensuringitisbothlevelandalignswiththereargutterandatthe
requireddistancesothatthesidegutterswilltproperlybetweenthefrontandrearframes.
7. Install the side gutters ensuring that the linear actuator is located to the rear where the control box will be
placedinsidethegutter.Makesuretosealthemtotheposts/cornerconnectorsusingsiliconesealantatthe
joins to ensure a watertight seal.
8. Fixthesideandfront/rearguttersusingtheM10andM6sealednuts:
9. Check if the structure is level on all sides. 5mm difference in the full
length(forwater)isallowed
10. Ifyouhaveconnectedadownpipeoutletfordrainagethenxthedownpiperunatthispointensuringthat
abracketisplacedwithintherst300mmofthedownpipeoutlet.Ifthisisnotpossibletheeithergluethe
downpipetothespigotatthebottomoftheoutletorxwithascrewthroughthedownpipeintotheoutlet
spigot.
www.deponti.com Assembly Manual –Pinela Pergola page
15
6.2 Pillar and integrated gutter connection
1. Determine which post will be used as the rainwater discharge post. An rainwater discharge hole
has to be drilled in this post. Place this upright on a flat, solid surface and determine the location for
the hole. Now drill a hole in the post. Although the diameter of the hole is flexible, we recommend a
diameter of 60mm.
2. Fix the aluminium pillar on both sides of the rear integrated gutter (the one with the black
controlbox inside) with a M8 and M6 sealed nut . (check below image)
NOTE:
•Lift up the rear frame.
•Don’t work alone. You may need an extra hand.
•Rear frame should be lifted up and fixed to the ground.
www.deponti.com Assembly Manual –Pinela Deluxe Pergola page
17
3. Connect the integrated gutter and lateral integrated gutter in a position as shown at below figure.
4. Fix the lateral side integrated gutter to the rear integrated gutter with M10 Sealed Nuts.
5. Check if the structure is level on all sides.
www.deponti.com Assembly Manual –Pinela Pergola page
17
6. Check if the structure is level on all sides. 5mm difference in the full length (for water) is allowed
6.3 Panel installation
1. When you start placing the panels. always start with the first front panel. This first panel has a
gasket (big rubber flap) for perfect insulation and has a clamp. The first panel should connect to the
clamp. The clamp is already installed to the lateral side integrated gutter.
2. Place the middle panels in to the integrated lateral side gutter which is shown in the figure below.
Check the cross Check the lateral gutter is level Check the Posts are level
Add silicone sealant where indicated to
ensure a watertight seal
Side gutter
Front gutter

Assembly Instructions - the Imperial page: 14
1. Whenplacingthepanels,startatrear(motorside).Therearpanelhasashortpin.
2. PlacetheshortpinintothehousingandxitwiththeclampandtheaM5countersunkheadbolt.
www.deponti.com Assembly Manual –Pinela Deluxe Pergola page
18
6.3 Panel installation
1. When placing the panels, start at rear(motor side). The rear panel has a short pin.
2. Place the short pin into the housing and fix it with the clamp and the a M5 countersunk
head bolt.
www.deponti.com Assembly Manual –Pinela Deluxe Pergola page
18
6.3 Panel installation
1. When placing the panels, start at rear(motor side). The rear panel has a short pin.
2. Place the short pin into the housing and fix it with the clamp and the a M5 countersunk
head bolt.
6.3 Panel installation
Pin

Assembly Instructions - the Imperial page: 15
3. Whenyouxedtheshortpanel,thenextpanelinlineisatype-2panel.Thereisashortplate,alongplateand
itscarrier.PlacethepanelinfrontoftherstpanelandfastenwiththeM6specialbolts.
4. Infrontofthepaneltype-3thereshouldbestandardpanels(thenumberofpanelsdependsonyour
projection).Thestandardpanelsareallthesame.
www.deponti.com Assembly Manual –Pinela Deluxe Pergola page
19
3. When you fixed the short panel, the next panel in line is a type-2 panel. There is a short
plate, a long plate and its carrier. Place the panel in front of the first panel and fasten with
the M6 special bolts.
4. In front of the panel type-3 there should be standard panels (the number of panels
depends on your projection). The standard panels are all the same.

Assembly Instructions - the Imperial page: 16
5. The last panel is the panel with a locomotive carrier.
6. This is the front house mechanism placing; The gear housing should be on each side. The housing has to be
aligned with your projection direction. Also mount the top nut, coloured green in the picture.
7. Thebracket’shousingwilltexactlyonthepins.Afterthatplacethewasherandfastenthenuts.
www.deponti.com Assembly Manual –Pinela Deluxe Pergola page
20
5. The last panel is the panel with a locomotive carrier.
6. This is the front house mechanism placing; The gear housing should be on each side. The
housing has to be aligned with your projection direction. Also mount the top nut, coloured
green in the picture.
7. The bracket’s housing will fit exactly on the pins. After that place the washer and fasten
the nuts.

Assembly Instructions - the Imperial page: 17
Note: If you shorten any of the posts, take into account the depth of the concrete bases and the bottom end of
the post.
1. There is a suitable bracket for each side.
2. Place the front gear into the ‘front mechanism house’.
3. Turn and place the stretching bolts. The stretching bolts must be placed in the related housing.
6.4 Rear mechanism house placing
www.deponti.com Assembly Manual –Pinela Deluxe Pergola page
21
6.4Rear mechanism house placing
1. There is a suitable bracket for each side.
2. Place the front gear into the ‘front mechanism house’.
3. Turn and place the stretching bolts. The stretching bolts must be placed in the related
housing.
www.deponti.com Assembly Manual –Pinela Deluxe Pergola page
21
6.4Rear mechanism house placing
1. There is a suitable bracket for each side.
2. Place the front gear into the ‘front mechanism house’.
3. Turn and place the stretching bolts. The stretching bolts must be placed in the related
housing.
www.deponti.com Assembly Manual –Pinela Deluxe Pergola page
21
6.4Rear mechanism house placing
1. There is a suitable bracket for each side.
2. Place the front gear into the ‘front mechanism house’.
3. Turn and place the stretching bolts. The stretching bolts must be placed in the related
housing.

Assembly Instructions - the Imperial page: 18
1. Thetubularmotorsethastobeontherearsideofthecanopy.Ithasasquareplatethattsexactlyintherear
housing bracket as shown below.
1. The rail belt goes over the front and back gear. The belt connection point should be in the centre of the
locomotive carrier.
www.deponti.com Assembly Manual –Pinela Deluxe Pergola page
22
6.5 Place the tube-motor set
1. The tubular motor set has to be on the rear side of the pergola. It has a square plate that
fits exactly in the rear housing bracket as shown below.
6.6 Rail belt installation
1. The rail belt goes over the front and back gear. The belt connection point should be in the
centre of the locomotive carrier.
6.5 Place the tube-motor set
6.6 Rail belt installation

Assembly Instructions - the Imperial page: 19
2. Fasten the brackets with a stay bolt and countersunk head bolt.
3. Rail belt stretching; This bolt ensures the tension on the belt is adjustable
4. Make sure there is the same stretch level of the belt on both sides. It should be just so tight that it just doesn’t
sag. Do not tighten.
www.deponti.com Assembly Manual –Pinela Deluxe Pergola page
23
2. Fasten the brackets with a stay bolt and countersunk head bolt.
3. Rail belt stretching; This bolt ensures the tension on the belt is adjustable
4. Make sure there is the same stretch level of the belt on both sides. It should be just so
tight that it just doesn't sag. Do not tighten.

Assembly Instructions - the Imperial page: 20
1. Place the special designed gasket into corners.
2. The corner cap should be on the frontside. Fix it to the housing with the M2,9x13mm rounded head screws.
3. PlacethetubularMotorcoveringprole;ThisproleshouldbeontherearandxedwithM2,9x13mmscrews.
Ifthereisperimeterlighting,thelightingcontrolboxshouldbeplacedontheproleasyouseeatbelow.The
cables should go from the corner to the box.
www.deponti.com Assembly Manual –Pinela Deluxe Pergola page
24
6.7 Finishing
1. Place the special designed gasket into corners.
2. The corner cap should be on the frontside. Fix it to the housing with the M2,9x13mm
rounded head screws.
3. Place the tubular Motor covering profile; This profile should be on the rear and fixed with
M2,9x13mm screws. If there is perimeter lighting, the lighting control box should be placed
on the profile as you see at below. The cables should go from the corner to the box.
6.7 Finishing
Table of contents
Other SBP Outdoor Storage manuals
Popular Outdoor Storage manuals by other brands

Biohort
Biohort StoreMax 190 Owner's manual & assembly instructions

Mercia Garden Products
Mercia Garden Products 05DTOVAX0307DD-V1 manual

Duratuf
Duratuf TUF 50 Assembly instructions

Outdoor Life Group
Outdoor Life Group Lantana manual

Rockford Fosgate
Rockford Fosgate Lagos 200 Assembly instructions

Riverlea
Riverlea SmartStore SM3025 Assembly instructions

Palram
Palram SkyLight Shed 6x8 Tan / Deco manual

Heartland
Heartland VALUE Series Assembly manual

Mercia Garden Products
Mercia Garden Products 01MS0808SDFW-V1 General instructions

TMG
TMG TMG-MS0810 product manual

Mercia Garden Products
Mercia Garden Products 03BUT0606-V1 General instructions

Absco
Absco 15081SK Assembly instructions