Page 2 of 12
1. FCC Notice
This device complies with Part 15 of the FCC Rules. Operation is subject to
the following two conditions: (1) this device may not cause harmful
interference, and (2) this device must accept any interference received,
including interference that may cause undesired operation.
This equipment has been tested and found to comply with the limits for a
Class B digital device, pursuant to Part 15 of the FCC Rules. These limits are
designed to provide reasonable protection against harmful interference in a
residential installation.
If this equipment does cause harmful interference to radio or television
reception, which can be determined by turning the equipment off and on, the
user is encouraged to try to correct the interference by one or more of the
following measures:
• Reorient or relocate the receiving antenna.
• Increase the separation between the equipment and receiver.
• Connect the equipment into an outlet on a circuit different from that to
which the receiver is connected.
Caution: Any changes or modifications in construction of this device which are
not expressly approved by the party responsible for compliance could void the
user’s authority to operate the equipment.
2. Tire Pressure Monitoring System (TPMS)
This system is a sensing device designed to measure and display tire
temperature and pressure, and to activate an alert to the driver when
pressure and temperature irregularities are detected. It is the responsibility of
the driver to react promptly and with discretion to alerts. Abnormal tire
inflation pressure should be corrected at the earliest opportunity.
Do not use any temporary re-sealing or re-inflation products containing
internal sealants or propellants in any tire assembly as these may adversely
affect the operation of the sensor/transmitter.
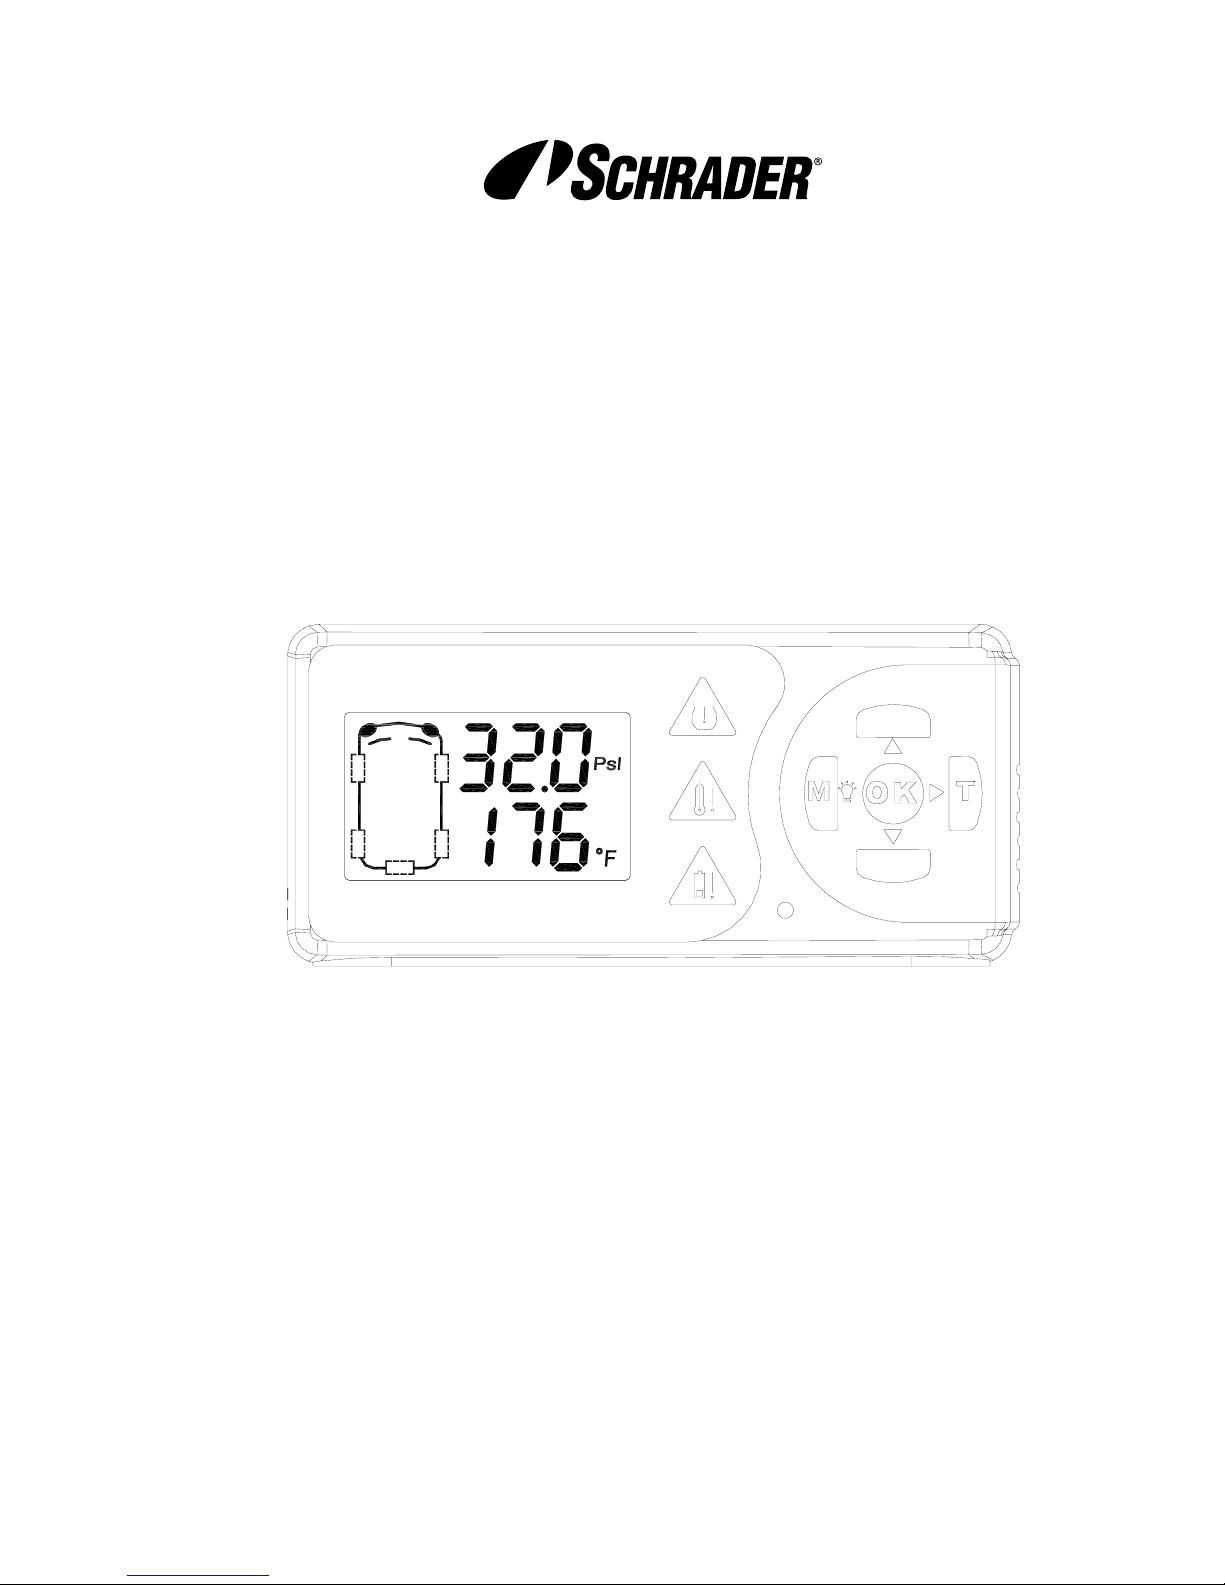
3. How It Works
Pressure and temperature information is transmitted by radio frequency to the
receiver and displayed on the LCD display. When an under-inflated,
over-inflated or over-heated tire is detected, the display will emit an audible
warning and activate a warning lamp to alert the driver. The icon for the tire
with the fault will be displayed along with the pressure and temperature. Each
sensor’s battery is also monitored, and an alert will activate if a sensor’s
battery is found to be low in charge. The receiver will turn on when a shock is
received and will automatically turn off after 5 minutes of no movement being
detected. The display will flash the last known data until next transmission is
received from that particular sensor.
Page 11 of 12
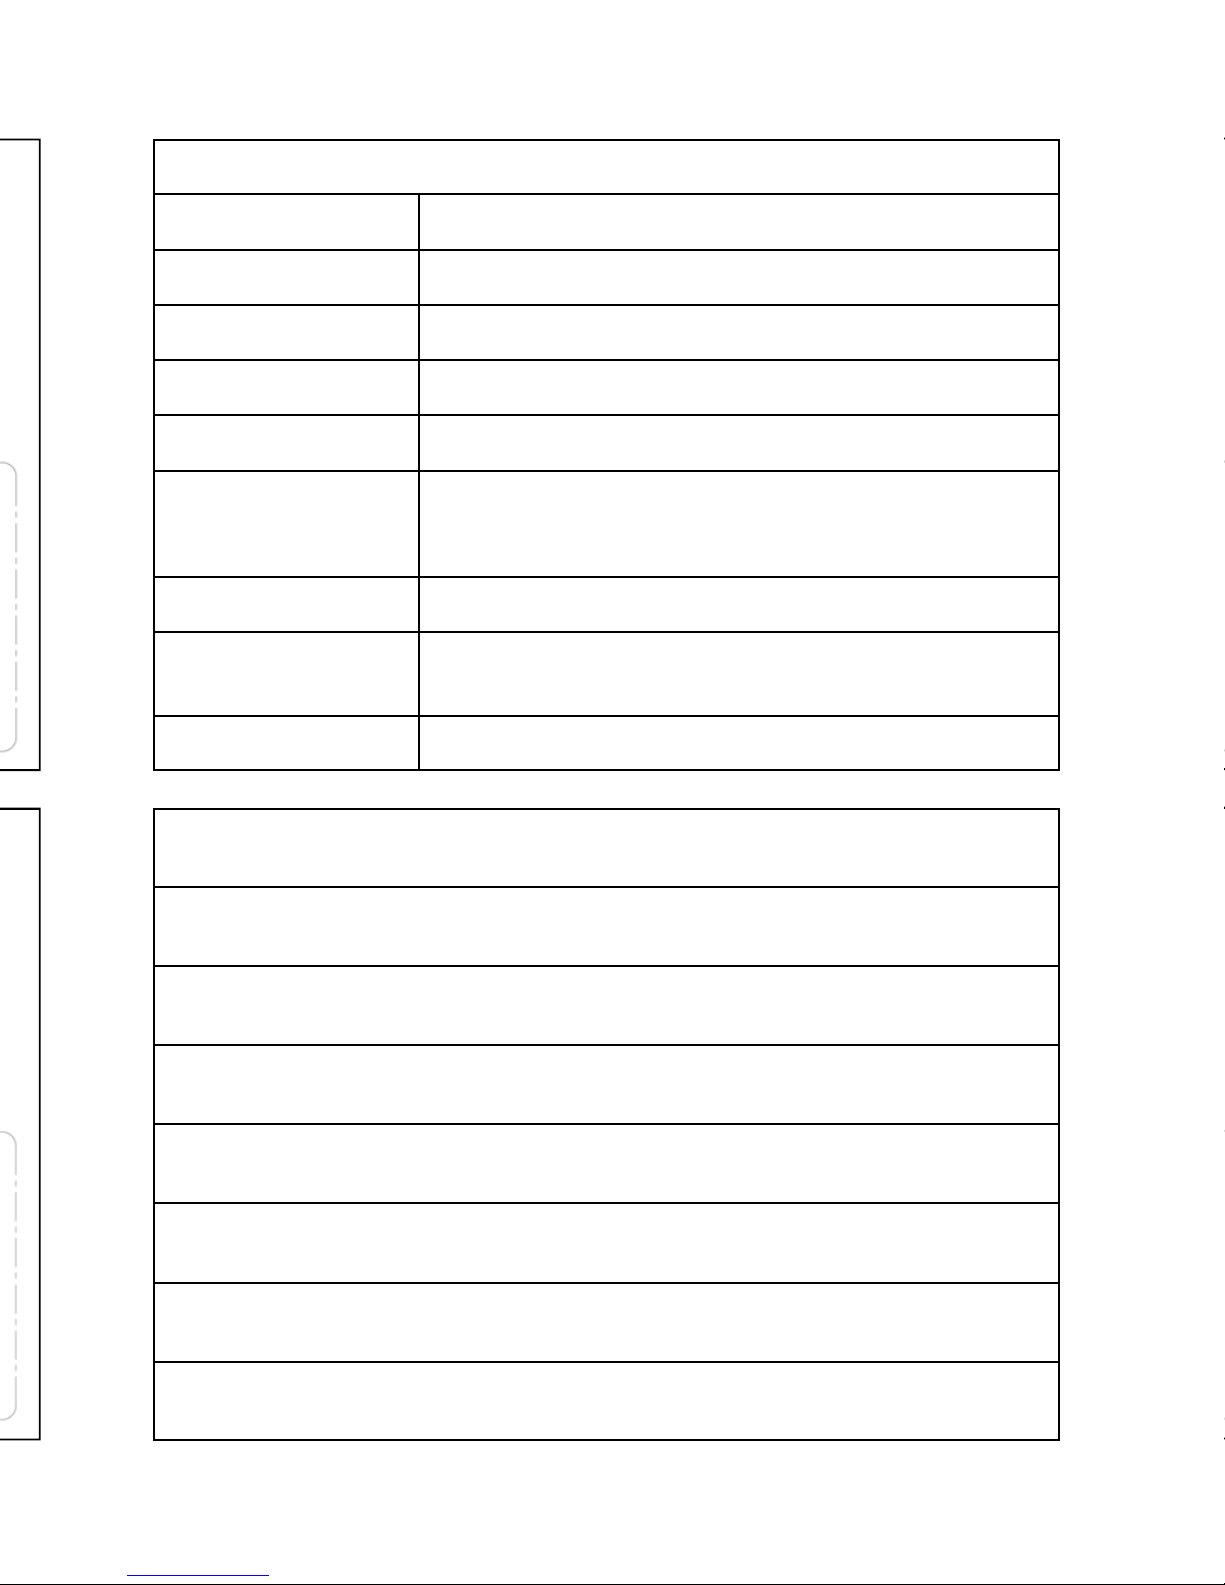
19. Parts List
Description Qty Part Number
Sensor (complete) 4 20154
Receiver (display) 1 20213
Wheel Sensor (Snap-in) 1 20214
Torx Screw (individual) 1 20562013
Valve (individual) 1 20522044
Hardware bag, inc. 1 20215
Cleaning Swab 1 20216
Top Dash Adhesive Strip 1 20217
Windscreen Adhesive Strip 1 20219
Windscreen Wedge Adaptor 1 20220
°C °F °C °F °C °F
-40 -40 20 68 80 176
-30 -22 30 86 90 194
-20 -4 40 104 100 212
-10 14
50 122
110 230
0 32 60 140 120 248
10 50
70 158
125 257
18. °C to °F Conversion Table