Installation 9
AV200pro
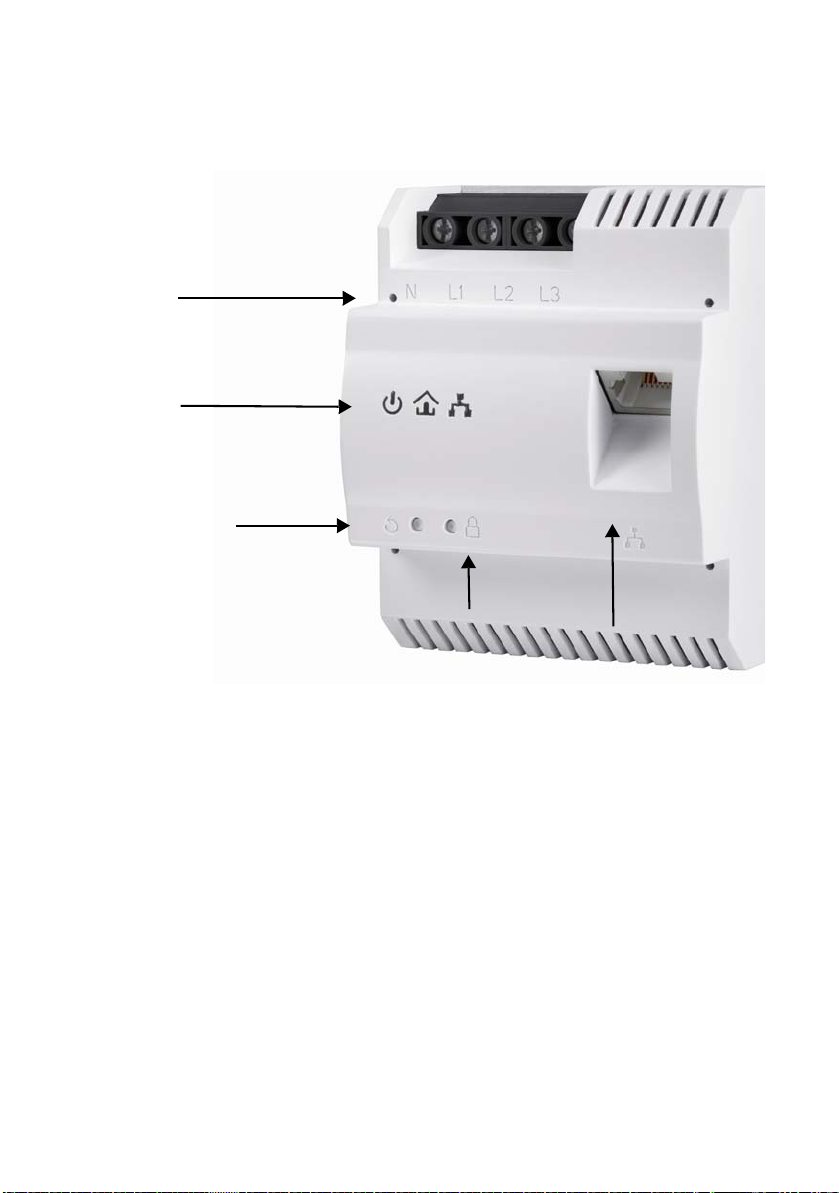
2Installation
In this chapter we describe the electrical installation of the AV200pro on the
top-hat rail in the power distribution box.
Systemvoraussetzungen
• Operating systems: Windows XP (32 bit), Windows Vista Home Premium
(32 bit/64 bit), Windows 7 Home Premium (32 bit/64 bit), Linux (Ubuntu),
Mac (OS X) or all operating systems with network support
• Ethernet connection
2.1 Important safety instructions
All safety and operating instructions should be read and understood before
using the device, and should be kept for future reference.
*forGermany:NAV
= Niederspan-
nungsanschluss-
verordnung (Low-
voltage Connec-
tionOrdinance)of3
September 2010
Installationmaybe performedby aqualified electricianonly (inacc.withGer-
man Low Voltage Connection Ordinance (NAV)*, Part 2, §13).
Components powered by the mains supply have to be secured
with a circuit breaker.
• The device is intended for installation on the top-hat rail in the installation
area of overvoltage category 3 or lower.
• Never open the device. There are no user-serviceable parts inside the
device.
• Use the device in a dry location only.
• Do not insert any objects into the openings of the device.
• Slots and openings on the case serve as ventilation. Never block or cover
them.
• Do not keep the device in direct sunlight.
• Never set up the device near a heater or radiator.
• Thedevice should belocatedonlywhere sufficient ventilation can be ensu-
red.
• Neveruse the devicewitha powersupply that does not meet the specifica-
tions provided on the rating plate.
• In the event of damage, contact customer service. This applies, for
example, if