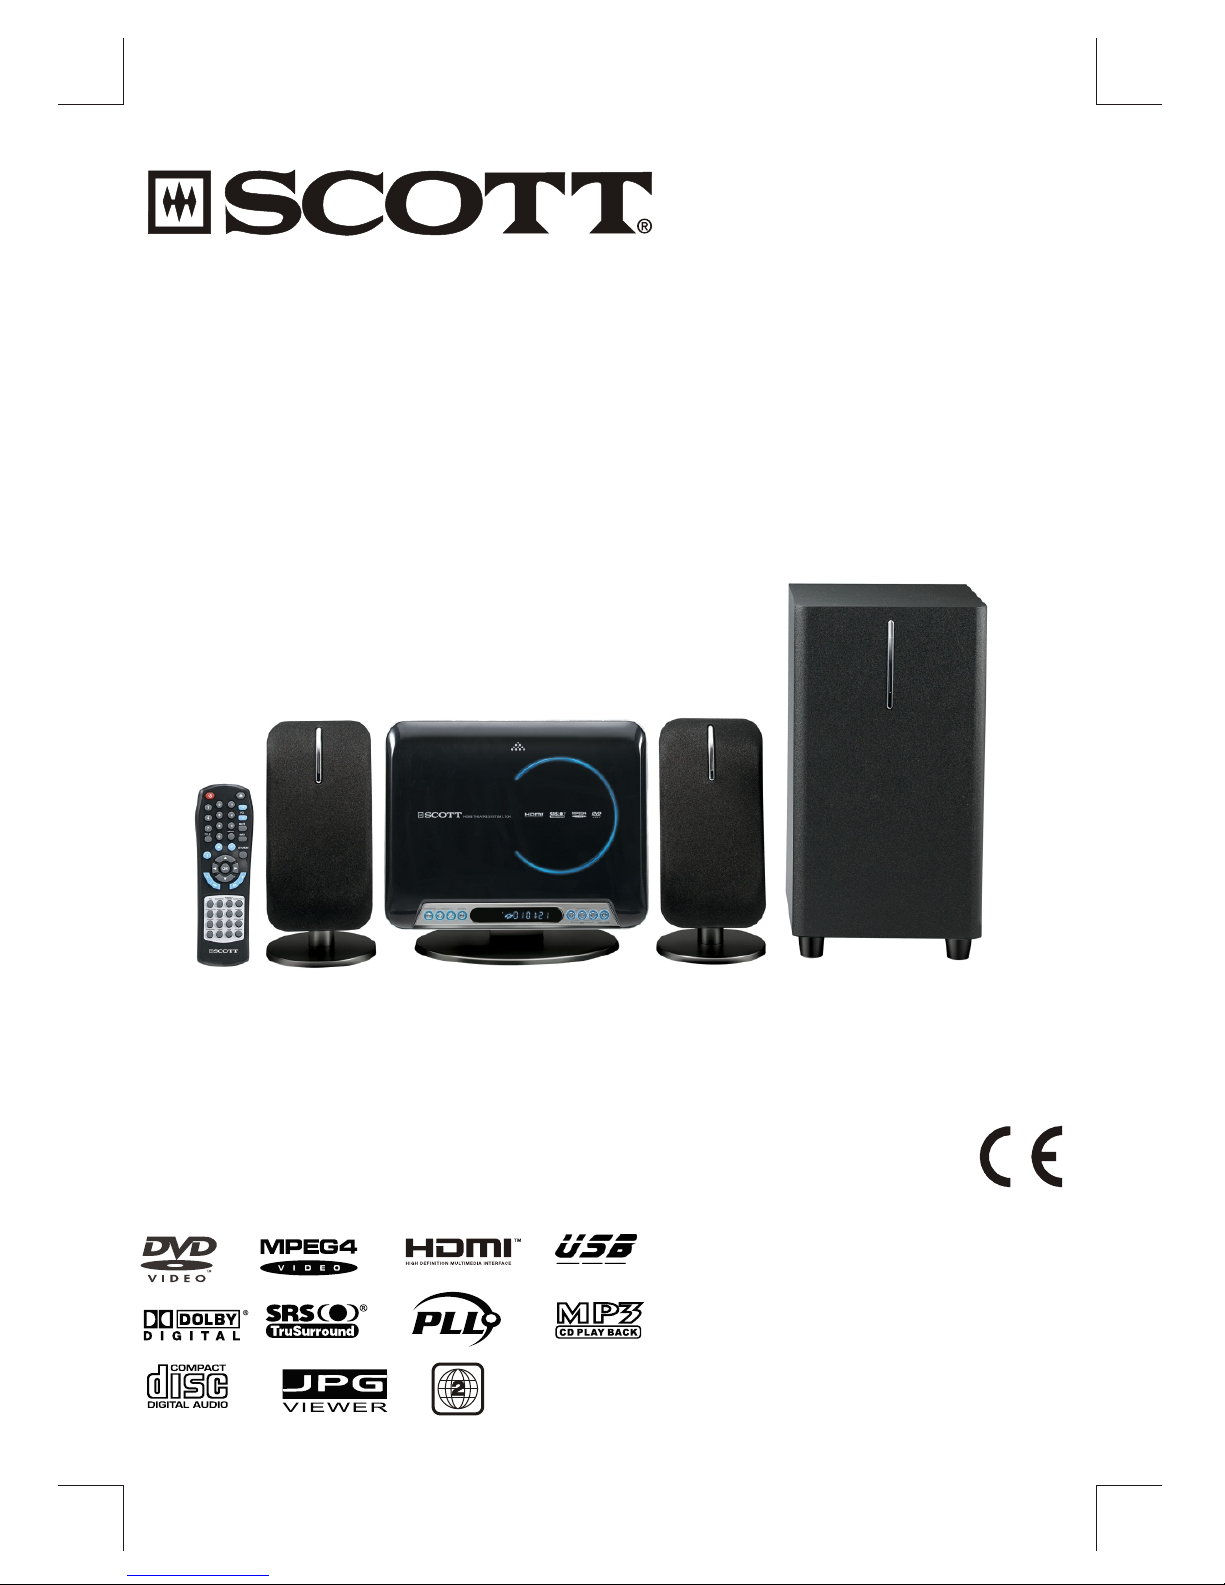
Scott MDX 100 SW User manual

HOME CINEMA 2.1 CH
HOME CINEMA 2.1 CH
HEIMKINO 2.1 CH
HOME CINEMA 2.1 CH
HOME CINEMA 2.1 KANAALS
HOME THEATRE 2.1 CH
MANUEL D’INSTRUCTIONS
MANUALE DI ISTRUZIONI
GEBRAUCHSANLEITUNG
MANUAL DE INSTRUCCIONES
HANDLEIDING
OWNER’S MANUAL
MODEL NO. MDX 100 SW

GB-1
SAFETY
To ensure proper use of this product, please read this owner’s manual carefully and keep for future reference.
Should the unit require maintenance, contact an authorized service location.
INVISIBLE LASER RADIATION WHEN OPEN OR INTERLOCK
FAILED OR DEFEATED.
WARNINGS:
DO NOT STARE INTO BEAM. Avoid direct exposure to laser beam.
To prevent direct exposure to laser beam, do not try to open the
enclosure.
LASER:
Type: Dual semiconductor laser GaAIAs
Wavelength: 650nm and 780nm
Output Power: 7mW
Beam Divergence: 60 degrees
CLASS 1
LASER PRODUCT
RISK OF ELECTRIC SHOCK
DO NOT OPEN
WARNING: SHOCK HAZARD-
DO NOT OPEN
CAUTION
The lightning flash with arrowhead symbol, within an equilateral
triangle, is intended to alert user to the presence of uninsulated
"dangerous voltage" within the products enclosure that may be
of sufficient magnitude to constitute a risk of electric shock to
persons.
The exclamation point within an equilateral triangle is intended
to alert the user to the presence of important operating and
maintenance (servicing) instruction in the literature accompanying
the appliance.
WARNINGS:
To reduce the risk of fire or electric shock, do not expose this appliance
to rain or moisture.
Dangerous high voltages are present inside the enclosure. Do not open
the casing. Refer servicing to qualified personnel only.
Use of controls or adjustments or performance of procedures other
than those specified may result in hazardous radiation exposure.
DO NOT REMOVE COVER or OPEN CASING.

GB-2
IMPORTANT SAFETY INSTRUCTIONS
CAUTION: RETAIN THIS BOOKLET FOR FUTURE REFERENCE.
This set has been designed and manufactured to assure personal safety. Improper use can result in electric shock
or fire hazard. The safeguards incorporated in this unit will protect you if you observe the following procedures for
installation, use and servicing. This unit does not contain any parts that can be repaired by the user.
•Damage Requiring Service
Unplug this product from the wall outlet and refer
servicing to qualified service personnel under the
following conditions:
a) When the power-supply cord or plug is damaged.
b) If liquid has been spilled, or objects have fallen
into the product.
c) If the product has been exposed to rain or water.
d) If the product does not operate normally by
following the operating instructions. Adjust only
those controls that are covered by the operating
instructions. Improper adjustment of other controls
may result in damage and will often require
extensive work by a qualified technician to restore
the product to its normal operation.
e) If the product has been dropped or damaged in
any way.
f) When the product exhibits a distinct change in
performance - this indicates a need for service.
•Servicing
Do not attempt to service this product yourself
as opening or removing covers may expose you
to dangerous voltage or other hazards. Refer all
servicing to qualified service personnel.
•Replacement Parts
When replacement parts are required, be sure the
service technician has used replacement parts
specified by the manufacturer or have the same
characteristics as the original part. Unauthorized
substitutions may result in fire, electric shock, or
other hazards.
•Safety Check
Upon completion of any service or repairs to this
product, ask the service technician to perform
safety checks to determine that the product is in
proper operating condition.
• It complies with CE requirements.
• Read these instructions.
• Keep these instructions.
• Heed all warnings.
• Follow all instructions.
• Do not use this device near water.
• Clean only with dry cloth.
• Do not block any ventilation openings. Install in
accordance with the manufacturer’s instructions.
• Do not install near any heat sources such as
radiators, heat registers, stoves, or other devices
(including amplifiers) that produce heat.
• Protect the power cord from being walked on or
pinched. Pay particular attention to the plug and
connections.
• Only use accessories specified by the
manufacturer.
• Unplug this device during lightning storms or when
unused for long periods of time.
• Use only with a cart, stand, tripod, bracket or
table specified by the manufacturer, or sold with
the device. When a cart is used, use caution
when moving the cart/device combination to avoid
injury from tip-over.
• The apparatus shall not be exposed to dripping or
splashing and that no objects filled with liquids,
such as vases, shall be placed on the device.
•Motorized door
Be careful that your fingers do not get trapped
when opening and closing the motorized door.
Ensure that there is enough room for the motorized
door to open in the location where you place the
appliance.
•Burden
Do not place a heavy object on the product. The
object may fall, causing serious personal injury
and serious damage to the product.
•Disc
Do not use a cracked, deformed, or damaged
disc. These discs are easily broken and may cause
serious personal injury and product malfunction.
• The main plug of apparatus should not be
obstructed OR should be easily accessed during
intended use.
• To completely disconnect the power input, the
mains plug of apparatus must be disconnected
from the mains.
• Do not expose the battery to excessive heat such

GB-3
CONTENTS
SAFETY -------------------------------------------------------------------------------------------------------------------------------------1
IMPORTANTSAFETYINSTRUCTIONS---------------------------------------------------------------------------------------------------2
PACKAGE ----------------------------------------------------------------------------------------------------------------3
INSTALLATION---------------------------------------------------------------------------------------------------------------------------------4
REMOTECONTROL----------------------------------------------------------------------------------------------------------------------------5
FRONT /SIDE PANEL,DISPLAY & BACK PANEL-----------------------------------------------------------------------------------6
MAIN UNIT PREPARATION------------------------------------------------------------------------------------------------------------7
CONNECTIONS--------------------------------------------------------------------------------------------------------------------------------9
SPEAKER PLACEMENT------------------------------------------------------------------------------------------------------------------13
GETTING STARTED & BASIC SETUP------------------------------------------------------------------------------------------------ 14
PLAYING DVD / CD / VCD DISC----------------------------------------------------------------------------------------------------19
ADVANCED PLAYBACK FUNCTION--------------------------------------------------------------------------------------------------------21
PLAYING MP3 /JPEG/ WMA/MPEG 4 FILES----------------------------------------------------------------------------------------25
AUDIO CD RIPPING (ENCODING IN MP3 FORMAT)---------------------------------------------------------------------------26
LISTENINGTOTHERADIO-------------------------------------------------------------------------------------------------------------------27
OTHEROPERATIONS AND FUNCTIONS-----------------------------------------------------------------------------------------------28
PLAYABLE DISCS/ FILES------------------------------------------------------------------------------------------------------------------29
TROUBLESHOOTINGGUIDE-----------------------------------------------------------------------------------------------------------------31
TECHNICALSPECIFICATIONS------------------------------------------------------------------------------------------------------------32
TEMPLATE FOR MAIN UNITWALLMOUNTING----------------------------------------------------------------------------------33
U.S. Patent Nos. 4,631,603; 4,819,098; 4,907,093; 5,315,448; and 6,516,132.
Examine the contents of the box for your DVD Micro Theatre System. It includes the following:
• DVD Micro Theatre System with power cord
• Detachable Stand
• Remote Control with 2xAAA Batteries
• AV Cable
• DIN SCART Cable
• FM antenna and AM antenna
• Subwoofer
• 2x Front speakers
• 2x Front speaker stands
• Instruction Book
PACKAGE
This product incorporates copyright protection technology that is protected by method claims of certain U.S.
patents and other intellectual property rights owned by Macrovision Corporation and other rights owners. Use of
this copyright protection technology must be authorized by Macrovision Corporation, and is intended for home and
other limited viewing uses only unless otherwise authorized by Macrovision Corporation. Reverse engineering or
disassembly is prohibited.

GB-4
Player Zones
Cleaning Disc
DVD Discs
Anti-Copy Disc Protection
INSTALLATION
ForthepurposeofdistributionofDVDdiscs,theworldhasbeenseparated
into6zones. ThezonethisunitisintendedforisindicatedontheZone
Label. Thisshouldbethesameas thelabelondiscsavailableinyour
region. Ifyouhaveanydifficultiesinplayingadisc,makesure that the
discisforthe samezoneasyour unit.
SomeDVDdiscs haveanti-copyingdevices. It isimpossibleto copy
thesediscs.
• Installyour uniton astable flatsurface. Theremust be
sufficientroom infront ofthe unitfor thedrawer tobe opened
andthe unitshould be positionedso that itcan faceto the
remotecontrol.
• Donotexpose yourunittoextremes oftemperatureor
humidity.
• Avoidstanding iton ahot surface suchas ontop ofother hot
runningequipment andensure thatthereis adequate
ventilationto the unit.
Caution:
Donotinstallthisequipmentin aconfinedspacesuchasabook
caseorsimilar unit!
Picturefreezing &sound skipping or repeating canoccur ifthe disc
insidetheplayerisdirty.
• Whena discbecomes dirty, clean it witha cleaningcloth.
Wipethe discfrom thecenter out.
• Do not wipe in a circular motion. Circular scratches can
causepicture distortionor renderthe discunplayable.
Caution: Donot use solvents,commercially available cleaners,or
antistaticsprayto cleandiscs.
Region 2
2
Thereareseveral typesofDVD Disc:
Single-sideddiscsplayfor approximate2Hours
Single-sidedtwo-layerdiscsplay for approximate 4Hours
Double-sideddiscsplayforapproximate 4 Hours
Double-sideddiscswithdouble-layeron both sidesplayfor
approximately8Hours
DVDdiscshave TitlesandChapters:
* Therecan be severalTitles onone discand each Title can
containseveral Chapters.Titles andChaptersare numbered,
e.g. Title 1, Title 2, Chapter 1 and etc.
* Usually Title one willshow thedisc publisher and studio
logos. The next Title will be the film. Other Titles contain
trailersfor other films, production notes,or alternative
endings for the film. There are many possibilities with Digital
Versatile Disc.
* Chapterswithin themain Titleallow youto searchquickly for
aspecific pointon thedisc. Manydiscs havea ChapterMenu
sometimescalled Scene Indexor SceneMenuthat displays
thefirst shotfrom eachChapter, whichallows youto selecta
shotand playthedisc fromthat point onwards.
DVDdiscscanbePALorNTSC.Thisplayercanplaybothtypes(ifthe
playerzoneis correct).
DVDdiscsallow upto8Languages and 32subtitleson a singledisc.
Thelanguageandsubtitlecan be changed,andthewholediscor just
partofit canbeplayedandviewed fromdifferentangles(ifthevideois
shotatdifferentcamera angles).

GB-5
REMOTE CONTROL
1
2
3
4
5
27
6
7
10
13
16
17
18
19
21
20
22
24
23
25
28
26
30
31
32
15
14
8
9
29
11
12
1. STANDBY/ON Press to switch between On
and standby mode.
2. 0 - 9 (number keys) DVD mode: Press to
enter title, chapter, track and time search
selections.Tuner mode : Press to enter a preset
station.
3. TITLE Press to display the title menu if available
on DVD disc.
4. Stop Press to stop playback.
5. Pause Press to pause playback and advance
frame by frame for DVD/VCD discs.
6. Navigation
- 1) Cursor function.
- 2) Press to flip or rotate a picture on
the TV. - 3) Tuner mode: Press or
to change the radio frequency. Press or
to change the radio Channel.
7. Press to skip backward/forward to the
previous/next chapter for DVD or track for CD/
VCD.
8. BOOKMARK Press to display Bookmark menu.
9. HD Press to change the HDMI output resolution.
10. ZOOM / CLEAR 1) Press to select different zoom
ratios during playback. 2) Press to clear the
information you have entered.
11. ANGLE / PBC 1) Press to select different viewing
angles (if available on disc). 2) Press to turn PBC
ON or OFF on a VCD/SVCD disc.
12. SOURCE Press to select a mode in the following
order: “DVD”, “AU1 “(Aux in jack) and “AU2”
(Scart input), “FM” or” MW” input.
13. RIPPING (encoding in MP3 format) Press to
convert CD audio files into MP3 digital files and
save them on a USB flash drive.
14. SURROUND Press to select switch surround
sound effect between ON or OFF .
15. SLEEP Press to activate a sleep timer to go into
standby mode automatically.
16. TONE Press to select an EQ mode from the
following: “FLAT”, “ROCK”, “POP”,
“CLASSIC ”, and “JAZZ”.
17. EX BASS(EXTRA BASS) Presstoturn EXBASSto
Soft Bass, Balance Bass, or Powerful Bass.
18. A-B Press to set a point-to-point repeat playback
or to clear repeat mode.
19. PLAYMODE Press to select different play modes:
program, random and repeat.
20. GOTO Press to display the search Menu to search
for a specific title, chapter, track or time on a
disc.
21. DIMMER Press to adjust the brightness of the
display, the buttons and the backlighting on the
motorized door in the following order:
“ON”,”DIM” ,”OFF”. (Even if you select
“OFF”, the display always lights up slightly so
that you can easily use the appliance).
22. AUDIO / FM ST 1) DVD mode - Press to select
different languages for DVD (If available on the
disc). For VCD discs, this option also enables you
to select one of these audio modes : ( “Stereo”,
“Mono L”, “Mono R”) . 2) Tuner FM mode -
Press this button to select Mono or Stereo.
23. SUBTITLE/SPEED 1) Press to select a different
subtitle language. 2) Press to change the speed of
encoding MP3 files for CD Ripping.
24. Press to fast search backward or forward.
25. OK Press to confirm the selection.
26. SETUP / EXIT Press to enter or exit the System
Setup menu.
27. Play Press to start playback.
28. MENU 1) DVD mode - Press to enter the disc
menu. 2) PBC ON mode - Press to view a VCD
disc menu.
29. INFO Press to displaycurrent playback information
30. MUTE Press to mute or restore the sound output
from the speakers.
31. - VOL + Press to increase or decrease the volume.
32. OPEN/CLOSE Press to open or close the
disc tray motorized door.

GB-6
BACK PANEL
FRONT/SIDE PANEL 1. PHONES Jack
2. AUX IN Jack
3. STANDBY/ON Button
4. VOLUME Button
5. SOURCE Button
6. Infra-Red Receiver Window
7. VFD Display
8. SKIP Backward Button
9. PLAY/PAUSE Button
10. SKIP Forward Button
11. OPEN/CLOSE Button / STOP Button
12. Disc tray motorized door
13. USB Port
14. DIMMER: Use this button to adjust the brightness of
the display, the buttons and the backlighting on the
motorized door in the following order “ON”, “DIM”
or “OFF”. (Even if you select “OFF”, the display
always lights up slightly so that you can easily use
the appliance)
1. Power Cord
2. Front speakers output terminal
3. Subwoofer output terminal
4. FM and AMAntenna Terminal
5. Digital coaxial output
6. Video and Audio output
7. DIN SCART cable output
8. HDMI output
6911 12 14
47
23
15810 13
1
8
7
6
5
3
42
Right side left side
DISPLAY 1. SLEEP Timer Indicator
2. Dolby Digital Indicator
3. DTS Indicator
4. Disc Indicator
5. DVD Disc Indicator
6. MP3 Indicator
Lights up during MP3 Playback
7. FM stereo Indicator
8. Radio signal indicator
9. KHz indicator for MW Frequency
10. MHz indicator for FM Frequency
11. MW mode Indicator
12. FM mode Indicator
13. Mute Status Indicator
14. Pause Indicator
15. Disc Play Status
16. Digit Display
2354
14
15
16
1
13
8
79
12
11
10
FM
MW
SLEEP ST.
KHZ MHZ

GB-7
MAIN UNIT PREPARATION
Installation methods
Make sure to unplug the AC power cord before installing the main unit.
The ergonomic feature incorporated into the design of your vertical HomeTheatre System is that it can be mounted
either on its stand or on the wall.
Notes:
• When attaching or removing the stand, place the main unit on a cushion or soft cloth to avoid damage.
• Remove the only specified screws otherwise a malfunction may occur. Be careful not to lose the removed
screws. Mounting on the stand
With both hands, guide the main unit along the sides
of connecting socket until it is firmly connected to
the stand.
The design of the stand can help you tightly fit the
connection cables.
1. To remove the stand cover, simply press the clip on
its top side, then pull out towards you.
2. Connect the main unit to the television. For more
detailed information, please refer to the next chapter-
--CONNECTIONS.
3. After placing the cables correctly, replace the stand
cover on your DVD stand.

GB-8
MAIN UNIT PREPARATION
Wall surface
Wall mounting screw
Min. 21/32”(16.5mm)
7/32”(5.5mm)
Min. 7/8”(22mm)
1/8”(3.2mm)
3/16”(5mm)
3/8”(9mm)
Mounting on the wall
Preparation:
•Remove the stand from the main unit:
Grip the top of the main unit with one hand and grip
the stand with another hand, slowly but firmly pull
the main unit off its stand.
•Use appropriate screws (not supplied). See the
illustration on the left for size and type of screws.
1. Please first cut out the template on the last page of
the user’s manual.
Fix the template on the wall where you want to hang
the appliance and drive two screw holes into the wall
with a distance of 100mm in between, then remove
the template.
2. Drive the appropriate screws into the holes and
tighten them, making sure that you leave 5.5 mm
between the screw head and the wall. Ensure that
the wall and the screws can support a weight of 1.25
kg.
3. Hook the main unit on the screw heads and make
sure it is secure.
CAUTION:
Handle the appliance carefully when mounting it on the
wall.
•Mounting screws are not supplied. Use appropriate
ones.
•Check the two mounting screws are properly fixed
to the wall and that the main unit is firmly attached
•Select a good location. In the wrong location,
accidents may occur or the main unit may get
damaged.
•Avoid placing above a bed, sofa, water tank, sink or
in a hallway.
Wall surface
Template for main unit
100mm

GB-9
CONNECTIONS
Connecting to TV
The way in which the Main unit is connected and the kinds of cables used can make a noticeable difference in picture
and sound quality. Before selecting one of the options, please make sure that any other equipment has the required
input/output connections. Use any of the options below:
For best picture quality, use a HDMI cable (not included)
What is HDMI (High Definition Multimedia Interface)?
This device transmits a digital video signal without the process of converting to an analog signal. You can get
sharper digital picture by connecting to your TV to the unit using an HDMI connection cable.
HDMI was developed to provide HDCP technology (High Definition Contents Protection). HDCP is used to protect
digital content transmitted and received.
Because HDMI is an evolving technology, it is possible that some devices may not operate properly with the DVD
Home Theatre System.
HDMI, the HDMI logo and High-Definition Multimedia Interface are trademarks or registered trademarks of HDMI
licensing LLC.
Notes:
Please make sure you have a HDMI TV and set the TV’s source to the HDMI (Refer to TV owner’s manual)
• Connect the HDMI cable to the HDMI output on the appliance.
• Once connected, press HD to select the resolution (480P/576P, 720P, 1080i, 1080P) for the HDMI output.
The resolution can only be changed according to the TV’s and Monitor’s resolution capabilities.
• If there is noise or lines on the screen, please check the HDMI cable.
• If you do not want to connect your TV with a HDMI cable, please refer to the TV Connections shown on the
next page.
HDMI CABLE
(Not Included)
Bottom side

GB- 10
CONNECTIONS
For good picture and sound quality, use supplied AV CABLE
Use a DIN SCART cable (included)
AUDIO IN
AV CABLE
(Included)
LR
VIDEO IN
Yellow
White
Red
1. Connect the yellow output jack on the AV cable to the video input jack on the TV.
2. Connect the white and red output jacks on theAV cable (white/red) to the audio input jacks (L/R) on theTV.
1. In DVD mode, the DIN SCART cable socket only transmits the video signal to the TV (not the audio signal).
The sound comes from your Home Theatre System’s speakers.
2. In AUX 2 mode (SCART input), the sound coming from the external appliance (from the TV for example) is
produced by the Home Theatre System’s speakers.
DIN SCART CABLE
(included)
SCART IN

GB- 11
Connecting to 5.1 CH Receiver
When connecting to a 5.1 CH receiver, do not connect the L-R Audio sockets to the TV. If the L-R connections are
made, the TV volume must be set to zero.
Using a Coaxial Audio Cable, connect the Coaxial Out socket (3.5mm jack) at the back of the player to the Digital
Coaxial Audio In socket of the 5.1 Ch receiver.
For best sound quality, use a COAXIAL AUDIO CABLE (not included)
CONNECTIONS
Radio connection
AM antenna connection - Stand the antenna up on its base. Place the antenna where reception is best. Keep the
antenna cable away from other wires and cables.
FM antenna connection - Affix the end of the FM antenna where reception is best.
ClicK
AM antenna
FM indoor antenna
COAXIAL IN
Coaxial Audio Cable
(not included)

GB- 12
CONNECTIONS
Audio in connection
You can use your Home Theatre System to amplify the sound of an external music device. In order to do this,
connect the AUX IN jack of this unit to the Headphone output of your music device using an AUX IN CABLE (not
included). Then press SOURCE on the remote control or the front panel to select AUX 1.
Speaker Connection
Before Connecting
This DVD Home Theatre System is designed to reproduce optimum sound quality when the supplied speakers are
used. If you wish to connect other speakers to the system instead of the supplied speakers, they should be 4 ohms
impedance for the speakers and 8 ohms impedance for subwoofer.
Ensure that the polarities are correct when connecting the speakers (colored wire for matching colored terminal clip).
To prevent damage to circuits, never short-circuit the speaker output terminals.
Front left speaker
Front right speaker
SUBWOOFER
3.5mm plug
AUX

GB- 13
The placement of the speakers plays an important role in the reproduction of surround sound effect.
Particular attention should be taken when designing the speaker layout. For the best surround effects, all speakers
should be installed.
1) Place the front left and right speakers to the left hand side and right hand side of your TV.
2) The subwoofer can be installed for powerful bass sounds when it is placed on the floor. Place the subwoofer
on the floor near the TV.
3) All speakers should approximately be at the same distance from your listening position and must face you.
SPEAKER PLACEMENT
Press the speaker terminal clip down & insert the wire of speaker, then release the clip.
Notes:
• Do not remove an excessive amount of insulation on the wire , in order to avoid the stripped portions of the
wires from touching each other. The optimal length for the stripped part should be around 1/3 inch (or 1cm).
• Do not push the stripped part too far into the speaker terminals.
• Do not connect more than one speaker to any one pair of speaker terminals.
• Do not connect speakers with an impedance lower than the speakers supplied.
Insert the speaker stand into the speaker in the way shown below.
You can place the speakers in a vertical or horizontal direction according to your preference.
Subwoofer
Front
speaker
( left )
Front
speaker
( right )
DIM L DIMR
TV
Front
speaker
( left )
Front
speaker
( right )
Sound Reproduction
Angle
Subwoofer

GB- 14
1. Press or to navigate to one of these menus:
• SYSTEM SETUP • LANGUAGE SETUP
• VIDEO SETUP • AUDIO SETUP
2. Press or to select different settings under the
menu. Press or OK to active the setting.
3. Press or to select a new setting, then press OK
to confirm the new setting.
4. Repeat steps 1 to 3 to change any settings.
5. Press SETUP/EXIT button to exit setup.
For details, refer to the corresponding chapters in the
following section.
Basic Operation
Press the STANDBY/ON button to turn on the unit and
press SETUP/EXIT button to enter SYSTEM SETUP menu.
BASIC SETUP
GETTING STARTED
Powering the unit
1. Finish the connections for the DVD HomeTheatre System as shown in the previous section.
2. Insert 2pcs AAA batteries (supplied), with correct polarities marked in the battery compartment, in the remote
control.
3. Connect the Power cord toAC mains outlet and press STANDBY/ON button on the unit or on the remote
control to turn on the unit.
4. Turn on the TV and set to the correct video-in source.
5. To go to the standby mode, press the STANDBY/ON button on the remote control or on the unit. If the DVD
Micro Home Theatre is not to be used for a long time, please disconnect the power cord.
Notes:
• The effective distance for remote control operation is about 5 metres.
• Replace the batteries when the remote control operating distance starts to reduce.
• If the remote control is not to be used for a long time, remove the batteries to avoid
damage caused by battery leakage.
Inserting a disc
1. Press the OPEN/CLOSE button on the remote or the button on the front panel
to open the disc tray motorized door.
2. Insert a disc, press OPEN/CLOSE button on the front panel or the button on
the remote control to close the disk tray motorized door.
The unit will start reading the disc and playing it. Before the movie starts to play, a
menu will be displayed.
Inserting a USB device( in DVD mode )
When there is no disc in the disc tray:
•Insert a USB device in the USB port on the unit. The player will automatically play the files contained in the
USB device.
When there is a disc in the disc tray:
•When the disc is playing, insert the USB device in the USB port on the unit, the DISC/USB selection menu
will pop up on the screen, you can press / to select DISC or USB and press OK to confirm.
•To play the disc, please stop the USB device playing first, then press SETUP/EXIT to access the SETUP
menu, select the SOURCE option and then select DISC.
Notes:
•Please ensure the USB device has been inserted.
•This unit cannot support NTFS format. If the device does not work on it, please check the device file system
and format it with FAT or FAT32.
Although you can watch a movie immediately, to get the best from this unit, you are suggested to proceed for the
Basic Setup first.

GB- 15
1.2 PASSWORD & RATING
Many DVD movie discs contain Motion Picture Association
rating codes. This DVD Player will recognize the codes on
these discs, providing a method to prevent children from
viewing films which are not suitable or are objectionable.
1 (Kid safe): Suitable for all audiences
2 (G): Suitable for general audiences
3 (PG): Parental guidance suggested
4 (PG-13): Parental guidance suggested, unsuitable for
childrenunder 13
5 (PG-R): Parental guidance recommended - very brief
mature language or situations
6 (R): Restricted - violence, adult language and situations
unsuitable for young viewers
7 (NC 17): Adult theme or content, not suitable for children
under17
8 ( Adult): Adult themes, language and nudity. Select this
level of control to switch off parental control.
1. Press or to highlight Rating, then press .
Select a parent control level and press OK.
2. Press or to select Password and press . Use
the number keys (0-9) to enter the four-digit password
and press OK to confirm. The system is locked
again, which means that the parental control function
is switched on.
3. In SYSTEM SETUP menu, press or to highlight
Password and press . Use the number keys (0-9)
to enter the four-digit password and press OK to
confirm. The system is unlocked, which means that
you can adjust the setup for parental control.
If a mistake is made before pressing OK, press the CLEAR
button and enter the 4-digit password again.
DVD discs that are rated above the selected level will not
play.
To change the password, first enter the old password, then
enter the new password.
Indicates Parental lock is NOT active.
The Parental lock is active.
Notes:
•The rating levels are only functional when the parental
lock is active.
•The rating levels can only be changed when the
parental lock is not active.
•If you forget the password, enter 76418 while the
player is in NO DISC mode. The password will be
cancelled.
1. SYSTEM SETUP
1.1 SCREEN SAVER
Use this setting to turn the screen saver option on or off.
If you turn the screen saver on, the screen saver image
appears when you leave the player in Pause or Stop mode
more than 3 minutes. It can protect the television screen
from being damaged.
On: To turn screen saver on.
Off: To turn screen saver off.
SYSTEM SETUP
PASSWORD OFF
RATING
SOURCE
EXIT SETUP
SCREEN SAVER ON
SYSTEM SETUP
SCREEN SAVER
RATING
SOURCE
EXIT SETUP
PASSWORD ----
SYSTEM SETUP
SCREEN SAVER 1 KID SAFE
PASSWORD 2 G
3PG
SOURCE 4 PG-13
5 PG-R
6R
7 NC-17
EXIT SETUP
RATING
8 ADULT

GB- 16
2. LANGUAGE SETUP
You can select different languages for the Setup menu.
You can also select the different languages for the audio,
subtitle, and disc menu recorded on the DVD.
2.1 OSD LANGUAGE
Selects the on screen display language.
2.2 AUDIO LANG
Selects the audio language.
2.3 SUBTITLE LANG
Selects the subtitle displayed on the TV screen.
2.4 DISC MENU
Selects the disc menu language.
1.3 SOURCE
Selectthe available inputsourcebetween Disc andUSB.
TheunitcanreadMP3,JPEG,MPEG 4, WMA file formats
in the USB.
SYSTEM SETUP
SCREEN SAVER
PASSWORD
RATING
DISC
EXIT SETUP
SOURCE
USB
LANGUAGE SETUP
OSD LANGUAGE
AUDIO LANG
SUBTITLE LANG
DISC MENU
EXIT SETUP

GB- 17
3.1 TV SYSTEM
This player supports different TV output, including NTSC
and PAL system. The setting of the unit can be changed
to match the TV.
NTSC: Select this if your television supports the NTSC
color system used in North America.
PAL: Select this if your television supports the PAL color
system used in Europe and Asia.
AUTO: Select this to automatically switch to PAL or
NTSC output according to the disc inserted.
Note: If the disc’s color system is different to the TV
system selected, the video from the HDMI output will
becomeflickering. Youshouldselect theAUTO toadjust
it.
3.2TV TYPE
4:3 PS Select this format if the unit is connected to a
normalTV.The left andright edgesof wide-screen images
are cut so that the image can be displayed in full screen.
4:3 LB Select this whentheunit is connectedto a normal
TV.Wide-screen images areshownonscreen, with black
bands on the top and bottom.
16:9 Select this when the unit is connected to a wide-
screen TV.
Notes:
•Some discs may not be able to play according to
your selection, due to the format that has been
recorded onto a DVD disc.
•A disc recorded in 4:3 mode will only play in 4:3.
•The TV TYPE should correspond to the TV.
3.3 HDMI OUTPUT
This function allows the user to select screen resolution
for HDMI output.
Note:
• If your TV or monitor does not support HDCP, a
blue screen without picture appears when playing
the DVD discs which are protected by copyright.
• The HDMI output options depend on TV System
(PAL/NTSC) selected.
• See your TV owner’s manual for more information
on how to select TV’s Video Input source.
• Please make sure your HD TV supports the high
resolution selected.
• You can also easily change the resolution by
pressing the HD button on the remote control
repeatedly.
3. VIDEO SETUP
VIDEO SETUP
NTSC
TV TYPE
HDMI OUTPUT AUTO
EXIT SETUP
TV SYSTEM
PAL
VIDEO SETUP
TV SYSTEM
4:3 PS
HDMI OUTPUT 4:3 LB
16:9
EXIT SETUP
TV TYPE
VIDEO SETUP
TV SYSTEM
TV TYPE
480P/576P
1080 I
1080P
EXIT SETUP
HDMI OUTPUT
720P

GB- 18
4. AUDIO SETUP
4.1 VOLUME SETUP
•Once you select the Volume Setup and press OK,
you will hear the calibrating sound from each
speaker for a few seconds as follows: Front Left -
> Front Right -> Subwoofer. If the sound is either
too quiet or too loud, adjust the volume control
until the sound is more clear. Let the calibrating
sound cycle through all the speakers at least once.
•If the calibrating sound level from all speakers is
approximately the same, no further adjustment is
necessary.
•If any speaker sound level appears unbalance to
the rest, you can increase or decrease the speaker
sound level by pressing or when that speaker
is highlighted.
•When you have completed the level adjustments,
press OK to exit the Volume Setup and return to
the previous menu.
Note:Werecommendtoset Volume = 30beforeentering
this Volume Setup to further calibrating any unbalance
speaker level output.
4.2DYNAMICRANGE
Reduceslargevariationsinvolumefornight-timelistening
and avoid loud sound such as explosion.
On: Loud sounds such as explosions are tuned down
sightly.
Off: The unit plays back at the recording level on the
disc.
4.3 DIGITAL OUTPUT
If an amplifier is connected to the unit’s “COAXIAL”
socket, the following settings can be selected
SPDIF/RAW: Dolby Digital signals are fed unaltered to
the digital output. Generally, this setting is used with a
5.1 channel receiver.
SPDIF/PCM: Dolby Digital and MPEG 2 multi-channel
signals are converted to PCM (Pulse Code Modulation).
This setting is suitable for amplifiers or receivers without
digital multi-channel sound decoders.
4.4 VOCAL MODE
SelectsamongSTEREO,MONOL, MONO R andVOCAL
ALL as the desired vocal sound effect when playing
Karaoke discs.
Note: This function is not available for some karaoke
discs.
AUDIO SETUP
VOLUME SETUP
DYNAMIC RANGE
DIGITAL OUTPUT
EXIT SETUP
VOCAL MODE
STEREO
MONO L
MONO R
VOCAL ALL
AUDIO SETUP
DYNAMIC RANGE
DIGITAL OUTPUT
EXIT SETUP
VOCAL MODE
VOLUME SETUP
FRONT LEFT
0dB
0dB
AUDIO SETUP
VOLUME SETUP
ON
DIGITAL OUTPUT
VOCAL MODE
EXIT SETUP
DYNAMIC RANGE
OFF
AUDIO SETUP
VOLUME SETUP
DYNAMIC RANGE
VOCAL MODE
EXIT SETUP
DIGITAL OUTPUT
SPDIF/RAW
SPDIF/PCM

GB- 19
PLAYING DVD / CD / VCD DISC
1. (Open / Close)
• Press to open the motorized door.
Note: Load the disc on the disc tray with disc label facing
forward.
• Press this button again to close the disk tray door. The unit
will start playback automatically.
2. (Play)
• Press to start playback.
3. (Pause / Frame-by-Frame Advance)
The image can be frozen and advance frame by frame.
• For CD, press to pause the playback. Press again or
directly press to resume the normal playback.
• For DVD / VCD, press to pause the playback. Press
again to go to STEP mode. Each press of the button will
advance the frame in STEP mode.
Press to resume the normal playback.
4. (Backward / Forward Search, Slow Motion)
• Press to search backward or forward. Press to
resume the normal playback.
Each time the or button is pressed, the speed of
backward / forward search changes at speed: x2, x4, x8,
x20.
• In PAUSE mode, press or to start forward/backword
slow motion play at speed: 1/2, 1/4, 1/8, 1/16, 1/32. Press
to resume normal playback.
Note: Slow motion is not applicable to CD playback.
5. (Skip Forward/Backward)
When a disc is playing, a chapter/track can be skipped
backward/forward.
• Press the button to skip to the beginning of the previous
chapter or track.
• Press the button to skip to the beginning of the next
chapter or track.
• For audio CD discs, use the numeric buttons (0 - 9 on the
remote control only) to directly jump to a track number.
6. (Stop)
• Press once to stop the current playback instantly and
enter the Resume Play mode.
Press again to resume playback from the point where
the disc was stopped.
• Press twice to stop playback completely. It is now
impossible to resume playback from the place where
playback was stopped.
Press again to start playback from the beginning of the
disc.
7. MENU
• Press to display the Disc Menu.
Notes:
This button has no function during playback of a CD.
For VCD, this function is only available at PBC ON mode.
8. TITLE
• Press to display the title menu if available on disc (DVD
only).
1
2
3
4
5
6
7
10
8
9
11
12
Table of contents