S E A&S E ACo.,Ltd.
1-4-6,Kitasenzoku,Ohta-ku,Tokyo,Japan145-0062 TE L.+81-3-5701-5533
http://www.seaandsea.jp (CurrentasofNov.2020)
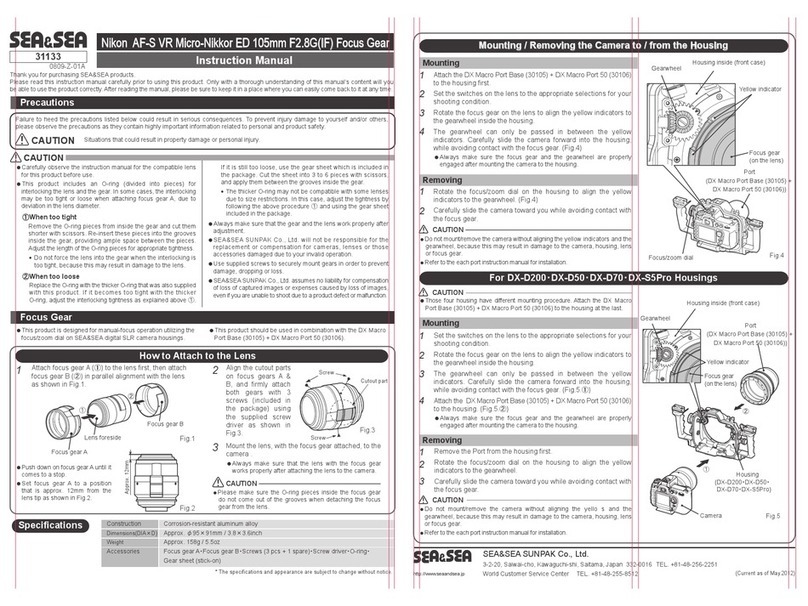
HowtoAttachtotheLens
ThankyouforpurchasingS E A&S E Aproducts.
Pleasereadthisinstructionmanualcarefullypriortousingthisproduct.Onlywithathoroughunderstandingofthismanualʼscontentwillyou
beabletousetheproductcorrectly.Afterreadingthemanual,pleasebesuretokeepitinaplacewhereyoucaneasilycomebacktoitatanytime.
NikonAF-S VR Micro-NikkorE D105mmF2.8G(IF)FocusGear
Ins tructionManual
Thisproductisdesignedformanual-focusoperationutilizingthe
focus/zoomdialonS E A&S E AdigitalS LR camerahousings.
ThisproductshouldbeusedincombinationwiththeDXMacro
PortBase(30105)+DXMacroPort50(30106).
Carefullyobservetheinstructionmanualforthecompatiblelens
forthisproductbeforeuse.
This product includes an O-ring (divided into pieces) for
interlockingthelensandthegear.Insomecases,theinterlocking
may be too tight or loose when attaching focus gearA, due to
deviationinthelensdiameter.
①Whentootight
R emovetheO-ringpiecesfrominsidethegearandcutthem
shorterwithscissors.R e-insertthesepiecesintothegrooves
insidethegear,providingamplespacebetweenthepieces.
AdjustthelengthoftheO-ringpiecesforappropriatetightness.
Donotforcethelensintothegearwhentheinterlockingis
tootight,becausethismayresultindamagetothelens.
②Whentooloose
ReplacetheO-ringwiththethickerO-ringthatwasalsosupplied
withthis product.Ifitbecomestootightwiththethicker
O-ring,adjusttheinterlockingtightnessasexplainedabove①.
Ifitisstilltooloose,usethegearsheetwhichisincludedin
thepackage.Cutthesheetinto3to6pieceswithscissors,
andapplythembetweenthegroovesinsidethegear.
ThethickerO-ringmaynotbecompatiblewithsomelenses
duetosizerestrictions.Inthiscase,adjustthetightnessby
followingtheaboveprocedure①andusingthegearsheet
includedinthepackage.
Alwaysmakesurethatthegearandthelensworkproperlyafter
adjustment.
S E A&S E AS UNPAKC o.,Ltd.willnotberesponsibleforthe
replacementorcompensationforcameras,lensesorthos e
accessoriesdamagedduetoyourinvalidoperation.
Usesuppliedscrewstosecurelymountgearsinordertoprevent
damage,droppingorloss.
SE A&S EASUNPAKCo.,Ltd.assumesnoliabilityforcompensation
oflossofcapturedimagesorexpensescausedbylossofimages,
evenifyouareunabletoshootduetoaproductdefectormalfunction.
Precautions
FocusGear
Failure to heed the precautions listed below could result in serious consequences. Toprevent injury damage to yourself and/or others,
pleaseobservetheprecautionsastheycontainhighlyimportantinformationrelatedtopersonalandproductsafety.
ForDX-D200・DX-D50・DX-D70・DX-S 5ProHous ings
CAUTION
AttachtheDXMacroPortBase(30105)+DXMacroPort50(30106)
tothehousingfirst.
S ettheswitchesonthelenstotheappropriateselectionsforyour
shootingcondition.
R otatethefocusgearonthelenstoaligntheyellowindicatorsto
thegearwheelinsidethehousing.
The gearwheel can only be passed in between the yellow
indicators. Carefully slide the camera forward into the housing,
whileavoidingcontactwiththefocusgear.(Fig.4)
Always make sure the focus gear and the gearwheel are properly
engagedaftermountingthecameratothehousing.
1
2
3
4
R otate the focus/zoom dial on the housing to align the yellow
indicatorstothegearwheel.(Fig.4)
Carefullyslidethecameratowardyouwhileavoidingcontactwith
thefocusgear.
1
2
R emoving
Mounting
Mounting/R emovingtheCamerato/fromtheHous ing
CAUTION
Donotmount/removethecamerawithoutaligningtheyellowindicatorsandthe
gearwheel,becausethismayresultindamagetothecamera,housing,lens
orfocusgear.
Refertotheeachportinstructionmanualforinstallation.
Please make sure the O-ring pieces inside the focus gear
do not come out of the grooves when detaching the focus
gearfromthelens.
Situationsthatcouldresultinpropertydamageorpersonalinjury.
CAUTION
S ettheswitchesonthelenstotheappropriateselectionsforyour
shootingcondition.
R otatethefocusgearonthelenstoaligntheyellowindicatorsto
thegearwheelinsidethehousing.
The gearwheel can only be passed in between the yellow
indicators. Carefully slide the camera forward into the housing,
whileavoidingcontactwiththefocusgear.(Fig.5.①)
AttachtheDXMacroPortBase(30105)+DXMacroPort50(30106)
tothehousing.(Fig.5.②)
Always make sure the focus gear and the gearwheel are properly
engagedaftermountingthecameratothehousing.
1
2
3
4
3
R emovethePortfromthehousingfirst.
R otate the focus/zoom dial on the housing to align the yellow
indicatorstothegearwheel.
Carefullyslidethecameratowardyouwhileavoidingcontactwith
thefocusgear.
1
2
R emoving
Mounting
Do not mount/remove the camera without aligning the yello s and the
gearwheel,becausethismayresultindamagetothecamera,housing,lens
orfocusgear.
Refertotheeachportinstructionmanualforinstallation.
CAUTION
Those four housing have different mounting procedure.Attach the DX Macro
PortBase(30105)+DXMacroPort50(30106)tothehousingatthelast.
Housing
(DX-D200・DX-D50・
DX-D70・DX-S5Pro)
Camera
①
②
Construction Corrosion-resistantaluminumalloy
Dimensions(DIA×D)Approx.φ95×91mm/3.8×3.6inch
Weight Approx.158g/5.5oz
Accessories FocusgearA・FocusgearB・Screws(3pcs+1spare)・S crewdriver・O-ring・
Gearsheet(stick-on)
S pecifications
*Thespecificationsandappearancearesubjecttochangewithoutnotice.
CAUTION
CAUTION
FocusgearA
Lensforeside
FocusgearB
①
②
Fig.1
Fig.2
Fig.3
Fig.4
Yellowindicator
Yellowindicator
Gearwheel Housinginside(frontcase)
Gearwheel
Housinginside(frontcase)
Focusgear
(onthelens)
Focusgear
(onthelens)
Focus/zoomdial
Fig.5
Port
(DXMacroPortBase(30105)+
DXMacroPort50(30106))
Port
(DXMacroPortBase(30105)+
DXMacroPort50(30106))
PushdownonfocusgearAuntilit
comestoastop.
Set focus gear A to a position
that is approx. 12mm from the
lenstipasshowninFig.2.
Alignthecutoutparts
on focus gears A &
B, and firmly attach
both gears with 3
screws (included in
the package) using
the supplied screw
driver as shown in
Fig.3.
2
3Mountthelens,withthefocusgearattached,tothe
camera.
Always make sure that the lens with the focus gear
worksproperlyafterattachingthelenstothecamera.
AttachfocusgearA(①)tothelensfirst,thenattach
focusgearB(②)inparallelalignmentwiththelens
asshowninFig.1.
1
Screw
Screw
Cutoutpart
31133
0809-Z-01A

