Quick Reference Guide 3
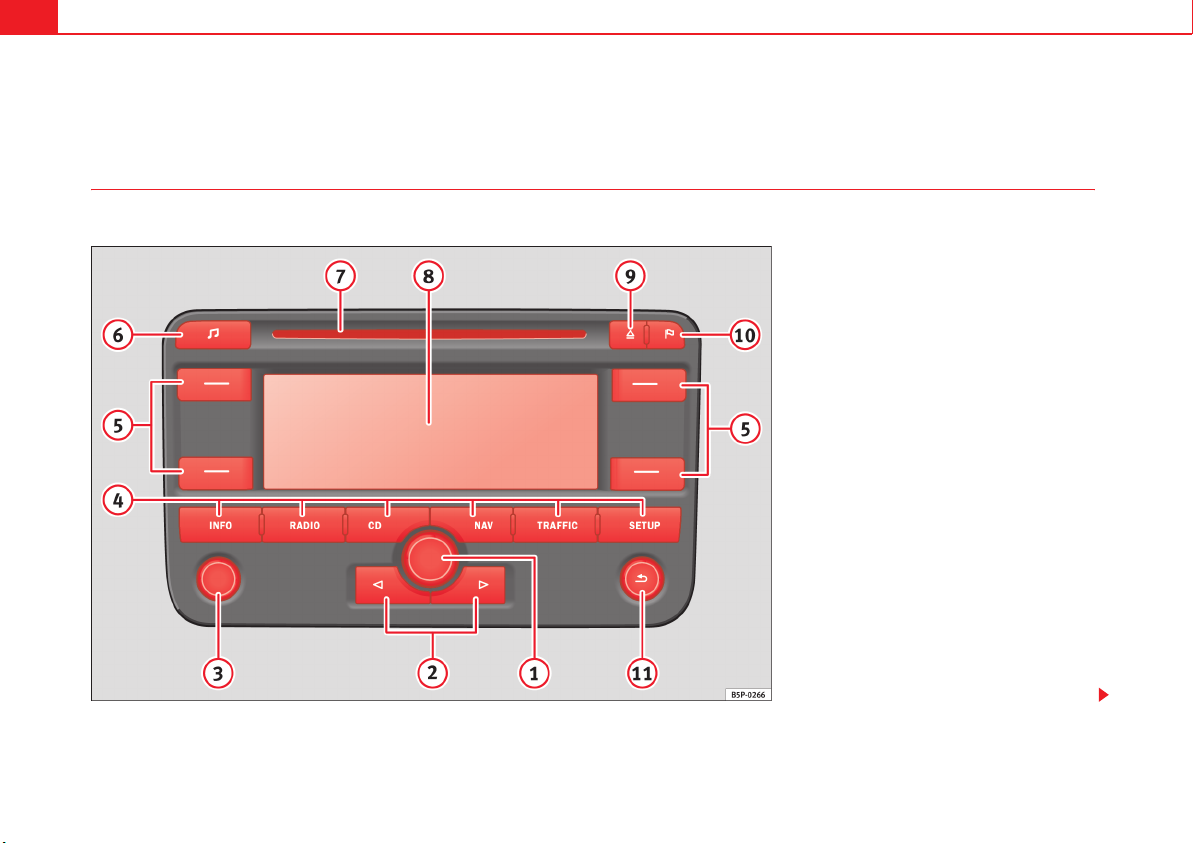
Entries in the screen menus can be made using the menu
button. Rotating the button selects a function or a submenu or
adjusts a value. Pressing confirms the selection
Backwards/forwards keys, apply to the active audio
source
−Press: in Radio mode: changes station; in CD mode changes
song (“track”)
−Press and hold: in Radio mode, manual station selection; in
CD mode fast forward/backward search
On/off knob (push) and volume control (turn). The volume
control will regulate the volume of the audio source currently
selected. A bar on the screen accompanied by a value indicates
the volume. IF the value is “0”, there is no sound. This control
may also be used to adjust the volume of a telephone conversa-
tion or a spoken navigation message.
The main menu buttons
−Repeat the last audio navigation instruction and show
the actual destination, position (direction) and the
geographical position.
−Activates the radio mode. . . . . . . . . . . . . . . . . . . . . .
−Activates the CD mode. . . . . . . . . . . . . . . . . . . . . . . . . . .
−Goes to Navigation mode. . . . . . . . . . . . . . . . . . . . . . .
−Shows the traffic reports from the actual TMC
(Traffic-Message-Channels) ⇒page 38, “Dynamic destina-
tion guide with TMC (Traffic Message Channel)”. Press the
function selector button goes directly to the
“route options” to make, for example, changes in the route
⇒page 29, “Route options”. During the guided navigation,
a section of a route may be manually excluded pressing
or re-included pressing .
⇒page 42, “To block sections and consult information from
a route”.
−The button allows adjustments to made in the selec-
tion area, on the screen (Function keys and
) and on the equipment ⇒page 14, “Radio
adjustments (SETUP)” and ⇒page 35, “Navigation settings
(SETUP)”.
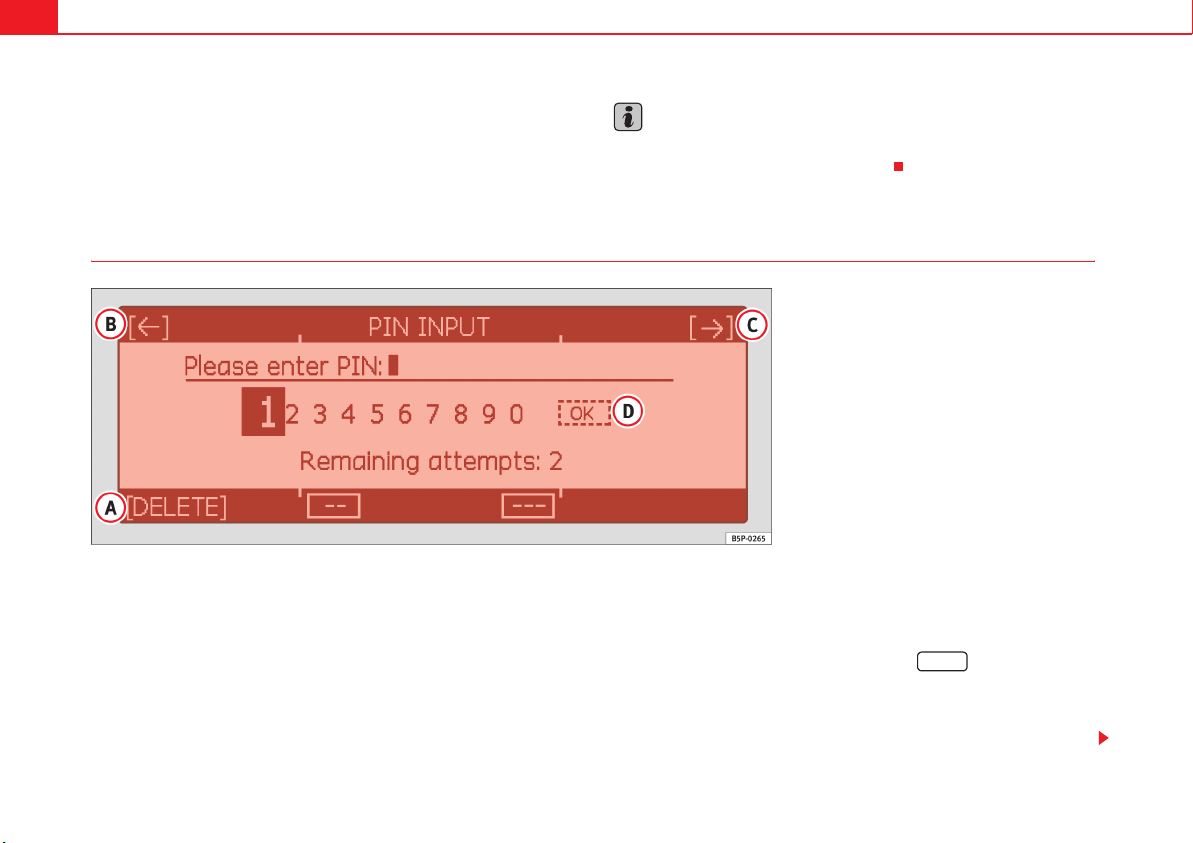
Screen function keys. Corresponding function indicated on the
screen close to the button. The brackets indicate that the func-
tion is temporarily not available (for example [ERASE] if no entry
has been made).
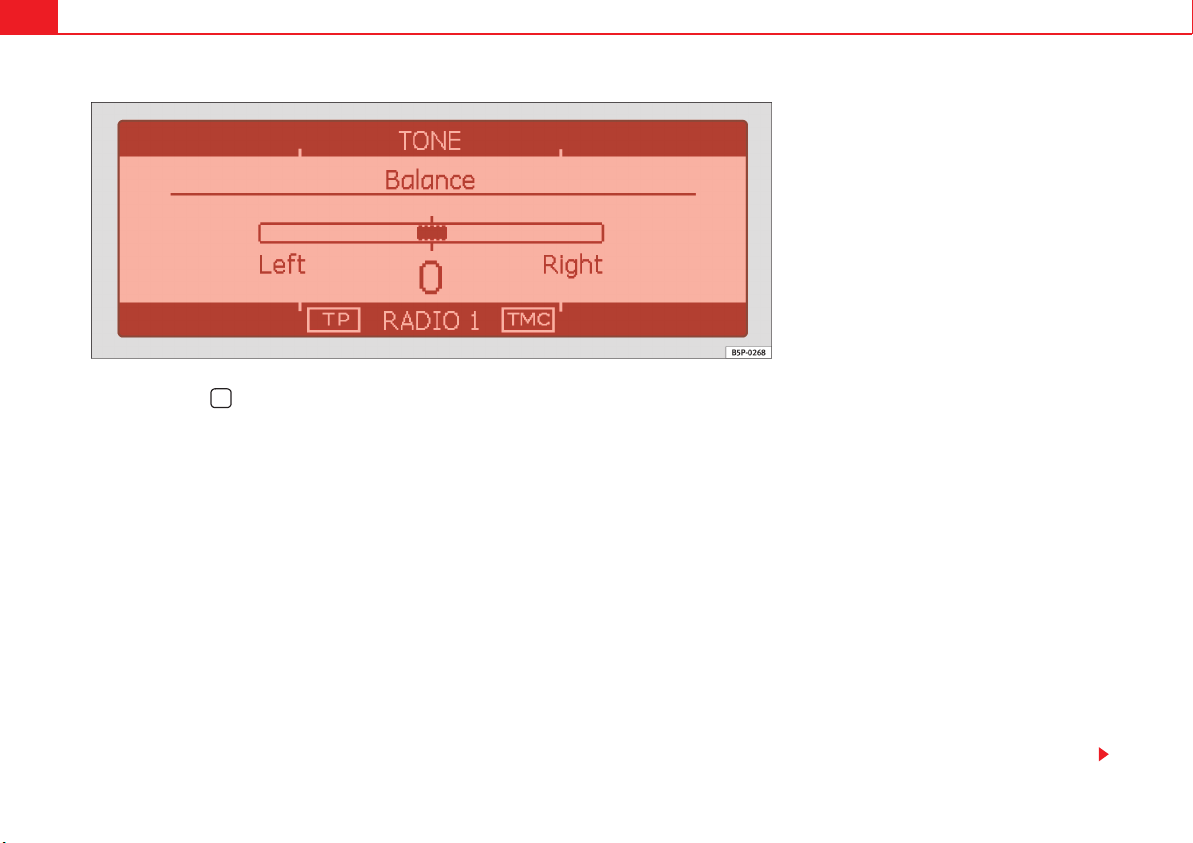
⇒page 8, “Sound, sound focus and volume”.
Slot for an audio or navigation CD.
Screen, adjustments on ⇒page 7, “System settings”.
CD eject button. The ejected CD will be pulled back into the
unit if it is not fully withdrawn within 10 seconds.
Set flagged destination. The unit will store the current
vehicle position when this button is pressed ⇒page 32, “To
record or select a final destination, intermediate destinations,
destinations with a flagor current position”.
Return to the previous menu, to the previous adjustment
and the main menu selected using the function keys.
WARNING
Adjust the volume so that you can still hear signals coming from outside
the vehicle, such as those of the fire brigade, ambulances or police cars.
Caution
•The screen is not a touch screen. Do not press on the surface. The screen
can be cleaned with a soft cloth (and alcohol, if necessary). Do not use
solvents such as turpentine or petrol to clean the surface as they will corrode
the material.
1
2
3
4
INFO
RADIO 10
CD 15
NAV 21
TRAFFIC
OPCS. ROUTE
TRAFFIC JAM ERASE. TRAFFIC JAM.
SETUP
BRIGHTNESS
OFF. SCREEN
5
6
7
8
9
10
11
Radionaveg300_angles Seite 3 Donnerstag, 13. Oktober 2005 11:48 11