Jalcor KTG-480 G User manual


KTG-480 GPS Navigation System
User Manual

Declaration
The information hereof has been carefully checked to prevent mistakes before publication. But due
to different comprehension or translation it all up to our explanation and please contact with our
customer service center for help.
Please read this manual carefully before using. Use only the battery and the accessories the original
factory provides, in order to avoid unanticipated damages, once use this system not following the
instruction or connect the device with incompatible components, the damages might even threaten
your personal safety and should not be covered by our warranty for which the company hereof holds
no liability.
Specifications are subject to change without prior notice. We reserve the right of final interpretation
of this user manual.
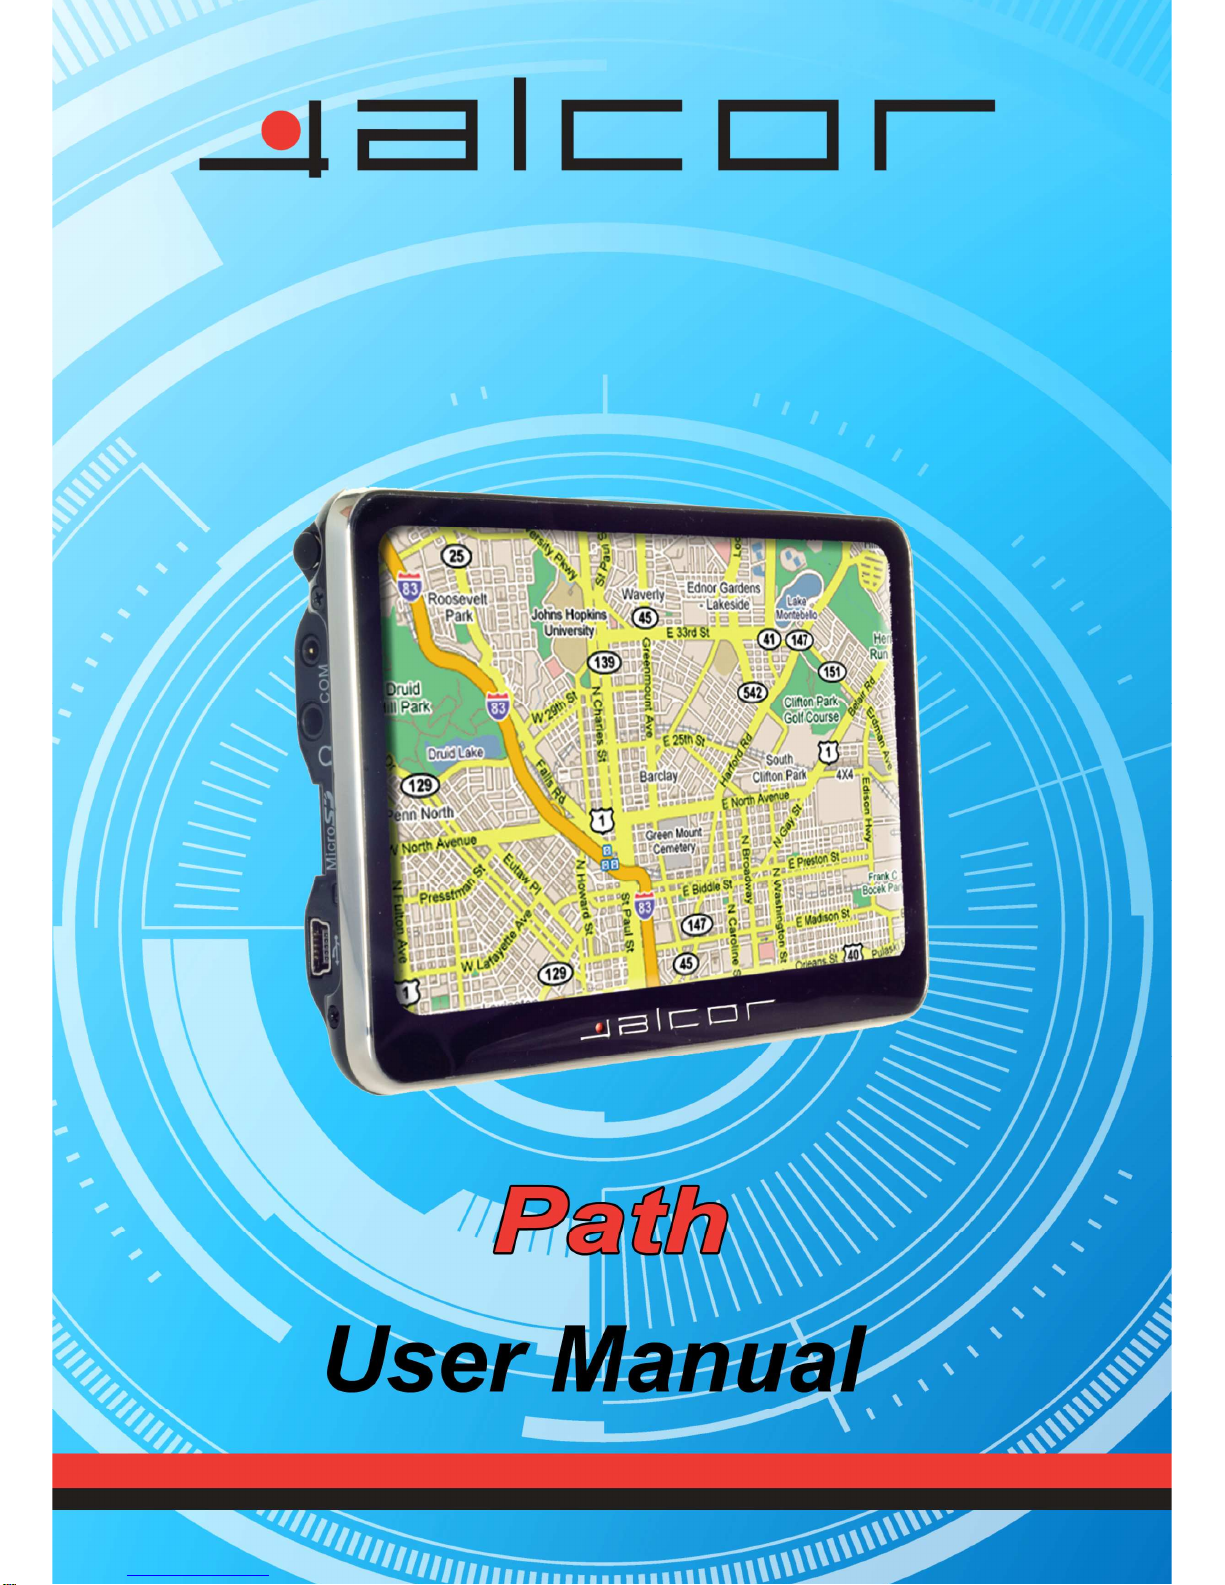
All pictures hereof are for your reference only, please subject to the real product.
Remarks
1) Storage
Please avoid placing the device under direct sun irradiation, sharply-changed temperature (below
0℃or above 60℃) environment or in high pressure, dusty or humid environment.
Please Avoid dropping or impacting upon the device
Keep away from caustic liquid or electromagnetic radiation.
Please avoid placing the device in the radiation produced by other electronic device.
[
[[
[NOTE]
]]
]Please put the device with your luggage for X-ray detection at the airport. Do not
directly use magnetic detector on the device or else will destroy the system.
2) Clean up
Clean with dry and soft cloth gently at power-off condition.
Please wipe the screen gently by soft cloth with light glass cleaner.
3) Battery
When start using the units, Please fully charge and discharge the battery 2~3 times while first use to
assure longer battery life and power capacity
Please do not dispose the unit into fire to avoid the battery exploding
Any unauthorized disassembly of the device will terminate official warranty.
4) Usage
a, Please do not use wet hand to plug/unplug or contact with device for preventing shock or damage.
b, Please do not judder, otherwise the device maybe damaged.
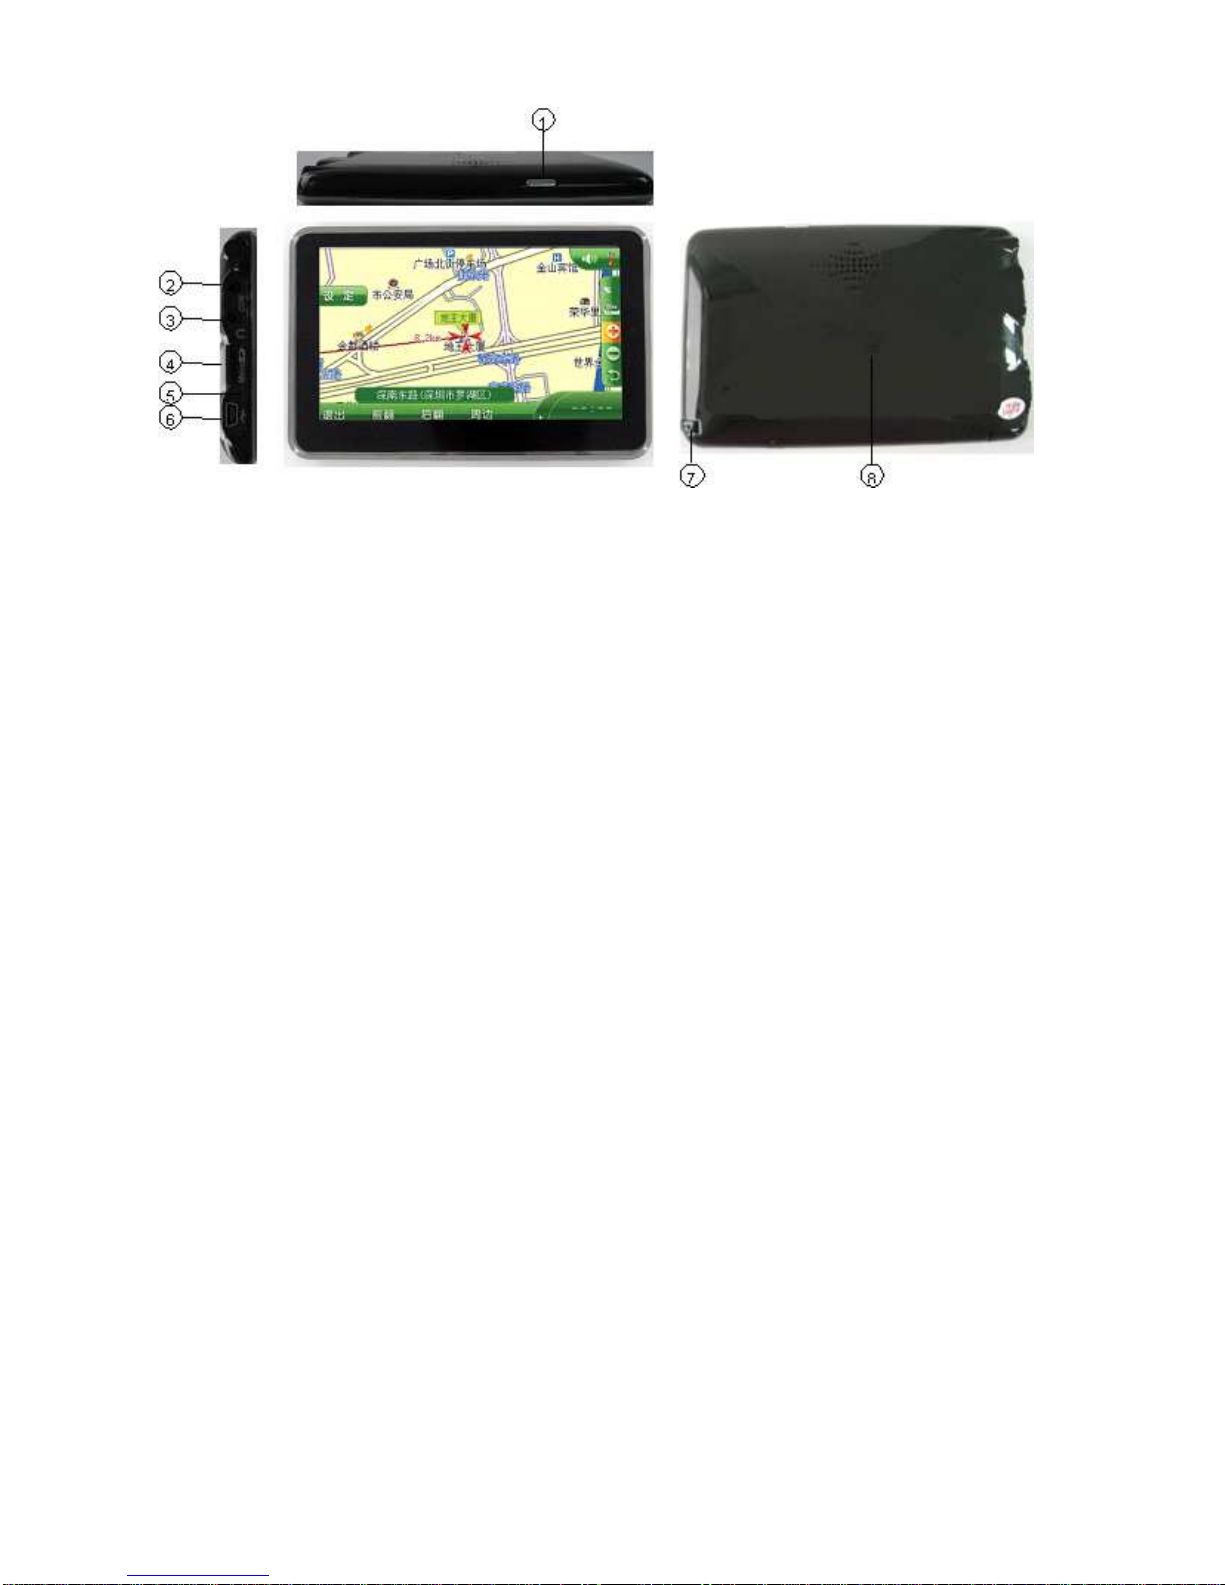
C, Please ensure that the micro SD card (T flash card) has enough space to save new files.
D, Files or data stored in the device can not completely avoid being destroyed or lost due to improper
use or other reasons. Please copy the files and data to your computer when necessary

Contents
Welcome to use
DECLARATION 3
REMARKS 3
CHAPTER 1 USE 6
1.1
I
NTRODUCTION
6
1.1.1
F
EATURES
6
1.1.2
P
ACKAGE
6
1.1.3
B
UTTONS AND
F
UNCTIONS
6
1.2
U
SAGE ON THE
C
OMPUTER
7
1.2.1
D
ATA
T
RANSFERRING
7
1.2.2
D
ISCONNECTION
7
1.3
B
ASIC
O
PERATION
8
1.3.1
B
ATTERY
8
1.3.2
P
OWER
B
UTTON
8
1.3.3
U
SE IN CAR
8
1.3.4
T
OUCH
P
EN
8
1.3.5
M
ICRO
SD
(TF)
C
ARD
9
CHAPTER 2 BASIC USE 10
2.1
P
OWER ON INTERFACEAND MAIN FUNCTION
10
2.2
N
AVIGATION FUNCTIONS AND FEATURES
12
2.3
B
LUETOOTH SETTING
&
USER INSTRUCTION
(
OPTIONAL
) 12
2.4
PLAYER OPERATION
19
2.4.1.
A
UDIO PLAYER
19
2.4.2 Video -Playing Interface and Operation 21
2.4.3 E-book Reading Interface and Operation 23
2.4.4 picture skimming interface and operation 25
2.4.4 Flash browser Interface and Operation 27
2.5
T
OOLS
I
NTERFACE AND
O
PERATION
29
2.5.1 Note book Interface and Operation 29
2.5.2 calculator interface and operation 31
2.5.3 calendar function and operation 31
2.6 I
NTERFACE
S
ETTING
32
2.6.1
V
OLUME ADJUST
:33
2.6.2
P
OWER SETTING
:34
2.6.3
B
ACKLIGHT
35
2.6.4
D
ATE AND
T
IME
35
2.6.5
L
ANGUAGE
37

2.6.6
S
YSTEM INFO
37
2.7
W
ALLPAPER INTERFACE FUNCTION AND OPERATION
39
2.8
G
AME INTERFACE FUNCTION AND OPERATION
41
2.9
S
CREENSAVER INTERFACE FUNCTION AND OPERATION
41
2.10
NAVIGATION PATH OPERATION
43
CHAPTER3 FAQ AND SPECIFICATION 44

Chapter 1 Use
1.1 Introduction
Thanks for Purchasing the car/portable GPS navigator, It is new type of portable GPS navigator,
which combines digital movie & music playing, photo browse, eBook reading and bluetooth
hand-free calling function (optional). Before using it, please read the use manual thoroughly, this
manual is applicable for this device only.
1.1.1
Features
Support GPS navigation
Support ASF, AVI, WMV, MP4, 3GP video file (this function is optional)
Support WMA, MP3, WAV format audio file (this function is optional)
Support JPEG, BMP, PNG format picture browse
Support TXT format e-book reading
Support bluetooth hand-free calling function (optional)
Support FM transmitter function (optional)
Support micro SD Card (T flash card)
Built-in speaker
Mini USB port
1.1.2
Package
Please check if you have all below items. Any miss please contact with the local agent or distributor.
Car/Portable navigator
AC adapter (optional)
Car adapter
User manual
USB cable
Touch pen
Holder
1.1.3
Buttons and Functions

1. Power button Start up / shut down
2. External TMC antenna port (optional) connect to TMC antenna
3. Earphone Jack Connect to stereo Earphone
4, Micro SD(TF) Card slot Insert the micro SD Card into it
5, LED Display charging state
6. Mini USB port Connect to PC through MINI USB cable/charging device by power adapter
7, Rope race Used to hang the touch pen on it.
8, Reset hole Reboot the system
1.2 Usage on the Computer
1.2.1
Data Transferring
Link the device with the computer through USB cable connection to do data transferring between
the device and PC.
Make sure the power-on condition of the device.
Mini USB port to the device and standard USB port to the PC USB host.
Connect the device with the computer through USB cable.
Double click ‘My Computer’ icon then find two ‘Removable Disk’. The first one represents the
device, and another represents Micro SD (TF) card.
Double click any one of the ‘Removable Disk’ to enter the folder then you can do copy, delete or
edit data.
[
[[
[
NOTE
]
]]
]Please do not pull out the USB cable while doing data transferring or else the data
will be lost.
1.2.2
Disconnection
Please do according to the system notice to remove the USB cable.
Left click USB icon on the taskbar in PC, then click the pop-up notice
After seeing the safety notice, remove the USB cable.

[
[[
[
NOTE
]
]]
]While connecting with the computer, other functions of the GPS device will pause.
1.3 Basic Operation
1.3.1
Battery
When the GPS Navigator is used for the first time, you have to use the adapter to charge the battery
completely, this models uses the built-in lithium battery. Please connect the navigator with AC
adapter for charging, or connect car adapter with cigar-lighter adapter of car to charge for the
battery.
[
[[
[
NOTE
]
]]
]The LED indicator will be red alight while charging and it will turn green after
completely charging. Please do not unplug the adapter while charging.
AC adapter – Insert the DC port of the adapter into the adapter jack connect another side of the
adapter to electrical outlet.
Car adapter – Insert the DC port of the car adapter into the adapter Jack, Connect another side
of the car adapter to the cigar-lighter adapter on the car for power.
[
[[
[
NOTE
]
]]
]Please use the car adapter after cranking up or else the current will destroy the
GPS device.
1.3.2
Power Button
To enter the sleeping mode to save the power, please press the power button for 1 second and
there is a message “entering sleeping mode” displayed, then screen would be shut off, but the
red light is on.
To start up the system, please press the power button again, the screen will display the last
picture showed before sleep automatically in the time of starting up.
To shut down the system, please press the power button for 2 seconds and there is a message
“power off” displayed, then screen would be shut off
[
[[
[
NOTE
]
]]
]The device can be normally charged while powered off, and please keep power-off
if no use for a long time.
1.3.3
Use in car
While use the GPS device in your car, please use the Window mounting kit and fixing clip provided
in the package to set the device on panel under the windshield.
[
[[
[
NOTE
]
]]
]Please carefully choose the GPS device setting position.
Do not disturb the eye sight of the driver.
Make sure well fixing.
Keep away from SRS airbag place
1.3.4
Touch Pen

The touch pen is an important tool, please keep it carefully.
Single click: click the screen once with the pen point to choose the wanted item
Double click : quickly click the screen twice with the pen point
Drag : choose one place with pen point and drag the touched item to the desired direction.
[
[[
[
NOTE
]
]]
]Please use touch pen to write on the LCD screen rather than other sharp objects
when use the hand writing function.
1.3.5
Micro SD (TF) Card
The Micro SD (TF) card use on the device saved map software and data, and it can also be used as
mass storage to keep files. Just inserting it to the card slot on the device. But while file reading,
please do not take out the card.
[
[[
[
NOTE
]
]]
]Please keep the card away from corrosive, over high or low temperature and direct
sunlight. And insert the card from right direction.

Chapter 2 Basic Use
2.1 Power on interface and main function
1. main interface
2. Function:
::
:
Navigation Provide navigation function for reference
Bluetooth Connect with phone by bluetooth, this navigator can dail and receive calls,

Player 1、Video player, support wmv, asf and avi format.
2、Audio player, support WMA9, MP3 and WAV format.
3、TXT format word reading, support page choose
4、Support such format picture browse: JPG、GIF、BMPand PNG, support picture
circumgyrate, magnify/ deflate picture, auto play all the picture
5、Flash player,support .swf format.
Tools 1、Note
2、Calculator
3、calendar
System volum、power、background light、date and time、language、system information。
Nav. Setup Set the path for navagation map software
GAME Tetris,Snake,Chess,Gobang,Reversi,BoxMan,LinLink and Duiduipeng.
Screensaver Set the Screensaver
Wallpaper Set the wallpaper

2.2 Navigation functions and features
According to your choice of navigation system, the GPS navigator can make position by GPS
satellite signal receiver and display on the navigation map. The system can calculate a best route after
setting the destination, which can help users to arrive the destination safely and rapidly.
The system can let you enjoy the individual charm and enjoy your trip by many different ways such
as vision map, vivid animation, voice indication, and words indication.
The specific navigation functions are depended on your choice of navigating software. Please refer
to the Navigation Software Instruction
The important knowledge
1. On map information
It is probably that the electronic navigation data is not consistent with the real traffic instructions because
of the traffic construction development. Please do comply with the highway condition and the actual
traffic rules. The updating and upgrading information on firmware will be come out on our website, It’s
depend on you weather or not to update or upgrade.
2. Navigation
The navigator offers the route for the reference; determine the route by yourself; The driver may be
more familiar with the route then GPS navigator.
3. On receiving signal.
Many factors such as lofty, dense buildings (in the tunnel, between the lofty building, underground
parking, under the trestle) various weather condition, and closure of the satellite will affect the ability to
receive signal so as to result in inaccurate position, inefficiency of navigation operation and system
function.
2.3 Bluetooth setting & user instruction (optional)
This chapter will introduce how to use the function of bluetooth to connect mobile phones with
bluetooth to make call and answer call.
[Notice]:After opening the bluetooth function, you have to wait 10 seconds, then you can click
“pair” to pair other devices with bluetooth.

Operating insturction:
2.3.1.Click on the main menu, and enter into the interface of Bluetooth setting, picture as
below 2.3.1:
Picture 2.3.1
Close Close the current folder
Phone
keyboard Dialing calls
Phone
records Record all dialed, received, missed call of the GPS; at most 20 records for
each item
Last call Note the last call you dialed
Pair To match the Bluetooth between Bluetooth mobile phone and GPS
Bluetooth
setting Set Bluetooth, incoming ring , close Bluetooth
pair
records Records pair device management and show all the paired devices
Status Bar Show the present pair situation
2.3.2.
..
.Click in Bluetooth interface,
,,
,it will show the Bluetooth setting as below picture2.3.2:

picture
2.3.2
Close Click to close the current folder
Bluetooth
name Bluetooth name: mypvdevice
Pin code The setting pin code is showed
Phone
keyboard Click and set pin code as below
picture 2.3.3
Keep
bluetooth run
when i
nterface
closed
Default is not selected.
Auto pick up
the coming
call
When call comes, answer the call
automatically
2.3.3.
..
.Click on Bluetooth setting, set pin code. as below picture 2.3.3
Picture 2.3.3
Close Click to close the current folder

Numeric
display area Display the pin code.
Number
keyboard Consist of 9 figures from 0 to 9, can compose any number from 0
to 99999999.
Reset Clear numbers set
enter Click to confirm the pin code
【Notice】After the pin code re-installed. To pair new phones will no longer input the default
"8888", need to enter a new pin code, if not can’t be paired.
2.3.4.
..
.Click pair key on the Bluetooth interface, enter the pair interface. as below picture
2.3.4
picture
2.3.4
Close Click to close the current folder
Pair time
The countdown started from the 60s
Pair instruction
Put the Bluetooth phone near to the GPS and then select "tools" - "Bluetooth" -
"matching device" menu , click "Options" and select "new matching device " .after
few minutes the phone will find new device "XXXX", that is our GPS. Click the
"Options", we will be prompted to input Bluetooth devices XXXX pass code, input
"8888" then confirmed. The phone will show that matching is completed.
The third time to click the “option” key, select “connect”, after the connecting
completed, the menu will appear a loudspeaker signs next to mobile terminal name.
our GPS will end the pair interface automatically. The main functions of Bluetooth
interface of the status bar will be prompted to "connect telephone calls". The status
bar of the phone icon will become red. Then the blue light become twinkle to lasting.
【Notice】This instruction is up to the Nokia 3280 mobile phone, another models
please refers to manual to be paired
【Remarks】If the phone have been paired before, Next time only to enter the Bluetooth interface,

the GPS will automatically connect to match the original device, and the phone will be display
"whether to accept the connection request XXXX," then click "confirm" is OK . no need to input
pass code again to search new device.
2.3.5.
..
.Click on Bluetooth interface , enter numeric key board interface, as below picture
2.3.5
Picture 2.3.5
Close Click to close the current folder
Numeric
display
area Show the input number.
numeric
key Consist of 9 figures from 0 to 9, can compose 20 piece of number,
Back
space Click to delete the last number
calling Click to calling
Cancel
Calling Single click to cancel the call
2.3.6.
..
.If call coming, it’ll display”Incoming call”, as below picture 2.3.6
Picture 2.3.6
minimize Click to minimize the interface

Volume+ augment volume(available on calling )
Volume- decrease volume(available on calling )
Numeric
display
area Display the coming phone number
Answer Click it to answer
Ignore Click it to hang up
2.3.7.
..
.Click of the Bluetooth “Function”, as below picture 2.3.7
Picture 2.3.7
Close Click to close the current
folder
Dialed records Click it to display dialed
records
Received calls
records Click it to display received
calls
Missed calls
records Click it to display missed
calls
Numeric display
area Display number records
Last Page View dial records on the
last page
Next Page View dial records on the
next page
Delete one
piece of records Click it to delete one piece
of records

Delete All Click it to delete all the
records
Dial the
selected
number of the
records
Click it to dial the selected
number of the records
【
【【
【Notice】
】】
】All the records contain Dialed, Received ,and Missed ,at most 20 records of each item
from the GPS, including numbers, time of calling, and lasting time , etc..
2.3.8.
..
.Click on the Bluetooth interface and enter the pair devices records as below picture
2.3.8
Picture 2.3.8
close Click to close the current
folder
Bluetooth devices
area Display the name of matched
Bluetooth device
Last Page Choose the previous device
Next Page Choose the next device
Connect Click it to send the connecting
request to the selected
Bluetooth device.
Disconnection Click it to disconnect the
current connecting device.
Delete ALL Click it delete all the paired
device records

【Notice】If the GPS needs to connect with another Bluetooth devices while it connecting with a
mobile already, it should cut the current connection first, then search the Bluetooth device and
click the to connect.
If failed, please turn back to the main interface , and click the “pair” key to research and connect the
device.
2.4 player operation
This chapter will introduce how to use the player function of GPS. This module include
audio ,video, ebook , picture ,it will be become to your funny facility at the moment.
Player interface:(below picture)
2.4.1. Audio player
The audio player support MP3 , WMA, WAV , M4A , AAC , AMR ,AWB , MID and OGG music format,
you can set the playing sequence at random.
Before using the audio playing, please copy your audio file to any folder.
Singly click the button in main menu to open the audio player as the following picture :

audio playing interfaces
Close Single click to close the folder
Last page Show the last page
Next page Show the next page
Go back Return to the previous folder
Folder name The name of the folder
Song title, format The title and the audio format of the playing song.
Single click the such interface 「audio player」button,open the audio player as below picture
audio player interface
Table of contents
Popular Car Navigation System manuals by other brands

Insignia
Insignia NS-NAV01 Guía del usuario

Holux
Holux V1.02 Product user manual

Magellan
Magellan RoadMate 300 Instructions for operating

Lexus
Lexus 2014 GX 460 quick guide

Sanyo
Sanyo NV-E7000 - Portable GPS And Mobile DVD Entertainment... Installation and operation manual

JVC
JVC EXAD KD-NX901 instructions