SeaViewer Surface Console User manual

SURFACE CONSOLE
ALL DOCUMENTATION IS AVAILABLE ON OUR WEBSITE
www. SeaViewer.com
Seaviewer Cameras Inc
Tampa FL 33619 -1-813-242.6160

DOCUMENTATION
NOTE: Components shown in documentation will change based on clients specific needs. Recorders,
overlays, specific screen, etc. Systems are custom configured; individual manuals will be included or
available on-line. Specific layout of your console may be different. Shown with a 13” monitor.
General
The Surface Console provides a totally portable solution for viewing your Seaviewer camera from the
surface. The console comes with internal power (battery) or can be powered externally from any 12v
source. Your console was shipped with a 110-220 converter to provide such power. Additionally you
can connect the console directly to any 12v battery. We recommend reading through this document
prior to use; however , we have provided a short version below that should eliminate any issues if you
want to get started quickly. Many issues can be prevented by connecting all accessories prior to turning
on your Surface Console.
Quick Start
:POWER ON
1. Make sure the power switch is in the neutral position (middle)
2. Plug in the Seaviewer Camera and Camera Power to the lower right portion of the panel.
3. If using “external power connection” connect external power.
4. POWER ON – Turn power on (external source or battery)
POWER OFF
1. Finalize the recording (IE: Stop the recorder, if installed)
2. POWER OFF – Turn power off
3. Disconnect the camera from the console
4. Prior to closing lid make sure no objects will damage the monitor
RECHARGING
1. Make sure the power switch is in the OFF or EXTERNAL Position
2. Attach the charger to the console
3. The light on the charger will start in RED , and turn GREEN when fully charged. The charger
is a high quality float charger but should be disconnected within 2 or 3 days of being charged.
DISCLAIMER
This manual may contain features that were not purchased with your Surface Console. Specific images
related to the devices included in the console may change as products are updated. In addition the
specific layout of the devices in the Surface Console will change based upon the manufactures choices
during assembly. The goal in layout is to provide the best functional system for our users.
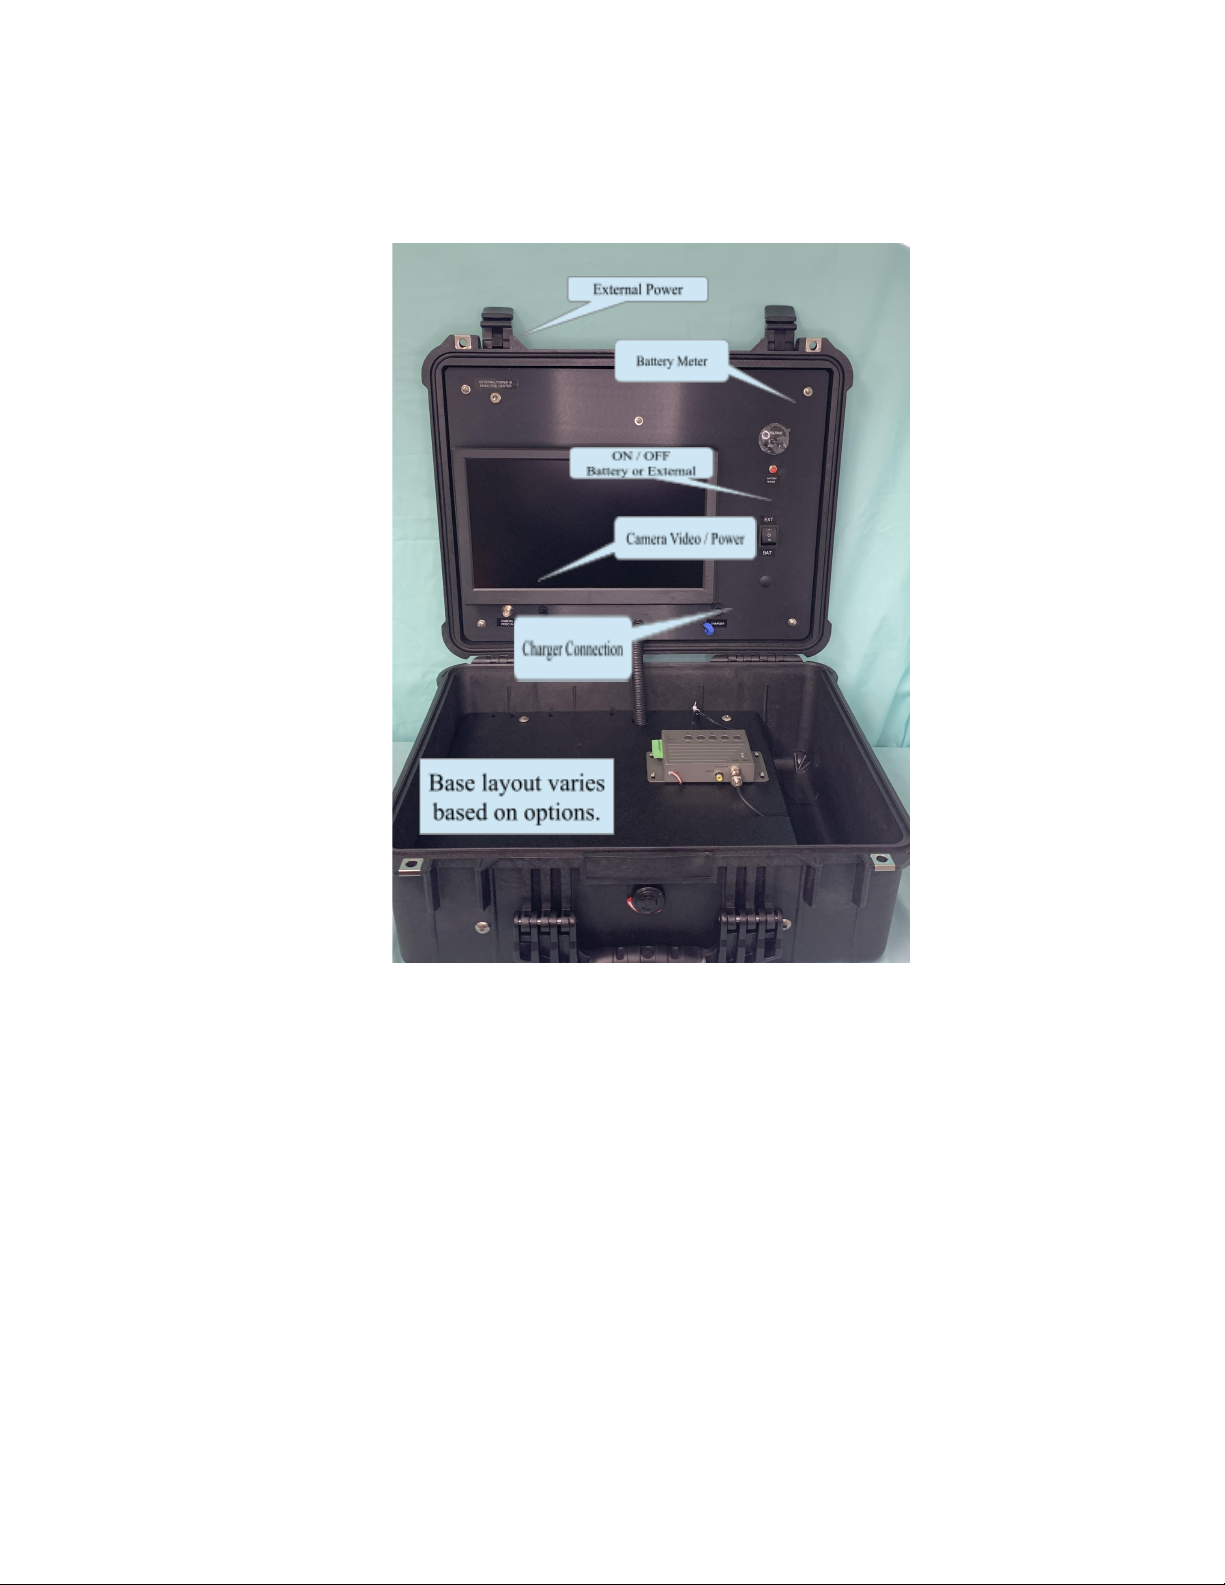
Typical Connections
Connections and Powered Panel
Fuses – The console has 1 fuse located on the positive (+) terminal of the battery. If proper procedures
are followed these fuses should never need to be replaced. The fuse is actually a mini circuit breaker so
if there is an issue it will automatically reset within a few seconds.
Usage
Make sure power is in the OFF position prior to connecting the camera and camera power. If you
connect the camera when power is on you might blow a fuse (10amp).
1. Verify power is off
2. Connect the camera to the Surface Console
3. Connect external power if using that as the power source
4. Power on – Select external or battery using the On/Off switch
5. Power off – When turning off the console please STOP the recorder if installed. This allows the
recorder to properly close any recordings in process.

CONNECTING CAMERA TO CONSOLE
BNC on CONSOLE connects to BNC Connector on CONTROL BOX (orange cable) – the color of
your cable will vary.
General Information - Custom Configurations
All Surface Consoles are custom manufactured to the clients specifics and layout of the back panel or
bottom panel will vary from the pictures shown. Recorders, Monitors, and other equipment will cause
your system to be slightly different to meet the needs of the application.
DVR -Recorders are factory configured with or without overlay (GPS Option) based on the customers
request. Seaviewer OEM recorders have the option for internal GPS function which eliminates the
need for external overlay devices.
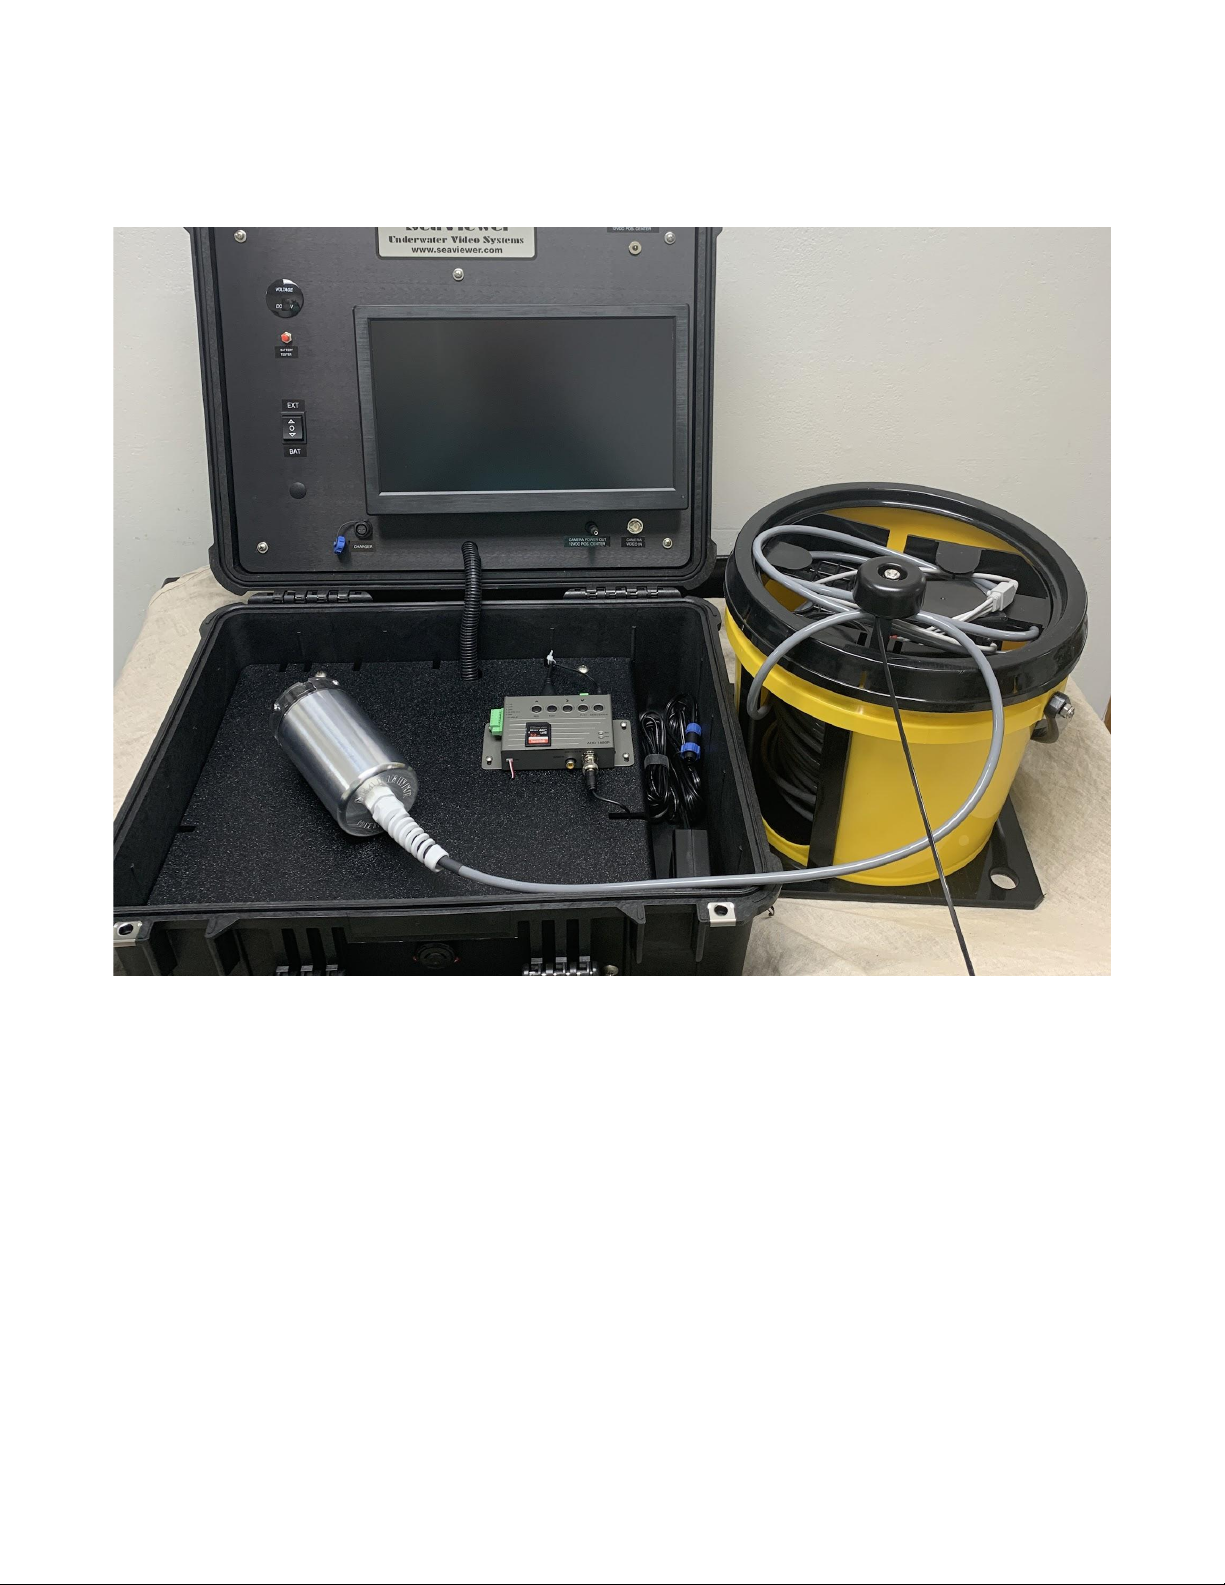
Typical Configuration with Recorder and Camera
Typical connections / Shown with optional accessories
CAMERA CONTROL BOX
The HD camera connection has multiple cables on the control box.
Dimmer Control – equipped if lights were ordered
On/Off Switch – controls lights if lights were ordered
On/Off Switch – Turns off camera video if no lights were ordered (should be always on)
Green – Not Used
Red – Power (Connected to Console)
Yellow – Analog Test Signal (not connected to console)

HD-DVR Recorder Documentation
Seaviewer DVR
Basic Operations of recorder - Full manual available on-line www.seaviewer.com
Note: Seaviewer DVR has optional GPS Overlay available.
1. Turn console to Power ON. (Recorder will light when power is applied)
2. Note: there is a power switch on the side of the recorder which should be on.
3. Recorder Options
a. complete operations are available with the buttons on top of the recorder
b. menu on recorder shows multiple selections
c. make sure recorder has formatted SD card installed
d. If using GPS overlay/antenna make sure the recorder is properly configured.
e. Select RECORD to start recording
NOTE: IMPORTANT TO STOP RECORDING PRIOR TO TURNING OFF
NOTE: There is a few second delay before recorder starts recording; this is
normal operation.
Note: The remote is not needed for operating the system, but is included.

NOTES FOR ALL USERS ...
A) The Display Console should always be ventilated (lid open) when using or charging to avoid heat
issues.
B) It is recommended not to use the Battery Charger while running the equipment since this could
cause the current rating of the Charger to be exceeded in some cases.
C) TURN “OFF” -STOP THE RECORDING prior to turning off the main console swithch. It is NOT
required that you turn off all accessories during the shutdown process.
D) Additional component documentation may be included for each accessory.
E) The DVR draws power from the MAIN POWER BATTERY .
F) The BATTERY CHARGER (110-240 Volt AC @ 50/60Hz) for the MAIN BATTERY is inside the
foam. You may expect to power the Surface Console and a SeaViewer Camera for up to 8 hours with
the MAIN BATTERY charged, depending on your choice of components. See the pages below
concerning Battery Information to get a more accurate estimation.
G) CABLE WITH ALLIGATOR CLIPS (IF EQUIPPED) – is used to power system when internal
battery is low, or to conserve internal battery. First turn OFF main battery switch. Then connect the
cigarette lighter plug to the console. If using alligator clips ordered from Seaviewer, connect the
FEMALE cigarette lighter plug to the alligator clips provided.
BE SURE RED CLIP IS ON POSITIVE (+) BATTERY POST.
CONSOLE BATTERY, CHARGER & SWITCH INFORMATION
There are two different size batteries available. Both are sealed lead-acid (SLA) batteries, and output
approximately 12 Volts DC. They are maintenance-free and come with a charger that uses 110-240 Volt
(50/60 Hz) AC input, along with an inline 12-Volt DC fuse which is replaceable. Those built into the
Surface Console units also include an ON/OFF switch. It is recommended not to use the Battery
Charger while running the equipment since this could cause the current rating of the Charger to be
exceeded in some cases.
BATTERY SIZES
The difference between the batteries, other than size and weight, is the running-time which they will
allow before needing to be re-charged. Of course, the more equipment that is powered, the less the
running-time will be; and also the larger the battery that will be required to achieve the same
running-time. The size of the battery is rated in Amp-Hours (AH). The running time below is based
upon the the typical configuration of our consoles.
Typical Hours of Operation:
Complete System FISH – no recorder (7ah – 5 hours / 18ah – 7 hours)
Complete System PRO – with Recorder (7ah – 4 hours / 18ah – 6 hours)
Complete System PRO+ – with Recorder and GPS/Overlay (7ah – 2-3 hours / 18ah – 5 hours)
Table of contents


