Sector Alarm PhoneWatch TC User manual

User Manual
Alarm system: PhoneWatch TC

Welcome to PhoneWatch
Our user manual is designed to support you in the daily use of your
alarm system. We recommend that you read the manual in order to
fully understand how your alarm works.
We look forward to keeping you safe for many
years to come with our alarm system and
monitoring service.
Over the first few pages, you will find a brief
description about how your alarm works.
You can get in touch with our customer service
team at any time if you have any questions.
Tel: 1850 753 753
Remember to always arm your
alarm!
Customer service team
PhoneWatch
Floors 3-5, Block 1
Irish Life Centre
Lower Abbey St.
Dublin 1
Telephone: 1850 753 753
www.phonewatch.ie
2 PHONEWATCH
Customer number

Easy-to-use alarm system
The following will give you information about the most important
functions of your alarm.
Full Arm mode (arms the entire alarm system)
Press the button Full Arm mode and enter your personal code or
place the keytag over the keytag reader symbol on the keypad.
Press the button Full Arm mode on the remote control.
Part Arm mode (arms part of the alarm system*)
Press the button Part Arm mode and enter your personal code
or place the keytag over the ketyag reader symbol on the keypad.
Press the button Part Arm mode on the remote control.
Disarm the alarm system:
Enter your personal code or place the keytag over the keytag reader symbol on the
keypad.
Press the Disarm button on the remote control.
*Part Arm mode is programmed according to your needs. Your PhoneWatch Engineer can
program the alarm according to your preferences.
EASY-TO-USE ALARM SYSTEM 3

Content
Images from the camera detector 5
How to use the keypad 6
Signal lights on the keypad 7
How to use the alarm system 8–11
Arming using the keypad 8
Arming using the remote control 9
Disarming using the keypad 10
Disarming using the remote control 10
Siren and sound 10
Door signal on/o 11
Maintenance and advice 15
4 CONTENTS
Panic alarm function 11
Information about the most common alarm components 12–13
Smart solutions 14

Images from the camera detector
The following clause defines how images should be processed when
transferred within systems equipped with one or more detectors with
cameras installed.
• Images will only be transferred to our Alarm Receiving Centre in the event of an alarm
activation.
• The images will be used solely as aids in the management of alarm activation. In other
words, in order to evaluate and determine the cause of an activation.
• Only the Alarm Operators, and if needed Garda authorities, will have access to the
images received.
IMAGE PROCESSING CLAUSE 5

How to use the keypad
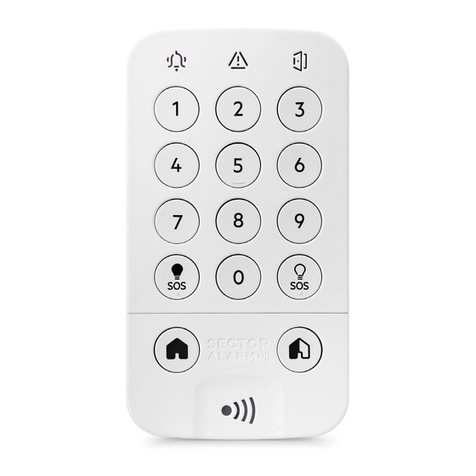
The keypad is used to arm or disarm the alarm system by means of a
personal code or keytag. The keypad is equipped with
a keytag reader at the bottom-centre.
Signal light 1
Alarm triggered
Signal light 2
System error
Keytag reader
SOS Panic
Alarm function
Full Arm mode Part Arm mode
6 HOW TO USE THE KEYPAD
Signal light 3
Tamper alarm

Signal lights on the keypad
There are three signal lights on the front of the keypad. These
indicate the current status of the alarm system.
Signal light 1 – alarm triggered
On: The alarm system has been triggered or one of the detectors is unable to be
armed. This could be because a door or window protected with a magnetic contact
sensor is open.
Flashing: There is an alarm activation in the alarm system’s memory which needs to
be reset.
O: The alarm system is ready to be armed.
Signal light 2 – system error
On: An error has occurred in the alarm system. This could be due to a problem with the
battery, power supply or because of a problem with sensor monitoring, an error with the
GSM/GPRS or interferences. Contact customer service for assistance.
Flashing: There is an error in the alarm system’s memory which needs to be reset.
O: The system is free of errors.
Signal light 3 – tamper alarm
On: A tamper alarm has been triggered in the system. This could be due to failure or
sabotage. Contact customer service for assistance.
Flashing: There is a tamper alarm in the alarm system’s memory which needs to be
reset.
O: The system is free of tamper alarms.
Resetting
You can reset the alarm system by entering your personal code or using your
keytag. If there are various alarm activations triggered in the system memory,
you will need to repeat the rearming process until LED lights 1, 2 and 3 are
all switched o.
HOW TO USE THE KEYPAD 7

SECTOR ALARM – DOMONIAL USER INSTRUCTIONS 4
How to use the alarm system
The alarm system is easy and convenient to operate using the
keypad, remote control or keytag.
Arming using the keypad
Full Arm mode (arms the entire alarm system)
Close all of the exterior doors and windows before arming the system.
Press the button Full Arm mode and either enter your personal code or use
your keytag.
The signal light 1 will light up and flash to confirm the command before switching o
again.
A warning alert will sound for a moment as you leave. In the case of a system error,
a warning tone will be emitted. You should rectify the system error and then try to
arm the system again.
Part Arm mode (arms part of the alarm system*)
Close all of the exterior doors and windows before arming the system.
Press the button Part Arm mode and either enter your personal code or use
your keytag.
The signal light 1 flash until the alarm is armed.
No warning alert will sound as you leave (If set to Part Arm silent). In the case of a
system error, a warning tone will be emitted. You should rectify the system error and
then try to arm the system again.
*Part Arm mode is programmed according to your needs. Your PhoneWatch Engineer can
program the alarm according to your preferences.
8 HOW TO USE THE ALARM SYSTEM

Arming using the remote control
Keep in mind that the remote control arms the system instantly. You should therefore be careful
not to arm the alarm until you are outside of the protected zone.
Full Arm mode (arms the entire alarm system)
Close all of the exterior doors and windows before arming the system.
Press the button Full Arm mode.
The button confirmation light will light up for a few seconds to confirm arming. In the case of
a system error, you will need to rectify the error and then try to arm the system again.
Part Arm mode (arms part of the alarm system*)
Close all of the exterior doors and windows before arming the system.
Press the button Part Arm mode.
The button confirmation light will light up for a few seconds to confirm arming. In the case of
a system error, you will need to rectify the error and then try to arm the system again.
Check status
To check the status of the system you press the status button with question mark and
the button of the current panel status will light for a few seconds.
*Part Arm mode is programmed according to your needs. Your PhoneWatch Engineer can
program the alarm according to your preferences.
Panic Alarm function
Full Arm mode
Disarm button
Part Arm mode
Status button
HOW TO USE THE ALARM SYSTEM 9

SECTOR ALARM – DOMONIAL USER INSTRUCTIONS 4
Disarming using the keypad
Disarm
The entire system will be disarmed, regardless as to whether it was in Full Arm mode or
Part Arm mode.
Enter your personal code or use the keytag.
The system light 1 will switch o.
When somebody enters the property, the system will generate a sound to indicate that
it is necessary to disarm the alarm system.
Disarming using the remote control
Disarm
The entire system will be disarmed, regardless as to whether it was in Full Arm mode or
Part Arm mode.
Press the Disarm button.
The LED confirmation light will light up for a few seconds to confirm the command.
When somebody enters the property, the system will generate a sound to indicate that it is
necessary to disarm the alarm system.
Siren and sound
When an alarm is triggered the siren will sound. The sound will be generated from the smoke
detectors and indoor sirens if fitted.
You will have two dierent sounds depending on the type of alarm.
If the sound is constant, there has been a burglar alarm or a panic alarm
If the sound is pulsing, the system has detected smoke - - - - - - -
10 HOW TO USE THE ALARM SYSTEM

Door signal on/o
Doors with magnetic contact sensors can, if desired, sound every time the door is opened. The
audio signal can, for example, inform you if children leave the house.
On the keypad press keys 1 and 3 simultaneously for at least two seconds.
Press the button Part Arm mode.
Two signals will sound and all lights are flashing.
To activate the door signal, press the left SOS button.
To deactivate the door signal, press the right SOS button.
To save your settings, press the right SOS button.
After a few seconds, two signals will sound and all lights on the keypad will switch o.
Panic alarm function
For PhoneWatch the panic alarm is of great importance as it gives you additional personal
security. If you need to, you can push the emergency panic alarm buttons easily either on the
keypad or on the remote control. Based on the situation we will take immediate action to make
sure you are safe.
Activating using the keypad
Push the two SOS Panic Alarm function buttons on the keypad at
the same time and then release the buttons.
The siren will sound immediately and switch o after the alarm has been disarmed.
Activating using the remote control
Push the two upper buttons on the remote control at the same time
for a minimum of two seconds.
The siren will sound immediately and switch o after the alarm has been disarmed.
HOW TO USE THE ALARM SYSTEM 11

Information about the most
common alarm components
Here we provide a description of the most common components for
the PhoneWatch TC alarm system. You can find more information
about other components on our website.
PIR motion sensor with camera
Reacts and takes colour photos with flash upon the
detection of motion or temperature changes, both
during the day and at night.
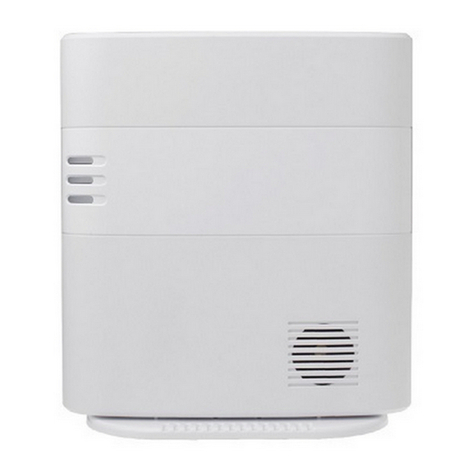
Central unit
The central unit is the brain of your alarm system.
It communicates with the other components, as well
as the Alarm Receiving Centre. It is the only component
that requires an electric power supply, but it has an
emergency battery in case of power loss.
Keypad
The keypad is the main unit in your alarm system.
The lights enable you to easily check the status of
your alarm system.
Door and window contact sensor
If the door or window is opened, the magnetic
connection will be interrupted and the alarm will be
activated. Used for protection at night (Part Arm mode)
and to adapt the system to pets.
12 INFORMATION ABOUT THE MOST COMMON ALARM COMPONENTS

INFORMATION ABOUT THE MOST COMMON ALARM COMPONENTS 13
Keytags
The keytags can be easily used by everyone. All you
need to do is tap them to the control panel in order to
arm or disarm the system.
Smart plug
Using smart plugs, you can turn lights and other
electrical appliances on and o using the PhoneWatch
app or the My Pages customer area on the PhoneWatch
website.
Magnetic contact with shock sensor
Combines two of our products in order to respond
to vibrations or strong impacts and attempts to open
windows or doors that are fitted with a sensor.
Carbon monoxide detector
Our carbon monoxide detector is fully monitored and
always active 24/7 even when your security alarm
system is unarmed. Our carbon monoxide detector
responds instantly should this dangerous gas be
detected in your home.
Smoke detector
Responds to smoke and are linked to the PIR motion
sensor with camera in order to take photos of the area.
The smoke detector also functions as a siren and will
sound in the case of any type of alarm. Note that the
siren will sound dierently depending on the type of
alarm. The smoke detector is active 24/7 regardless of
the burglary alarm.
Remote control
An easy-to-use remote control for the rapid
activation of the alarm. It also has a panic alarm
function.
Components available as sensors of choice or can be purchased separately.

Smart solutions
Our smart solutions oer you a greater level of safety and better
control over your alarm system. Using the PhoneWatch app, you can
arm and disarm the alarm, receive alerts when somebody enters or
leaves, etc.
Create an account on My Pages/PhoneWatch app
By creating an account on My Pages or in the PhoneWatch app, you can check and get status
from your alarm system. To create an account, you need to have your customer number available.
This can be found in the documentation of your alarm system. Register an account at
mypages.phonewatch.ie or via the PhoneWatch app which you will find in your app store.
We update the app and add features continuously.
14 SMART SOLUTIONS

MAINTENANCE AND ADVICE 15
Maintenance and advice
In order to ensure that your alarm system is working properly.
• The system is remotely supervised by PhoneWatch 24/7/365.
• PhoneWatch recommend that you perform a local system test every third month. Please
contact PhoneWatch customer service for further information on how to perform a local
system test.
• Ensure that none of the components have been damaged and are free from dirt, dust,
cobwebs etc.
• Clean the keypad with a dry cloth.
• If you are carrying out renovations or moving furniture, make sure that you do not block
or cover the components or the components line of sight.
• If you are painting, wallpapering or sanding it may be necessary to temporarily remove
part of the alarm system to prevent damage or false activations. Please contact
PhoneWatch customer service before you do this.
The alarm systems siren(s) are designed to wake a person sleeping heavily,
and to deter/disturb intruders. Prolonged exposure to the siren for long periods
of time should be avoided. In the event that the system is accidently activated
while you are on the premises please ensure you turn the alarm o (see page
3), if unable to do so please leave the premises. When testing the system we
recommend that you protect your ears.

PW0002
www.phonewatch.ie
PSA Number: 00621
Table of contents
Other Sector Alarm Security System manuals
Popular Security System manuals by other brands
Fortinet
Fortinet FortiManager-400 quick start guide
weintek
weintek cMT1106X Series installation instructions
La Crosse Technology
La Crosse Technology WS-5220U-IT instruction manual
Climax Technology
Climax Technology vesta series user manual

Deltronic Security
Deltronic Security CN-1221 owner's manual

Velleman
Velleman CCTVPROM13 Quick installation guide
