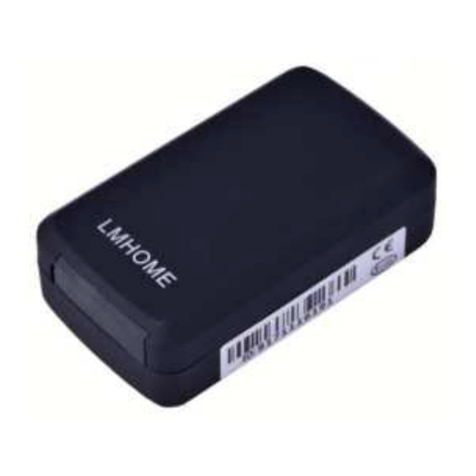
SecureShop SS-LK209C User manual

SS-LK209B/C
GPS Tracker Manual
Version 1.0

2
Preface
Thank you for purchasing this GPS tracker at Securitashop. We have
decided to make our own manual as the one we have received from
the manufacturer is hard to read. Despite our best efforts to change
this it remains below our standards which is why you receive our
own manual –with additional information on setup on platform too.
This manual shows how to operate the device smoothly and
correctly. Make sure to read this manual carefully
before using this product. Please note that specification
and information are subject to changes without prior notice in this
manual. Any change will be integrated in the latest release.
The manufacturer assumes no responsibility for any errors or
omissions in this document.
Summary
Working Based on existing GSM/GPRS network and
GPS satellites, this product can locate and monitor
any remote targets by SMS or internet. The most
advanced technology of GPS and AGPS dual positioning.

3
HARDWARE DESCRIPTION

4
Content Specifications
Content
Specifications
Dim.
120 x 64 x 35 mm
Weight
305 / 465 gram
Network
GSM/GPRS
Band
850/900/1800/1900Mhz
GPS chip
UBLOX
GPS sensitivity
-159dBm
GPS accuracy
5m
Time To First Fix
Cold status 35-80s
Warm status 35s
Hot status 1s
Car charger
12—24V inp
5V output
Wall charger
110-220V input
5V output
Battery
Chargeable changeable 3.7V
10000mAh (SS-LK209B) or 20000mAh Li-
ion battery (SS-LK209C)
Standby
90/150 days
Storage temperature
-40°C to +85°C
Operation
temperature
-20°C to +55°C
Humidity
5% - 95% non-condensing

5
SIM card installation
Open the rubber plug –Fig. 1
Insert the GSM SIM card as shown below fig. 2.
Close the rubber slip
Fig. 1
Fig. 2
Battery and Charger
Charge the battery to maximum capacity for 8-12 hours the first
time. Please use the battery and charger provided by the
manufacturer. This unit adopts built-in Li-ion battery and full battery
can standby 90 to 150 days. After first use, the battery usually
should be charged fully in 5-8 hours.
Cautions
Li-ion batteries contain harmful chemicals and may burst, please
do not bump, puncture it violently and expose it to fire.
Please charge the battery in time to keep it working normally.

6
Startup
Put the SIM card and battery in place.
Turn on the unit outdoors by pushing the button to “On”.
For first use, please initialize the unit and restore it to default
setting
In 10 or 40 seconds, the unit will begin to work and acquire the
GSM signals as well as the GPS signals. The indicator will keep
flashing every 3 seconds when the unit has received the signals.
When the unit receives GPS and GSM signals normally, you can
use it and do any setting as the instructions of this manual.
Green LED for GPRS working status
Status of indicator
Meaning
Slow flash (flash 1s after every
2s)
GSM/GPRS conversation start
Continuously in bright status
No GPRS signal
Green led off
Device fault or inactive
Blue LED for GPS working status
Status of indicator
Meaning
Slow flash (flash 1s after
every 2s)
GPS location successful
Continuously in bright status
Searching GPS signal
Blue led off
Device fault or inactive
Red LED for power charging status
Status of indicator
Meaning
red led on all the time
Charging
red led flash
Low battery
red led off
Full battery or charged full

7
Google link: click link, there is map when
positioning ok, no map means no positioning.
V:A GPS signal ok.V:V no GPS signal
2013-08-30 20:54:15: the last time receive
GPS signal.
Spd:000km/h: the speed of the tracker.
Bat:6 battery balance. Range is from 1 to 9
ID: 4102000759: ID code of device (used for connect tracking
website or APP)
S19G04;plmn:46001 GSM operator data
Lac:9516,cellid:23596 LBS data
Initialization
Send;
begin+password
in SMS to the unit, it will reply
begin ok
and
initialize all the settings. (default password:123456)
For example, send SMS: begin123456 to the tracker via a cell phone,
if succeeded, if will reply “begin ok”.
Change the password
Set Password: send sms: password+old password+space+new
password” to the unit to change the password.
For example, send sms: password123456 000000 to terminal device,
it will reply sms: password OK. New password 000000 changed in
success.

8
Make sure the new password is in 6 digits Arabic numbers or the
tracker cannot recognize the password.
Authorization
Send SMS:admin+password+space+cell phone number” to set up
an authorized number. The first authorized number should set the
other authorized numbers. If the number is successfully authorized,
the unit will reply “admin ok!” in SMS.
Send SMS:noadmin+password+space+authorized number” to
delete the authorized number.
for example, send:admin123456 13265790180 to tracker to set
13265790180 as an authorized number.
When the authorized number call the device, it will hang up your
phone and reply a real-time latitude and longitude information as
below:
Single Locating
If there is no authorized number when any number dials up the unit,
it will report a geo-info. If there is already an authorized number, it
will not respond when an
unauthorized
number calls it up.

9
Single message inquires the latitude and longitude
information, any telephone number can send instruction
”where” to the equipment, then the
equipment will reply the latitude and longitude
information to this telephone.
When an authorized number dials up the unit, it will hang up and
report a real-time Geo-info as below:
*Tracking location, When GPS signals is weak, the position of
latitude and longitude included in the SMS is the position that the
tracker received GPS signals at last. If it is different with its exact
current location, pay attention to check the time included in the SMS
you got.
Auto Track
Send SMS command “t030s005n+password” to the tracker device, it
will report the “no reply” at 30s intervals for 5 times. (s:second,
m:minute, h:hour). This command setting must be in 3 digits and
the maximum value is 255.
Unlimited times auto track: Send SMS “t030s***n+password” to the
tracker device, it will reply the “no reply” continuously at 30 seconds
intervals.
Cancellation: Send SMS “notn+password” to the tracker device, it
will report the “notn ok”.
Note: the interval must not less than 20s.
Monitor (voice surveillance)
The command to switch between track and monitor are “tracker”
and “monitor”.
The default mode is “track” (track mode).
Send SMS “monitor+password” to the unit and it will reply
“monitor ok!” and switch to “monitor” mode.
Send SMS “tracker+password” to the unit, it will reply “tracker
ok!” and restore to “track” mode.

10
Geo-fence
Set up a geo-fence for the unit to restrict its movements within an
area. The unit will send the message to the authorized numbers
when it breaches that area.
Geo-fence setup
When the unit stays immobile in a place for 3-10 minutes, the user
can send SMS:
“stockade+password+space+latitude,longitude; latitude,longitude”
to unit to set the restricted area.
Remark: The first latitude & longitude is coordinate of the top left
corner of the Geo-fence while the second latitude & longitude is the
coordinate of the bottom right corner.
Cancel geo-fence: send SMS: nostockade+password to deactivate
this function, tracker will reply nostockade ok.

11
Movement alert setup
When the unit stays immobile in a place for 3-10 minutes the user
can send SMS: “move+password” to the unit, then the unit will reply
“move ok!”. In case of such a movement(the unit default distance
is 500M), it will send SMS “move ALARM+latitude and longitude” to
the authorized number
Cancel: Send SMS:” nomove+password” to deactivate the movement
alert, tracker will reply “nomove ok”.
Overspeed alert setup
Send SMS: speed+password+space+080 to the unit (suppose the
speed is 80km/h) and it will reply speed ok!. When the target moves
exceeding 80 km/h the unit will send SMS: speed ALARM!+ latitude
and longitude” to the authorized numbers every 5 minutes.
To cancel: Send SMS “nospeed+password” to deactivate the
overspeed alarm, tracker will reply “nospeed ok”.
Remark: The recommended speed should be not less than 50km/h.
For below that rate, it will be effected the accuracy by gps signals
drift etc.

12
Low battery alert
When GPS device battery is going to be about 3.7V, it will send SMS:
“bat:l” at 30 minutes interval.
Terminal (local) Time Setting
Send SMS “time+space+zone+password+space+local time”.
For example, send SMS: time zone123456 1 (time zone of Denmark).
If the local time zone is negative as “-3”, then it should set as SMS:
time zone123456 -3

13
Sleeping power-save mode
On normal status when the unit stops over 10minutes it will change
to sleeping mode- In this mode the power consumption is 4mah/h
only. When it get any command or been moved it will start GPS
locating automatically.
Forced sleeping mode setting: Send SMS sleep+password, the unit
will reply “sleep ok”, it enter to forced sleeping power-save mode.
Start device, send SMS: nosleep+password, the unit will reply
nosleep ok, it start GPRS and GPS locating.
Shock alert
Note: It is effective sending by authorized number
Send SMS command“shock+password”, the unit will reply “shock
ok.”
Cancel: Send SMS command “noshock+password”, the unit will reply
“noshock ok.”
Dropped Alarm.
When device have been attracted on metal 15 seconds after (the
dropped button have been pressed 15 seconds), if it device was
dropped, it would alarm to the admin number by SMS or calling.

14
Restore factory settings
Can only be done by authorized number(s). Send SMS command
format
, the unit will reply “The tracker will immediately restore the
factory settings. All previous settings will be cancelled.”
GPRS setting
User must send SMS via cell phone to set up IP, port and APN before
starting GPRS.
Setting up APN
APN standards for Access Point Name and differs from country to
country. For more information about the local APN, inquire with your
local GPRS network operator. In Denmark many GSM providers use
the APN; internet
Send a SMS: apn+password+space+your local APN via a cell phone
and if succeeded the tracker will return the message apn ok
E.g. send SMS command: apn123456 internet
Set IP Send SMS command: adminip123456 60.191.150.102 7700.
If succeeded, “adminip ok”
Cautions
Keep the unit dry.
Do not use and store the unit in dusty places
Handle carefully

15
Do not vibrate or shake it violently.
Clear the unit with a piece of dry cloth.
Do not clean in chemicals, detergent.
Do not paint the unit as it may cause loss of GSP signal

16
Function
SMS command
SMS reply
Initialize
begin123456
begin ok
Change password
password123456 new
password
password ok
Authorization
number
admin123456 phone
number
admin ok
Autotrack SMS
t030s005n123456
no reply (every
30 seconds for
5 times)
Monitor mode
monitor123456
monitor ok!
Track mode
tracker123456
tracker ok!
Geo-fence
stockade123456
114.104150E,22,614140N;1
14.103740E,22,614130N
stockade ok!
Movement alert
move123456
move ok
Cancel movement
alert
nomove123456
nomove ok
Speed alert
speed123456 080 (if speed
is set to 80 km/hour)
speed ok!
Cancel speed alert
nospeed123456
nospeed ok
Time setting
time zone123456 1
time ok
Sleep mode
sleep123456
sleep ok
Cancel sleep
mode
nosleep1234546
no sleep ok
Shock alert
shock123456
shock ok
Restore
format
The tracker will
APN setting
apn123456 apnname
apn ok
IP setting
adminip123456 ipaddress
space port number
adminip ok
No sleep mode
sleep123456 off
Always on
Time sleep mode
Sleep123456time5 (5 can
be 1-60)
Working 5 min
then sleep

17
Securitashop Internet platform setup and APP’s
Securitashop offers in cooperation with Wialon access to paid
internet tracking platform where you can track, set geo-fence,
control fuel, set drivers, monitor tracks over a period and many other
things. We have chosen Wialon as our partner as they are #1 in GPS
software platform, is reliable and have support and backup services.
Setup:
To setup your GPS tracker you need 2 things:
1. A standard SIM card from a mobile phone provider –not a
3G or 4G card only.
2. Your IMEI number mentioned on either the box or the GPS
tracker itself. On the PET100 it is mentioned on the back of
the unit.
Once you have noted these numbers you have to login to the
platform at http://gps.securitashop.com
Username and password will be provided by Securitashop if you
have signed up for this option.
When logged in you will see like this in your top left corner of your
screen –in this case a GT300

18
You should clik on the and chose and you will see
this screen
I. Give the unit a name of your choice
II. Device type is the name of the unit without the SS. For the
SS-LK209 it is LK206
III. Unique ID is the IMEI number of the unit (written on the box
or on the unit itself)
IV. Phone number is the number of the SIM card that you have
inserted into the unit –remember to put your country code
in front of the number –for Denmark it is +45
V. Click OK and go back to “Monitoring”
Next step is to send commands into your unit so it can communicate
with the platform:
I. Make sure you have set your APN as written in 4.1 –
otherwise you cannot send/receive data
II. Send following SMS to the GPS tracker adminip123456
193.193.165.165 20912
III. You will receive an “OK”
IV. Wait some minutes for the GPS tracker to go online.

19
You are all setup and ready to see your unit go online in a matter of
minutes. Full setup can be seen at:
http://docs.wialon.com/en/hosting/user/quick/quick or if you are in
doubt call our support at +45 6053 4077 or e-mail
support@securitashop.com
APP for Ipad, Iphone and Android
I. Find the APP by searching for Wialon and chose the APP
called Wialon. For Apple it looks like this:

20
II. Once downloaded enter the connectivity settings as below
(below is a SS-GT100). Unique ID is the IMEI number of the
unit.
III. You are all set –go back and click MAP. You should see your
GPS tracker on the map.
This manual suits for next models
1
Table of contents
