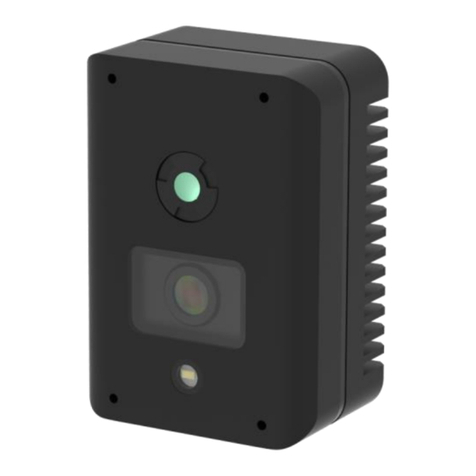
Sekotech GCU-OSD10 User manual

INSTRUMENT FOR COVERT ELECTROOPTICAL SURVILLENCE
SYSTEMS DETECTION
«GCU-OSD10»
OPERATING MANUAL
2018

2
The present Operating manual is intended for correct and safe operation of the instrument «GCU-OSD10»
(further in the text referred to as «Instrument») designed for detection of covert electrooptical surveillance systems and for eval-
uation of the Instrument technical condition with the goal to make decision whether it should be sent for repair.
1. DESCRIPTION AND PRINCIPLE OF OPERATION
1.1. Area of application
1.1.1. The instrument is designed for search and visualization of location places of electrooptical surveillance systems (ESS)
operating in various lighting conditions in moderate climate on open air, under a shed or in the premises.
1.2. Technical parameters.
1.2.1.
Distance of ESS detection
Minimal
2m
Maximal
500m-750m
1.2.3.
Receiving channel field of view
5° x 3.8° (HxV)
1.2.4.
Maximal azimuth angle of ESS
The same as FOV of ESS
1.2.5.
Output signal format
CCIR (PAL)
1.2.6.
Power supply:
Rechargeable battery
4 x Li-Ion 18650
1.2.7.
Power consumption, not more than
11W
1.2.8.
Time of continuous work without battery replacement/charge
@ normal climatic conditions, not less than
3 hours
1.2.9.
Overall dimensions, not more than:
Instrument
217х144х75 mm
Delivered set in standard package-case
470х370х180 mm
1.2.10.
Weight, not more than:
Instrument with battery
1,4 kg
Delivered set in standard package-case
5,5 kg
1.2.11.
Climatic conditions of the instrument operation
Operating temperatures range
from minus 10 Сto plus +40 С
Relative humidity @ plus 25С, not more than
95%
Absence of influence of atmospheric precipitation

3
1.3. Delivery set
1.3.1. The delivery set is in accordance with the table 1.
Table 1
Description
Q-ty
Note
Instrument «GCU-OSD10»
1
Battery Li-Ion type 18650, 3.7 V
4
Charging unit
1
Mains adapter for charging unit
1
Video cable
1
Cleaning tissue
1
Package-case
1
Operating manual
1
Buttery delivered uncharged.
Battery , mains adapter and charging unit can be replaced by technically similar or better devices
The general view of the instrument set in package is presented in Fig. 1.
Fig.1. General view of the delivered set in the package.
GCU-OSD10
Transportation case
Batteries (18650)
Video cable
Cleaning tissue
Charging unit
Mains adapter for
charging unit
Battery compartment

4
Delivery set:
1. GCU-OSD10 device;
2. Video cable;
3. Optionally LCD-monitor (with attachment bracket);
4. Charging unit;
5. AC/DC converter;
6. Rechargeable battery;
7. Protective packing. Plastic case with foam-rubber pad.
1.4. Principal of operation.
1.4.1. The principal of operation is based on the cat’s eye (retroreflection) phenomena, i.e. on ability of optical objects to
reflect the transmitted radiation in the opposite direction at an angle close to angle of sight.
As the source of transmitted radiation used is the semi conducting laser IR diode (transmitting channel). Reflected signal
is registered by sensitive CCD matrix video camera.
The transmitting channel forms the laser beam in the form of vertically located rectangular scanning field. When required
and depending on the distance to the observed object the power of scanning field illumination can be changed to get the best
image contrast. Image details sharpness focusing is performed by adjustment of video camera lens.
The visualization of observed object is performed through built-in pseudo binocular. Available on the instrument housing
standard video signal output (CCIR format) is used for connection to external monitor, video recorder or PC (the last one should
be equipped with the video input PCB) to enhance the quality of obtained image
The instrument has number of adjustment keys used to control the laser radiation power, receiving TV-camera sharp-
ness, pseudo binocular diopter fine tuning to fit operator’s vision. At the bottom part of the instrument’ casing the 1/4" thread
hole is provided allowing mounting the instrument on tripod by means of a screw.
The level of battery charge is indicated in the right top corner of the image (Fig. 4). When the battery is flat the instru-
ment is automatically switched off.
To switch the laser illumination on press and keep pressed corresponding control button.
When using the instrument, the observer looks through its binocular trying to detect the searched object (ESS) and as a
result of successful search to visualize on monitor screen or in view finder the places of location of intensive glowing dots
(flares) upon less bright scanning field background. In cases when outside the scanning field such glowing dots (flares) disap-
pear they can be interpreted as potential ESS. If flares do not disappear when laser illumination is switched off they are not
considered as potential ESS.
Range of detection of the glaring optical and electrooptical means (with a diameter of aperture not less than 40mm) con-
ducting counter surveillance at normal conditions is not less than 500m at ambient light not more than 10^3 luxe with detection
probability not less than 0.9.

5
1.4.2. General view of «GCU-OSD10» see Fig. 3.
Fig. 3. «GCU-OSD10» controls
1.4.4. Example of image obtained with the help of «GCU-OSD10», Fig. 4.
Fig.4. Example of image obtained with the help of «GCU-OSD10».
Laser switch on button
Video cable connector
Laser power
adjustment
Diopter adjustment
Switch On/off button
Battery level indicator
Laser power indicator (%)
Keyline of laser
scanning field
Laser scanning field
Detected object
Focus
adjustment
ring
Battery compartment

6
1.5. Marking.
1.5.1. The marking provided on the instrument housing contains the following information:
•Short name of the manufacture;
•Name of the instrument;
•Unique factory number;
1.6. Packaging.
1.6.1. The instrument «GCU-OSD10», battery, charging unit, mains adapter for charging unit, video cable and operating manual
are put in standard packing (robust, shock- and moisture proof plastic package-case).
1.6.2. Optionally standard plastic package-case can be packed in the transportation packing (plywood box).
2. RUNNING THE INSTRUMENT
2.1. Operating limitations
2.1.1. Before the battery is to be inserted into the correspondent instrument compartment it is necessary to make sure that the
Instrument is switched off.
2.1.2. IT IS NOT ALLOWED TO RUN INSTRUMENT WITH OPENED COVER OF THE BATTERY COMPARTMENT and to
unseal the Instrument (to break integrity of a guarantee seal)!
2.1.3. It is not recommended to use for Instrument power supply the power supply sources different from the source that is in
delivered set as this may cause fail of the Instrument.
2.1.4. It is not recommended to use type of the charging unit for standard battery different from the one in the delivered set as
this may lead to battery incomplete charging or failure.
2.1.5. It is not allowed to close the battery terminals as this may cause its failure.
2.1.6. Do not store the battery at the temperature exceeding plus 60ºС, for example, in the car left on the sun.
2.1.7 To maintain stated battery capacity in case of work at the low temperatures it is recommended to store it in warm place,
for example in a pocket and to insert it into the Instrument just before use.
2.1.8. It is recommended to perform the battery charging at the ambient temperature from plus 10º to plus 30ºС.
2.1.9. It is not allowed to switch on the charging unit under rain or at high humidity.
2.1.10. During the Instrument operation or transportation it is not allowed to touch by hands or in any other manner to make
dirty outlets of lens and laser filter as this may have negative influence and significantly worse operation of the Instrument. If
outlets of lens and laser filter became dirty it is required thoroughly to clean these outlets with specially provided tissue before
continuing to use the instrument.
2.2. Preparation for use.
2.2.1. To prepare the Instrument for use it is required to fulfill the following steps:
•Take the Instrument and battery out of the standard package;
•Unscrew the cover of the battery compartment;
•Remove the battery compartment cover;
•If the battery is uncharged - charge it;
To charge the battery it is required to fulfill the following steps:
•Connect the charging unit to mains;
•Insert the battery into charging unit;
•Charge the battery. The battery charge level is indicated in the process of charging on the screen of the
charging unit;
•Insert the battery in the instrument;
•Close the battery compartment cover and tighten it with screw;
•Switch on the Instrument.
2.2.2. To charge the lithium ion battery it is necessary to remember the following:
•It is not required to discharge the battery prior to its charging as presence of residual charge do not have effect on its
rating;
•Recommended ambient temperature for charging process is from plus 10º to plus 30ºС;
•Battery charging shall be performed on the flat surface in absence of vibration;
•During charging the charging unit can heat up a little. This is normal;
•If fully charged battery will be inserted in the charging unit then value 100% will be present on the charging unit dis-
play.

7
2.3. Running the Instrument
2.3.1. It is required to fulfill the following steps to run the Instrument:
•Switch on the instrument by pressing and keep pressed for approx. 2 seconds button “ON\OFF”;
•Orient the instrument lens in the direction of examined area;
•When required –carry out diopter adjustment of binocular to fit operator’s vision, this is done by rotation of correspond-
ing control keys. The image of battery level sign in binocular shall be razor sharp;
•Depending on the illumination level and required focusing depth adjust the position of lens diaphragm by means of ro-
tation of corresponding ring (during night time it is recommended fully to open the diaphragm); get maximal sharp im-
age in binocular;
•Be aware of the absence of any people within the field of view of the Instrument, after that press and keep pressed the
«LAZER» button that switch it on.
•When necessary rotate the handle of laser power adjustment and regulate it depending on distance from observed ob-
jects. The indication of the laser power value (in percent) is displayed on the bottom part of the image. Usually at dis-
tance of 10m the power shall be minimal (10%) while at distances above 100m it shall be maximal (99 %). At the same
time it is required to obtain optimal contrast of the image within the scanning field. The interior elements within scan-
ning field also should be well observable. It is necessary to take into account that in conditions of high-illumination level
or at considerable distances the keyline of laser scanning field may be invisible but this is acceptable and practically do
not have any effect on the of ESS detection probability. The laser illumination spot (pattern) can be seen (via binocu-
lar) if to orient the Instrument on the uniform surface (like wall or screen) located at the distance of 20 –500m;
•Keep push button «LASER» pressed and perform scanning of area of interest. All appeared glowing dots seen within
the scanning field limits, i.e. occurring within the area illuminated by laser, are considered as reflecting surfaces of op-
tical and electrooptical surveillance systems. At the same time when laser is switched off or scanning filed illuminated
by laser is moved away from the initial observation position these dots shall disappear and this is the criteria how to
separate detected ESS from ghost flares.
2.3.2. The Instrument switch off is performed in reverse to switch on order.
2.4. Safety precautions
2.4.1. Warning! When the instrument is switched on it is necessary to keep away eyes of operator or any other
person from the laser illumination beam.
2.4.2. When operating charging unit it is required to follow up electric safety rules for industrial non-electro technical personnel
of group I.
3. TECHNICAL MAINTENANCE AND REPAIR WORKS
3.1. The Instrument maintenance does not require special training.
3.2. In cases when an output window of the Instrument and/or the view-finder lens are dirty they should be cleaned with clean
tissue (cloth) made from the natural or microfibrous suede intended for rubbing of optical details (for example glasses).
3.3. The current repairs are performed in accordance with the Table 2.
Table 2
Description of failure effects and
damages
Possible reasons
Actions to be taken to eliminate the failure
When the instrument is switched on
there is no image in view finder,
There is no contact between
spring contacts and battery con-
tacts.
The battery is flat.
The battery failed.
Clean the contacts of battery and battery com-
partment from dirt and oxides bend the spring
contacts and try to insert battery once again.
Charge the battery.
Replace the battery.
When operating the instrument dis-
turbing flashings, flares and stains are
continuously present.
The output window of the instru-
ment is dirty.
Clean the output window with clean tissue
made of natural or micro fiber suede.

8
Battery graphical symbol displayed on
the charging unit screen start blinking
and it dimly glow.
The battery is wrongly inserted in
the charging unit. There is no reli-
able contact with the charging
unit.
To insert battery in the charging unit in a right
manner to provide reliable contact.
Note: If measures taken to eliminate the problems listed in the table with the aim to restore serviceability of the instrument
failed, it is necessary to pass over the Instrument for repair to the specialized repair division of the manufacture.
4. TRANSPORTATION AND STORAGE
4.1. The Instrument should be transported in special transportation container by any type of cargo and passenger transportation
means at ambient temperature from minus 30Сto plus 50Сand relative humidity up to 95% at ambient temperature plus
25С. The direct influence of atmospheric precipitation is not allowed.
4.2. After transportation and prior to use, the Instrument prior to use should be kept in normal climatic conditions not less than
12 hours.
4.3. During transportation it is recommended to remove the battery from the instrument.
4.4. The Instrument should be stored in standard package stacked on racks in capital heated storehouse at air temperature
from plus 5Сto plus 40Сand relative humidity up to 80 % at temperature plus 25С. In a premise for storage should not be
conducting dust and vapors of acids and alkalis, and also gases causing corrosion and destroying insulation.
4.5. In case of storage the battery should be removed from the instrument and stored separately in corresponding slot of stand-
ard package-case.
4.6. Before long term storage of the battery in idle state once a year it should be totally charged and totally discharged after.
Such charge/discharge operations should be repeated once a year for preservation of operability of the battery.
5. MANUFACTURE’S WARRANTY.
5.1. The manufacturer guarantees compliance of a product to requirements of specification within 12 months from the date of it
put in operation, but no more than 18 months from the date of goods shipment (with taking into account storage and transporta-
tion time) if the conditions of use, storage and transportation stipulated in the present Operating manual are met.
5.2. Guaranteed storage term is 6 (six) months.
5.3. Service lifetime (with replacement of the battery when required) is - 7 years.
5.4. The warranty obligations cover electrical or mechanical defects of basic items caused by bad workmanship or faulty mate-
rial within the period stated in clause 5.1.
5.5. Such warranty shall not include batteries or other products to which a specific manufacturer’s warranty applies.
5.6. Under this warranty, the manufacture will supply to the Buyer, free of charge, replacement of parts or the whole instrument.
In such a case the Seller should be informed by the Buyer in writing or by fax within 14 (fourteen) days after the defects have
revealed themselves, and the defective goods have been placed in Seller’s disposal; the defective parts will become Seller’s
property as soon as they have been replaced. Warranty obligations do not include any traveling and/or transportation costs.
5.7. When sending back faulty goods it should be written on the parcel “DAMAGED GOODS BEING RETURNED TO SENDER”
and made a reference on the contract and invoice under which the goods were delivered.
5.8. The manufacturer warranty is valid upon condition of preservation of the guarantee seal integrity and absence of external
mechanical damages.
Table of contents
Other Sekotech Security Sensor manuals
Popular Security Sensor manuals by other brands

Hytronik
Hytronik HIR28 Installation and instruction manual
Bosch
Bosch D-tect 150 Original instructions
Siemens
Siemens FDOOT271-O Mounting

Air Specialties Express
Air Specialties Express LU-BELT Installation, operating and maintenance instructions

MIREL
MIREL VZ1 MAINTENANCE AND DIAGNOSTICS MANUAL
ZANTINGH
ZANTINGH CO Quick setup guide
