Selectron DVD-300 User manual
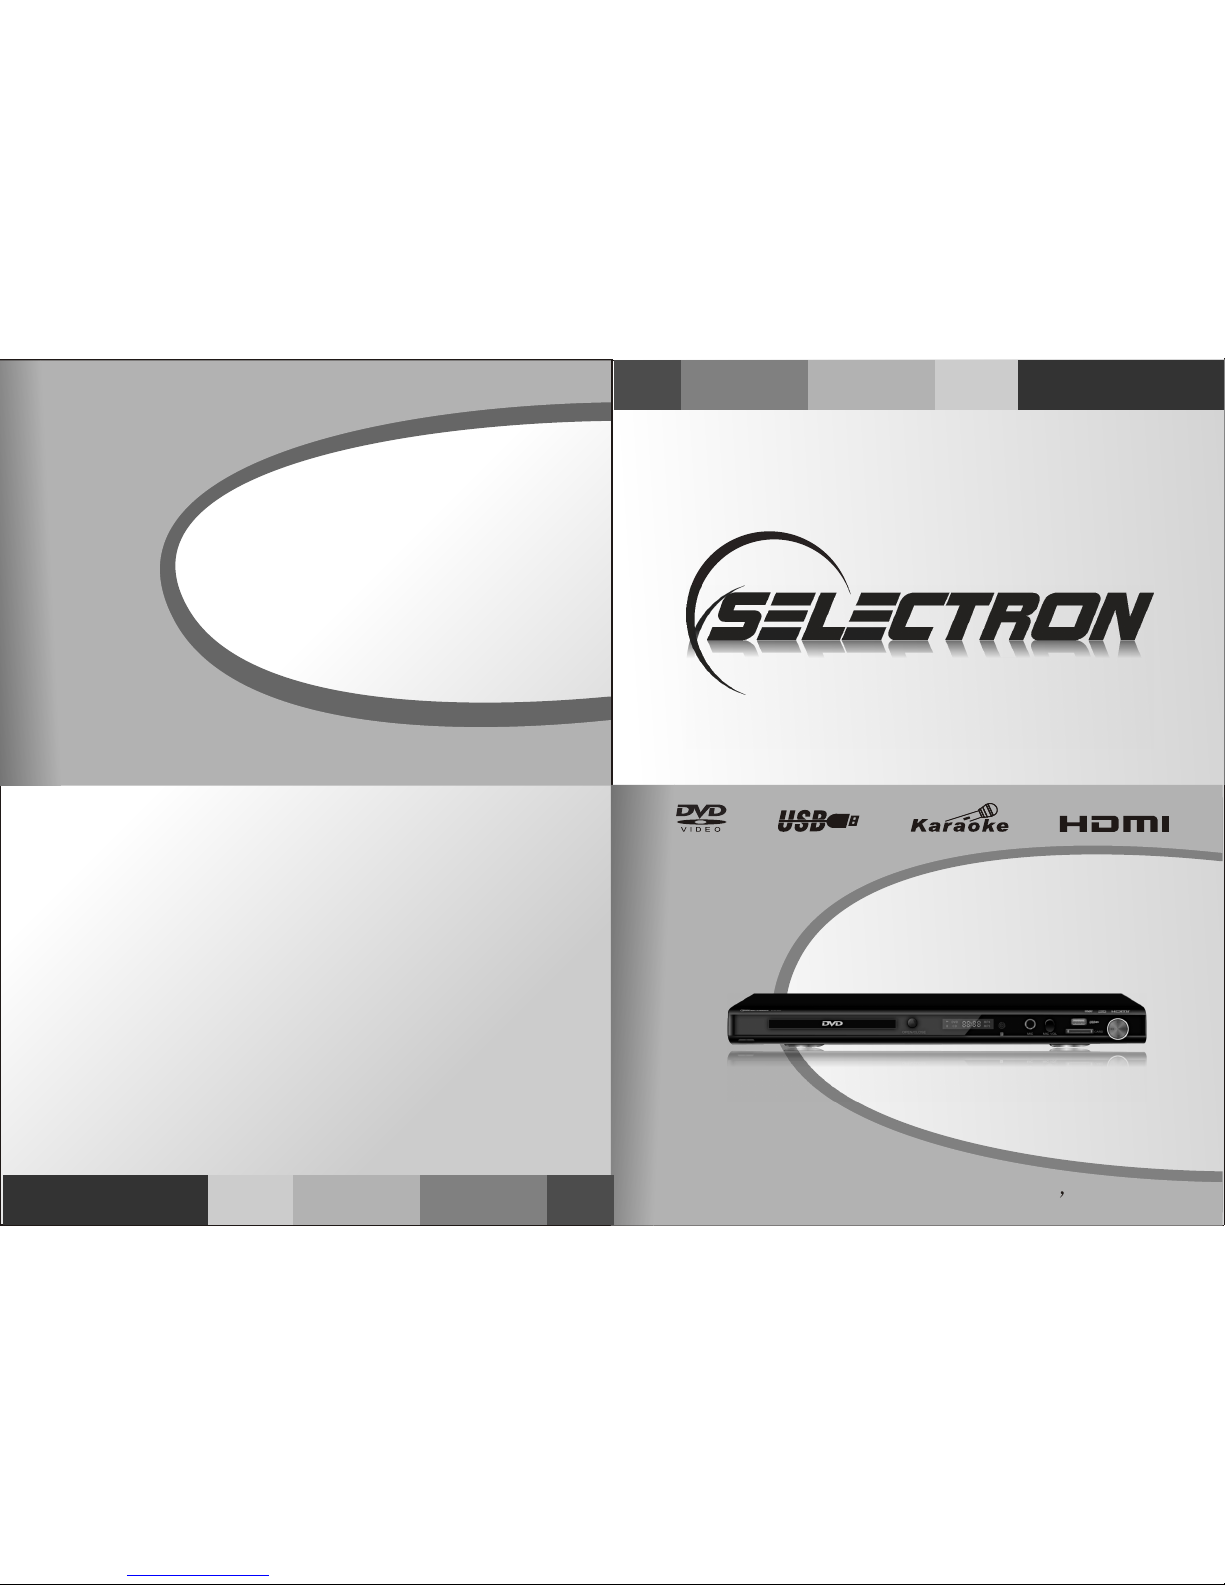
USER S MANUAL
MODEL:DVD-300
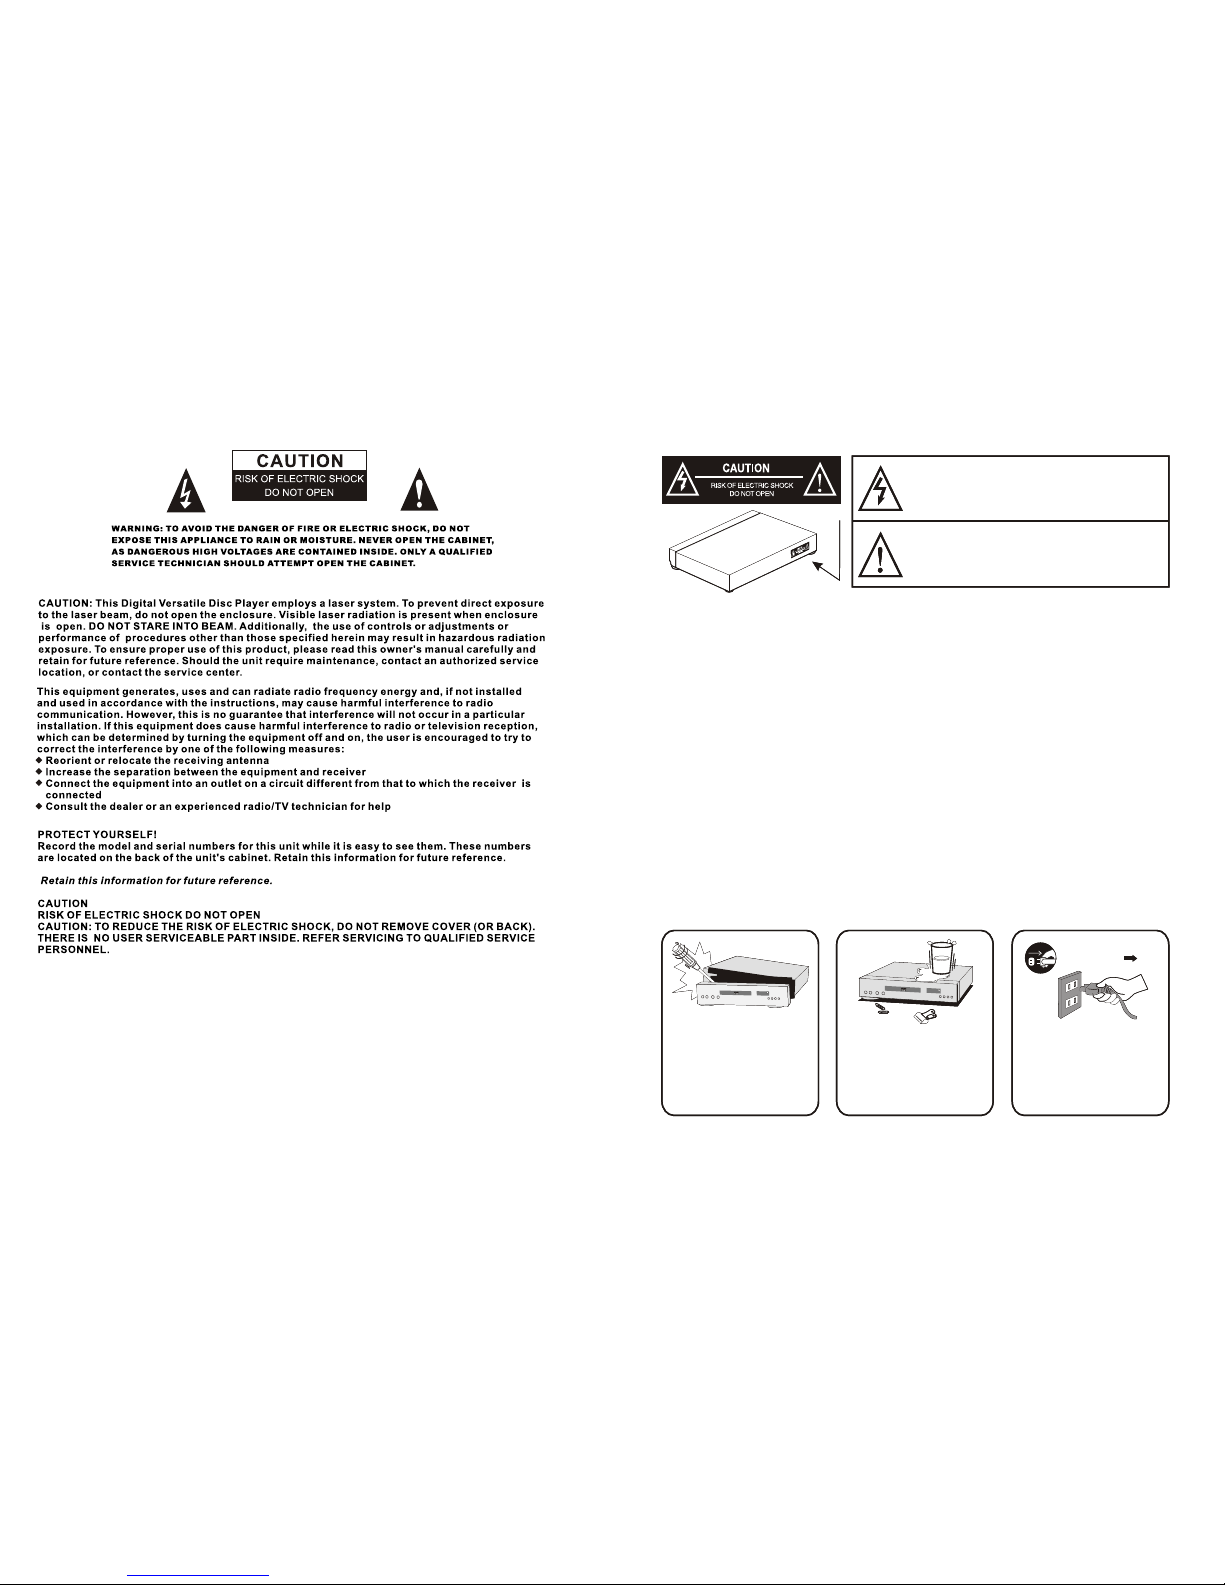
Basic safety requirements
WARNING: DO NOT EXPOSE THIS APPLIANCE TO RAIN OR MOISTURE,
DUE TO THE HIGH RISK OF FIRE OR ELECTRIC SHOCK, DO NOT OPEN
THE CABINET DANGEROUS HIGH VOLTAGES ARE PRESENT INSIDE THE
ENCLOSURE. ONLY QUALIFIED SERVICE PERSONNEL SHOULD ATTEMPT
THIS.
CAUTION: This Digital Video Disc Player employs a Laser System. To prevent
direct exposure to the laser beam, do not try to open the enclosure. Visible laser
radiation when open and interlocks defeated. Use of controls or adjustments or
performance of procedures other than those specified herein may result in
hazardous radiation exposure.
DO NOT STARE INTO BEAM.
To ensure proper use of this product, please read this owner’s manual
carefully and retain for future reference. Should the unit require
maintenance, contact an authorized service location, or contact us. Only
qualified service personnel should remove the cover.
Unplug the apparatus
during the lightning
storms or when unused
for a long period
Do not open the cabinet Do not use the apparatus
near the water
The lightning flash with an arrowhead symbol within an
equilateral triangle is intended to alert the user to the presence
of uninsulated "dangerous voltage" within the product's
enclosure that may be of sufficient magnitude to constitute a
risk of electric shock to persons.
The exclamation point within an equilateral triangle is
intended to alert the user to the presence of important
operating and maintenance (servicing) instructions in the
literature accompanying the appliance.

CONTENT
1.FRONT PANEL FUNCTION
.......................................................................................
1
4.PREPARATIONS
.................................................................................................................
5.BASIC OPERATION
6.DESCRIPTION OF FUNCTION
2.BACK PANEL FUNCTION
3.REMOTE CONTROL
.......................................................................................
.......................................................................................
1
2
14
11.TROUBLE SHOOTING
12.TECHNICAL SPECIFICATION
7.GENERAL STEPS IN THE SETUP MENU
8.CD RIPPING
9.MP3 / MPEG4/ JPEG OPERATION METHOD
10.HDMI OUTPUT MANUAL
.................................................................................................................
.................................................................................................................
.................................................................................................................
.................................................................................................................
.................................................................................................................
.................................................................................................................
.................................................................................................................
.................................................................................................................
13
12
11
10
6-10
3
4
5
TIMETIME
OPEN/CLOSEOPEN/CLOSESTANDBYSTANDBY
CLEARCLEARLANGUAGELANGUAGEANGLEANGLESUBTITLESUBTITLE
TITLETITLE SETUPSETUP
MENUMENU
STOPSTOP PLAY/PAUSEPLAY/PAUSE
VOLVOL HDMIHDMI
KARAOKEKARAOKE
MUTEMUTE ZOOMZOOM REPEATREPEAT USB/CARDUSB/CARD
OSDOSD
L/RL/R
PROGPROG
N/PN/P
A-BA-B
RETURNRETURN
SLOWSLOW STEPSTEP
ENTERENTER
12
1
2
3
4
5
6
7
8
9
10
11
12
13
14
15
16
17
18
32
31
30
29
28
27
26
25
24
23
22
21
20
19
33
34
35
36
1 STANDBY
2 DIGITALKEY
3 SUBTITLE
4 ANGLE
5 TITLE
6 DIRECTION KEY
7 MENU
8 STOP
9 11 VOL+/-
10 27 PREV/NEXT
12 25 REV/FWD
13 MUTE
14 ZOOM
15 SLOW
16 STEP
17 RETURN
18 A-B
19 N/P
20 L/R
21 PROG
22 OSD
23 REPEAT
24 USB/CARD
26 HDMI
28 KARAOKE
29 PLAY/PAUSE
30 PBC
31 ENTER
32 SETUP
33 LANGUAGE
34 CLEAR
35 TIME
36 OPEN/CLOSE
1.POWER SUPPLY SOCKET
WIRE 100-240V~ 60Hz
2.FL
3.FR
4.SW
5.Y.Pb.Pr
6.CVBS
7.SL
8.SR
2.Back panel function:
1.POWER
2.CABINET DOOR
3.OPEN/CLOSE
4.LED Display
5.MIC1 JACK
6.MIC VOL
3.Remote Control
9.CE
10.L
11.R
12.COAXIAL
13.HDMI
14.S-VIDEO
15.OPTICAL
1.Front panel function:
100-240V
50/60Hz 13W MODEL:DVD-300
INPUT:100~240V 50/60Hz 13W
MADE IN CHINA
Serial no:
CARD
MIC VOLMIC
OPEN/CLOSE
1 2 3 4 5 6 7 98 10
11
12
7.CARD SLOT
8.PREV
9.STOP
10.NEXT
11.PLAY/PAUSE
12.USB
123456
151413121110987
100-240V
50/60Hz 13W MODEL:DVD-300
INPUT:100~240V 50/60Hz 13W
MADE IN CHINA
Serial no:
4. Preparations
4.1 Accessories
1. Remote controller 2. Audio/Video cable 3. User's manual 4.Battery
(check whether be fully equipped after open the box)
4.2 Battery installation of remote controller
Place two AA batteries in the battery compartment. Be sure the polarities are correct. There should
be no large obstacles between the remote controller and the main unit.
4.3 System connection
1. When making connection between this unit and other components, be sure all connection with
power-off.
2. Audio/Video cables are connected according to the different colour identification and they should
be fitted firmly.
Yellow to video terminal
White to audio terminal
Red to audio terminal
3. Scheme of connection
Once it has read the disc, this machine will
start playing automatically.
If it is a DVD, the machine will show the DVD
menu or title menu.
If it is a VCD2.0 disc, the machine will activate
PBC playback control status.
If it is a CD, this machine will start playing in
the sequence.
POWER
If there is no disc, NO DISC shown on screen:
Step 2: Press OPEN/CLOSE key on the front
panel , the tray comes out automatically.
Step 3: Place disc on the tray, press
OPEN/CLOSE key to close the tray, the disc type
will beshown on the up-left corner of the screen.
Note: Press POWER key on the remote
controller to bring the unit into standby status.
5.1 Play disc
Press <REV> key to get 2X, 4X, 8X, 16X,
32X or normal play circular fast reverse function
on disc playing.
4
4.4 Play mode setting
If you found the picture could not spread all
screen or no color, please select PAL, NTSC or
Multi by pressing <N/P> key.
5. Basic operation
Once all the connection of the system have
been done, this machine will be ready for service.
Prior to play, make sure to complete the following
preparatory operations.
1. Switch on TV and select AV mode. If it's
S-Video connect select S-Video mode.
2. Switch on amplifier if it connected, select
AC-3 or DVD mode.
3. Plug-in of DVD player.
Step 1: Press POWER button, DISC LOADING
shown on screen.
PAUSE/PLAY key:
Press <PAUSE/PLAY> key to return
playback while disc stop, pause or step.
Press<PAUSE>key toput the playbackin
temporary halt.
Press <FWD> key to get 2X, 4X, 8X, 16X,
32X or normal play circular fast forward function
on disc playing.
Press <PAUSE> key to put the playback in
temporary halt.
PREV key:
NEXT key:
Press <PREV> key to skip backward to the title
before current.
Press <NEXT> key to skip forward to the title
after current.
Press <STOP> key first time to followed by a
<PLAY> key will allow a auto resume to the last
played location. Press <STOP> key twice will halt the
playback completely.
REV key:
FWD KEY:
STOP KEY:
6. Description of function
6.1 Screen display
DISPLAY
In the condition of DVD disc playing, press
<DISPLAY> key on the remote controller to display
the single elapsed time, single remain time, total
elapsed time, total remain and other information of
the disc.
In the condition of VCD disc playing, press
<DISPLAY> key on the remote controller to display
single elapsed time, single remain time, display off
and other information of the disc circular.
READY
()
SRS
ProLogic
Digital3-stereo
AC3IN 5.1CH
WIDE
NORMAL
PHANTOM
LIVE ROCK DISCO SIMUL MATR CLAS HALL POPS
DIRECT BYPASS AUTO TUNED STEREO MEMORY
LC R
S
S
KHz
MHz 100 300 1K 3K 10K
STANDBY
REMOTE
SENSOR
TEST
VCD
CD
VCR
AC-3
DVD
DOLBY
TAPE
CENTERMODE DELAY TIME
AUX BAND PRESET MEMO TUNING
CHANNELSELECT FMMODE AUTO
L/R SW/CEN SURL/R
DSP
3D BOOST
DIRECT BASS TREBLE
DSP
AP-7610
STANDBY/ON
1 2
MIC
AVSURROUND INTEGRATED AMPLIFIER
POWER
Digital Home Theater amplifier
Optical, coaxial input
LOUNDESS
POWER
ON OFF
BASS
VOLUME
TREBLE
MIN
MIN
MAX
MAX
DOWN UP
2910HPOWER AMPLIFIER
D
REMOTE
VCD
PROLOGIC 3 STEREO BYPASS NORMAL WIDE PHANTOM DSP TEST
LD DVD VCR TUNER AC-3 15ms 20ms 25ms 30ms LOUNDESS CEN- CEN+
BAL-L BAL-R
SUR- SUR+
MUTE RESET
ECHO MIC VOL
1 2
MIC
1 2
5.1CH input
Multi Standard TV
6.2 Play mode
Press <N/P> key one by one to get NTSC.
PAL, MULTI display on the screen.
6.3 Subtitle
This function may enable you to select multi
subtitle languages (as many as 32 kinds and only
for the disc with multi subtitle encoded). Press
<SUBTITLE> key to get desired display.
For example, to select language 2 from
8 options.
6.4 Angle
During athletic match, concert or theatrical
program, press ANGLE key continually on
remote controller to select various angle to
view the same image (This operation works
only for the disc with multi angle encoded).

6.6 Title
For DVD disc playing, press <TITLE> key to
get title menu.
6.7 Menu
Press <MENU > key to return to main menu for
DVD disc playing.
Press <MENU> key to return PBC menu for
VCD 2.0 disc playing.
6.8. Direction key
There are four direction keys assist in navigation.
They are normally use while in title, navigation, and
setup menu.
5
Press left or right direction keys to select title or
chapter and etc., then press number to input time, title,
chapter, then press <Play> key to begin playing. .
Press relevant number key to play the favorite
chapter or title according to the serious number of
the menu.
6.11 PBC play
For VCD 2.0 disc playing, in the condition of PBC
ON, song selection can only be done when the
playing returned to the main menu. In the condition of
PBC OFF, press relevant number key to get favorite
song during playing.
TIME
6.10 TIME
For disc playing, press <TIME> key to TIME desire
title, chapter, time, audio, subtitle, angle, and repeat.
PBC
6.13 Repeat
For DVD disc playing, press <REPEAT> key to
repeat title, chapter, all or close repeat. For VCD disc
playing, press <REPEAT> key to repeat track, all or
close repeat.
6.12 Repeat from A to B
First time pressing <A-B> key to set initial point
(A):
Second time pressing <A-B> key to set end
point (B). After setting, the program repeats
playing from A to B. Third time pressing <A-B>
key to cancel repeat.
A-B
REPEAT
6.14 ZOOM
The picture may be enlarged by up to 4 times
to facilitate you to enjoy a particular action or still
picture. Press <ZOOM> key 6 times, the zoom
scales will be 2x, 3x, 4x ,1/2,1/3 and 1/4
respectively. Pressing direction key to move the
screen while zoom in. Pressing the button once
again will return to normal play status.
6.17 PROGRAM
In the condition of disc playing, press
<PROGRAM> key on remote controller to come
into program status; Enter the track Numbers desired,
2,4, 6 and 8, for example, you can press <CLEAR>
key to remove the numbers if you enter wrong number,
then using direction key move the cursor to start
button, then <ENTER > key to start playing.
To exit the programmed play mode, simply
press the <PROGRAM> key to exit it.
6.18 SLOW
Press <SLOW> key repeatedly, you will
enjoy the slow motion at a 1/2x, 1/4x, 1/8x,and
1/16x slower forward speed, or a 1/2x, 1/4x and
1/8x, 1/16x slower backward speed and normal
backward speed.
6
6.15 CHANNEL
When play SVCD,VCD or CD disc, press
<CHANNEL> key to select Left Vocal, Right Vocal,
No Vocal Assist, Vocal Cancel.
6.16 Volume and Mute
Press <VOLUME +> key to increase volume,
press <VOLUME -> key to reduce volume till to no
volume output.
Press <MUTE> key to get mute, press it again
to recover it from mute.
6.9 Number key
6.5 Language
There are 8 kinds of language for selection.
Press < LANGUAGE> key to select language
(This operation works only for the disc with multi
subtitle encoded).
For example, to select language 1 from 2
language options, sound field effect AC-3,
2channels, English.
When play a VCD disc, press this key to select Left
Channel, Right Channel, Mix, Stereo audio output.
7.General Steps in the setup menu
SCREEN SAVERSCREEN SAVER
HD OUTPUTHD OUTPUT
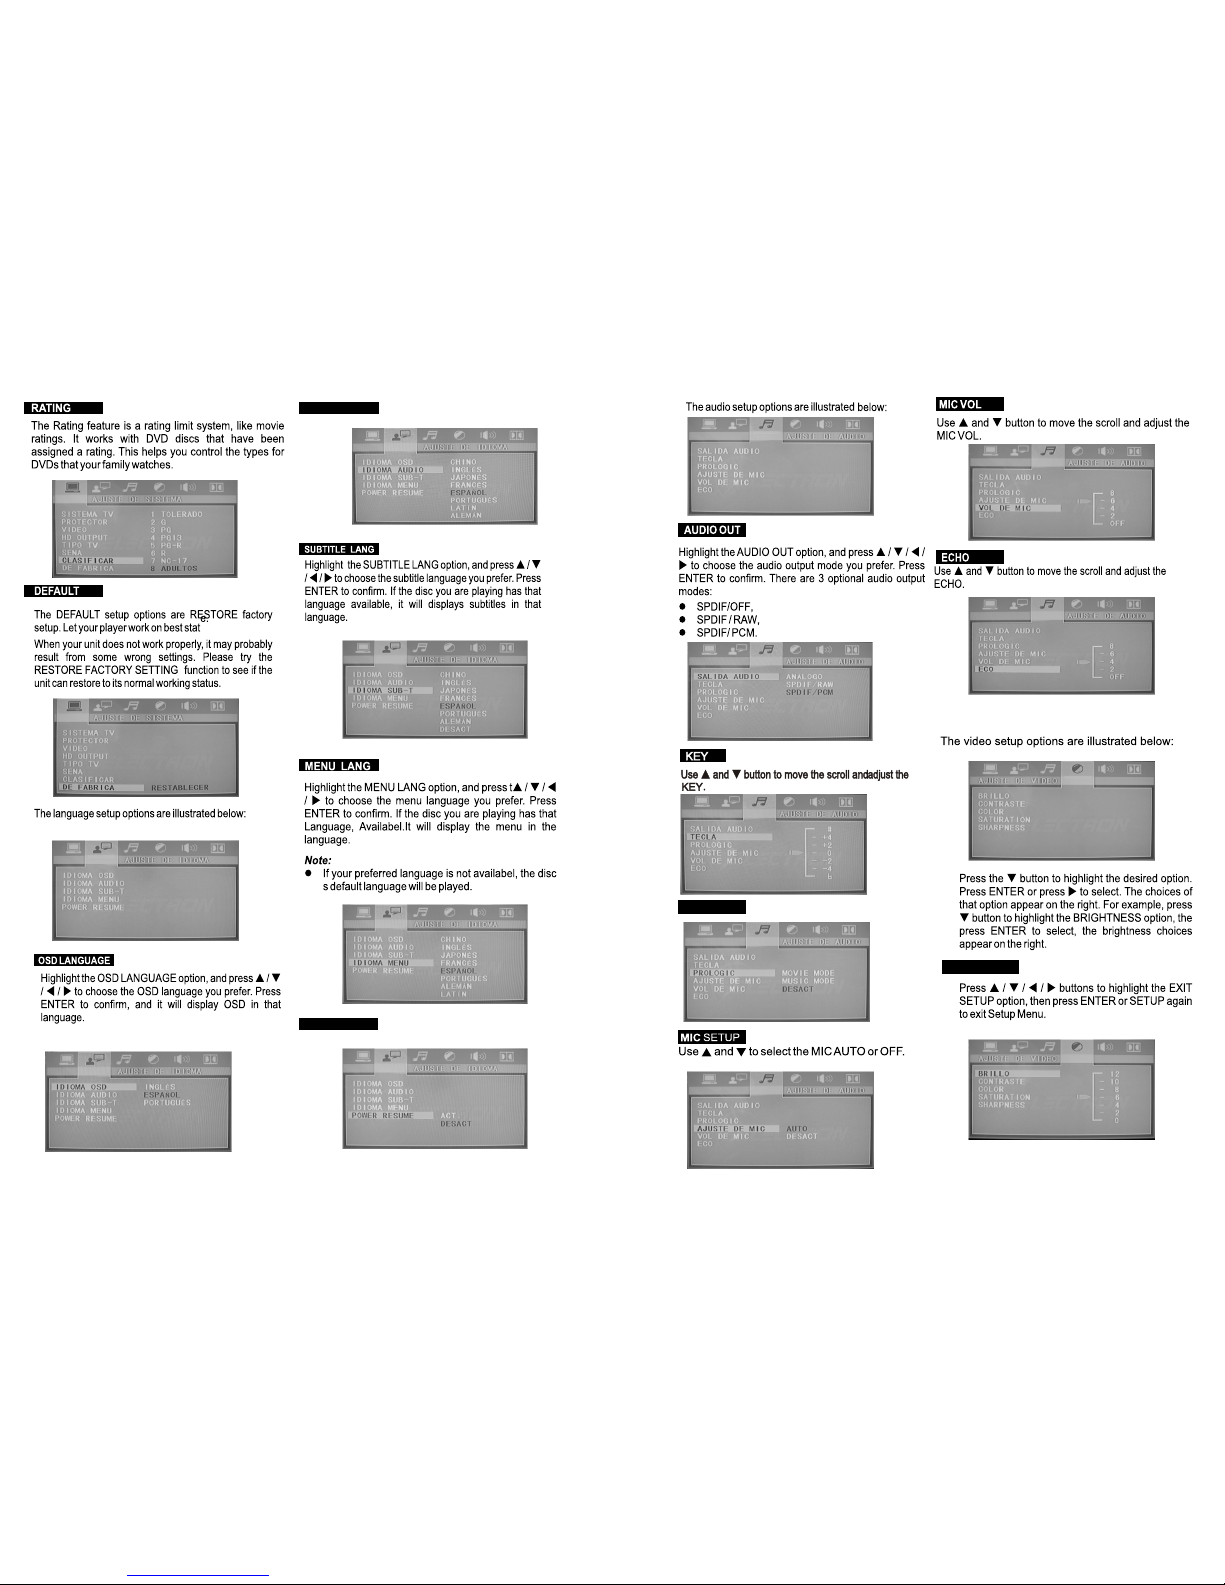
78
AUDIO LANG
PROLOGIG
BRIGHTNESS
POWER RESUMEPOWER RESUME
910
SUBWOOFERSUBWOOFER
CENTERCENTER
CENTER DELAYCENTER DELAY
5.1CH
REARREAR
REAR DELAYREAR DELAY
DYNAMIC RANGEDYNAMIC RANGE
OP MODEOP MODE
SHARPNESSSHARPNESS
FRONTFRONT
DUAL MONODUAL MONO
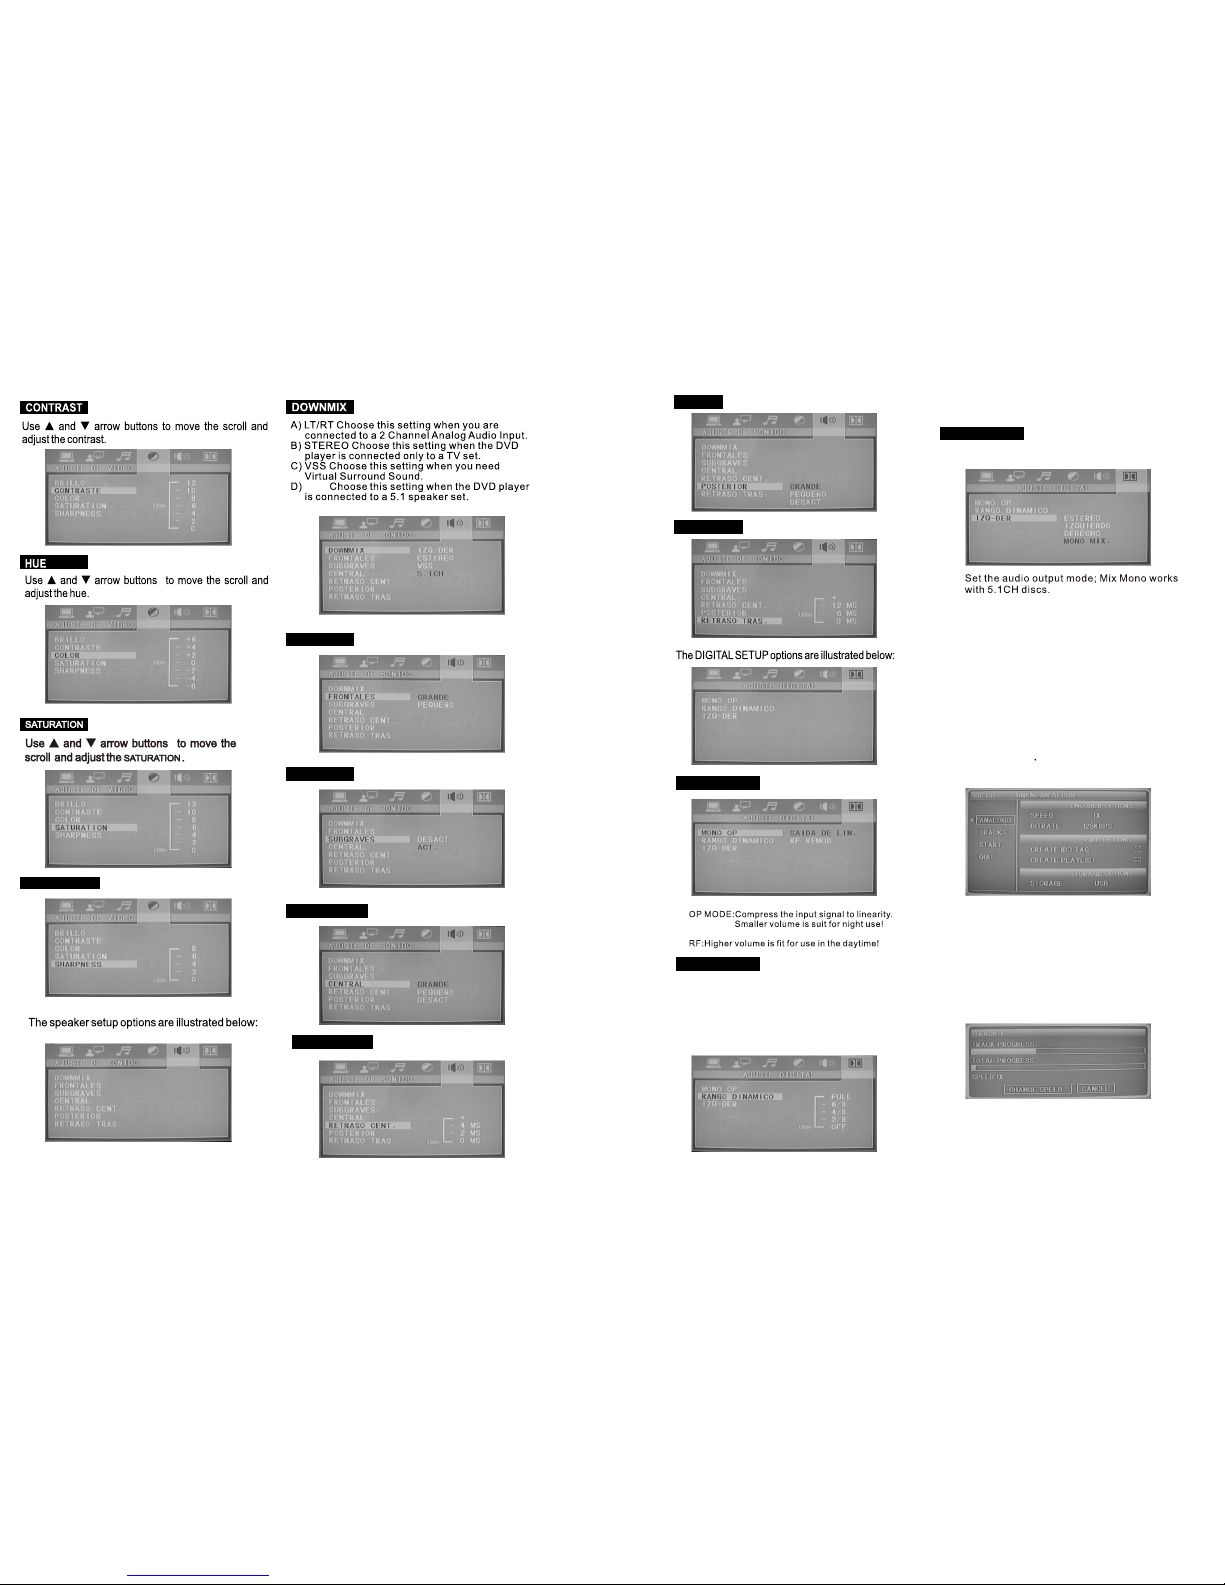
8.CD RIPPING
When the MP3player and Udisk inserted ,
push remote controlbutton on thematrix will be
selected at Uintraday repertoire oftranscription.
only be recordedeach time thecursor location
repertoire(
remark:Flash Disc connectwith DVD usb
terminal directly note:can not connectedwith
connecting wire
When the MP3player and U disk inserted,and push
remote control buttonon the matrix Can appear right
menu option.Then enterthe menu option,one is
Selected items,and otheris unSelected items.
Determine the repertoire afterthe cursor tothe left
(start) option, thenpress OK button can be selected
to the Uafter transcription repertoire.Progress bar
shows that 100%of post-transcriptional finish,then
choose the quitoption,and push ok key to quit the
menu
Note:
This is applicable when you chooseand set the
mixed mode STEREOor LT+RTor VSS of the speaker
Setting !
When you choose the compression mode ofline output,
you can choose it to adjustthe linearity of compression
ratio and thenreceive different compressioneffects.
When you choose FULL,the peak ofsound
signal-the peak value is low tominimum ,however when
you choose OFF, the peak will reach to
the maximum!
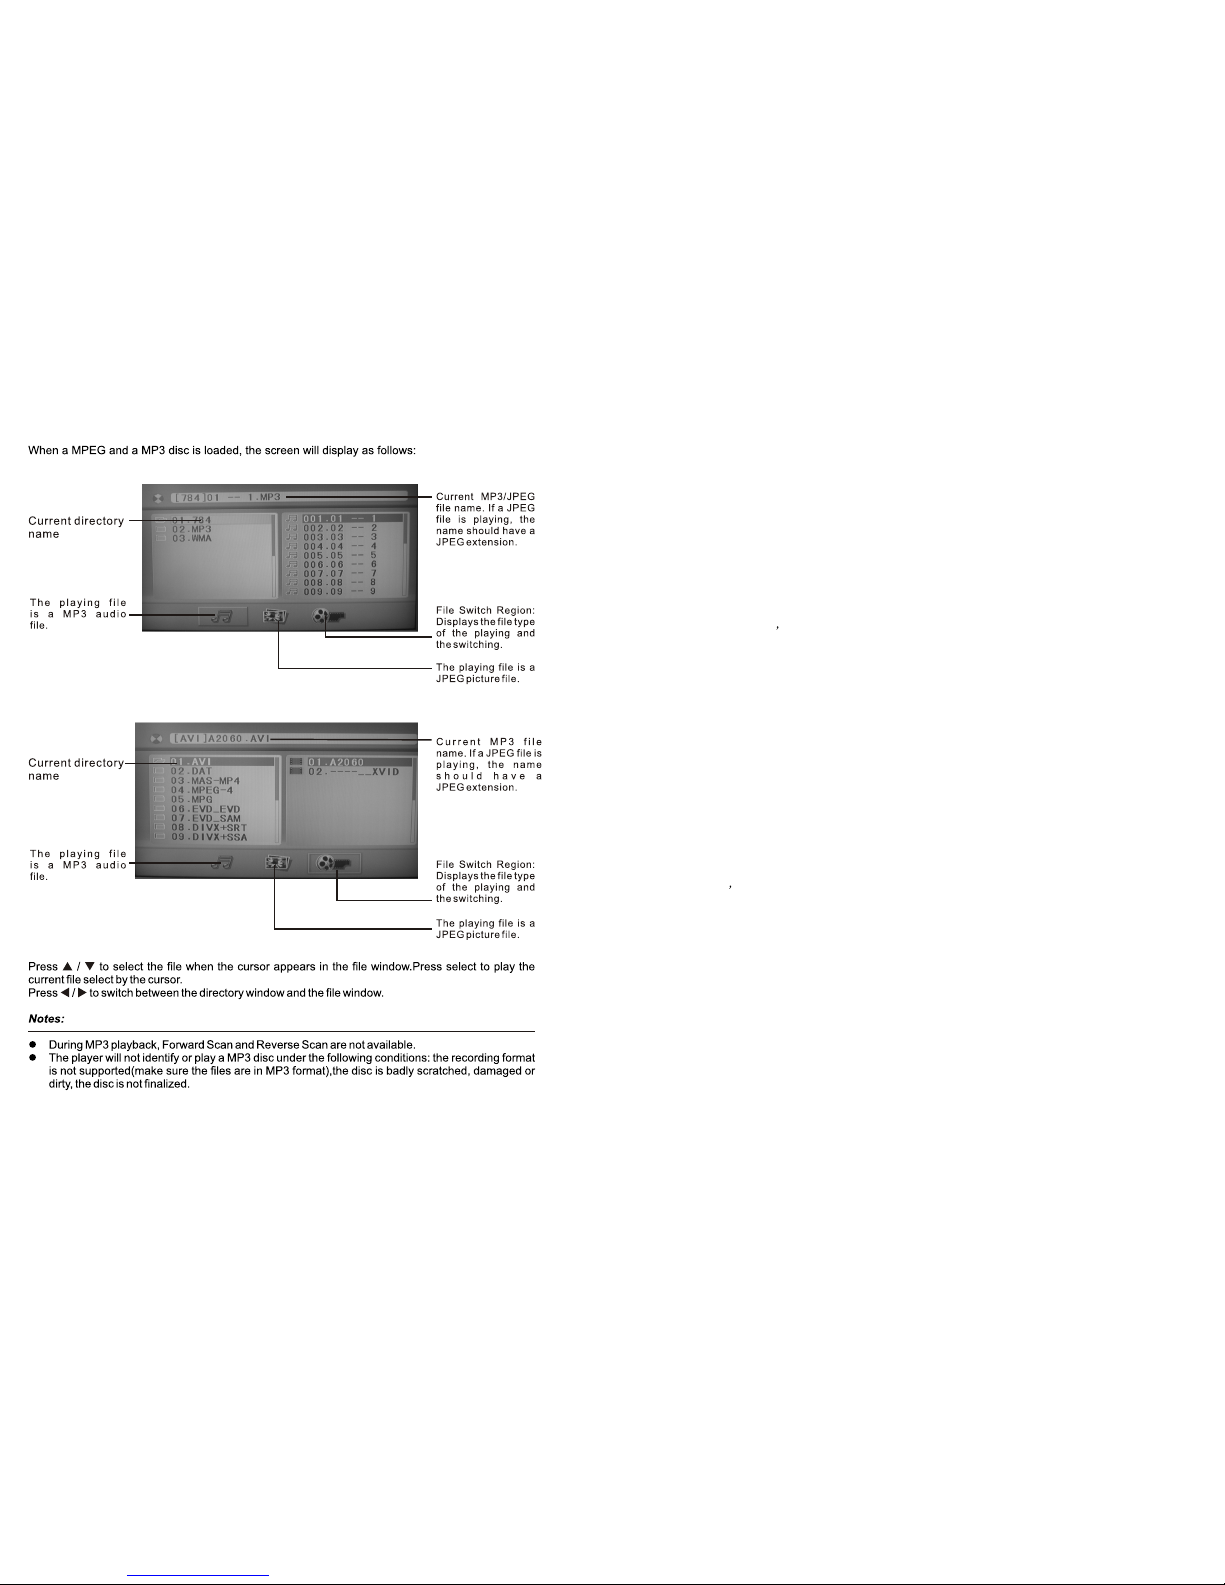
9.MP3 / MPEG4 / JPEG OPERATION METHOD
11 12
10.HDMI OUTPUT MANUAL
System connection:
HDMI TV
Use type A <->Type A HDMI cable to connect the DVD player to the TV.
Turn ON both the TV and DVD player .Make sure the TV Video IN sourcoe is configured to
HDMI mode.
DVI monitor
Use type A<->Type B DVI cable to connect the player to the DVI monitor. DVI cable is not
driving audio.There fore,Audio is to be connected separately from the player to the Monitor
speakers or audio sound system User may select either the digital or the analog audio outputs
of the DVD player.
Turn ON the monitor and DVD player.Make sure the monitor Video IN source is configured to
DVI mode.
HD analog
Use 3X RCA cables to connect the HD analog components video outputs to the monitor.
Connect the player s audio outputs to the Monitor speakers or audio sound system.
Turn ON the monitor and DVD player.Make sure the monitor Video IN source is configured
appropriately.
System configuration:
The following parameters should be configured as described below:
1.System must be in the right video mode (PAL or NTSC)
2.Vaddis must be in progressive mode
3.HD resoluti on can be changed
4.HD-JPEG resolution must be set up appropriately
HD resolutions
The DVD player reads imformation(EDID)from the TV to extract data such as type of TV
(HDMI/DVI)and resol ution,and configures the DVD resolutio on accordingly. However the
following remote control buttons can be sued to enable evaluation of other resolutions.:
B button-switches among resolutions. Each time the user presses the button,the resolution
changes according to the following cyclic mode:
In NTSC mode-480p,720p,1080i,1024*768p,1360*768p
In PAL mode-576p,720p,1080i,1024*768p,1360*768p
OSD indication with the new resolution is displayed temporarily,upon a change.
Notes:Can s support HD jpeg.
HD jpeg
Images in JPEG format can be show nvia the HDX treme outputs in native high resolution.The
output esolution should be set via the Vaddis Video Set-Up menu.The avail able values are:
1360*768p/1024*768p/1080i/720p/SD(Standard resol ution).
In this mode:
ANGLE-used to rotate the mage by 90 degrees,180 degrees,270 degrees.(also support PAL)
Notes:
If the EDID data read by the DVD player from the TV, through the HDMI port,is not providing
imformation regarding the resol ution, the player drives the default mode to be 480p for NTSC
or 576p for PAL.
Notice that it takes few seconds for the TV to switch to the new resolution.Yet,it might be that
some resol utions are not supported by the TV,In this case,the user should press again the B
button,until the DVD switches to a resolution that is supported by the TV.
The default audio stream via the HDMI port is un-compressed PCM data.If the HDMI receiver
device (i.e.HDMI TV or HDMI AV receiver)can accept compressed data,the user may change
the output audio format to RAW through the Set Up menu.For more information on how to set
PAL/NTSC and RAW/PCM, please refer to the paragraph Set Up menu,o vide and audio setting.
Be advised that the rest of parameters within video and audio setting are not relevant for the HD
output.
13 14
Type
Play mode
Disc mode
Video characteristic
Resolution
Video S/N ratio
Audio characteristic
Frequency response
Audio S/N ratio
Dynamic range
Distortion
D/A converter
Output characteristic
Video output
S-Video output
Audio output
Digital audio output
AC-3
Power Voltage
Power consumption
Size
DVD-300
PAL/NTSC/AUTO
DVD, VCD, CD, MP3, JPEG
.
500 lines.
56dB.
.
20Hz-20KHz:+/-1dB
90dB
90dB
< 0.01%
192KHz/24bit
.
1Vp-p(75 W)
Y: 1Vp-p(75 W) C: 0.3Vp-p(75 W)
2.0V
coaxial, optical
5.1 channel output
100-240V~ 60Hz
13W
430x38x210mm
Specifications are subject to change without notice.
0.0V
1.0V
.
.
192KHz/24bit
.
1Vp-p(75 W)
11.Trouble shooting 12.Technical Specification
Table of contents


