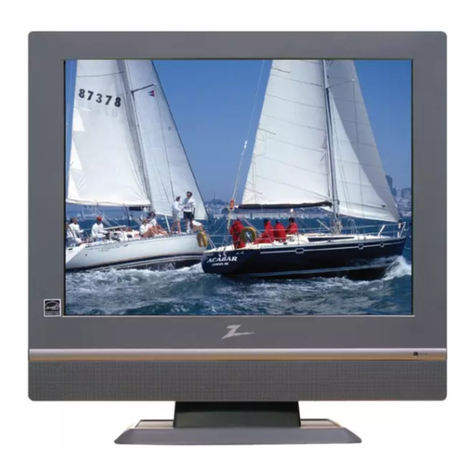
Selectron LE-320 User manual

Description:
Job No.
MODEL:
REV:0
Engineering Dept:
Artwork By:
Checked By:
Approved By:
Brand Name:
P/No.
Scale:
Date:
Date:
Date:
MANUAL
32E61
2011-2-25
SELECTRON
SIZE:A5
To obtain the best performance and safety, please read this manual carefully.
Please keep this manual for future reference.
8K39S-••••
LE-320LE-320

-1-
CONTENTS
WARNING AND PRECAUTION........................................................................................................ 2
CONTENTS ...................................................................................................................................... 1
INTRODUCTION,FUNCTIONS AND FEATURES ............................................................................ 4
EXTERNAL SCHEMATICAND INSTALLATION .......................................................................... 5-11
Antenna / Cable Connection .................................................................................................... 9
Front Panel .............................................................................................................................. 7
Back Panel ............................................................................................................................... 8
Remote Control ................................................................................................................... 10-11
MENUS CONTROL .....................................................................................................................14-20
Picture Settings .......................................................................................................................14
Sound Settings ........................................................................................................................15
Advanced Settings ..................................................................................................................19
PC Settings .............................................................................................................................20
Setup Settings .........................................................................................................................17
SPECIFICATIONS ...........................................................................................................................23
TROUBLESHOOTING ....................................................................................................................22
ANALOG MENU SCREENS ............................................................................................................21
UPLAYER CONTROL .................................................................................................................12-13
Photo View ..............................................................................................................................12
Music Play .............................................................................................................................. 12
Video Play .............................................................................................................................. 13
Important Notice ..................................................................................................................... 13
Basic operation .......................................................................................................................14
Installation Settings..................................................................................................................16
Antenna And Power Connections ............................................................................................ 6
Inserting Batteries In The Remote .......................................................................................... 6
Positioning The TV Set ............................................................................................................ 6
Stand Foot Installation Instruction ............................................................................................5

Read all of the instructions before operating the set. Keep these instructions well for later use.
Follow the instructions to install and adjust the product. Adjust those controls that are covered in
this operating instructions as improper adjustment of other controls may result in damage. If this
happens,unplug the set and refer to the service personnel.
PRODUCT
The ventilation should not be impede by covering the ventilation openings with items, such
as newspaper, table-cloths, curtains, etc.
Do not push any objects of any kind into this unit through the cabinet slots as they could touch the
current carrying parts or short-circuit parts, resulting in fire, electric shock, or damage to the unit.
Unplug the set when it is not used for a long period of time.
Do not dismantle this product by yourself as this may cause damage.
Do not touch the screen surface with fingers as this may scratch or mar the LED screen.
Do not impact the LED screen with hard pressure as this may damage the LED screen severely.
The battery (battery or batteries or battery pack) shall not be exposed to excessive heat such
as sunshine, fire or the like.
WARNING AND PRECAUTION
POWER
Please use the core plug as required.
PLUG
Unplug the set under the following conditions:
If the set will not be used for a long period of time.
If the power cord or the power outlet/plug is damaged.
If the set is subject to impact or has been dropped to have the cabinet damaged.
The mains plug is used as the disconnect device and shall remain readily operable.
POWER CORD & SIGNAL CABLE
Do not allow anything to rest on or roll over the power cord & signal cable.
Protect the power cord & signal cable from being trampled.
-2-

CLEANING
Dust the set by wiping the screen and cabinet with a soft, clean cloth or some special liquid cleaner.
Do not apply excessive force to the screen when cleaning.
Do not use water or other chemical cleaner to clean the screen as this may damage the surface of
the LED screen.
USE ENVIRONMENT
Do not install this equipment in a confined space such as a book case or similar unit. To
prevent injury, this apparatus must be securely attached to the wall mount fastened on the
wall.
Place the set on a place that allows good ventilation.
Do not use the set near damp, and cold areas, protect the set from overheating.
Keep away from direct sunlight.
The apparatus shall not be exposed to dripping or splashing and that no objects filled with
liquids, such as vases, shall be placed on the apparatus.
Do not use the set near dust place.
To reduce the risk of fire or electric shock, do not expose this appliance to rain or moisture.
No naked flame sources, such as lighted candles, should be placed on the apparatus.
Do not overload the power cord or power outlet.
Do not expose the power cord & signal cable to moisture.
WARNING AND PRECAUTION
-3-

BRIEF INTRODUCTION:
TV FUNCTIONS
FUNCTIONS
1. Auto and Manual tuning
2. Supports NTSC M PAL M/N systems in TV mode
3. Supports PAL and NTSC color systems as well as stereo input in AV mode
4. Supports component input modes (480i/p, 576i/p, 720p@50/60Hz and 1080i@50/60Hz formats), this function is
available for some model only
5. Full-function Infra-red Remote Control
6. 3 Selectable Color Temperatures
7. Sleep timer
8. Enters standby mode automatically after 15 minutes without any signals in TV mode
PC MONITOR FUNCTIONS
1. Auto resizing & centering, perfect geometric graphic
2. Supports PC sound source input
3. Supports VGA input (the optimum refresh rate is 60Hz)
FEATURES
1. Embedded digital color gain control circuit, provides better brightness and reality
2. Embedded 3D comb filter
3. Black/white Level Stretch Circuit
4. Auto signal format recognition, plug and play
5. High class LED screen features high brightness, high contrast and wide viewing angle, responding fast.
6. Supports high definition signal formats
7. This TV can be used as a high-performance PC monitor for it has a VGA interface. Computer sound source can
also be supported to realize the multimedia function.
8. Low power consumption in standby mode to save energy
9. Latest high integrated digital processor chip
Thanks for your purchase of our digital high-definition LED television! This product with
diverse functions is designed to fulfill the optimum requirements from commercial, industrial
and household uses. LED television possesses the display function of both TV and PC. It
features advanced picture performance, smaller in size and lighter in weight, meanwhile,
consumes less power and makes no radiation. The new generation LED provides you with
comfortable, safe and environmental protection feeling. Some description could be little different
based on different model.
-4-
INTRODUCTION, FUNCTIONS AND FEATURES

-5-
EXTERNAL SCHEMATIC AND INSTALLATION
Stand Foot Installation Instruction
Please read the following installation instruction and operate the below steps carefully.
Step One: Check the package
Open the package and check the correctness of the accessories according to the form in the left.
In addition, you need take additional installation tool for help, for example, electric cross.
If there is no problem identified above, Please operate the below procedure according to the
following left installation photo.
S/N Description Guide Photo Qty
1
2
1pc
1pc
BASE
BASE CONNECT BKT.
Step Two: Installation of Connecting the stand foot with bracket
Please take out of the stand foot and the bracket, fastening the bracket on the stand foot with
4pcs BT4X14 screw, Attention: The screws must the tight. (Photo A)
Step Three: Installation of the stand foot
(1) Put the TV on the platform and make sure the screen down to the platform with one soft
Cloth Pad to avoid the scratch of the LCD screen and cabinet.(Photo B)
(2) Insert the stand foot from the bottom of the TV and
make sure the direction of the stand foot. The stand
foot could not connect with the TV if the direction is
wrong. (Photo B)
(3) After connecting the stand foot, The four round holes
for connecting the bracket with stand foot should be
on the same center line with the four holes of the rear
cabinet. Then please connect the stand foot with the
TV set with four BM4X15 screw after making sure the
correctness of the above step. Attention: The screw
must be fastened closely. (Photo C)
34pcs
SCREW (BT4X14)
44pcs
SCREW (BM4X15)
Photo A
Photo B
Photo C
Platform Cloth pad

Positioning The TV Set
Install Display on solid horizontal surface such
as a table or desk. For ventilation, leave a space
of at least 10cm free all around the set. To
prevent any fault and unsafe situations, please
do not place any objects on top of the set. This
apparatus can be used in tropical and/or
moderate climates.
10CM
10CM
10CM
Antenna And Power Connections
1.Connect the antenna cable into the antenna
input terminal at the rear panel and wall
antenna socket.
2.Connect the power plug into the wall outlet.
(The type of power plug provided may be
different from the above picture for some
countries.)
Inserting Batteries In The Remote
Do not use old and new batteries together.
Do not use different types of batteries (for
example, Manganese and Alkaline batteries)
together.
Note that there are chargeable and non-
chargeable batteries. Do not attempt to charge
non-chargeable batteries.
Remove the batteries from the remote control
unit if you do not intend to use the unit for a
long time.
Precautions when using batteries
Do not drop the remote control unit.
Do not subject the remote control unit to physical
shocks.
Keep the remote control unit dry. Wetting it may
cause the unit to malfunction.
Replace the batteries with new ones when
operation of the unit deteriorates.
Note:
Remove the battery cover located on the back
of the handset by gently pulling up-wards from
be indicated part.
Insert two AAA Alkaline or equivalent batteries.
Following the +/- marking in the battery
compartment.
Replace the battery cover.
-6-
EXTERNAL SCHEMATIC AND INSTALLATION

Note: The graphics are for representation only.
Front Panel
-7-
EXTERNAL SCHEMATIC AND INSTALLATION
2.Power Indicator /Remote Sensor
1.Power Button
3.Speakers
4.Channel Up/Down Button
5.Volume Up/DownButton
6.Menu Button
7.Source Button
8.Standby Button
Note: This machine uses induction buttons.Operation, with thefinger on thesensor area
corresponding buttons atthe center of a ~ 2 seconds or more re-operation;
4
5
6
7
8
1
2 3 3

75 ANT
HDMI4 HDMI3
HDMI2
VGA IN
VGA
AUDIO IN
-8-
EXTERNAL SCHEMATIC AND INSTALLATION
Back Panel
Note: The graphics are for representation only.
1.Uplayer: Uplayer port.
2. HDMI1\HDMI2\HDMI3\HDMI4:Connect HDMI input signal from signal source such as DVD.
3. AV OUT: Connect AUDIO and VIDEO output signal.
4. S/PDIF : Connect digital AUDIO output signal.
5. AV IN: Connect AUDIO and VIDEO input signal from signal source such as DVD.
6. Y Pb Pr
hare the same AUDIO input with AV.
7. EARPHONE
VGA: Connect a PC via a VGA cable.
9 VGA AUDIO IN: Audio input for PC.
10. ANTENNA IN: Connect a coaxial cable to receive signal from the antenna or cable.
(Component input): Connect YPbPr signal from signal source such as DVD.
S
:Audio output, speakers will be muted when earphone plugged.
8.
.
1
2
810
Uplayer
HDMI1
AV OUT
S/PDIF
LEFT
RIGHT
VIDEO
AV IN
Y
PB
PR
YPBPRIN
2
3
4
5
6
7
8 9

EXTERNAL SCHEMATIC AND INSTALLATION
There are two kinds of antenna in use.
VHF/UHF
To TV VHF/UHF
ANTENNA jack
(75 )
TWO KINDS OF ANTENNA
VHF TV ANTENNA
UHF TV ANTENNA
U/V MIXER
No need to install adapter
COAXIAL ANTENNA
(Note 1)
(Note 2)
FLAT CABLE
Need to install adapter
1. Connect the plug of the antenna cable or CATV cable to the cable (not provided with this unit), then
connect to the antenna input of this unit for best reception.
2. If the antenna cable in your home is other than the above two, or you have problems in installing the
antenna, please contact your dealer.
Antenna / Cable Connection
Notes:
Current outdoor antenna or cable TV usually use 75 OHM coaxial antenna cable.
For better reception suggest using this kind of antenna cable.
Flat cable or indoor antenna are old design, the reception may not be good enough.
-9-

-10-
EXTERNAL SCHEMATIC AND INSTALLATION
1.Standby( )
Press to turn the TV on or standby.
2.Picture Mode(P.P)
Press to select the desired picture mode.
3.Sound Mode(S.M)
Press to select the desired sound mode.
4.Zoom
Press to the desired picture aspect ratio..
6.Number buttons
Press to set the TV channel directly.
7.Last Channel(RECALL)
Press to return to previously viewed channel.
10.Volume Up/Down(V+/V-)
Press to adjust the volume.
13.Menu
Press to enter or exit from the TV menu.
8.INFO buttons(INFO)
Press to display the current information including
screen format, source, etc.
12.MTS
Press to select desired sound output(Mono,Stereo or
SAP)depending on the broadcasting channel.
11.Mute( )
Press to mute or restore the volume.
9.Channel Up/Down(CH /CH )
Press to select previous/next channel.
5.
Press this button to freeze picture.
FREEZE buttons
Remote control
14.Source
Press to select the input source mode.
1
2
34
5
6
78
910
11
12
13 14

26.Stop button( )
Press to stop the music.
25.Play & Pause button( )
Press to pause music or picture play and press again
to make play continue.
-11-
EXTERNAL SCHEMATIC AND INSTALLATION
Remote control
15
16
17
17.OK button
Press to confirm and execute the selection.
15.Up/Down buttons( / )
Press to select the desired item on the TV menu.
16.Left/Right buttons( / )
Press to adjust the desired item on the TV mode.
18 19
19.EXIT button
Press to exit from OSD display or function.
20
21
23
22
24
25 26
20.Uplayer button
Press to into Uplayer menu.
23.Previous button( )
Press to play the previous music or picture.
21.Fast Backward button( )
Press to make fast backward when playing music by
Uplayer.
22.Fast Forward button( )
Press to make fast forward when playing music by
Uplayer.
24.Next button( )
Press to play the next music or picture.
18.CC buttons
Press to select CC1, CC2, CC3, CC4, TEXT1,
TEXT2, TEXT3, TEXT4.

Remarks:
1. Please avoid pulling out Uplayer storage frequently,especially in Uplayer working. This may cause
system fault or damage your Uplayer storage•
2. We can not surly guarantee this system support all the Uplayer in market, due to various kinds of
Uplayer chips using by different manufacturing. If you find that your Uplayer can not be read, please try
plug in&out for several times, in order to avoid the condition that your Uplayer can not be read due to
poor contact. If you use mobile HDD or other storage that need high voltage to play, please connect the
Uplayer terminals and supply power to the storage separately and conjunctire wire best short. However,
we can not 100% guarantee these two tips can be used to all the condition that the Uplayer storage
can not be read. We also can not be 100% sure that all the Uplayer can be supported stably, because
the manufacturers use various kinds of storage chips. Because of the restriction of read speed, for high
resolution pictures, the refresh time may be long. Please be patient when this occurs.
-12-
UPLAYER CONTROL
1. Press "source"key to shiftto USB interface,or press
"Uplayer" directly toenter USB interface.
2. Press " " key to choosepicture file, andpress "OK"
to confirm, youcan view thepictures you chooseand
press "OK" againto view thenext picture insequence.
3. If appear"The current folderis empty", press"MENU"
key and choose"Media Type" to setsub-menu, and then
choose "photo" toview picture.
Sort press "OK"button select betweenName•• Genre••
Atrist•• Album options.
Media Type press "OK"button select between photo••
Music•• Video options.
Thumbnail Size press"OK" button selectbetween Small•• Middle•• Large options.
4. In picture-viewstatus, press "MENU"to set sub-menu.
PAUSE press "OK" buttonselect between play•• pause options.
REPEAT press "OK" buttonselect between none•• once•• repeat options.
SHUFFLE press "OK"button select betweenshuffle off•• shuffle on options.
DURATION press "OK" buttonselect between short•• medium •• long options.
EFFECT press "OK" button selectbetween none•• dissolve•• wipe right•• wipe left•• wipe up••
wipe down•• box in•• box out•• random options.
SHOW INFO press"OK" button displaypicture info.
1. In pictureview status, press" / "key to speedyview previous ornext picture.
2. Press "EXIT"key to stopand exit pictureview.
PHOTO View
01/02 Photo
_Photo...
Music Play
1. You can listento your favoritemusic stored in your
mobile hard diskin the following way: in system random
menu, choose thefolder you store music, press
MENU and choose Media Type and next choose
Music to choose the song you want and press OK
to play it.
2. Press EXIT key to stopand exit musicplaying
"" ." "
"" ""
"" .
00:00:56/00:03:59 Music
Photo.. 1024:768
Repeat Shuffle Info. Exit
INFO EXIT
Pause Duration Info. ExitINFO EXIT
Super Star....

Important Notice
1. Simple folder system in Uplayer storage would speed up response time of our TV system,
while complicate folder system would speed down the date-process and may bring trouble.
So we strongly recommend that you can collect your files with simple folder in your Uplayer
storage.
2. If you are using mobile HDD, the indicator light would flicker to indicate the operation
situation of your file. When working, the indicator light should always flicker.
3. If your previous operation is still in process, please do not press the remote control more
frequently, or the processing speed will be affected.
4. If the system operates in abnormal situation because of wrong order, please try to shift to
other channel and then return to Uplayer model. The operation system will be initialized.
5. After long time use, your Uplayer storage would occur some file fragmentation. Please
defragment them, or the operation system would be speed down. You can defragment your
Uplayer storage with a computer.
6. If screen is on non-active status for long time, system would turn to screen-saver situation,
in order to protect LED panel. You can press any key to be renewed.
7. As we use multi-system technology in our product, due to compatibility and stability
problems of your Uplayer device, when file reading or playing, may cause system can not
operate smoothly. Although this is very rare phenomena, you can shut down the power
supply and initialize the system to recover to normal situation.
Remarks: With the system constantly improvement and upgrade, the actual display and
operating instructions may be slightly different with the service manual. This is normal
phenomenon is normal condition. And you also can use and enjoy the happy that our product
can bring to you and your family.
-13-
UPLAYER CONTROL
Video Play
1. You can watchyour favorite videostored in your mobile
hard disk inthe following way:in system random menu,
choose the folderyou store video, press MENU and
choose Media Type and next choose Video to
choose the songyou want and press OK to play it.
2. In video-playingstatus, press MENU to set sub-menu.
PAUSE press OK button select between play•• pause
options. REPEAT press OK button select betweennone
repeat One repeat Alloptions.
SHOW INFO press OK button display videoinfo. Picture Mode press OK button select
between Personal•• Soft•• Normal•• Bright options.
Screen Mode press OK button select between4:3•• Full•• Zoom•• Cinema options.
2•• Press EXIT key to stopand exit video playing
""
"" ""
""
""
""
"" .
.
"" ""
""
"" .
_IMGP0148...
Remarks:
1. The Uplayer picture viewfunction can support PG, BNG, BASELINEformat of JPEG,
doesn't support progressiveformat, and the supportive resolution is less than 16Million pixel.
2. The Uplayer music playingfunction can onlysupport MP3 formatranged 8~320kbps .
""
Repeat Zoom Info.MTS INFO
MTS
01/01 Video_IMGP0148....

-14-
MENUS CONTROL
Picture Settings
Basic Operation
This section explains the menus of your TV. Each menu is outlined and detailed to help you get the
most from your TV.
1. Press MENU on the remote control or on the TV key panel to display the
main menu.
2. Press " " and " " to highlight the desired menu/item.
3. Press " " or " " to change the setting.
4. Press MENU to save setting and go back to last menu.
5. Press MENU to exit the menu.
Note:
The buttons on the side key panel have the same functions as the corresponding
buttons on the remote control.
The scheme and description are in TV mode as below, there will be a note if there
is an exception.
PICTURE
Picture Mode
Brightness
Contrast
Color
Sharpness
Color Temp.
Tint
50
Soft
50
50
50
50
PICTURE
Off
Noise Reduction
MPEG NR
Display Mode
Back Light
Picture Mode
the picture
mode: Personal, Soft, Normal, Bright four kinds.
Press to adjust the Picture Mode," "
Sharpness
" " . This function is not
available in PC mode.
Press to adjust the Sharpness
Brightness
" " , and usually is
adjusted together with Contrast.
Press to adjust the Brightness
Contrast
" " , Adjusts the
difference between the light and dark areas of the picture.
To get better picture value, Contrast should be adjusted to
the proper value.
Press to adjust the Contrast
Color
" " . This function is not
available in PC mode.
Press to adjust the Color
Tint
" " .
Only can bedone under theNTSC system.
Press to adjust theTint
LOW
50
Full

-15-
Color Temp.
Color Temperature Adjusts the colour temperature of the
picture, to select the option:
as you desired.
Personal
Press OK button to enter the color temperature sub menu.
Cool, Normal, Warm, Personal
Medium: Keep the original white
Warm: Red
: The user may customize the color temperature.
(Red/Green/Blue).
Cold: Blue.
NOISE Reduction
Press button to adjust the noise ofTV, which can choose "Medium, High, Auto, Off,
Low" modes .
" "
Color Temp.
Personal
Color Temp.
R Gain
G Gain
B Gain
55
50
20
MPEG NR
Press button to select four modes of digital noise reduction are available including Off, Low,
Medium and High.
" "
Back Light
Press button to adjust the Back Light." "
Sound Settings
Bass
P""ress button to adjust the bass of the TV.
Treble
P""ress button to adjust the treble of the TV.
Balance
Press button to adjust the balance of the TV." "
Surround
" "Press button to adjust the SURROUND sound
effect which can choose from"Off ,On".
AVL
" "Press button to adjust the AVL of the TV
which can choose from "Off, On" .
Personal
Equalizer
Equalizer
" "
with Personal, Film, News, Music, Normal.
Press button to adjust the Sound Mode,
120Hz, 500Hz,1.5KHz,5KHz,10KHz of TV.
Sound mode
Sound Mode
EQ 120HZ
EQ 500HZ
EQ 1.5KHZ
EQ 5KHZ
EQ 10KHZ
0
0
0
0
0
MENUS CONTROL
Display Mode
Press " " button to select "Full, Zoom1, Zoom2, 4:3 " modes.
SOUND
Equalizer
Bass
Treble
Balance
Surround
AVL
SPDIF TYPE
50
50
50
Off
Off
PCM
SPDIF TYPE
" " " Dolby Digital, PCM,
off " modes.
Press button to select

MENUS CONTROL
-16-
Installation Settings
INSTALLATION
Singnal Source
Auto Search
Channel Skip
Channel Edit
Air
Singnal Source
" "Press button to adjust the Singnal Source
which can choose "Air, Cable".
Auto Search
" "Press button to adjust Auto Search, then
press [OK] button to enter the Auto Search sub menu.
A Channel Search Menu will appear as below.
"AUTO Search" all of the channels at the one time and store all of the channels which
have signal, thenback to channel1 .In theprocess of autosearch, press "MENU"button to
interrupt search .
Channel Skip
You can skip unnecessary program channels of your choice not to be displayed during viewing and
scanning when pressing the" " buttons.Select " " by pressing " OK " buttons to select the
channel that would not like to skip from the channel scan operation.
Channel Skip
1Analog
2Analog
3Analog
4Analog
5Analog
6Analog
Channel Edit
This setting lets you edit channels. press the " " buttons to select Channel Edit Once you
have selected your setting, press [ SOURCE ] to confirm.
Channel Edit
Channel Index
Channel Edit
1
Auto Search
Status: Scanning...
Analog Channels: 0
Digital Channels: 0
20%
Cable

-17-
MENUS CONTROL
Setup Settings
OSD Language
Press button to select OSD language." "
SETUP
OSD Language
TIME
Closed Caption
100/120Hz Scan
Scan Leval
100/200Hz Domo
English
TIME
Press button to select Time. Press OK button
to enter the Time sub menu. Depending on your need
to select: Time Zone, Date/Time, Sleep Time.
" "
TIME
Time Zone
Date/Time
Sleep Time 10 Minutes
Closed Caption
Press button to select Closed Caption. Press OK button to enter the Closed Caption menu." "
Closed Caption
Press button to select Closed Caption. Press OK button to enter the Closed Caption menu." "
Time Zone:
Sleep Time:
Showing the country's time zone.
Date/Time: Set the TV Date/Time.
AUTO: Press button to select
: Press button to select
Press button to select
Lets you choose the off TV time from OFF, 5Minutes, 10Minutes, 15Minutes, 30Minutes,
45Minutes, 60Minutes, 90Minutes, 120Minutes, 180Minutes and 240Minutes.
" " " On ", at the time, shows the time of televison signals.
Date/Time " " " Off ", press number buttons to enter the date or time.
Press " OK " button to select "AM " or "PM ".
Timer : " " " On" , lets you set " On time" or " Off time" .
Closed Caption
Analog Caption
Digital Closed Caption
Digital Caption Style
Off
Off
Off
Low
Off

MENUS CONTROL
-18-
Digital Caption Style
Window Color
Window Opacity
Black
Transparent
Caption Style lets you selectbetween Default, Custom options.
Font Size lets you selectbetween Medium, Large and Small options.
Font Style lets you selectbetween Style(1-7) options.
Font Color lets you selectbetween White, Red,Green, Blue, Yellow, Magenta,Cyan and
Black options.
Font opacity lets you selectbetween solid, translucent, transparentoptions.
Background Color Lets you choosethe color ofthe area ofthe screen behind the digital
closed-caption
text: White, Black,Red, Green, Blue,Yellow, Magenta, or Cyan.
Background opacity letsyou select between solid, translucent, transparent options,
Window Color Lets you selectbetween Red, Cyan, Yellow, Magenta, Black, White, Green,
Blue options.
Window Opacity Lets you selectbetween transparent translucent, solidoptions.
Analog Caption press button to adjustthe AnalogCaption. Which can choose "Off,
CC1, Cc2, CC3,CC4, Text1,Text2, Text3, Text4".
Digital Closed Captionpress button to adjustthe Digital Closed Caption. Which can
choose "Service1, Service2,Service3,Service4, Service5, Service6, Off".
Digital Caption StyleIf available, letsyou customize the following display options:
" "
" "
Digital Caption Style
Caption Style
Font Size
Font Style
Font Color
Font Opacity
Background Color
Background Opacity
Custom
Large
Style1
White
Solid
Black
Solid
100/120Hz Scan (Option)
Press button to select" " " On "or " Off ".
Scan Leval (Option)
Press button to select" " " Low " / " Middle " / " High " / " Modes ".
100/120Hz Domo (Option)
Press button to select" " " Off " / " Demo on Top " / "Domo On Botton " / "Domo On Left " /
" Demo on Right " modes.

MENUS CONTROL
-19-
Change Password
New Password
Confirm Password
Change Password
This option letyou set a new V-chip password.
1. Press MENUon the remote control (the TV's Main
Menu appears).
2. Select ParentalControl.
3. Select ChangePassword and press OK to display
the password resettingmenu.
4. Using numberbuttons to enter the old password,
press OK. Enterthe new password again and press
OK to confirm.
Are you sure
OK Canel
Cleck All
Clear set ofV-Chip.
Advanced
Enter Password
Press / button to select Advanced menu, then press [OK]
button to enter. Input password to enter, default password is
"0000".
Advanced
channel Block
Parental Control
Change Password
clean All
Channel Block
Turn this option on to block the channel you see in the
Select Channel option.
Use the left/rightarrow buttons to find the channel you
want to block,Then press the down arrowbutton to
select Block Channel.Press OK to place a check mark
in the BlockChannel box to block the channel. When
you tune tothat channel you'll need to enter a
password to viewthe channel if the TV Parental
Controls are locked.
Channel Block
2 Analog
3 Analog
4 Analog
5 Analog
6 Analog
7 Analog
Parental Control
You can set the parental control function to suit viewing
for children ofall ages.
Advanced Settings
Table of contents
Other Selectron LCD TV manuals


