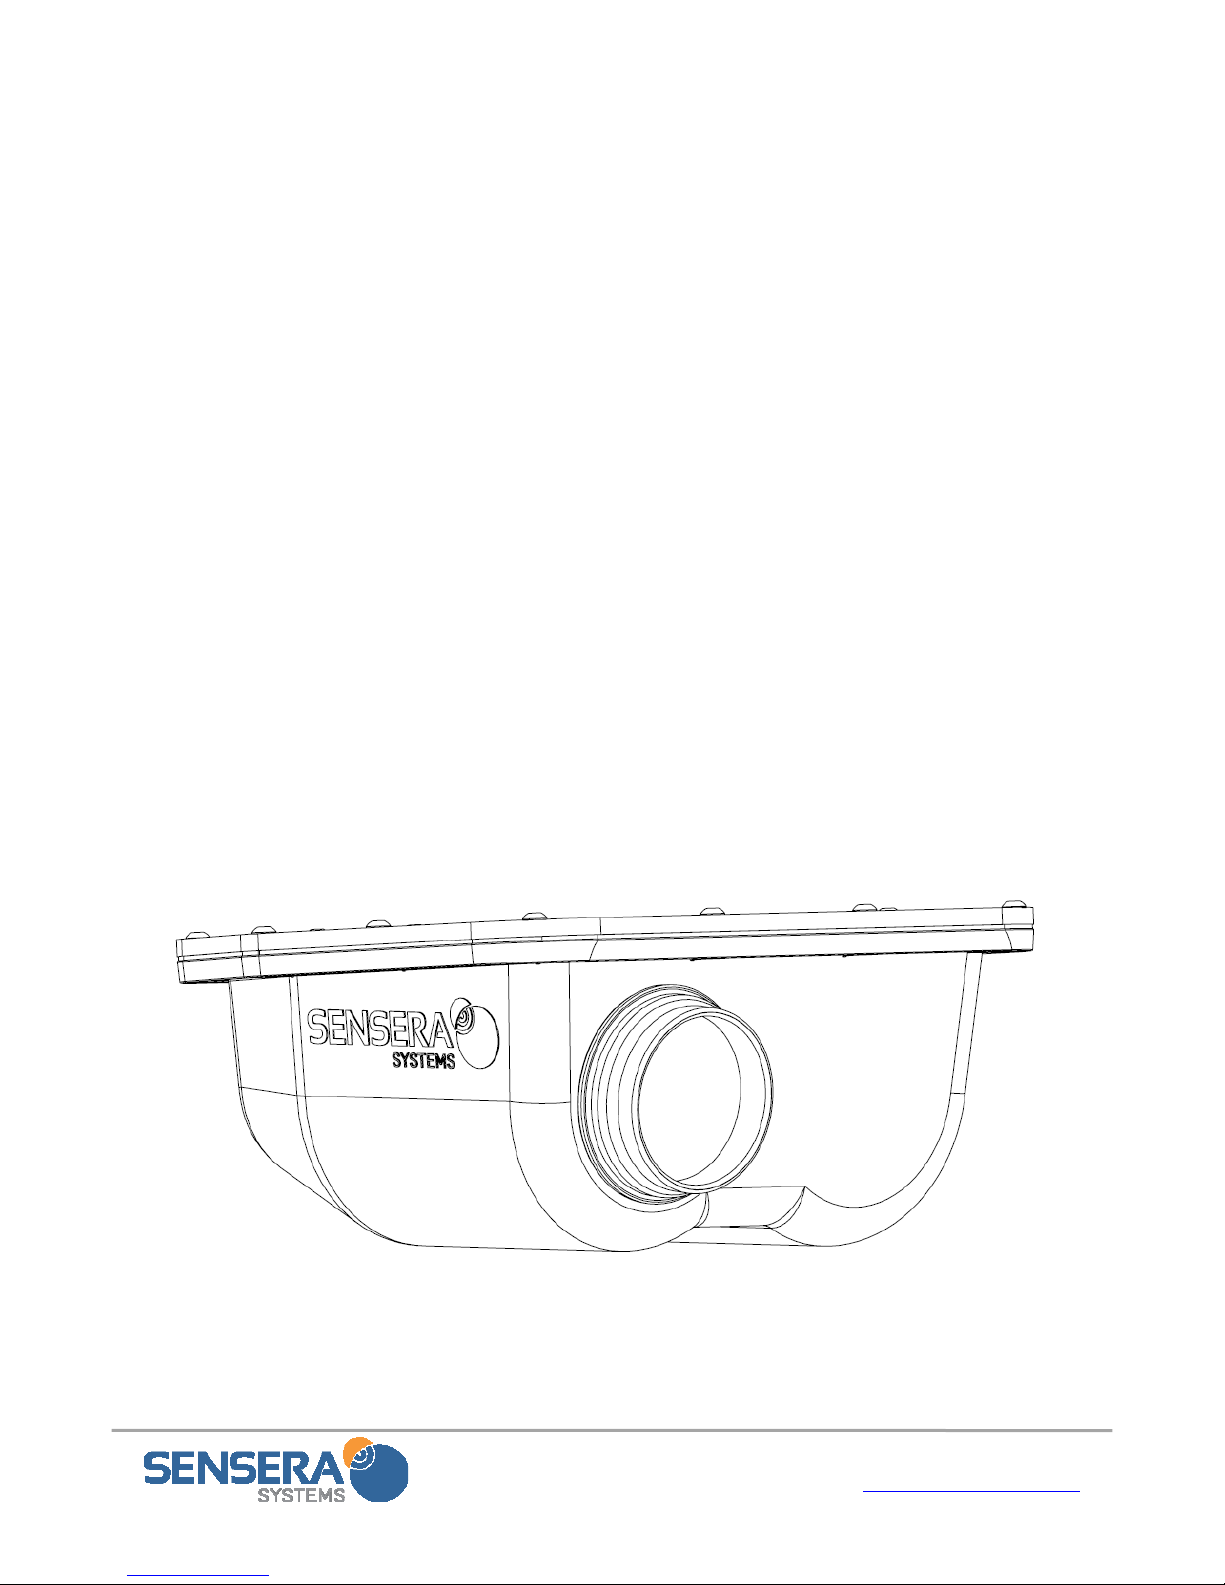
Sensera MC-38 User manual
Page 1 of 45 www.SenseraSystems.com
Installation
&
User Guide
with Quick Start
Models:MC‐38,MC‐68
Version2.9
2/27/2016

Installation & User Guide with Quick Start– MC-30/MC-60 Series
Page 2 of 45 www.SenseraSystems.com
Support
Shouldyourequireanytechnicalassistance,
pleasefirstcontactyourreseller.Iftheyare
unabletoansweryourquestionspromptly,or
youpurchaseddirectlyfromSenseraSystems,
youaredirectedtoourtechnicalsupport
processasfollows:
Checkavailableuserdocumentation
andsoftwareupdatesat
www.senserasystems.com/support
ContactSenseraSystemstechnical
supportteamat:
Or800‐657‐0437
Besuretohaveavailableyourproduct
model#andserialnumberwhenever
contactingtechnicalsupport
ContactInformation
SenseraSystems,Inc.
17301W.ColfaxAve.Ste310
GoldenCO80401
Tel:1‐800‐657‐0437
Fax:1‐888‐764‐5831
SupportEmail:[email protected]
Website:www.senserasystems.com
LegalConsiderations
Videosurveillancemaybeprohibitedbylaws
thatvaryfromlocationtolocation.Checkthe
lawsinyourlocalregionbeforeusingthis
productforsurveillancepurposes.Thisproduct
shallbeusedincompliancewithlocallawsand
regulations.
EquipmentModifications
Thisequipmentmustbeusedandinstalledin
strictaccordancewiththeinstructionsgivenin
theuserdocumentation.Thisequipment
containsnouser‐serviceablepartsor
components.Unauthorizedequipmentchanges
ormodificationswillinvalidateallapplicable
regulatorycertificationsandapprovalsandmay
voidanywarranty.
TrademarkAcknowledgments
Microsoft,InternetExplorer,Mozilla,UNIX,
Windows,WWW,Javaandrelatedtrademarks
areregisteredtrademarksoftheirrespective
holders.Sensera,SenseraSystems,and
MultiSensearetrademarksofSenseraSystems,
Inc.
Liability
Everycarehasbeentakeninthepreparationof
thisdocument.SenseraSystems,Inc.cannotbe
heldresponsibleforanytechnicalor
typographicalerrorsandreservestherightto
makechangestotheproductand
documentationatanytimewithoutpriornotice.
SenseraSystems,Inc.makesnowarrantyofany
kindwithregardtothematerialcontained
withinthisdocument,including,butnotlimited
to,theimpliedwarrantiesofmerchantability
andfitnessforaparticularpurpose.Sensera
Systems,Inc.shallnotbeliablenorresponsible
forincidentalorconsequentialdamagesin
connectionwiththefurnishing,performanceor
useofthismaterial.Theproductisonlytobe
usedforitsintendedpurpose.

Installation & User Guide with Quick Start– MC-30/MC-60 Series
Page 3 of 45 www.SenseraSystems.com
1SAFEGUARDS
Avoidexposingtheproducttovibration,shocks,orheavypressureorextreme
temperatureconditions.
Donotinstalltheproductonunstablebrackets,orunstablewallsorsurfaces,sincethis
maycausedamagetotheproduct.
Onlyuseapplicableandrecommendedtoolswheninstallingtheproduct.
Donotusechemicals,causticagents,oraerosolcleaners.
Donotattempttorepairtheproductyourself.ContactSenseraSystemsoryour
authorizedSenseraSystemsreseller.
StoretheSenseraproductinadryandventilatedenvironment.
Usetheoriginalpackagingorequivalentwhentransportingtheproducttoprevent
damage.
2QUICKSTART GUIDE
Thisdocumentcoversallcameramodelsinthefollowingseries:
MC‐38,MC‐68forallcarrieroptions.
2.1 Package Contents
TheMC‐30/MC‐60SeriesCameraKitincludesthefollowinghardwarecomponents:
MC‐30/MC‐60SeriesCamera(colors
vary)
Solarpanelwithcable
USBcable–mini‐A
2xMountingarmwithadapterplatekit
Stainlesssteelstrapkitforpolemount
QuickStartGuidehardcopy
IMPORTANT:TheMC‐30/MC‐60Series
camerasystemrequiresSenseraCloudServiceforoperation.CloudServiceispurchasedfora
specificcamera,referencedbytheDeviceID(SerialNumber)onthelabelontheoutsideofthe
camera.Youcanpurchaseormodifyyourcloudservicebyvisitingwww.senserasystems.com
orcalling1‐800‐657‐0437.ThisquickstartassumesyouhavepurchasedCloudServiceforyour
device.

Installation & User Guide with Quick Start– MC-30/MC-60 Series
Page 4 of 45 www.SenseraSystems.com
2.2 Create Account and Test Access
ItisrecommendedthatyoucreateyourWebAppuseraccountandregisterthecameratothe
systembeforeinstallingattheremotesite.Youwillneedtohavecellularservice(orconfigureto
WiFi)atthelocationyouaredoingthistest.ThisQuickStartassumesyouhaveMultiSense
CloudServiceforCellularorWiFiserviceactivatedwithSenseraSystemsasofthedateyouare
installing.
1. Pointyourwebbrowserto:webapp.senserasystems.com
2. Attheloginscreen,choose“CreateanewSensera
WebAppAccount”.Youwillneedtoenteraunique
usernameandapassword.
3. Loginwithyournewlycreatedcredentials.
4. Thiswilltakeyoutothe“Systems”screen.Pulldownthe
“RegisterNewDevice”menuandentertheSerialNumber
(frombackofcamera).Time‐zone,name,andgroupcanbe
sethereoratanytimelater.
5. ClickRegister.YourCamerashouldnowappearintheSites
andGroupslist.Itmayshow“offline”untilyoucomplete
nextsteps.
6. ConnecttheincludedUSBcableintocomputerandtothe
MC‐38/MC‐68(unscrewthelowercapandplugin),FOR2‐
3MINUTESANDTHENUNPLUG.Orconnectthesolar
panel,indirectsunlight.This“wakesup”thecameratoberecognizedbytheWebApp.
Ifthecamerahasbeenstoredorunusedformorethanafewdaysyoumayneedto
chargethecamerafirst.Thisisdonebypluggingitintothesolarpanelandplacingin
thesunfor1‐2hoursormore.
IfyouhavepurchasedCellularservice,thedeviceshouldnowbeonline.Ifyouare
connectingviaWiFiseestep8.
ClickRegister.Afterafewminutes,yourCamerashouldnowappearintheSitesandGroups
listas“Online”.Ifitdoesnotdisplay“Online”afterseveralminutes,pleasesee
Troubleshootingsection.
7. Visithttp://www.senserasystems.com/products/MC‐30‐cameraOR
http://www.senserasystems.com/products/MC‐60‐camera“Documents”tabto
downloadcompleteInstallation&UserGuideforcompleteinstructionsonthecamera.

Installation & User Guide with Quick Start– MC-30/MC-60 Series
Page 5 of 45 www.SenseraSystems.com
8. WiFiSetup–ifyouareconnectingyourcameraviaWiFi,youwillneedtoconfigurethe
SSID/PasswordofyourlocalWiFinetworkintothecamera.YouwillneedaWiFi
enableddevicewithawebbrowsersuchasasmartphone,PCortabletinorderto
connecttothecameratoconfigurethecamera’sWiFiconnectivity.SeeSection4.1.2
WiFiNetworkConnectfordetailsonhowtoconfiguretheWiFiconnectionofthe
camera.
2.3 Installation and Mounting
Tools:Flatheadscrewdriveror5/16socket
(preferred)forsteelbands.Electricdrill/nutsetter
(optional).Ladderforaccessingpole.
Mountthecameraandsolarpanelatthesitewith
thecameraatthedesiredviewingangle,withthe
includedbracketkit.Ifpossibleitisbesttoaimthe
camerasoitispointedinaNortherndirection
towardyoursite,tolimitsolarglareintheimages.
Alternatively,ahighermounting,withcamerapointingmore
“down”willalsohelpwithglare.
1. Attachthecamerabrackettothepole/fence/building
usingtheincludedbracketsandpipebanding.This
shouldbeorientedsothatthebracketfacesingeneral
directionthatcamerawillbeaimed.Ifattachingto
woodenpostorpoleuselagbolts.Forsmallerpoles,
pipebandingmaybewrappedaroundtwice.The
bandscanbetightenedwithastraightscrewdriver
or5/16socket(preferred).
2. AttachthesecondbracketfortheSolarPanelto
pole/fence/buildingusingtheincludedbracketsand
pipebanding.Insummeritisdesirabletoreduce
theheat/sunloadonthecamera.Ifpossible
mountthisbracketdirectlyabovethecameraso
thatthesolarpanelwillprovideshadingtothe
camera(thisisoptionalandnotrequiredifthe
solarpanelneedstobemountedelsewhere).
Incoldclimatewintersitisdesirabletoincrease
heat/sunsoifpossiblemountthisbracketsoitdoesnotshadethecamera(again,thisis
optional).Thepanelshouldbeorientedsothatthebracketfacesingeneraldirectionof

Installation & User Guide with Quick Start– MC-30/MC-60 Series
Page 6 of 45 www.SenseraSystems.com
thesuntravel(i.e.,SouthernskyforNorthAmericanlocations).Thismayrequire
adjustmentfromsummertowinterinanorthernclimateastheangleofthesunchanges.
3. Attachcameratothecamerabracketusingtheincluded¼‐20thumbscrew.Aimthe
camerainthegeneraldesireddirectionandtighten.
4. Attachthesolarpaneltothesolarpanelbracketusingtheincluded¼‐20thumbscrew.
PanelshouldbeaimedSouthtiltedtoapproximately30degreesfromflat(1/3oftheway
fromflattovertical).
5. Attachsolarpanelpowercabletothecamera’spowerconnector.Thiswill“wakeup”
thecamera,allowingittoconnecttothenetwork.Thismaytakeafewminutes.Make
sureconnectorisscrewedinsecurely.
6. Dofinalaimingofcamera,adjustingthepanandtiltthumbscrewas
necessary.Amobilesmartphoneortablet(orlaptop)connectedtothe
internetisrecommended.LogintoyourWebAppAccount,andnavigate
totheViewpageforthiscamera.ClickontheAimingbutton(“cross‐hair”)icontoload
theaimingpage,whichwillupdatealow‐resolutionpictureevery15‐20secondsfor
aimingpurposes.Youcanalsoclickthe“Takepicturenow”icontotestafull‐resolution
picture.Adjustcameraasnecessarytoachievedesiredfieldofview,andthenand
tightenallthumbscrewswell.
2.4 Accessing the Camera From the WebApp User Interface
AcompletedescriptionoftheWebAppuserinterfacefunctionsandcameraconfiguration
optionscanbefoundinSection6.
2.4.1 Configure Time-lapse & DVR
NavigatetotheViewpageandclicktobringupConfigureTime‐lapsescreen.Hereyoucanset
theintervalforyourtimelapse,startandstopdate,andhoursanddaysofweekto
capturetime‐lapse.ForMC‐6xSeriesmodels,NavigatetotheViewpageandclick
andConfigureDVR.EnabletheDVR,andselectscheduleandrecordingoptions
desired.
2.4.2 Configure Contacts
NavigatetotheViewpageandclick tobringuptheAccountPreferencesscreen.Enterone
ormoreemailaddressesasAccountPointofContact.Thisisusedtosendnoticesregardingthe
cameraaccount.Yourcameraisnowconfiguredandwillcollecttime‐lapseimagesasspecified.

Installation & User Guide with Quick Start– MC-30/MC-60 Series
Page 7 of 45 www.SenseraSystems.com
Forcompletedescriptionofallthefunctionsandconfigurationsavailableseethefollowing
sections.
2.5 Additional Documentation
Completeusermanuals,datasheets,drivers,andotherdatacanbedownloadedfrom:
http://www.senserasystems.com/product‐support

Installation & User Guide with Quick Start– MC-30/MC-60 Series
Page 8 of 45 www.SenseraSystems.com
[thispageintentionallyleftblank]

Installation & User Guide with Quick Start– MC-30/MC-60 Series
Page 9 of 45 www.SenseraSystems.com
Contents
1Safeguards...........................................................................................................................................3
2QuickstartGuide................................................................................................................................3
2.1PackageContents.......................................................................................................................3
2.2CreateAccountandTestAccess..............................................................................................4
2.3InstallationandMounting........................................................................................................5
2.4AccessingtheCameraFromtheWebAppUserInterface....................................................6
2.4.1ConfigureTime‐lapse&DVR..........................................................................................6
2.4.2ConfigureContacts............................................................................................................6
2.5AdditionalDocumentation.......................................................................................................7
3SystemOverview.............................................................................................................................12
3.1ProductFeatures......................................................................................................................12
3.2HardwareComponents...........................................................................................................13
3.3WebAppUserInterface...........................................................................................................13
3.4CommunicationsArchitectureandOperation....................................................................14
4PretestandConfiguration...............................................................................................................14
4.1ConnectMC‐30/MC‐60SeriestoNetwork...........................................................................15
4.1.1CellularNetworkConnect..............................................................................................15
4.1.2WiFiNetworkConnect....................................................................................................15
4.2CreateUserAccount................................................................................................................17
4.3RegisterDevice.........................................................................................................................18
5Installation.........................................................................................................................................18
5.1ToolsRequired..........................................................................................................................18
5.2ChoosingaCameraLocationandOrientation....................................................................19
5.3MountingtheCameraandSolarPanel.................................................................................19
5.4SolarPanelOrientation...........................................................................................................20
5.5CameraAiming........................................................................................................................20
6WebApplicationUserInterface.....................................................................................................21
6.1BrowserRequirements............................................................................................................21
6.1.1MobileDevices(phones,tablets–IOS,Android)........................................................21
6.2LoginPage.................................................................................................................................21
6.2.2MultiUserAccess....................................................................................................................22
6.3AccountPreferences................................................................................................................22
6.4SystemPage..............................................................................................................................23
6.5ViewPage..................................................................................................................................23
6.5.1NavigationArea...............................................................................................................24
6.5.2DataUsageEstimator......................................................................................................25
6.5.3ImageViewerSection......................................................................................................25
6.5.4TimelineSection...............................................................................................................32
6.5.5CapturedImages..............................................................................................................34
6.5.6CameraStatus...................................................................................................................34
6.5.7ImageCompare................................................................................................................34

Installation & User Guide with Quick Start– MC-30/MC-60 Series
Page 10 of 45 www.SenseraSystems.com
6.6DashboardPage........................................................................................................................35
6.7LoggingPage............................................................................................................................35
6.8AccessingFromMobileDevices............................................................................................36
7StoringandMovingtheUnit..........................................................................................................36
7.1StoringorMoving....................................................................................................................36
7.2Reconfiguring/ReinstallingStoredUnit................................................................................36
8TechnicalSpecifications..................................................................................................................37
9Troubleshooting...............................................................................................................................38
9.1CameraShowsOnly“Offline”...............................................................................................38
9.1.1CellularConfiguration....................................................................................................38
9.1.2WiFiConfiguration..........................................................................................................39
9.2CameraDoesnotAppearinmyWebAppAccount............................................................39
9.2.1CheckRegistration...........................................................................................................39
9.2.2CheckNetworkConfiguration.......................................................................................39
9.3StreamingVideoorDVRVideoClipswillnotPlayorDisplay........................................39
9.4USBConfig.exeApplicationDoesnotConnecttoCamera................................................39
9.5CameranotconnectingtoWebAppserveroverWiFi........................................................40
9.6Reusingacamerathathasbeenstoredorisinunknownstate.........................................40
9.7Movingacameratoanewproject.........................................................................................40
10RESOURCESANDTECHNICALSUPPORT..............................................................................41
10.1Documentation.........................................................................................................................41
10.2TechnicalSupport....................................................................................................................41
11TripodMountingKit.......................................................................................................................41
11.1Components..............................................................................................................................41
11.2Tools...........................................................................................................................................42
11.3Setup..........................................................................................................................................42
12CableLockKit..................................................................................................................................43
13DataPlanandCameraConfigurations.........................................................................................44
13.1CameraSettingsthatAffectDatausage...............................................................................44
13.2EstimatingDataPlanUsage...................................................................................................44
13.3MonitoringYourDataPlanUsage........................................................................................44

Installation & User Guide with Quick Start– MC-30/MC-60 Series
Page 11 of 45 www.SenseraSystems.com
[thispageintentiallyleftblank]

Installation & User Guide with Quick Start– MC-30/MC-60 Series
Page 12 of 45 www.SenseraSystems.com
3SYSTEM OVERVIEW
TheMC‐30/MC‐60SeriesCameraisdesignedasanintegratedsystemthatworkstogetherwith
theMultiSenseCloudServicetoprovide
acompletelyhostedapplicationand
networkconnectivityservice.
TheMC‐30/MC‐60Seriescommunicates
viacellularorWiFitotheMultiSense
CloudService.
AllMC‐30/MC‐60Seriescamerasare
configuredfromthefactorytoknow
howtocommunicatewiththeCloud
Servicegreatlysimplifyingsetup.As
soonasthecamerareceivespower,and
anetworkconnectionisestablished,the
MC‐30/MC‐60Serieswillconnectwith
theCloudService.
OnceyoulogintoyourWebApp
Account,andRegisteryourdevicewith
yourloginaccount,itwillbeavailableto
(only)youraccountandfullnetworkmanagementwillbegin.
BecausetheMC‐30/MC‐60SeriesispreconfiguredtocommunicatewiththeMultiSenseCloud
Service,noconfigurationofyournetworkisrequired(i.e.nocelltowerconfiguration,noLAN
orrouter/firewallconfiguration).
3.1 Product Features
TheMC‐30/MC‐60SeriesandMultiSenseCloudServiceprovidethefollowingfeaturesand
capabilities:
ImageDisplayandManage
TakeliveimageORvideo
Search/Viewimagebydate/time
Displaystreamingvideo(MC‐6x)
Browseallimages/videos
Shareimage(viaemail,text)
Exportimages,time‐lapsetodesktop
Annotateimage(text,draw)
Compareimages
Createtime‐lapsemovie
Deleteimages,videos
Displayweather(live,historical)
Upload/ViewDVRimages/videos
CameraConfiguration
EditCameraResolution
SetTimeZone

Installation & User Guide with Quick Start– MC-30/MC-60 Series
Page 13 of 45 www.SenseraSystems.com
Configuretime‐lapsefrequency
Configuretime‐lapseschedule(days
ofweek
ConfigureDVRsettings
ConfigureLiveViewSettings
Alerts&Alarms
Configuresystemalarms(text/email
address)
Viewalarmstatus
Viewalarmhistory
CameraStatus
Displaynetworkstatus
Displaybatterystatus
Displaytemperature
Displaypowerconsumption
Displaychargingstatus
SystemManagement
Register/Adddevicetosystem
EditSystem/SiteName
Editdevicenames
Displaydevicetypeandconfiguration
Displaydevicelocation
Showservicestatus
Setdefaultemail,textforalarms/alerts
DataloggingandAlert
Configuredatalogging(select
models)
Configurealertconditions(select
models)
Exportdata
3.2 Hardware Components
MC‐30Series/MC‐60SeriesCamera
Solarpanelwithattachedcable
USBcable–mini‐A
1xMountingarmkit(2armswithadapterplates
attached)
2xStainlesssteelstrapkitforpolemount
QuickStartGuide
Accessories(Tripod,cablelock)willbeshippedseparately
3.3 WebApp User Interface
TheWebAppprovidesfullweb‐basedaccesstoyourcamerafromabrowseronanyinternet
enabledPC,tabletorsmartphone.TheWebAppUserInterfaceisintegratedwiththe
MultiSenseCloudServicetoprovidecompletecameramanagementincludingalerting,online
status,dataarchiving,anduseraccessandconfiguration.DetailsoftheWebAppUserInterface
arefoundinSection6:WebApplicationUserInterface.

Installation & User Guide with Quick Start– MC-30/MC-60 Series
Page 14 of 45 www.SenseraSystems.com
3.4 Communications Architecture and Operation
TheMC‐30/MC‐60SeriescamerasareconfiguredtoautomaticallyconnecttotheMultiSense
CloudService.TheMC‐30/MC‐60SeriescamerahasbothcellularandWiFiinterfaces,however
thecameramustbeconfiguredtouseoneortheothernetwork.Thefactorydefaultiscellular.
TheMC‐30/MC‐60Seriesshipsfromthefactoryina“dormant”modeinordertopreserve
batterypowerduringshippingandstorage.Inthisdormantmodethecamerawillnotattempt
anycommunications.ThedormantmodeisexitedautomaticallywhenevereithertheUSBcable
isconnected,orsolarpower(orauxiliarypowerviathesolarpowerconnector)isapplied.
MC‐30/MC‐60Seriescamerasarebatterypowereddevicesdesignedtorunonverylowpower
continuouslywithonlyintermittentsolarpowerinputs.MC‐30/MC‐60Seriescameras
periodicallycontacttheWebApptocheckforanywaitingusercommands,andtouploaddata.
ThelengthoftimebetweencontactstotheWebAppisdynamicandwillvarydependingon
activity.TheWebAppuserinterfaceundertheViewwindowwillshowyouthetimeuntilthe
nextexpectedcontactbythecamera.
AlertswillbeprocessedimmediatelyandcommunicatedtotheWebAppserver(andontothe
configuredNotificationaddresses).
TheMC‐30/MC‐60Serieshassignificantlocalstoragecapabilities,andsoifcommunicationsare
unavailable,datawillbeautomaticallystoredlocally,anduploadedthenexttime
communicationsareavailable.
MC‐60Seriescamerasstore“DVR”images/videoslocallyonthecamera’sflashmemory.
Images/videoscanbeuploadedbytheuserfromtheWebApp.
TheMC‐60Seriesmodelssupportlivevideostreaming.Duringlivevideostreaming,asingle
H.264videostreamissentfromthecameratotheWebAppserver.Theserverthenrelaysthis
streamtoanyusersthatareloggedintotheaccountandviewingthevideostreams.TheMC‐60
SeriesmodelsalsosupportLiveView.DuringLiveViewlowerresolutionimagesaresentfrom
thecameratotheWebAppserveratauserdefinedfrequency.Thisallowsforanuptodate
viewofthesitewithsignificantlylessdatausagethanthatrequiredbyavideostream.
4PRETEST AND CONFIGURATION
BeforeinstallingtheMC‐30/MC‐60Seriescameraataremotefieldsite,itisrecommendedthat
youfirstconnectthecameratotheCloudService,andcreateyouruserlogin.Thiswillreduce
thetimerequiredatthesite.
Therearethreestepsrecommendedfortheinitialtestandconfiguration:
ConnectMC‐30/MC‐60Seriestothenetwork(mobileorWiFi)

Installation & User Guide with Quick Start– MC-30/MC-60 Series
Page 15 of 45 www.SenseraSystems.com
CreateaUserAccountontheWebApp(thisstepcanbeskippedifyoualreadyhavean
account)
RegisteryourdevicetoyourUserAccount
4.1 Connect MC-30/MC-60 Series to Network
AllMC‐30/MC‐60SeriescameraswilloperateoneithercellularorWiFi.Bothmodesrequirean
activeMultiSenseCloudServiceplanforthecamera.Camerasshippre‐configuredforcellular
sowillwork“outofthebox”oncellularwithnoadditionalconfiguration.
ForuseonWiFi,youwillneedtochangethecameratoWiFimodeandenteryour
SSID/PasswordoftheWiFinetworkyouwanttoconnectthecamerato.ToconfiguretoWiFi
mode,connecttheUSBcabletoacomputerandtothecameratoinitiatethecamera’sbuiltin
WiFihotspot.ThenuseaWifienableddevice(laptop,phone,tablet)toconnecttothecamera’s
hotspot,andconfiguretheWiFicredentialsyouwantthecameratooperateon(seebelow).
4.1.1 Cellular Network Connect
MC‐30/MC‐60Seriescamerascomefromthefactorypre‐configuredforcellularforaspecific
carrier(dependingonmodel).Theyalsocomefromthefactoryina“dormant”modeinorderto
preservebatterylevelsduringshippingandstorage.Thedormantmodewillbeexited
wheneverpowerisappliedbyeitherconnectingtheUSBcable,orthesolarpanel(with
sufficientdirectsunlight).
Ifthecamerahasbeenstoredorunusedformorethanafewdaysyoumayneedtochargethe
camerafirst.Thisisdonebypluggingintothesolarpanelandplacinginthesunforanhouror
more.
Assoonastheunitexitsdormantmode,itwillcontacttheWebApp.Ifyouhavealready
createdaUserAccountandregisteredthecamera,itwillchangefrom“offline”to“online”
statusshortlyafterthecameracontactstheWebApp.IfyouhavenotyetcreatedaUser
Account,theWebAppwillkeeptrackofthedevice,andonceyoudocreateauseraccountand
registerthecameratothataccount,itwillappearintheaccountas“online”.
4.1.2 WiFi Network Connect
YoumustconfiguretheMC‐30/MC‐60Seriescamerafromthedefaultcellularconfigurationand
providetheWiFiSSID/passwordforthenetworkyouwantthecameratousetoconnecttothe
Internet.
ToconfigureyourdevicetoWiFi:

Installation & User Guide with Quick Start– MC-30/MC-60 Series
Page 16 of 45 www.SenseraSystems.com
1. ConnectUSBcabletothecamera,andtoacomputer.Thiswillopenthecamera’sWiFi
hotspotwithSSID“SenseraMCXXXX”onchannel1.Where“XXXX”isthelast4digits
oftheserialnumberofthatcamera.
2. ThishotspotwilluseWPA2
authenticationandthepassword
willbethe“MC”plustheLAST6
DIGITSOFTHEcamera’scase‐
sensitiveserialnumber(foundon
thestickeronbackof
camera).Example:Serialnumber
isMC987654321,passwordis
MC654321.
3. Whenyourdeviceisconnectedto
theSenseraMCxxxxhotspot,open
awebbrowserandenterthisURL:
http://camera
(Ifthisshouldnotworkforsome
reason,tryhttp://192.168.43.1
includethe“http://”ineither
case).
NOTE:Whenopeningthecamera
webpageasecondorthirdtime,besureto“refresh”yourbrowser.Alsobesureto“Save
Settings”whenfinished.
4. Onsuccessthebrowserwilldisplaytheconfigurationwebpage.Thispagewilldisplay
thecameraserialnumberandbuttonstoselectWiFiorMobile.WhenWiFiisselected,
therewillalsobefieldstoentera(casesensitive)SSIDandpasswordfortheWiFi
networkthecameraistouse.Ifthepagecomesupblank(noserialnumberand
neitherMobileorWiFiselected)thenrefreshthebrowser.
5. Afterdesiredsettingshavebeenentered,clicking“SaveSettings”willsaveyoursettings
tothecamera.
6. Thereisalsoacheck‐boxmarked“Dormantmodeonsave”.Ifthe“Dormantmode”
Check‐boxisselected,thecamerawillenterdormantmodeimmediately.Otherwise,
thecameraremainsinconfigurationmodeuntiltheUSBisdisconnected,atwhichtime
itwillattempttobeginconnectingtoWebAppserverusingthenewsettings.Allowup
tooneminuteforserverconnectionstatustoupdate.

Installation & User Guide with Quick Start– MC-30/MC-60 Series
Page 17 of 45 www.SenseraSystems.com
7. IMPORTANT:Theconfigurationpagewillalsodisplaytheconnectionstatusthelast
timethecameraattemptedtoconnecttoanetwork.Ifthecameradoesnotappear
“online”intheWebAppafterchangingtoWiFi,reconnecttotheHotSpot,openthe
browser,andcheckthestatusofthelastconnectionattempt.Possibleissuescaninclude
misspelledSSIDorpassword,WiFinetworknotwithinrange,internetnotreachable
fromthespecifiedWiFinetwork.
8. ROUTERSANDFIREWALLSANDPROXIES:TheMC‐30/MC‐60Seriesaredesigned
toworkwithnomodificationstoroutersorfirewalls.Thecameracommunicates
outboundtotheWebAppserver.Therearenoinboundconnectionstocamerainitiated
bytheWebAppserver.Inthemajorityofconfigurations,norouterorfirewallchanges
areneeded.However,ifyourfirewall/routerblocksOUTBOUNDtraffic,youneedto
ensurethatOUTBOUNDport8080and55400areopentothecamera.Thecameraisnot
designedtogothroughaproxyforinternetconnectivity.
TheMC‐30/MC‐60SeriescamerashouldnowbeconnectedviaWiFi,andwillautomatically
connectwiththeWebAppserver.Thismaytakeupto5‐10minutes.Ifyouhavealready
createdaUserAccountandregisteredthecamera,itwillchangefrom“offline”to“online”
statusshortlyafterthecameracontactstheWebApp.IfyouhavenotyetcreatedaUser
Account,theWebAppwillkeeptrackofthedevice,andonceyoudocreateauseraccountand
registerthecameratothataccount,itwillappearintheaccountas“online”.
4.2 Create User Account
AUserAccountisrequiredinordertoaccessyourcamerasviatheWebApp.TheUserAccount
ensuresthatonlyyoucanaccessyourcamerasordata.
TocreateaUserAccount:
NavigatetotheWebAppLoginpage
Choose“CreateanewSenseraWebAppAccount”(bottomofpanel)
Fillinanemailaddress(thisisyourusernameandisusedforalertsabouttheaccount
andtoretrieveyourpassword)
ChooseaPassword
Click“CreateAccount”

Installation & User Guide with Quick Start– MC-30/MC-60 Series
Page 18 of 45 www.SenseraSystems.com
4.3 Register Device
TheMC‐30/MC‐60SeriescamerawillautomaticallyconnecttotheWebAppserverassoonasa
networkconnectionisestablished.However,itwillnotshow
upinyourspecificUserAccountuntilyouregisterthedevice
underyourparticularUserAccount.Thisallowsprivate
accesstoyourspecificcamera.
Youcanregisteryourdeviceatanytime,whetherthedevice
isonlineornot.
Toregisteryourdevice:
Logintoyouruseraccount
Gotothe“Systems”page
Pulldown“RegisterNewDevice”menu
EntertheSerialNumberofthedevice.Thiscanbefoundon
thebackoftheMC‐38/MC‐68Camera
Selectthetimezoneyourcamerawillbeinstalledat.This
allowsthetime‐lapsescheduletooperatecorrectly.
Youmayalsoentera“Name”forthecamera(ofyour
choosing)
Youmayalsoaddthisdevicetoa“SystemorSite”.Thisisa
groupingofcameras.
Click“Register”.
Yourdeviceshouldnowshowupunder“SitesandGroups”intheGroupyouaddeditto(or
“OtherDevices”groupifyoudidnotputitinagroup).The“Status”willshowwhetherthe
deviceisonlineornot(thismaytakeafewminutestoupdate).
5INSTALLATION
ThissectiondescribesphysicalinstallationoftheMC‐30/MC‐60Seriescamera/solarpanel
systematthesite.TheMC‐30/MC‐60Serieshasbeendesignforextremelysimpleandquick
installationinavarietyofscenarios.
5.1 Tools Required
Thefollowingtoolsmayberequireddependingonthemountinglocation:

Installation & User Guide with Quick Start– MC-30/MC-60 Series
Page 19 of 45 www.SenseraSystems.com
Ladder
Largeflat‐headscrewdriveror5/16”nutdriver(recommended)forstainlesspolestraps
No.2Philipsscrewdriverforpole/wallmountifscrewinginmountplate
Lagboltsifmountingtowoodenpole/post
Smartphone/tablet/laptopwithinternetconnection(recommendedonlyforfinalaiming
ofcamera)
5.2 Choosing a Camera Location and Orientation
Choosingacameralocationwilldependonanumberofconsiderationsincluding:
Desiredangleofviewofthebuilding/location
Availablemountinglocations
Sundirection
Itisrecommendedthatyourcamerabeaimed“away”fromthesunforbestresults.Formost
locationsinNorthAmerica,thismeansthatthecamerashouldNOTfaceinaSoutherly
direction(however,ifmountedatahigherlocation,lookingmoredownward,southerlyfacing
maybeacceptable).
Highermountinglocationsgenerallyprovidebetterimageviewpoints.
5.3 Mounting the Camera and Solar Panel
Mountthecameraandsolarpanelatthesiteatdesired
viewingangle,withtheincludedbracketkit.
1. Attachthecamerabrackettothepole/fence/buildingusingthe
includedbracketsandpipebanding.Thisshouldbeorientedso
thatthebracketfacesingeneraldirectionthatcamerawillbe
aimed.Forsmallerpoles,pipebandingmaybewrapped
aroundtwice.
2. AttachthesecondbracketforSolarPaneltothe
pole/fence/buildingusingtheincludedbracketsandpipe
banding.IMPORTANT:Thisshouldbeorientedsothatthe
bracketfacesingeneraldirectionofthesuntravel(i.e.,Southfor
NorthAmericalocations).
3. Attachcameratothecamerabracketusingtheincluded¼‐20

Installation & User Guide with Quick Start– MC-30/MC-60 Series
Page 20 of 45 www.SenseraSystems.com
thumbscrew.Aimingeneraldesireddirectionandtighten.
4. Attachedsolarpaneltosolarpanelbracketusingtheincluded¼‐20thumbscrew.Panel
shouldbetiltedtoapprox.45degreesandpointedSouth.SeesectionbelowonSolar
PanelOrientation.
5. AttachsolarpanelpowercabletotheMC‐30/MC‐60Seriespowerconnector(lower
bulkheadconnector).Thiswill“wakeup”thecamera,allowingittoconnecttothe
network.Thismaytakeafewminutes.Makesuretoscrewpowerconnectorinsecurely
tolowerbulkheadconnector.
5.4 Solar Panel Orientation
Thesolarpanelwilloperatebestifitisorientedinthedirectionofthesun.ForNorthAmerica
therecommendedorientationisasfollows:
Azimuth:DueSouth
TiltAngle:2⁰intheSummer,15⁰intheSpring/Falland
upto47⁰intheWinter.
Iftheunitwillbedeployedyear‐round,andyouare
unabletoreadjustthetiltangle,werecommendatiltangleofapproximately30⁰or1/3upfrom
horizontal.
Ifthetiltisnotadjustedbetweensummerandwinter,thesystemwillstilloperate,howeverit
maynotcollectthemaximumamountofenergy.TheSolarlogsavailableintheWebAppallow
youtochecksolarperformanceofthesystemovertime.
TIP:Therearesmartphoneapplicationsavailablethatwillprovidecompassheadingtohelp
withproperorientationofthesolarpanel.
5.5 Camera Aiming
OncetheMC‐30/MC‐60Seriescameraandsolarpanelaresecurelymountedand
connected,thelaststepistodoafinalaimingofthecameratoachievethedesired
fieldofview.Camerasshouldbepointedinanortherlydirectionifpossible,toreduce
solarglareinimages.
Ifyoudonothaveanysmartphoneorinternetaccessavailable,youcanhaveacolleaguecheck
thecameraaimingfromaremotecomputer,andcommunicateviaphonewhetherthecamera
aimneedstobeadjustedup/downorleft/right.
Fromeitheraremotecomputer,orfromahandheldsmartphone/tablet,youcanusetheCamera
AimingiconontheWebApptofacilitatethisprocess.
This manual suits for next models
1
Table of contents
Other Sensera Security Camera manuals


