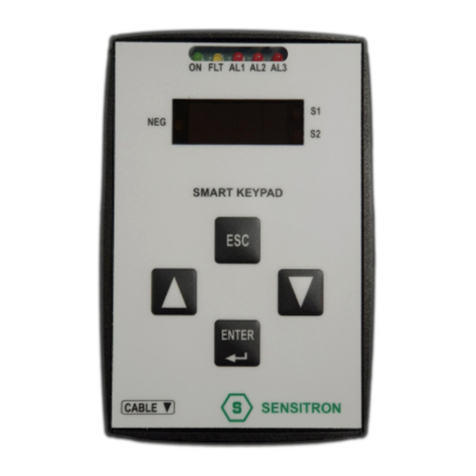
Sensitron SMART 3 User manual

MT1195 rev3.4.doc 03/09/2019 Pag. 1 di 13
TASTIERA CALIBRAZIONE
PORTATILE
RIVELATORI DI GAS
SERIE SMART 3
HANDHELD CALIBRATION
KEYPAD
FOR THE SMART 3 GAS
DETECTOR
INDICE / INDEX
1 INTRODUZIONE 2
1 INTRODUCTION 2
2 COLLEGAMENTO AL RIVELATORE E
FUNZIONAMENTO 2
2 CONNECTION TO THE GAS DETECTOR AND
OPERATION. 2
2.1 Identificazione delle parti della tastiera 2
2.1 Identification of the keypad part 2
2.2 Collegamento al rivelatore gas Smart 3 3
2.2 Connection to the Smart 3 gas detector 3
3 ISTRUZIONI DI CALIBRAZIONE 4
3 ADJUSTMENT INSTRUCTIONS 4
3.1 Premessa 4
3.1 Forewords 4
3.2 Menù di accesso in taratura 5
3.2 Adjustment mode access 5
3.3 Taratura dello ZERO 6
3.3 ZERO adjustment 6
3.4 Taratura dello SPAN 7
3.4 SPAN adjustment 7
3.5 Taratura dello SPAN per rivelatore
Ossigeno 8
3.5 SPAN adjustment for Oxygen gas
detector 8
3.6 Taratura dell’uscita 4-20 mA 9
3.6 4-20 mA output adjustment 9
3.7 Procedura di reset degli errori 10
3.7 Error reset procedure 10
3.8 Risoluzione dei problemi 11
3.8 Troubleshooting 11
4 TAGLIANDO DI GARANZIA PER LA RIPARAZIONE
12
4 WARRANTY COUPON FOR REPAIRING 12
Per ulteriori informazioni, contattare/For further information:
Sensitron S.r.l.
MILANO - ITALY
Ph. 0039 - 02 - 935.48.155
Fax: 0039 - 02 - 935.48.089
e-mail sales@sensitron.it

MT1195 rev3.4.doc Rev.3.4 03/09/2019 Pag. 2 di 13
1 INTRODUZIONE
1 INTRODUCTION
Queste istruzioni riguardano la tastiera portatile di
calibrazione per rivelatori serie SMART 3 e devono
essere osservate in aggiunta alle avvertenze
riportate nel manuale d’uso fornito dal costruttore e
relativo ai rivelatori della serie SMART 3.
I rivelatori della serie Smart 3 prevedono la
possibilità della taratura in campo dei parametri di
Zero, Span (risposta in gas) e dell’uscita 4-20 mA
tramite appunto la tastiera di calibrazione portatile.
E’ possibile modificare i parametri tramite i comandi
presenti sulla tastiera e contrassegnati con ENTER,
NEXT e EXIT.
Durante l’operazione, gli impianti devono
essere messi in sicurezza.
This handbook refers to the handheld portable
keypad for the calibration of the SMART 3 gas
detectors. All details reported in this document are to
be fulfilled along with the instructions given on the
SMART 3 user manual.
Smart 3 gas detectors offer a field adjustment for the
Zero, Span (response to gas) and 4-20mA
parameters.
By operating with the portable keypad, pressing
ENTER NEXT and EXIT, the Zero, span and 4-
20mA adjustments shall be accomplished by one
person.
During the operation, be sure all safety
precautions have been considered
2 COLLEGAMENTO AL RIVELATORE
E FUNZIONAMENTO
2 CONNECTION TO THE GAS
DETECTOR AND OPERATION.
Una volta collegata al rivelatore SMART 3, il display
della tastiera visualizzerà messaggi diversi a
seconda del modello di rivelatore e del gas per il
quale è stato realizzato.
When connected to the Smart 3 gas detector the
display of the keypad will show different messages
according to the gas detector model and the gas it
has been calibrated for.
2.1 Identificazione delle parti della
tastiera
2.1 Identification of the keypad part
LED Alarm 1
Fault LED LED Alarm 2
LED Alarm 3
LED di acceso
(power on LED)
INDICAZIONE A LED
(LED INDICATIONS)
COMMANDS
VISTAFRONTALE
(FRONTVIEW) VISTADELRETRO
(BACKVIEW)
100 mm
60 mm
21 mm
Flat cable per il
collegamento al rivelatore
Flat cable for the
connection to the detector.
DISPLAY
MATERIALE: PLASTICA COLORE NERO
MATERIAL: PLASTIC, COLOR BLACK
SMART 3 DISPLAY KEYPAD LAYOUT

MT1195 rev3.4.doc Rev.3.4 03/09/2019 Pag. 3 di 13
2.2 Collegamento al rivelatore gas
Smart 3
2.2 Connection to the Smart 3 gas
detector
Il collegamento della tastiera di calibrazione può
essere effettuato con il rilevatore acceso ed
operativo. Dovendo però aprire lo strumento,
durante l’operazione, gli impianti devono essere
messi in sicurezza.
Inserire il connettore posto all’ estremità del cavo flat
della tastiera nel connettore J7 presente sulla base
dello SMART 3; rivolgere la sporgenza presente sul
connettore verso l’ interno del circuito.
Ultimato il montaggio, sul display della tastiera dovrà
apparire l’indicazione della concentrazione di gas
misurata dallo strumento in quel momento che dovrà
essere 0 (l’indicazione sarà 20,8 per riv. di
Ossigeno).
The keypad can be connected when the detector is
powered ON and operating. Before opening the
detector enclosure, be sure all safety precautions
have been considered.
Insert the female connector of the keypad at the
edge of the flat cable into the male connector J11 on
the Smart 3 main board. Beware that the black
triangle on the female connector (corresponding to
pin one) is facing towards the internal part of the
board.
Once connected, the keypad will display the gas
concentration being measured, which should be 0
(20,8 for the Oxygen detector).
1
ON
23456
SCHEDA ELETTRONICA RIVELATORE SMART 3
SMART3 GAS DETECTOR MAIN BOARD
KEYPAD

MT1195 rev3.4.doc Rev.3.4 03/09/2019 Pag. 4 di 13
3 ISTRUZIONI DI CALIBRAZIONE
3 ADJUSTMENT INSTRUCTIONS
I rivelatori della serie Smart 3 Display prevedono la
possibilità della taratura in campo dei parametri di
Zero, Span (risposta in gas) e dell’uscita 4-20 mA
tramite appunto la tastiera di calibrazione portatile.
E’ possibile modificare i parametri tramite i comandi
presenti sulla tastiera e contrassegnati con ENTER,
NEXT e EXIT.
Smart 3 gas detectors offer a field adjustment for the
Zero, Span (response to gas) and 4-20mA
parameters.
By operating with the portable keypad, pressing
ENTER NEXT and EXIT, the Zero, span and 4-
20mA adjustments shall be accomplished by one
person.
3.1 Premessa
3.1 Forewords
Le procedure di seguito descritte permettono di
correggere i valori di “Zero”, “Span” e
dell’uscita 4-20 mA dei rivelatori di gas serie
SENSITRON SMART 3 , qualora gli stessi
siano in uno stato di Guasto o Allarme
improprio causato da condizioni ambientali
(correzione dello Zero) oppure se i rivelatori
stessi necessitano di una modifica della
risposta (sensibilità) al gas che devono rilevare
(correzione dello Span). Per la correzione del
valore dell’uscita 4-20 mA, i rivelatori devono
essere già connessi alla propria centrale
analogica o PLC. Per eseguire la taratura in
gas dei rivelatori (Span) è indispensabile
l’utilizzo di una bomboletta con il gas di
taratura, che può essere il gas che dovrà
rilevare il rilevatore oppure un gas di
riferimento suggerito dal costruttore del
rivelatore (per esempio il metano per tarare un
rivelatore di Alcool Etilico oppure il Butano per
tarare un rivelatore di GPL). Per far fluire il gas
dalla bombola alla testa del rivelatore, è
indispensabile l’apposito adattatore mod.
ZM.CAP In acciaio inox, che permette di far
fluire la giusta quantità di gas nella testa dei
rivelatori. Completo di 2 raccordi per i diversi
tipi di rivelatori gas.
Condizioni essenziali per eseguire le
operazioni di taratura di Zero o Span oppure 4-
20 mA, sono le seguenti:
Il rivelatore di gas deve essere in
aria pulita (assenza di gas e/o altre
sostanze interferenti) ed alimentato da
almeno 8 ore.
Al termine dell’operazione deve
essere eseguita una prova con gas
per verificare il regolare
funzionamento del rivelatore.
Durante l'operazione l'impianto deve
essere messo in sicurezza
The routines described here after allow
adjusting the "Zero", "Span", and "4-20mA
output" values on the SMART3 Display.
Adjustments are required whenever either Fault
or unjustified Alarms due to environmental
conditions occur (Zero adjustment) or detectors
need modifying their response to gas (Span
adjustment).
Have the detectors connected to the control
panel or PLC before adjusting the 4-20mA
output values.
Span adjustment requires a calibrated gas
cylinder, either filled with the same gas the
detector has been calibrated for or a reference
gas advised by the manufacturer (e.g. Methane
to adjust a detector calibrated for Ethyl Alcohol
or Butane for an LPG detector).
The ZM.CAP calibration cap is necessary to let
the gas flow to the sensor head. These cap,
made of stainless steel, has been designed to
inlet the right gas flow to the sensor. It comes
complete with two adapters to make it fit with al
of Sensitron' sensor heads.
Essential requirements to perform correct Zero,
Span and 4-20mA adjustment routines are as
follows:
Gas detectors are to be in fresh air
(without any gas or interfering
compounds) and powered on since 8
hours at least.
Once the routine is over a test with
gas is to be made to verify the right
working condition.
While these routines are performed the
plant must be safe (area
declassified).

MT1195 rev3.4.doc Rev.3.4 03/09/2019 Pag. 5 di 13
3.2 Menù di accesso in taratura
3.2 Adjustment mode access
0
000 00
0261
Cal
Zero
SPAn
ENT (AGIRE FINO A CHE IL MESSAGGIO “ ” APPARE, POI RILASCIARE IL PULSANTE)
(HOLD ON “ ENT” UNTIL THE MESSAGE “ ” WILL APPEAR, THAN RELEASE THE BUTTON)
SET SET
INDICAZIONE IN FUNZIONAMENTO NORMALE, INASSENZADI GAS
INDICATION DURING THE NORMALOPERATION (NO GAS PRESENT)
VIENE MOSTRATO Adr E L’INDIRIZZO
SOLO SE IL RIVELATORE E’ VERSIONE “IDI”
(SCHEDINA INSERITA),ST.S/IDI
TENERE PREMUTO “NEXT” FINO
A RAGGIUNGERE 0261 (PASSWORD DI DEFAULT)
PUSHAND HOLD “NEXT” TILL REACHING 261
ENT (PER 3 SECONDI / FOR 3 SECONDS)
ENT
NEXT
NEXT
NEXT
NEXT
VEDISCHEMASUCCESSIVO
(SEETHENEXTBLOCKDIAGRAM)
EXIT
ENT
ENT
ENT
ENTRATA IN MODALITA’ TARATURA / ADJUSTEMENT MODE ACCESS
ENT
(PER 3 SECONDI
/ FOR 3 SECONDS)
NEXT NEXT
ENT
Set
2.00d VERSIONE SOFTWARE DEL DISPLAY
DISPLAY SOFTWARE VERSION
(1)
(1)VERSIONESOFTWAREDELDISPLAYEDELRIVELATOREDALLA2.00INAVANTI
DISPLAYANDGASDETECTORSOFTWAREVERSION2.00ANDABOVE
Adr 0200
ENT
(1) (1)
(1)
(1)
VIENE MOSTRATO Adr E L’INDIRIZZO
SOLO SE IL RIVELATORE E’ VERSIONE “IDI”
(SCHEDINA INSERITA),ST.S/IDI

MT1195 rev3.4.doc Rev.3.4 03/09/2019 Pag. 6 di 13
3.3 Taratura dello ZERO
3.3 ZERO adjustment
(PER3SECONDI/
FOR3SECONDS)
(PER3SECONDI/
FOR3SECONDS)
ILVALORECHEAPPAREE’QUELLO
DELLO“ZERO”INPUNTI
PROVENIENTEDALSENSOREDEVE
ESSERECOMPRESOTRA120e511.
PREMERE“ENT”PERFARLO
ACQUISIREDALMICROPROCESSORE
DISMART3.
THEDISPLAYEDVALUEISTHE“ZERO”
INPOINTSOFTHESENSOR.ITMUST
BEBETWEEN120and511.PRESS
“ENT”TOCONFIRMTHEACQUISITION
TOTHESMART3MICROPROCESSOR.
ILVALORECHEAPPAREE’IL
VALOREATTUALEDELLO“ZERO”,
INPUNTI,ININGRESSOAL
MICROPROCESSOREDEL
RIVELATORESMART3
THEDISPLAYEDVALUEISTHE
ACTUAL“ZERO”INPOINTSATTHE
INPUTTOTHE
MICROPROCESSOR.
SCEGLIERE“NO”PERNON
SALVAREILNUOVO“ZERO”
SCEGLIERE“YES”(SI)PER
SALVAREILNUOVOVALORE
CHOOSE“NO”TOABORTTHENEW
PARAMETERCHOOSE“YES”TO
SAVETHENEW“ZERO”
PARAMETER.
SCEGLIERE“NO”PERNONSALVARE
ILNUOVOVALORESCEGLIERE“YES”
(SI)PERSALVAREILNUOVOVALORE
CHOOSE“NO”TOABORTTHENEW
PARAMETERCHOOSE“YES”TOSAVE
THENEWPARAMETER
RITORNOALNORMALEFUNZIONAMENTO.
RETURNTOTHENORMALOPERATION
MODE
(ETENEREPREMUTO/
ANDHOLDPRESSED(ILVALOREAPPAREALRILASCIODI“ENT”/
THEVALUEAPPEARSWHENENTISRELEASED)
T
ARAT
URADELLO“ZERO”/“ZERO”ADJUS
T
EMENT

MT1195 rev3.4.doc Rev.3.4 03/09/2019 Pag. 7 di 13
3.4 Taratura dello SPAN
3.4 SPAN adjustment
PereseguirelataraturadelloSPANserve
labomboladigascampione.Periniziare
laTaraturadelrivelatoreèindispensabile
essereinariapulita.
(InordertocarryouttheSPANcalibration
asamplegascylinderisrequired.
Performthedetectorcalibrationinfresh
aironly)
(PER3SECONDI/
FOR3SECONDS)
(1)Fc
Fc
(2)
significaFattorediconversione.ScegliereSIperprovareilrivelatoreconilgasdicalibrazionecheèilmedesimo
percuiilrivelatoreètarato.PeresempioMetanoconMetano,ButanoconButano,MonossidodiCarbonioconMonossido
diCarbonioecc.ScegliereNOquandosidevetestareilrivelatoreconungasdiriferimentocheèdiversodaquellopercui
ilrivelatoreèstatotarato.Peresempio
AcetilenetestatoconIdrogeno,XiloloconMetano,
AlcolEtilicoconMetanoecc.
meansRelativeResponsecoefficent.ChooseYEStotestthedetectorwiththesamegasforwhichthedetectorishas
beenmanufactured.ForistanceMetanewithMetane,ButanewithButane,CarbonMonoxidewithCarbonMonoxideetc.
ChooseNOtotestthedetectorwithadifferentthanthetheoneforthedetectorhasbeenmanufacturedfor.
Aquestopunto,
gas
Applicaregasalrivelatoree,trascorsoiltemponecessarioalgasperinteressarecompletamenteil
rivelatore(normalmentedai30ai45secondi,riferirsialleistruzioniallegatealrivelatoreedalkitdicalibrazioneutilizzati),
premereENTperfaracquisireilvaloredellaconcentrazionedigasalrivelatore.
Letthegasflowtothedetectorand,oncethetimenecessaryitsdetectionisdue(usuallyfrom30to45seconds,referto
theinstructionsattachedtothedetectorandthecalibrationkitused),pressOKtoallowacquisitionofthegas
concentrationvaluetothedetector.
Inserireilvaloredellaconcentrazionedigascampionedellabombolachesièapplicataalrivelatore(es.50),tramitei
tasti“NEXT”e“EXIT”epremereENT.
Inserttheconcentrationvalueofthesamplegasbottlethatwillbeappliedtothedetector(e.g.50),bypress“NEXT”and
“EXIT”andpressENT.
(4)Coefficienteditaraturainpunti(nontenereinconsiderazione).
Adjustementcoefficentinpoints,(nottobeused)
(3)
(PER3SECONDI/
FOR3SECONDS)
SCEGLIERE“NO”PERNONSALVARE
ILNUOVOVALORESCEGLIERE“YES”
(SI)PERSALVARELENUOVE
IMPOSTAZIONI.
CHOOSE“NO”TOABORTTHENEW
PARAMETERCHOOSE“YES”TOSAVE
THENEWPARAMETER
RITORNOALNORMALEFUNZIONAMENTO.
COMEBACKTOTHENORMALOPERATIONMODE
T
ARAT
URADELLO“S
P
AN”/“S
P
AN”ADJUS
T
EMENT
AquestopuntosecompareETAR(errore
ditaratura),premereENTpercontinuare
nelmenù.IlvalorediSPANnonèstato
acquisitoper:guastodelsensore,errata
applicazionedelgasalsensoreoppure
erratovalorediconcentrazionedelgas
inserito.
IfatthispointETAR(adjustementerror)
appear,pressENTforgoon.TheSPAN
valueithasnotbeenaquiredfor:sensor
failure,errortotestthesensoringasor
errortoinputtheadjustementgasvalue.
NonvalidaperrivelatorediOssigeno/NotforOxygendetector

MT1195 rev3.4.doc Rev.3.4 03/09/2019 Pag. 8 di 13
3.5 Taratura dello SPAN per rivelatore
Ossigeno
3.5 SPAN adjustment for Oxygen gas
detector
TARATURA DELLO “SPAN”RIVELATORE / “SPAN”ADJUSTEMENT FOR GAS DETECTOR
OSSIGENO OXYGEN
In order tocarry out theSPAN calibration of the
Oxygen gas detector, a sample gas cylinder
with an Oxygen concentration below 20,8%
(between3 and 10 %), balanced withNitrogen,
isrequired.
Per eseguire la taratura dello SPAN del
rivelatoredi Ossigeno, serve la bomboladigas
campione con una concentrazione di
Ossigeno inferiore al 20,8 % e più
precisamentetra il 3 ed il10 % (resto Azoto)
NEXT
ENT Fc ENT NO
Yes
NEXT
ENT
(PER 3SECONDI /
FOR3SECONDS)
ENT
208
(1)
Conc
(2)
ENT ENT
(3)
3789
ENT
NO
Yes
ENT
(PER 3 SECONDI /
FOR 3 SECONDS)
ENT
SCEGLIERE “NO”PERNON SALVARE IL NUOVO VALORE
SCEGLIERE “SI”(Yes) PER SALVAREILNUOVO VALORE
CHOSE “NO”TOABORTTHENEW PARAMETER
CHOSE “Yes”TOSAVE THENEW PARAMETER
(1)
(1)Fcsignifica Fattore di conversione. Scegliere SI(Yes).
Let the Oxygen flow to the detectorand, once the time necessary its detection is due (usually from 30 to 45 seconds),
press OK toallow acquisition of the Oxygen concentration value to the detector.
Adjustement coefficent, in points,( not to be used).
Insert the concentration valuedeclaredon the Oxygen samplegas bottle that will be applied to the detector(e.g. 10 %) by
pressing “NEXT”and “EXIT”and press ENT.
Fc means RelativeResponse coefficent.Choose Yes.
(3) Inserire il valore della concentrazione di gas campione della bombola di Ossigeno che si è applicata al rivelatore (es.
10%) tramitei tasti “NEXT”e“EXIT”e premereENT .
Coefficiente di taratura, in punti (nontenere inconsiderazione).(4)
(2)Aquestopunto, applicareOssigeno e, trascorso il temponecessario al gas per interessare completamente il rivelatore
(normalmente dai 30 ai 45 secondi), premere ENT per far acquisire il valore della concentrazione di Ossigeno al
rivelatore.
NEXT
EXIT SAV ENT NO
Yes
NEXT
ENT
(PER 3 SECONDI /
FOR 3 SECONDS)
ENT
NEXT
CHOOSE “NO”TO ABORT THE NEW
PARAMETER CHOOSE “YES”TO SAVE
THE NEW PARAMETER
SCEGLIERE “NO”PER NON SALVARE IL
NUOVO VALORE SCEGLIERE SI (Yes)
PER SALVARE LE NUOVE
IMPOSTAZIONI.
RITORNO ALNORMALE FUNZIONAMENTO.
BAC K TO N ORMAL OPERATION MODE
NEXT
NEXT NEXT
(4)
A questo punto se compare ETAR (errore di
taratura), premere ENT per continuare nel
menù. Il valore di SPAN non è stato acquisito
per: guasto del sensore, errata applicazione
del gas al sensore oppure errato valore di
concentrazione delgas inserito.
Should, at this point, ETAR (adjustement
error) appear,pressENT to go on. TheSPAN
value has not been aquired because of: a
sensor failure, error while testing sensor in
gas or wrong sampling gas value.
(1)
Nota 1: pereseguirela taraturadello SPAN del rivelatore di Ossigeno,
NON utilizzare bombola di gas con AZOTO puro (senza Ossigeno).
Quantitàminima di Ossigeno nellabombola: 3%
Note1: to carry out the SPAN adjustement of the Oxygen gas detector,
never usepureNitrogen gas cylinder.
(Minimun Oxygenconcentrationin the gas cylinder: 3 %)
.
100.
(Entrare nella procedura di SPAN del rivelatore solo se si ha disponibile la bomboletta con Ossigeno) (Enter the SPAN adjustment procedure only with Oxygen gas cylinder)
Nota 2: la vita operativa del sensore per Ossigeno è di circa 2 anni.
Note 2: the espected operative life of the Oxygen sensor is of about 2 years.

MT1195 rev3.4.doc Rev.3.4 03/09/2019 Pag. 9 di 13
3.6 Taratura dell’uscita 4-20 mA
3.6 4-20 mA output adjustment
(PER3SECONDI/
FOR3SECONDS)
ILVALOREVISUALIZZATOE’IL4mAINPUNTI.COLLEGAREUN
MILLIAMPEROMETROALL’USCITAINCORRENTEDELRIVELAT.E
PREMERE“NEXT”ED“EXIT”FINOAPORTAREILVALOREA4mA.
THEVALUEDISPLAYEDISTHE4mAINPOINTS.CONNECTA
MILLIAMPEROMETERTOTHE4mAOUTPUTOFTHEDETECTORAND
PRESS“”NEXT”AND“EXIT”TOINCREASEANDDECREASETHEVALUE
TILL4mAHASBEENACHIEVED.
(PER3SECONDI/
FOR3SECONDS)
SCEGLIERE“NO”PERNONSALVAREI
NUOVIVALORI;SCEGLIERE“SI”PER
SALVAREINUOVIVALORIIMPOSTATI.
CHOOSE“NO”TOABORTTHENEW
PARAMETERCHOOSE“SI”TOSAVE
THENEWPARAMETER
RITORNOALNORMALEFUNZIONAMENTO.
RETURNTOTHENORMALOPERATION
MODE
T
ARAT
URADELL
’US
CIT
A4-20mA/4-20mAOUT
PUT
ADJUS
T
EMENT
(*)
(*)Lataraturadelgeneratoredicorrente(4-20mA)èstataeseguitainfasedicollaudodelrilevatoreedottimizzatasuuna
resistenzadicaricodi200ohm(vedicentraliSENSITRON).Attuarequestaprocedurasolosenellacentraleutilizzata,
misurandoconunmilliamperometrosiriscontraunvalorenoncorretto.
The4-20mAadjustementithasbeendoneduringthecommissioningofthegasdetectorinthelaboratoryofthemanufacturer
andwitharesistanceloadof200ohm.Usethis4-20mAadjustementjustifwithdifferentkindofcontrolunitavaluemisuredby
amilliamperometerisdifferent.

MT1195 rev3.4.doc Rev.3.4 03/09/2019 Pag. 10 di 13
3.7 Procedura di reset degli errori
3.7 Error reset procedure
000 00
0459
RES
ENT (AGIRE FINO A CHE IL MESSAGGIO “ ” APPARE, POI RILASCIARE IL PULSANTE)
(HOLD ON “ ENT” UNTIL THE MESSAGE “ ” WILL APPEAR, THAN RELEASE THE BUTTON)
SET SET
INDICAZIONE DISPLAY CON MESSAGGIO ESEMPIO DI MESSAGGIO DI ERRORE
TENERE PREMUTO “NEXT” FINO
A RAGGIUNGERE 0459 (PASSWORD TECNICA)
PUSH AND HOLD “NEXT” TILL REACHING 0459
(TECHNICAL PASSWORD)
ENT (PER 3 SECONDI / FOR 3 SECONDS)
PROCEDURA DI RESET / RESET PROCEDURE
Set
2.00d VERSIONE SOFTWARE DEL
DISPLAY
DISPLAY SOFTWARE VERSION
(PER 3 SECONDI /
FOR 3 SECONDS)
L’indicazione OH sta per OK e significa che la procedura
di Reset ha avuto successo. Aquesto punto il rivelatore
ripeterà automaticamente la procedura di accensione
e ritornerà al normale funzionamento.
OH is for OK and it means that the Reset procedure
it has been done with success. At this point the detector
will restart automatically and it will return to the normal
operation mode.
Scegliere Yes
(chose Yes)
Nota:
Se il rivelatore gas è in guasto con uno dei messaggi di errore elencati
sotto e visualizzati sul display, eseguendo la procedura di Reset il
rivelatore Smart3 dovrebbe tornare al normale funzionamento. Con
alcune versioni di rivelatori Smart3 la procedura di Reset non è
possibile.
Note:
If the Smart3 gas detector is in Fault status with one of the Error
messages listed below and shown by the display, doing the Reset
procedure the Smart3 gas detector should be restored to the normal
operation mode. With some versions of Smart3 gas detector the Reset
procedure is not possible.
I messaggi sotto riportati possono apparire sul display del rivelatore
Smart3 quando è in Guasto
The messages below can appear on the display of the Smart3 if the
detector is in Fault status.
Elenco messaggi di errore Smart3 / Smart3 error messages list
EE2P errore interno E2Prom / internal E2Prom error
EFLS errore flash / flash error
ERAM errore RAM / RAM error
EALM errore alimentazione / power supply error
EI2C errore E2Prom amplificatore / E2Prom amplifier board error
EAMP errore scheda amplificatore / amplifier board error
EE2P EXAMPLE OF ERROR INDICATION ON THE SMART3 DISPLAY DETECTOR

MT1195 rev3.4.doc Rev.3.4 03/09/2019 Pag. 11 di 13
3.8 Risoluzione dei problemi
3.8 Troubleshooting
Problema / Problem
Possibile causa/ Possible causes
Rimedio / Remedies
Tre linee orizzontali sul
display.
Vi è stata una deriva del valore di zero
Assicurarsi di essere in aria pulita ed
effettuare la taratura dello zero.
Messaggio EE2P sul
display
La memoria interna E2Prom del rivelatore
presenta un anomalia
Effettuare l’operazione di reset mediante il
codice di accesso 459
Messaggio EFLS sul
display
La memoria interna Flash del rivelatore
presenta un anomalia
Effettuare l’operazione di reset mediante il
codice di accesso 459
Messaggio ERAM sul
display
La memoria interna RAM del rivelatore
presenta un anomalia
Effettuare l’operazione di reset mediante il
codice di accesso 459
Messaggio EALM sul
display
L’alimentazione del rivelatore è fuori dai
range prescritti (da 12VDC a 27VDC)
Controllare l’alimentazione sui morsetti + e –
del rivelatore
Messaggio EI2C sul
display
Non c’è comunicazione fra la testa
sensibile e la base a microprocessore
SMART 3
Controllare che il rivelatore non sia installato
in ambienti con temperature di lavoro superiori
ai 60°C, spostare eventualmente il rivelatore.
Se il problema persiste sostituire la testa
sensibile con una nuova.
Messaggio EAMP sul
display
La base base dello SMART non riconosce
il serial number della testa sensibile ad
essa collegata e questo può dipendere dal
fatto che le teste fra due rivelatori sono
state invertite.
Controllare che il serial number della testa sia
lo stesso riportato sull’etichetta del serial
number sul rivelatore.
Messaggio EBCH sul
display
I dip-switch (1 & 8) per il ripristino dati a
default sono in posizione sbagliata
Riportare I dip-switch in posizione corretta
seguendo le istruzioni riportate nel manuale
tecnico del rivelatore
Problem
Possible causes
Remedies
Three horizontal lines on
display
There was a drift of the detector Zero
value
Make sure you are in clean air and please
adjust the Zero by the calibration procedure
Message EE2P on
display
The internal memory E2Prom is not
working
Please perform the reset procedure by the
459 tech password
Message EFLS on
display
The internal memory Flash is not working
Please perform the reset procedure by the
459 tech password
Message ERAM on
display
The internal memory Ram is not working
Please perform the reset procedure by the
459 tech password
Message EALM on
display
The power supply of the detector is
outside of range (from 12VDC to 27Vdc)
Please check the power supply on the + and –
terminals of the detector
Message EI2C on display
There is no communication between the
sensor head and the microprocessor base
board of SMART 3
Please check that the detector is not installed
in environments with a temperature over 60 °
C. If so, change the detector installation
position. If the problem is still present replace
the sensor head with a new one.
Message EAMP on
display
The SMART3 detector main board does
not match the sensor head connected
(doesn’t match the serial number inside).
May be that the heads between two
different detectors are inverted.
Check that the serial number printed on the
sensor head it is the same that the one printed
on the detector label.
Message EBCH on
display
The dip switches (1 & 8) for the data
recovery of the detector are in the wrong
position
Please set the dip switches for data recovery
in the right position, following the technical
manual.

MT1195 rev3.4.doc Rev.3.4 03/09/2019 Pag. 12 di 13
4 TAGLIANDO DI GARANZIA PER LA
RIPARAZIONE
4 WARRANTY COUPON FOR
REPAIRING
La garanzia sui prodotti Sensitron è valida
un anno dalla data di fabbricazione
riportata sul prodotto. Si intende valida
comunque per un anno dalla data di
installazione, purchè la stessa avvenga
entro i dodici mesi successivi la data di
fabbricazione. Fanno fede il timbro e la
data posti dall’installatore sul presente
modulo, che l’utilizzatore dovrà
debitamente conservare e rendere allo
stesso in caso di verifiche funzionali e
riparazioni.
Warranty on Sensitron products is valid 1
one from the manufacturing date placed on
the product and it is extended of one year
from the date of the installation on
condition that the installation is performed
within the first year of life of the product. As
proof will be considered the stamp and
date of the installer placed on the present
coupon which is to be duly kept by the user
and returned to the installer in case of any
working tests and repairs
Data di installazione
* /
Installation date *
Modello/i
Model(s)
Numero/i di
matricola
Part Number(s)
______________ ______________ ______________
______________ ______________ ______________
Timbro installatore
Installer Stamp
Firma installatore
Installer signature
* Utilizzare un singolo modulo per ogni data di
installazione
*Use one single coupon for every installation date
Nota Bene: si evidenzia che per i componenti deperibili
installati sui prodotti (sensori, batterie tampone in
genere), la garanzia di cui sopra è comunque vincolata
e limitata ai termini di garanzia dichiarati dalla casa
costruttrice.
ATTENTION: Please be aware that all perishables
installed in our products (sensors, buffer batteries,
etc.) benefit only of the warranty conditions stated by
the original manufacturer

MT1195 rev3.4.doc Rev.3.4 03/09/2019 Pag. 13 di 13
La SENSITRON S.r.l. allo scopo di migliorare i propri prodotti, si riserva il diritto di modificare le caratteristiche tecniche o estetiche in qualsiasi
momento e senza alcun preavviso.
Per ulteriori informazioni, contattare:
Sensitron S.r.l.
MILANO - ITALY
The above information does not make the manufacturer liable, and the manufacturer reserves the right to make any changes that it retains will
be useful in improving the product.
For any further information, please contact:
Sensitron S.r.l.
MILANO - ITALY
Other manuals for SMART 3
2
This manual suits for next models
1
Table of contents
Other Sensitron Keypad manuals
Popular Keypad manuals by other brands

Keyautomation
Keyautomation EGKTB1 Instructions and warnings for installation and use
Black Box
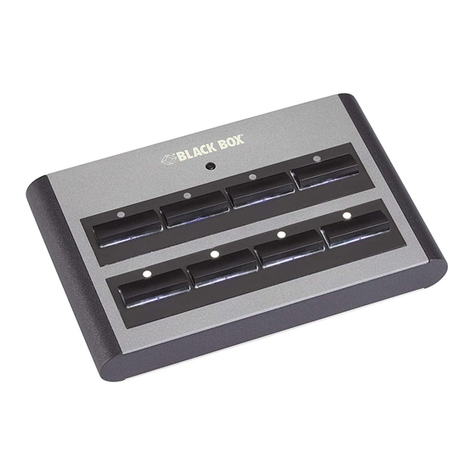
Black Box ControlBridge CB-KEYPAD-208-T user manual

Paradox
Paradox Esprit+ 642 user manual
Open Plan Systems
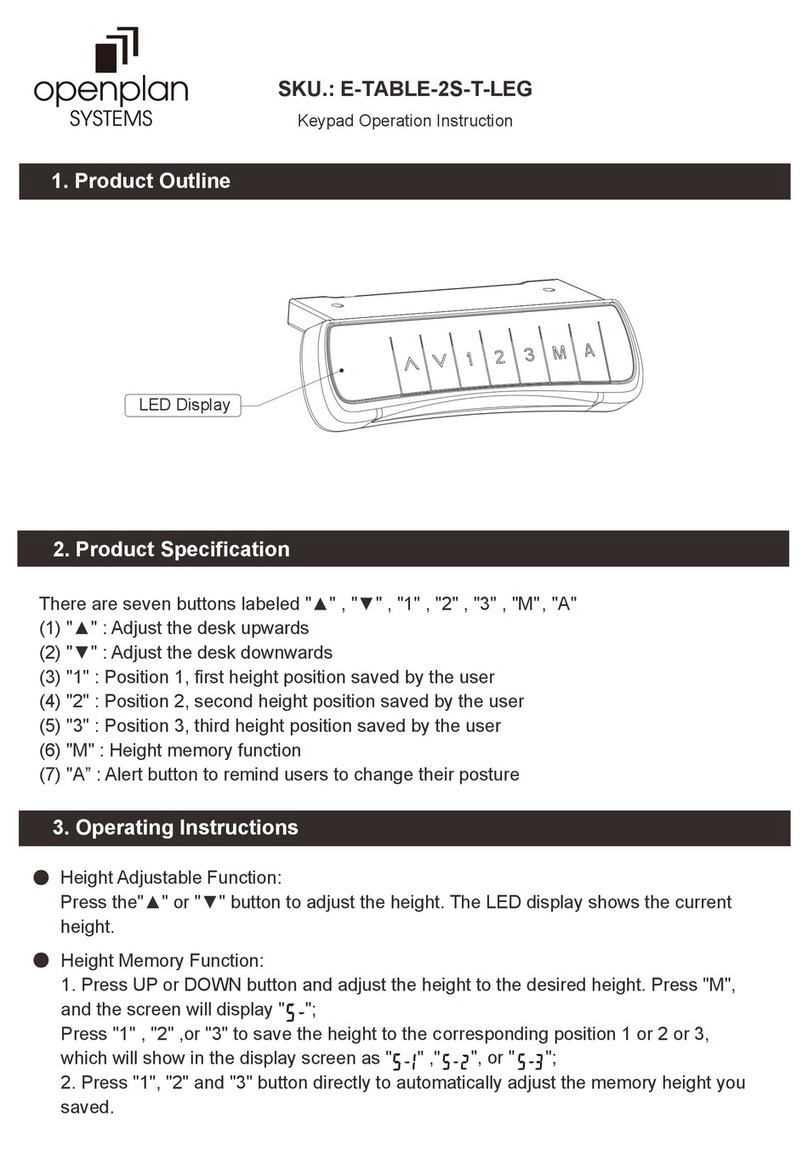
Open Plan Systems E-TABLE-2S-T-LEG operation instruction
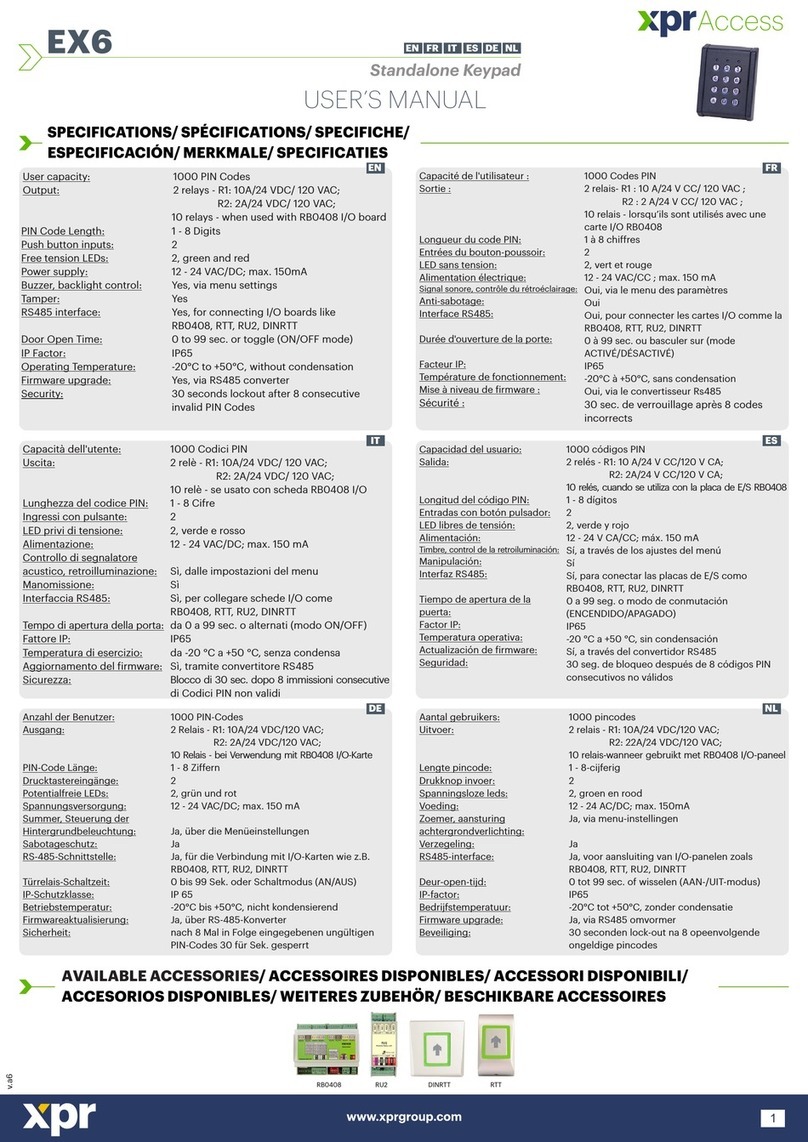
XPR Access
XPR Access EX6P-TP user manual
XPR Access
XPR Access EX7 Installer manual
