Sergio iH-100 User manual
1
Sergio iH-100 Operation Manual
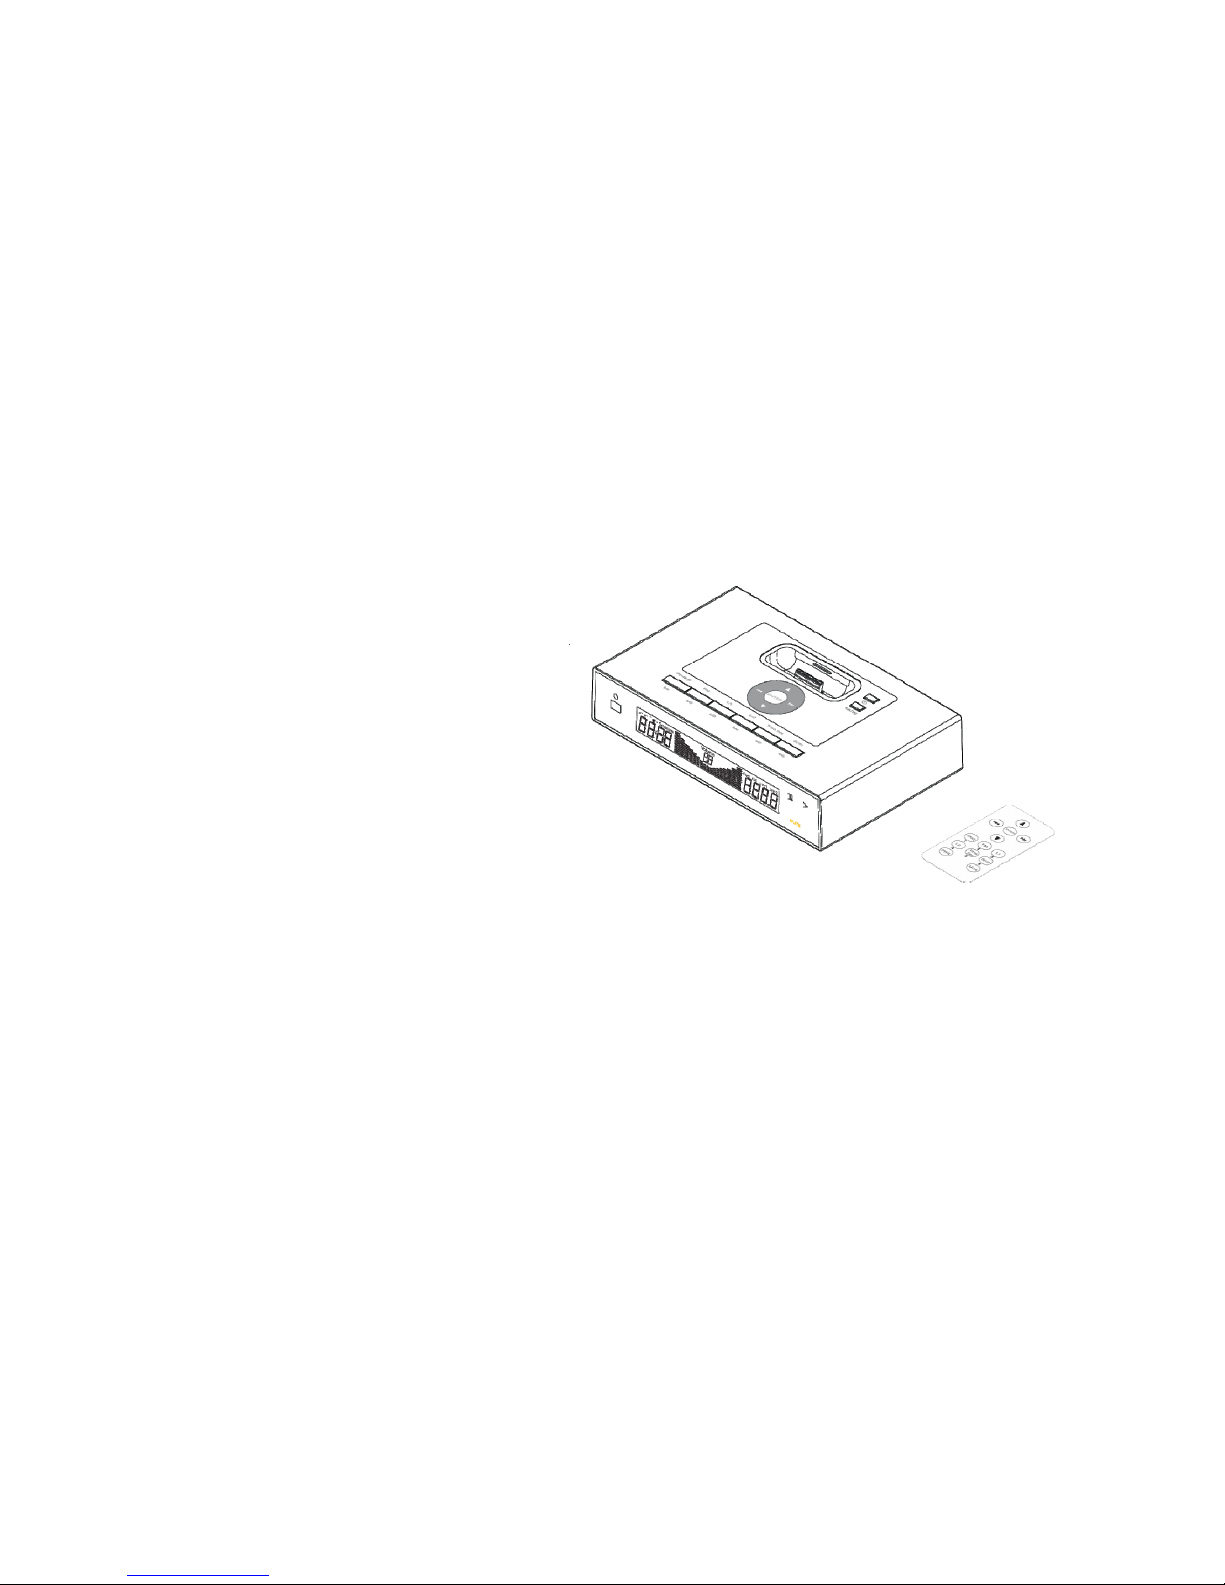
Thank you for purchasing Sergio iH-100 music sound effect system for your iPod® or MP3 player. The Sergio iH-100 is the
latest innovation from Sergio, a long time leader in the manufacture of professional audio systems. It features a fresh and
innovative new iPod® docking system that allows users to play music with their favorite stereo system, and watch movies on
the big screen display. iH-100’s multi functional features not only will diversify your iPod® life, but also creates an environment
for your enjoyment.

1
IMPORTANT
Read Before Proceeding
Please read through this operating instruction so you will know how to operate this product properly. After you have finished
reading the instruction, put it in a safe place for future reference.
In some countries or regions, the shape of power plug or power outlet may sometimes differ from that shown in the
explanatory drawings. However the method of connecting and operating the unit is the same.

2
Table of Contents
Table of Content
1. Package Contents ………………………………………………………………………………………………………………………… 3
2. Features
…………………………………………………………………………………………………………………………………..… 4
3. Getting Start
……………………………………………………………………………………………………………………………… 5
4. Using Remote Control Unit
……………………………………….……………………………………………………………………… 7
5. Controls and Indicators ………………………………………………………………………………………………………………… 8
6. iPod® / MP3 Player ……………………………………………………………………………………………………………………… 12
7. Using iH-100
……………………………………………………………………………………………………………………………… 14
8. Wiring Diagrams
…………………………………………………………………………………………………………………………… 18
9. Specification ……………………………………………………………………………………………………………………………… 19
10. Consumer Guide to Product Safety …………………………………………………………………………………………………… 20
11. Trouble Shooting
…………………………………………………………………………………………………………………………… 22
12. Warranty
……………………………………………………………………………………………………………………………………… 24

3
Package Contents
The iH-100 package included the following
1. iH-100 multimedia center
2. A power adaptor
3. Antenna
4. USB cord
5. 3.5mm phone jack converter
6. iPod® Inserts
7. Operation manual

4
Features
zPlay and simultaneously charge you iPod®
zTwo line-in 3.5mm plugs for MP3 players (Rear)
zTransferring video from iPod®-Video to Television
zTransferring music from iPod® to home stereo system
zInfrared remote controller
zUpdates iTune and uploads video via iH-100 (USB Port) directly
zSupport FM radio
5
Getting Start
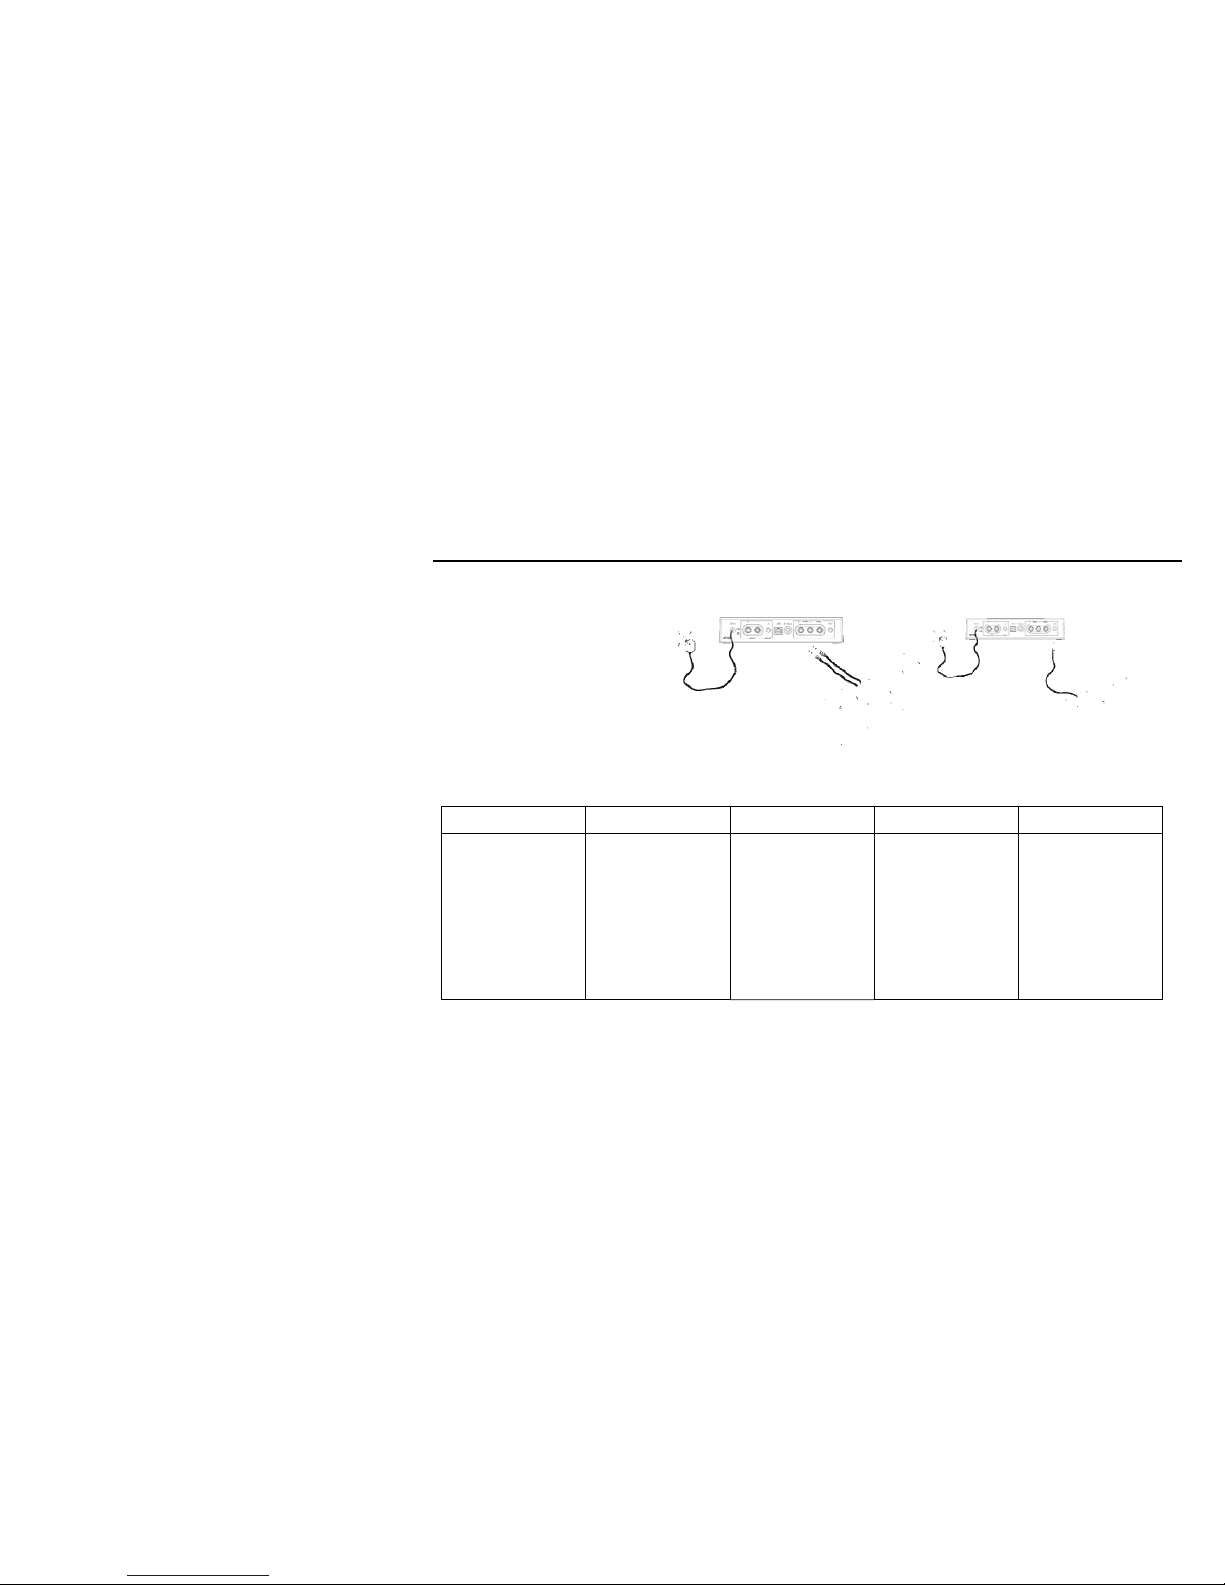
Install Speakers
Install Speakers (RCA Jack) Install Speakers (Phone Jack)Connect AV cord or 3.5mm patch cord
from your speakers to RCA jack or
phone jack.
iPod® Inserts
Insert iPod®s onto connector or MP3 player into line-in jack (rear).
Shuffle Insert Mini Insert Thin iPod® Insert Thick iPod® Insert Nano Insert
Use with iPod®
Shuffle
NOTE: iBuddy will
NOT charge iPod®
shuffle.
Use with iPod® Mini iPod® 3Gen 10-15 GB
iPod® 3Gen 20 GB
iPod® 4Gen 20 GB
iPod® Photo 30 GB
iPod® 3Gen 30GB
iPod® 3Gen 40GB
iPod® 4Gen 40GB
iPod® Photo 40GB
iPod® Photo 60GB
iPod® 5Gen 30GB
iPod® 5Gen 60GB
iPod® 5Gen 80GB
iPod® Nano 2GB
iPod® Nano 4GB

6
Install FM Loop Antenna
Plug the FM loop antenna into the connector located on
the back of unit for FM band radio operation. For the best
reception, please move the FM antenna 12” away from the
unit and iPod®.
Install AC Adaptor
Connect the AC adaptor cable plug into the jack on the
back of the system, and then plug adaptor into the wall
outlet.
7
Using Remote Control Unit
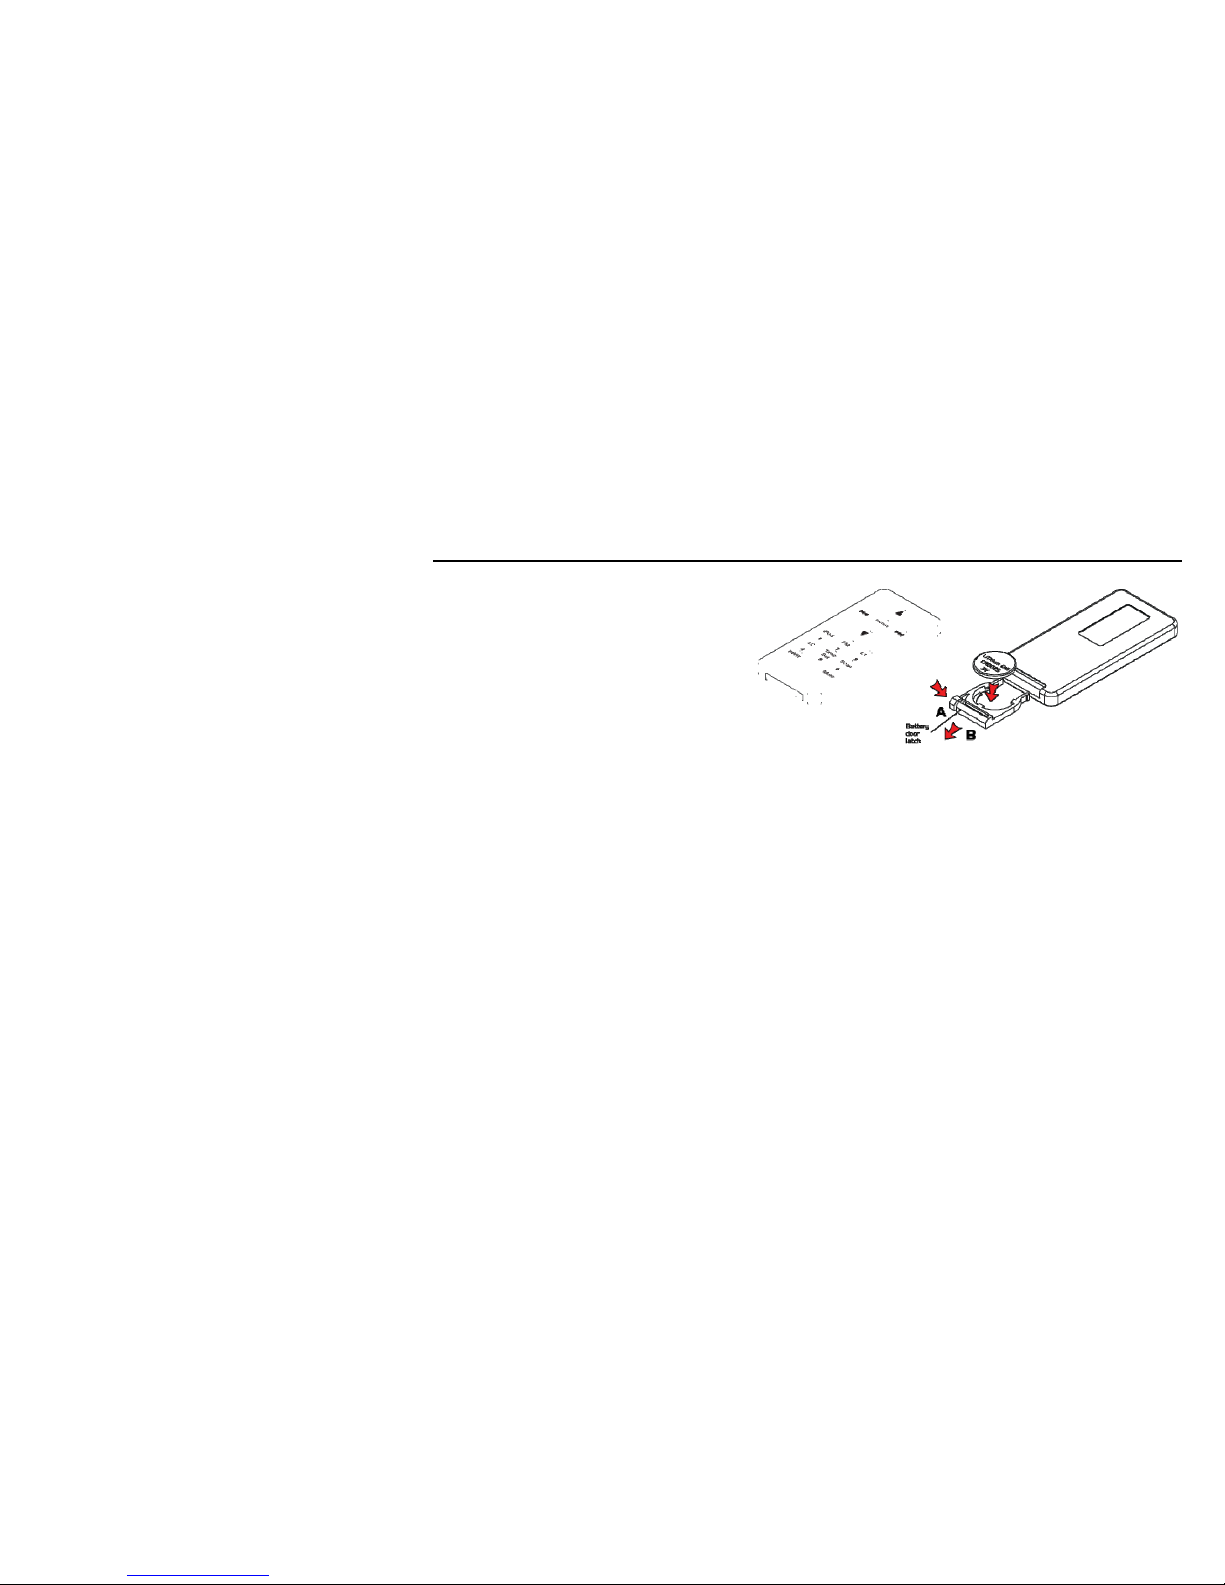
Install/Replace the Remote Control Battery
The remote control battery is already installed at the
factory. When the remote control stops operating or
its range seems reduced, replace the battery with
new one.
1. The battery door is located on the back end of the unit.
2. Squeeze notched tab A while pulling battery door latch B to release the battery door latch and take out the battery holder.
3. Insert a “CR2025” 3 volt lithium battery. Make sure the polarity (the + and – side of the battery) is correct.
4. Replace the battery holder back in the remote control.

8
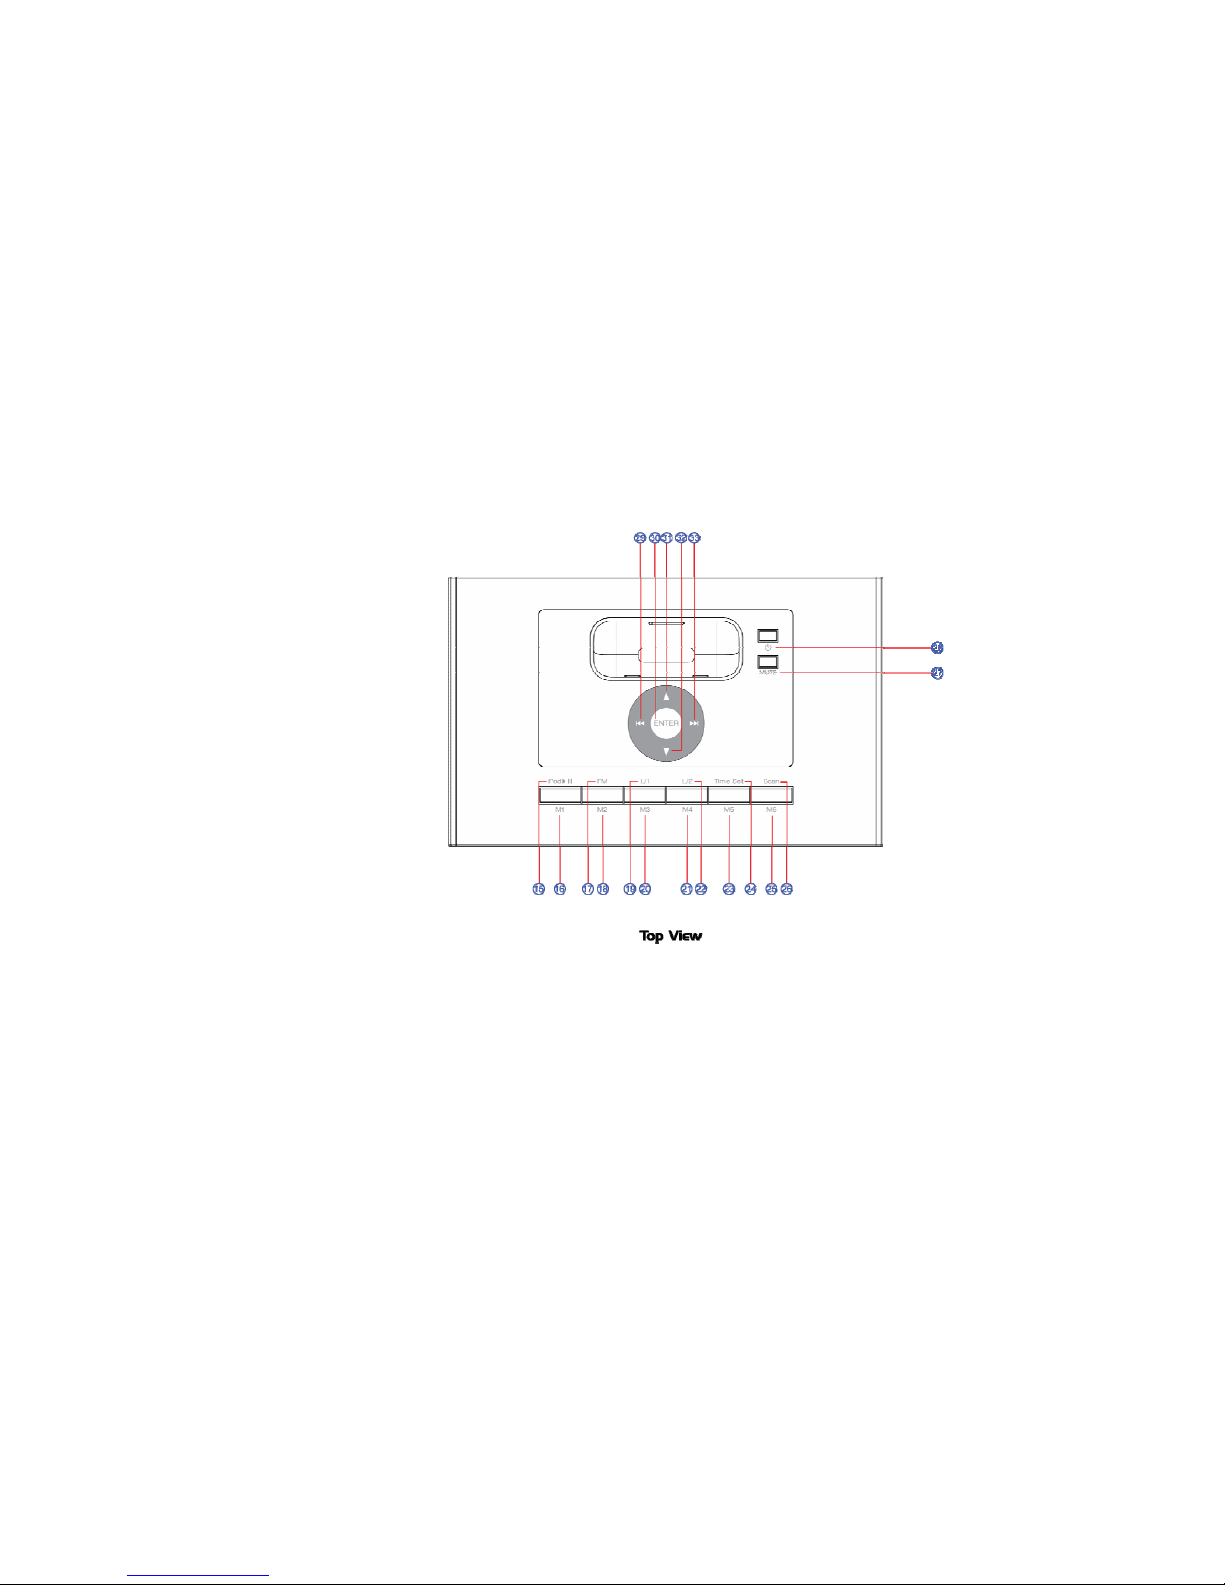
Controls and Indicators
1.Infrared Remote Receiver
2.Time Display
3.Volume Indicator
4.Radio Frequency
5.MUTE Display
6.Power Indicator
7. AM/PM Indicator
8.Volume Number Indicator
9.iPod® Indicator
10.FM Indicator
11.Line1 Indicator
12.Line2 Indicator
13.Pause Indicator
14.Play Indicator
9
15.iPod® Play/Pause Button
16.Radio Memory 1
17.FM Button
18.Radio Memory 2
19.Line 1 Button
20.Radio Memory 3
21.Radio Memory 4
22.Line 2 Button
23.Radio Memory 5
24.Time Set Button
25.Radio Memory 6
26.Radio Station Scan Button
27.Mute Button
28.Power ON/OFF Button
29.Circular Previous Key
30.Circular ENTER Key
31.Circular Volume Up Key
32.Circular Volume Down Key
33.Circular Next Key
10
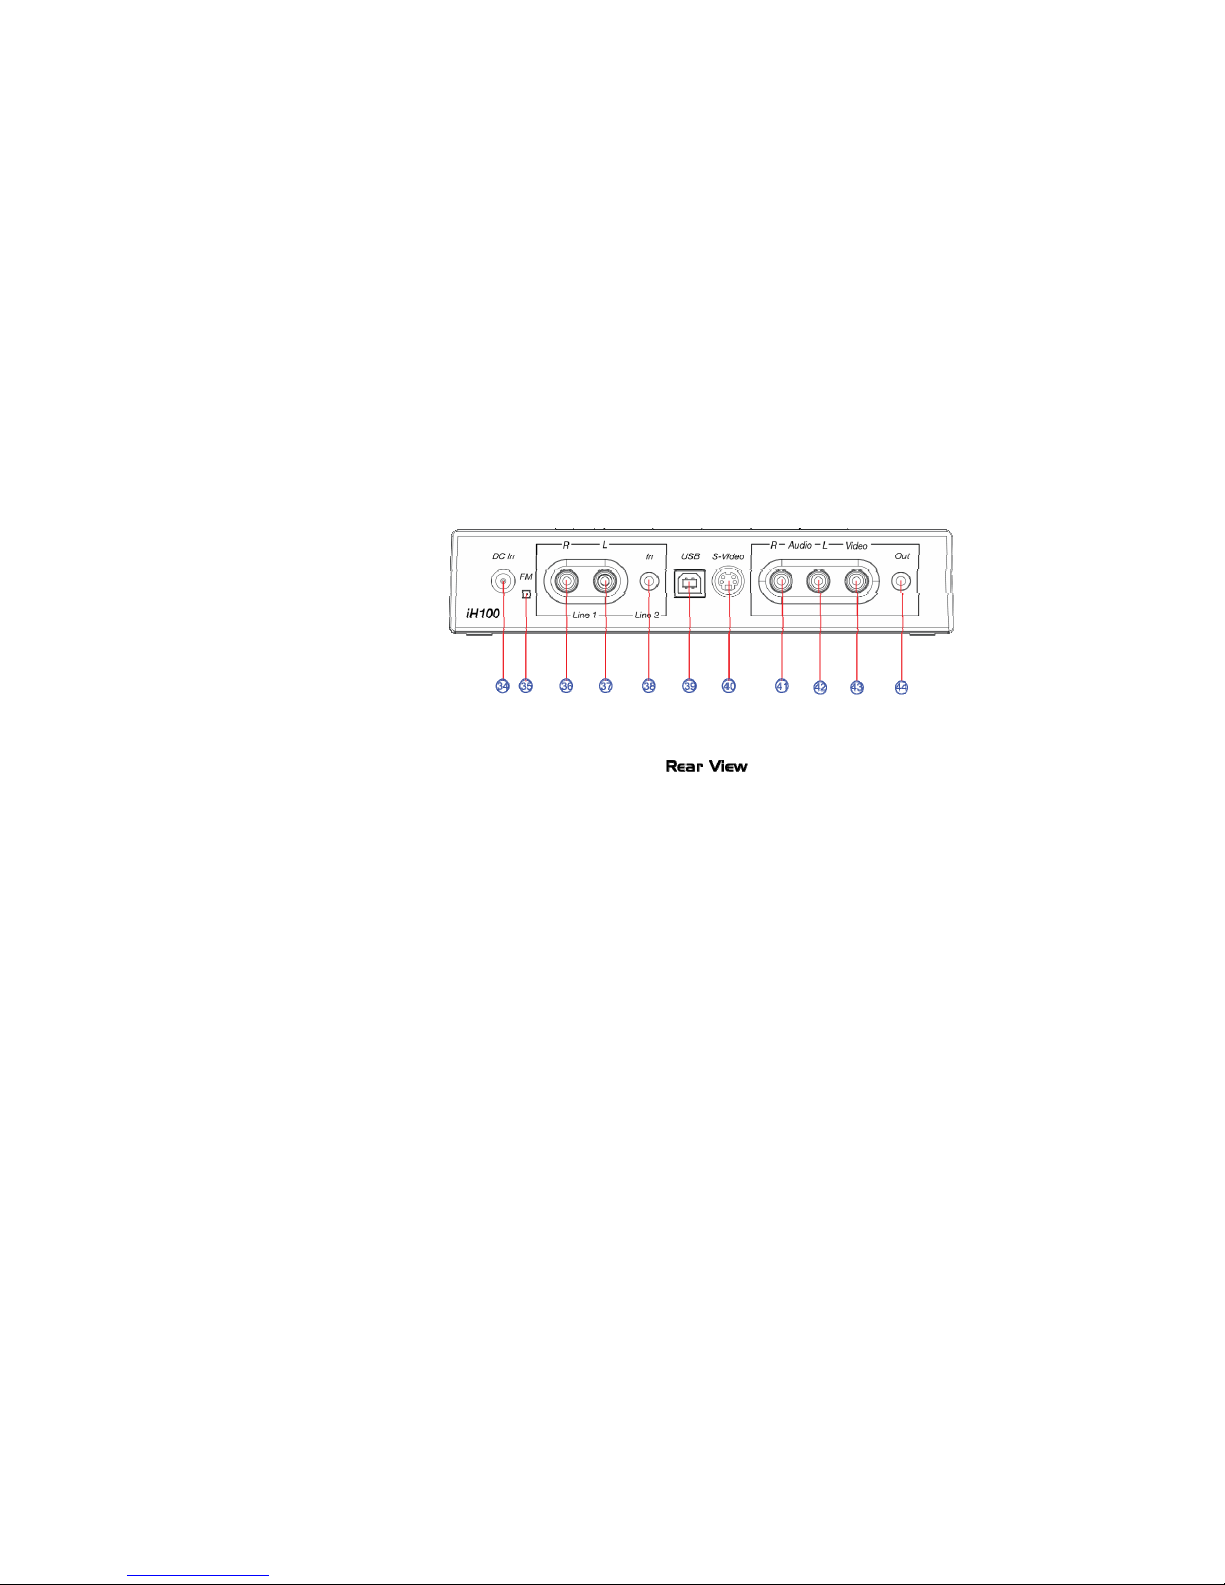
34.DC Power Input
35.FM Loop Antenna Socket
36.Line1 Source Right RCA Jack
37.Line1 Source Left RCA Jack
38.Line2 Source Phone Jack
39.USB 2.0 Input
40.S-Video Input
41.Right RCA Jack
42.Left RCA Jack
43.Video Input Jack
44.Audio Output Phone Jack

11
45.Previous Key
46.Enter Key
47.Volume Up Key
48.Volume Down Key
49.Next Key
50.FM Radio Key
51.iPod® Play Key
52.Radio Memory 1
53.Line 2 Key
54.Radio Memory 4
55.Power ON/OFF Key
56.Time Set Key
57.Radio Memory 5
58.Radio Memory 2
59.Mute Key
60.Radio Memory 6
61.Scan Key
62. Radio Memory 3
63. Line 1 Key

12
iPod® / MP3 Player
Charge your iPod®
Note: Please make sure you are using the correct insert for your iPod® or MP3 player and that it is properly docked into the
iH-100. Failure to do so may damage your iPod® or MP3 player.
*[While your iPod® is docked in the system, it recharges (until fully charged). Note that iPod® Shuffles and
other non-docking iPod®s will NOT be charged.]
Listening to your iPod®
1. Plug-in the RCA Jack (○
41 ,○
42 )or Phone jack (○
44 ) from the multimedia speaker / subwoofer.
2. Turn the power ON (○
28 )
3. Insert the iPod® onto the dock. (iPod® will automatically turn ON)
4. a. Press Play/Pause button for Play or Pause iPod® music
b. Press Circular Previous/Next key for play Previous or Next iPod® music
c. Press and hold Circular Previous/Next key for Fast Previous/Next search iPod® music
5. a. Press Circular Volume Up or Down Key to adjust the system volume
b. Press Mute button to mute the music, and press again to un-mute music.

13
Listening to a non docking iPod® or other portable audio devices
1. Plug-in the RCA Jack (○
41 ,○
42 )or Phone jack (○
44 ) from the multimedia speaker / subwoofer.
2. Turn the power ON (○
28 )
3. Connect your MP3 player’s audio AV cord to the Line1 line-in jack (○
36 ,○
37 ). Or connect your MP3 player’s audio 3.5mm
patchcord to line2 line-in phone jack (○
38 ).
Note: If you are using 2.5mm patchcord, please plug it to 3.5mm patchcord converter include in the package for fitting in
the line2 line-in phone jack.
4. Press L/1 or L/2 buttons for MP3 player music play depends on which line-in jack you have plug your MP3 player into.
5. Choose the music from MP3 player instead of surface circular control.

14
Using iH-100
Before operating the following functions, please turn your iH-100 power ON, and connect
your speakers’ AV cord to the back of iH-100 AV jack.
Time Set
On iH-100 Device:
1. Press Time Set button to adjust clock.
2. Press “Next” or “Previous” button to adjust hour, then press “Enter”
3. Press “Next” or “Previous” button to adjust minute, then press “Enter”
On Remote Control:
1. Press Time Set Key to adjust clock.
2. Press “Next” or “Previous” button to adjust hour, then press “Enter”
3. Press “Next” or “Previous” button to adjust minute, then press “Enter”
FM Radio
Extend FM wire antenna fully for best FM reception.
Scan Radio
On iH-100 Device:
1. Press FM button to switch to FM mode.
2. Press scan button or press “Next” or “Previous” key on circular control to scan your favorite radio station.

15
On Remote Control:
1. Press FM key to switch to FM mode.
2. Press scan button or press “Next” or “Previous” key on remote control to scan your favorite radio station.
Memorize Your Favorite Radio Stations
On iH-100 Device:
1. Press FM button to switch to FM mode.
2. Press scan button to scan your favorite radio station.
3. Press and hold one of the buttons from M1 to M6 until the FM indicator flashes.
On Remote Control:
1. Press FM key to switch to FM mode.
2. Press scan key to scan your favorite radio station.
3. Press and hold one of the buttons from M1 to M6 until the FM indicator flashes.
Recall Your Favorite Radio Stations
On iH-100 Device:
1. Press “Enter” button on the circular control and press one of the buttons you have saved for favorite station from
M1 to M6.
On Remote Control:
1. Press “Enter” Key on the remote control and press one of the keys on the remote control you have saved for
favorite station from M1 to M6.

16
Manage iTune Music
Before you can manage iTune directly from iH-100, you have to turn off the power first in order to let iH-100 switch
to iTune mode. The steps are following:
1. Plug-in the USB cord to the USB 2.0 jack on the back of the unit and your computer.
2. Turn off the power of iH-100.
3. Insert your iPod® to the dock.
4. Computer will automatically start up the iTune.
5. Manage your music from iTune.

17
Video out for iPod® Video
Note: Video-out feature is only made for 5th generation iPod® and iPod® Photo. Other
generations of iPod® are not suitable for this feature.
S-Video Wiring
RCA Video Wiring
1. Insert your iPod® to the dock.
2. Plug one end the S-Video or yellow AV cord to the
S-Video or Video jack on the back of the unit and
other end to the television’s S Video input.
3. Switch to S-Video mode on your television.
4. Turn the TV Out option to ON mode by choose Videos
option -> video settings from your iPod®.
5. Choose favorite video and choose play on your iPod®.

18
Wiring Diagrams
For Your Speakers
RCA Jack Phone Jack
Plug-in one end of audio cord (RCA cord) into the Main-Out
(R/L, ○
41 ,○
42 ) and other end to the speaker set for PC or MP3
(with amplifier).
Plug-in one end of 3.5mm patchcord into the Out (Out, ○
44 )
and other end to the speaker set for PC or MP3 (with
amplifier).

19
Specification
Specification
General Specification
Power DC 5V, 1A
Power Input AC 100 ~ 240 V / 50 ~ 60Hz / 0.4A
Power Consumption 500mA
Operating Environment Temperature +5°C - +35°C (+41°F - +95°F)
External Dimension 199mm*123mm*40mm
Weight 700g
Recommend Speaker / Subwoofer
Satellite 40 watts (PMPO) *2 (MAX)
Impedance: 4-8 Ω.
Frequency: 165~18KHZ
Subwoofer 120 Watts (PMPO) *1 (MAX)
Impedance: 8Ω.
Frequency: 35~165HZ
Table of contents
Other Sergio Stereo System manuals


