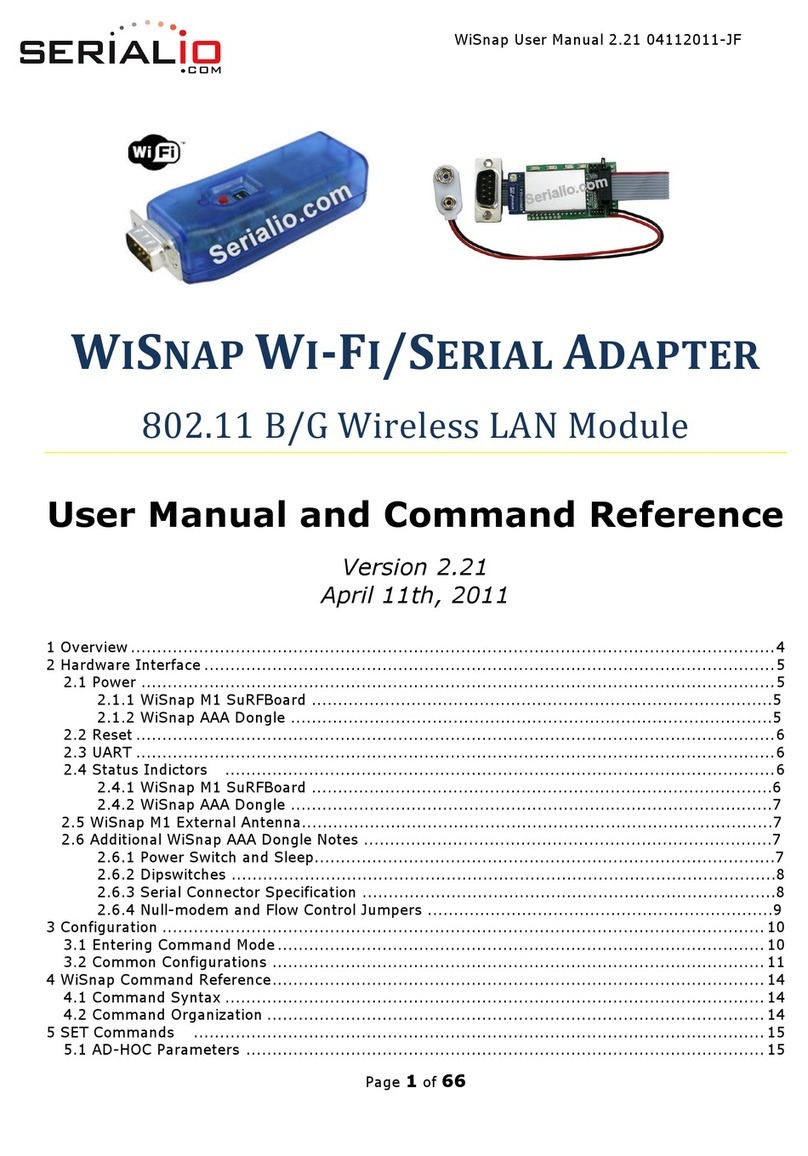
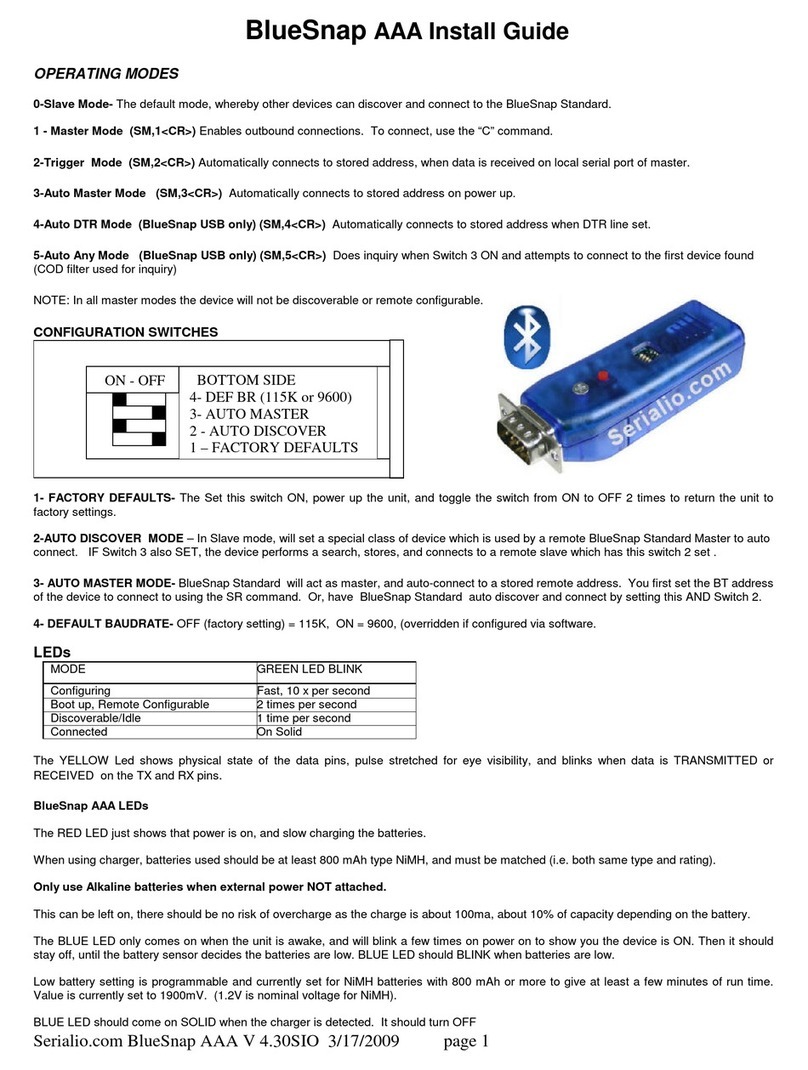
Serialio WinSnap Installation manual

WiSnap User Manual 4.41 05282015-ML
Page 1
WISNAP WI-FI/SERIAL ADAPTER
802.11 B/G Wireless LAN Module
User Manual and Command Reference
Version 4.41
May 28, 2015

WiSnap User Manual 4.41 05282015-ML
Page 2
1
Overview
4
2
Hardware Interface
4
2.1
Power
4
2.2
Reset
5
2.3
UART
5
2.4
Status Indicators
6
2.5
WiSnap M1 External Antenna
6
2.6
Additional WiSnap AAA Dongle Notes
7
3
Configuration
9
3.1
Entering Command Mode
9
3.2
Common Configurations
10
4
WiSnap Command Reference
12
4.1
Command Syntax
12
4.2
Command Organization
13
5
SET Commands
13
5.1
AD HOC Parameters
13
5.2
BROADCAST Parameters
14
5.3
COMM Parameters
14
5.4
DNS Parameters
15
5.5
FTP Parameters
15
5.6
IP Parameters
15
5.7
OPTIONAL Parameters
17
5.8
SYSTEM Parameters
18
5.9
TIME Server Parameters
20
5.10
UART Parameters
20
5.11
WLAN Parameters
21
6
GET Commands
24
7
STATUS Commands
25
8
ACTION Commands
26
9
FILE IO Commands
27
10
Advanced Features and Settings
27
10.1
System Timers and Auto Connect Timers
29
10.2
Wake on Sensor Input
30
10.3
Wake on UART
31
10.4
UART Receiver, RTS/CTS Hardware Flow Control
31
10.5
Setting GPIO direction, Alternate Functions and Disabling LEDs
32
10.6
Setting Debug Print levels
34
10.7
Scan Output Format
35
Firmware Version 2.36 & 2.45
35
Firmware Version 2.22 through 2.30
36
10.8
UART Heartbeat Messages
36
10.9
Using the Real Time Clock Function
37
10.10
Time Stamping Packets
38
11
Sending data using UDP
38
11.1
Overview
38
11.2
UDP Auto Pairing
39
11.3
UDP Retry
39
11.4
Using the UDP Broadcast Function
39
12
Joining Networks and Making Connections
40
12.1
Associate with a Network Access Point
40
12.2
Making Connections
41
12.3
Setting up Automatic Connections
42
12.4
Controlling Connections using PIO5 and PIO6
42
12.5
Using DNS Settings
42
12.6
Utilizing the Backup IP Address/Connect Function
43
13
Using HTML Client Feature
43
13.1
Built-in HTML Client Modes
43
13.2
Automatically Periodically Connect to Web Server
44

WiSnap User Manual 4.41 05282015-ML
Page 3
13.3
Automatically Connect to Web Server on UART Data
44
13.4
Posting Binary Data
45
13.5
Auto Posting Sensor Data
45
13.6
Examples Using the HTML Client
45
14
Firmware Upgrade over FTP
47
14.1
FTP Upload and Upgrade
47
15
Ad Hoc Networking Mode
48
15.1
Infrastructure and Ad Hoc Comparison
48
15.2
Configuring Ad Hoc Mode
48
15.3
Enable Ad Hoc Mode in Software
48
15.4
Scanning for Access Points in Ad Hoc Mode
49
15.5
Enable Ad Hoc Mode in Hardware
50
16
Access Point Networking Mode
50
16.1
Enabling AP Mode
50
16.2
Using Access Point Mode
51
17
Wi-Fi Protected Setup (WPS)
53
18
Analog Sensor Capability
55
Automatic sampling of sensor pins
56
Using the Built-In Sensor Power
56
19
Default Configuration Settings
57
19.1
Restoring Default Configuration Settings
59
20
Boot-up Timing Values
60
21
Supported 3rd Party Access Points
60
22
Command List
61
23
Release Notes
64
23.1
Known Problems
64
23.2
Current Firmware Features and Fixes
64

WiSnap User Manual 4.41 05282015-ML
Page 4
1 Overview
The “WiSnap”radio module is a complete, standalone embedded wireless LAN access device. The device has an on-board
TCP/IP stack and requires only 4 pins (POWER, TX, RX, GND) to design in. The RS-232 interface can transfer data to remote
applications, such as an iPhone app, data logger, or PC control console. Once initial configuration is set, the radio can
automatically access the Wi-Fi network and send/receive serial data over UART.
Features
Fully Qualified and Wi-Fi Certified 2.4GHz IEEE 802.11b/g transceiver
High throughput, up to 4Mbps sustained data rate with TCP/IP and WPA2
Ultra-low power (4uA sleep, 40mA Rx, 210mA max Tx)
Small, compact surface mount module
On board ceramic chip antenna and U.FL connector for external antenna
UART and SPI (future) data/control interfaces
10 general purpose digital I/O
8 analog inputs
Real-time clock for wakeup and time stamping/data logging, auto-sleep and auto-wakeup modes
Accepts 3.3V regulated or 2-3V battery with on board boost regulators
Supports Ad-hoc and Infrastructure mode connections
On board ECOS-OS, TCP/IP stacks
Wi-Fi Alliance certified for WPA2-PSK
FCC / CE/ ICS certified and RoHS compliant
Host Data Rate Up to 2.7 Mbps for UART
Memory 128 KB RAM, 2MB ROM, 2 KB battery-backed memory, 8 Mbit Flash
Intelligent, built-in power management with programmable wakeup
Can be powered from regulated 3.3-3.7V source or 2.0-3.0V batteries
Configuration over UART or wireless interfaces using simple ASCII commands
Over the air firmware upgrade (FTP), and data file upload
Secure Wi-Fi authentication WEP-128, WPA-PSK (TKIP), WPA2-PSK (AES)
Built in networking applications DHCP client, UDP, DNS client, ARP, ICMP ping, FTP, TELNET, HTTP
802.11 power save and roaming functions
One of the main applications for this device is the iPhone, since it requires buying additional authorization hardware to use
Bluetooth SPP; the WiSnap in ad-hoc mode is a simple and cost effective way to connect to iPhone apps. The WiSnap Serial
Adapter is more than a cable replacement solution. By allowing multiple TCP/IP sockets, applications can control and monitor
hundreds of Wi-Fi Serial adapters remotely distributed across a building LAN or campus WAN.
2 Hardware Interface
Please see the specific data sheet on the SerialIO.com website for hardware specifications and layout information, located
here: http://serialio.com/support/wifi/Serialio_WiSnap_GSX_Super_Module_Specs_2.0.pdf
2.1 Power
2.1.1 WiSnap M1 SuRFBoard
There are two options for powering the WiSnap module directly.
DC SUPPLY:

WiSnap User Manual 4.41 05282015-ML
Page 5
Apply 3.3 VDC power to VBATT (pin 20), and V3.3IN (pin 21).
Tie 3.3VREG-IN (pin 18) to GROUND.
Leave 3.3V-REG-OUT (Pin 17) floating/no connect.
BATTERY:
Apply battery = 2.0 to 3.3VDC to VBATT (pin 20). Leave V3.3IN pin 21 floating/no connect.
Tie pin 17 to pin 18. (This enables the on board battery boost 3.3V switcher).
There is a built in voltage brownout monitor which will shut down the chip when the voltage drops below 2.0 VDC.
Warning: Do NOT exceed these voltage ratings or damage to the module will occur!
NOTES:
1) The Sensor inputs SENS0-7 are extremely sensitive to over voltage. Under no conditions should these pins
be driven above 1.2VDC. Placing any voltage above this will permanently damage the radio module and
render it useless.
2) Placing 5VDC or any voltage above 3.3VDC into the VDD pins of the module will permanently damage the
radio module.
3) Placing 3.3VDC into the PIO’s while they are set as outputs will permanently damage the module. The failure
mode is a short across GND and VCC.
2.1.2 WiSnap AAA Dongle
The WiSnap AAA Dongle is powered by two AAA batteries, an external AC to 5VDC power cable, or
5VDC (only) on pin 9 of the DB9 connector. Rechargeable NiMH batteries will be trickle charged when used with an external
5VDC (only) power source.
The power cable is center pin positive, outer cylinder GND. Input MUST be 5 VDC for proper battery charging. Higher
voltages can permanently damage the charger and battery.
NOTE: Although external power is possible, batteries MUST BE CONNECTED in order to complete the circuit. Without
batteries, permanent damage to the unit may result.
WARNING: Do NOT use alkaline batteries while connecting any external power source. Doing so will cause
permanent damage. If you desire to run off AC or external DC power, this can be accomplished by inserting NiMH
re-chargeable batteries.
Charging is a trickle charge; it typically takes 10 hours to charge batteries fully from low battery. The charge rate of the charger
is low enough (< 100ma) such that the batteries can be charged indefinitely with no harm to them.
In configuration mode the show bat command will return the current battery voltage. Note that with rechargeable NiMh
batteries, the voltage will remain relatively unchanged until they go dead.
2.2 Reset
NOTE: The following only applies to the WiSnap M1 module.
Reset is active LOW and is optional/does not need to be connected. The reset pin is 3.3V tolerant and has an internal pull up of
100K to the VBATT.
2.3 UART

WiSnap User Manual 4.41 05282015-ML
Page 6
NOTE: The following only applies to the WiSnap M1 module.
Connect a common ground when using the external TX, RX inputs. For a 3 wire DB-9 interface, connect TX, RX, and GND only.
Factory default is hardware flow control disabled; CTS and RTS are not required.
PIO’s are not 5.0 VDC tolerant. If using a 5.0 VDC circuit, input, PIO and UART input pins require a resistor divider. A
suggestion is to use a 10K resistor in series with 20k resistor to ground.
2.4 Status Indicators
2.4.1 WiSnap M1 SuRFBoard
PIO 4, 5 and 6 are active high and can be connected to external LEDs to provide network, connection and data status.
State
Red LED (PIO6)
Amber LED (PIO5)
Green LED (PIO4)
ON solid
Connected over TCP
Fast blink
Not Associated
Rx/Tx data transfer
No IP address or Config Mode
Slow blink
IP address OK
OFF
Associated
2.4.2 WiSnap AAA Dongle
LEDs found on the WiSnap AAA are slightly different than on the M1.
State
Green LED
Yellow LED
Red LED
Blue LED
ON solid
Connected over TCP
Full charge
Fast blink
No IP address or Config Mode
Not Associated
Rx/Tx data transfer
Slow blink
IP address OK
Associated, No Internet
Low power
OFF
Associated, Internet OK
The blue LED blinks when data is sent or received on the serial interface. This does not indicate that the data was sent over the
Wi-Fi connection. If the blue LED is not flashing and your device is sending data to the serial port, you likely have a connection,
incorrect baud rate, or HW flow control (RTS/CTS) problem.
The blue LED also indicates battery status and will blink slowly when the batteries are low except when charging. When
charging the blue LED remains off. If the device is on while the batteries are charging the blue LED will come solid when the
batteries are fully charged.
There is an additional red LED near the power connector that indicates external power is present at either the power plug of
DB9 connector.
2.5 WiSnap M1 External Antenna
An external antenna with UF.L connection can be mounted onto the WiSnap M1 module. This is most useful when the device
will be embedded inside of another metal casing.
The FCC certified antenna has the following specifications:
Center Freq.
2.45 GHz
Bandwidth
120MHz
Wavelength
½-wave
VSWR
<1.9 typ. At center
Impedance
50 ohms
Gain
2.20dBi

WiSnap User Manual 4.41 05282015-ML
Page 7
Other antennas can be used, such as a higher gain antenna, but would not be FCC certified.
2.6 Additional WiSnap AAA Dongle Notes
2.6.1 Power Switch and Sleep
The red button on the top of the WiSnap AAA Dongle is a soft ON/OFF switch.
To turn ON the WiSnap AAA Dongle, press down the red button for 1 second, and then release it. You will see the green,
yellow, red and blue LEDs flash in succession. After a moment the blue and yellow LEDs will go OFF, leaving the red and green
LED flashing.
To turn OFF the WiSnap AAA Dongle, press down on the red button for 1 second, and then release it. The green, yellow, red
and blue LEDs flash in succession several times. Then all the LEDs will turn off and the device will be in sleep mode.
By default, the WiSnap AAA Dongle automatically shuts itself off if not connected for more than 3 minutes = 180 seconds. The
sleep timer duration is controlled by using the set sys sleep <seconds> command. Use the get sys command to display the
current settings of the sleep timer.
2.6.2 Dipswitches
There are four small configuration switches on the top of the WiSnap AAA Dongle. You will need a paper clip or flat
screwdriver to change them. Holding the device with the DB9 connector facing to the right, the switches are numbered one to
four from bottom to top. The off position is towards the DB9 connector.
Switch 1 –Ad-hoc override and restoring factory defaults
There are two ways to enable ad-hoc mode from the WiSnap: hardware, and software. See section 3.1 for more information
about ad-hoc networking.
Note: Ad-hoc has been deprecated as of firmware version 4.41. If you require ad-hoc mode, contact Serialio prior to purchase
to have an earlier firmware version installed on the WiSnap.
Software ad-hoc is recommended and is enabled by default.
If dipswitch 1 is ON when powering the WiSnap, the device will boot in hardware ad-hoc override mode. This is only useful if
the boot-up configuration is bad and you can’t access the device otherwise.
The SSID (network name) and other Wi-Fi settings are hardcoded and cannot be changed while in hardware ad-hoc mode. The
SSID of the ad hoc network will be WiSnap-GSX-NN where NN is the last two digits of the devices MAC address.
To restore factory defaults, power on the device with this switch ON, and then toggle the switch five (5) times. If there is a
config file named "user" on the WiSnap AAA Dongle file system, it is read in as the factory defaults instead of using the
hardcoded defaults. If no "user" config file is present, the hardcoded factory defaults are used.

WiSnap User Manual 4.41 05282015-ML
Page 8
The "user" config file is created using the save user command, which saves the current configuration settings.
Even if there is a “user”config file arming and toggling this switch nine (9) times will override the “user”settings and restore
the WiSnap module to the factory hardcoded defaults. This is a bypass mechanism in case a bad configuration is saved into
the “user”file.
Switches 2, 3, and 4 are currently not used.
2.6.3 Serial Connector Specification
DB9 connector Pin Out
Pin
WiSnap AAA Male
DB9
WiSnap AAA Female
DB9
1
NC
NC
2
RXD
TXD
3
TXD
RXD
4
DTR (=PIO7)
DON’T USE
5
GND
GND
6
DSR (=PIO8)
5V DC (input)
7
RTS
CTS
8
CTS
RTS
9
5V DC Only
5V DC Only
NOTE: The RS232 interface uses the SIPEX SP3232ECA chip with capacitor switch to generate the + and –signals and
thus is not driving the full RS232 voltages. Devices stealing power from the RS232 pins may not have enough voltage.
2.6.4 Null-modem and Flow Control Jumpers
The WiSnap AAA Dongle serial interface can be configured to enable flow control and null modem signaling. The jumper block
can be accessed by removing the battery cover from the WiSnap AAA Dongle.
WARNING: Flow control signals are NOT RS-232 signaling tolerant. If these are enabled with the jumper, do not
exceed 3.3 VDC or permanent damage can occur.

WiSnap User Manual 4.41 05282015-ML
Page 9
3Configuration
3.1 Entering Command Mode
Upon power up, the device will be in data mode. To enter command mode, send the three characters $$$ and the device will
respond with CMD.
While in command mode, the device will accept ASCII bytes as commands.

WiSnap User Manual 4.41 05282015-ML
Page 10
To exit command mode, send exit<cr>. The device will respond with “EXIT”.
Parameters, such as the SSID, channel, IP address, Serial Port settings, and all other settings can be viewed and configured in
command mode.
ASCII characters can be sent through a terminal emulator connected to the UART or via Telnet. When using the UART
communications settings should match the settings used when RN-131g connects, for example: the default is 9600 baud rate, 8
bits, No Parity, 1 stop bit, and hardware flow control disabled.
Use TeraTerm, PuTTY, or SerialIO’s JavaTerm as your terminal emulator. Please DO NOT use HyperTerminal as it is known to
have issues with our products.
Type $$$ on in the terminal emulator. You should see “CMD”returned to you. This will verify that your cable and comm.
settings are correct. Most valid commands will return an “AOK”response, and invalid ones will return an “ERR” description.
NOTE: You can enter command mode locally over the UART interface at any time when not connected and
also when connected if the appropriate settings are enabled.
NOTE: When the WiSnap module is powered up, it tries to auto associate to the Access Point stored in the
config settings. If for some reason the module cannot find the Access Point, it goes into auto association
mode and gets busy scanning and trying to join a network. This may cause the UART to become unresponsive
for a brief amount of time and you may lose the data sent to the module while the module is in this “not
associated”state making it difficult to get into command mode and configure the module
Version 2.21 of the firmware fixes this issue. The auto-join feature is disabled when in command mode. This makes it easy to
configure the module. Auto-join will re-enable when you exit out of command mode.
The auto join feature can be disabled by setting the set wlan join 0. This will prevent the WiSnap module to attempt to
associate to a network that does not exist.
Another alternative is to boot the module in ad-hoc mode by using the PIO9 ad-hoc/factory reset jumper. If this is high on
power up, the module will not associate to any network; it will use the temporary ad-hoc mode. When in ad-hoc mode, you
can configure the network settings.
3.2 Common Configurations
Two common modes of operation for the WiSnap module are A) initiating a connection to a server and B) listening for a remote
host connection. This section will go through the configuration for each setup. The setups are shown using infrastructure
network. I.e. with an access point, however the same can be done with ad-hoc networking.
Initiating a connection from the WiSnap
Step 1: Set up the WLAN properties so the device will connect to the network automatically upon power up. In this
example we want to connect to the wireless network my_network.
Command
Result
1
set wlan join 1
Auto join upon power up
2
set wlan chan 0
Scan all channels
3
set wlan ssid my_network
Network name
4
set wlan phrase my_secret_code
Pass phrase

WiSnap User Manual 4.41 05282015-ML
Page 11
The join 1 setting ensures that when the module wakes up, it tries to join the access point that matches the stored SSID,
passkey and channel. Channel =0 (the default) will force auto-scanning. Setting the channel will reduce the time it takes the
WiSnap to find and associate.
Step 2: Set up the IP address and port number of the remote server, so the WiSnap can connect when it wakes up.
Command
Result
1
set ip host 10.20.20.75
Set the host IP address
2
set ip remote 3000
Set the remote port
3
set sys autoconn 2
Try to connect to the host every 2 seconds
4
save
Save configuration
NOTE: If autoconn = 1, the WiSnap will only make one attempt to auto connect.
Step 3: Set the wake up and sleep conditions. By default the adapter will wake whenever there is data written to the serial
interface. You can also configure the device to wake up on CTS, on a PIO or timer. See the command reference for details. We
are going to set this up to wake on a timer then sleep after 2 minutes if there is no connection or if connected and no data has
been transferred for 30 seconds.
Command
Result
1
set sys sleep 120
Sleep after 2 minutes if no connection
2
set sys trigger 2
Wake on CTS
3
set conn idle 30
Disconnect after 30 seconds of no data
4
save
Save all the settings to the config file
5
reboot
Use the new settings
This setup can be tested using TCP server application that opens a socket on port 3000. Port Peeker is a free application that
you can download off the web. It is available at http://www.linklogger.com/portpeeker.htm
Waiting for the remote host to connect to the serial adapter (listen mode)
In this example we are using a static IP so that the remote host knows where the WiSnap Serial adapter is on the network.
Alternatively you can write your application software to listen for the broadcast UDP packet (automatically sent by
WiSnap by default) to identify the WiSnap Serial adapter and get the IP address and TCP port number that the WiSnap is
listening on.
Step 1: Set up the wlan properties so the device will connect to the network automatically upon power up. In this example we
want to connect to the wireless network my_network.
Command
Result
1
set wlan join 1
Auto join upon power up
2
set wlan chan 1
Only look on channel 1
3
set wlan ssid my_network
Network name
4
set wlan phrase my_secret_code
Pass phrase
Step 2: Configure the WiSnap static IP address so the remote application can connect, turn off DHCP and set the IP address
and netmask.
Command
Result
1
set ip address 10.20.20.63
Set the IP address
2
set ip localport 5030
Set the local port to listen on
3
set ip netmask 255.255.255.0
Set the IP netmask
4
set ip gateway 10.20.20.1
Set the network gateway
5
set ip dhcp 0
Turn of DHCP

WiSnap User Manual 4.41 05282015-ML
Page 12
Step 3: Set the wake up and sleep conditions. In this mode the sleep and wake timers are used to conserve battery. Since
we don’t know when the remote host will connect, the module should to occasionally wake up and listen for the remote
host. The trade off with these timers is that the longer you sleep, the better your battery life will be but the longer it will take
the remote host to connect.
WARNING: Do not set the sleep timer below 5 seconds or it will be impossible to get into command mode to
reprogram this mode without it going back to sleep!
Command
Result
1
set sys wake 20
Wake after 20 seconds
2
set sys sleep 10
Go to sleep after 10 seconds
3
save
Save configuration
4
reboot
Restart using the new configuration
At this point you could test this configuration using telnet on a computer sharing the same network to connect to the WiSnap
module.
Enabling Access Point Mode (Requires firmware to 2.42 and higher)
Devices using firmware versions 2.42 and higher are able to put the device into Access Point mode. Access point mode allows
for an alternative for connecting android devices. The device can be put into access point mode by issuing the following
commands:
Command
Result
1
set wlan ssid WiSnap
Set the Access Point SSID
2
set wlan join 7
Create an access point on power up
3
set ip dhcp 4
Turn on the DHCP server
4
set wlan chan 1
Only broadcast on channel 1
5
set ip address 1.2.3.4
Set the IP address for the WiSnap device
6
set ip net 255.255.255.0
Set the subnet mask
7
set ip gateway 1.2.3.4
Set the Access Point gateway
8
save
Save configuration
9
reboot
Restart using the new configuration
When the device reboots, it should be in access point mode.
4 WiSnap Command Reference
4.1 Command Syntax
Commands begin with a keyword, and have optional additional parameters, generally space delimited. Commands and options
are case sensitive. Hex input data can be upper or lower case. String text data
,
such as SSID is also case sensitive.
The first command is fully decoded and must be complete. Other command parameters can be shorted by using only the first
character.
For example,
set uart baud 115200 is valid
set uart b 115200 is also valid
set u b 115200 is also valid

WiSnap User Manual 4.41 05282015-ML
Page 13
however,
s uart baud 115200 is NOT valid.
Numbers can be entered as either decimal, (like 115200 above) or hex. To enter hex, use “0x”before the value: 0x<value>.
For example, the hex value FF would be entered as 0xFF.
4.2 Command Organization
Commands fall into 5 general categories:
SET COMMANDS - Changes settings immediately and permanently (save command issued).
GET COMMANDS - Retrieve the permanently stored information for display to user.
STATUS COMMANDS - See what is going on with the interface, IP status, etc.
ACTION COMMANDS - Perform action such as scan, connect, disconnect, etc.
FILE IO COMMANDS - Upgrade, load and save configuration, delete files, etc.
NOTE: You must save any changes made or the module will load the previous settings upon reboot or power up.
When the system boots, all configuration data is loaded into RAM variables from the file called “config”. The set commands
actually only modify the RAM copy of variables in the system. In general, the IP, WLAN and UART settings need a save and
reboot to take effect, since they operate at boot up time. For example: At power up, you will only associate, set the channel
and get your IP address once.
Most of the other commands take effect immediately like the COMM settings and timers. This allows temporary change of
parameters “on the fly” to test features, minimize power usage and save on flash re-write cycles.
Once all configuration is complete, the user must save the settings using the save command to store the configuration data,
otherwise it will not take effect upon reboot or reset. Multiple configurations can be stored by using the save <filename>
command, and these configurations can be loaded using the load <filename> command.
5SET Commands
These commands begin with set. There are 11 major categories.
AD-HOC - controls the ad-hoc parameters
BROADCAST - controls the broadcast hello/heartbeat UDP message
COMM - communication and data transfer, timers, matching characters
DNS - DNS host and domain
FTP - FTP host address and login information
IP - IP settings
OPTION - optional and not frequently used parameters
SYS - system settings such as sleep and wake timers
TIME - timer server settings
UART - serial port settings such as baud rate and parity
WLAN - wireless interface settings, such as SSID, channel, and security options
5.1 AD-HOC Parameters

WiSnap User Manual 4.41 05282015-ML
Page 14
set ad-hoc beacon <ms> - sets the ad-hoc beacon interval in milliseconds where <ms> is a decimal number from 0 to 65,436.
Default is 100.
set ad-hoc probe <num> - sets the ad-hoc probe retry count. Default is 5. This is the number of consecutive probe responses
that can be lost before declaring “AD- HOC is lost” and disabling the network interface.
5.2 BROADCAST Parameters
set broadcast address <addr> - sets the address to which the UDP hello/heartbeat message is sent. The default address is
255.255.255.255.
set broadcast interval <value> - sets the interval at which the hello/heartbeat UDP message is sent. Interval is specified in
seconds. The value is a mask that is ANDed (compared) to a free running seconds counter. For example:
-If the interval is 0x1, the module sends one packet every 2 seconds.
-If the interval is 0x2. The module sends two packets every 4 seconds.
-If the interval is 0x3, the module sends one packet every 4 seconds.
-If the interval is 0x6, the module sends two packets every 8 seconds.
-If the interval is 0x7, the module sends one packet every 8 seconds.
The minimum interval value is 1 (every 2 seconds) and max value is 0xff (every 256 seconds). Setting the interval value to zero
disables sending UDP broadcast messages. The default interval is 7.
set broadcast port <port> - sets the port number to which the UDP hello/heartbeat message is sent. The default port is 55555.
5.3 COMM Parameters
set comm $ <char> - sets character used to enter command mode. Typically used when “$$$”is a possible data string. Default
is “$”. Care should be taken when setting this to note the new character as once this setting is saved every subsequent reboot
will ignore “$$$”and look for “<char><char><char>”.
set comm close <string> - sets the ASCI string that is sent to the local UART when the TCP port is closed. If no string is desired,
use 0 as the <string>parameter. Max string length is 32 characters. Default is *CLOS*
set comm open <string> - sets the string that is sent to the local UART when the TCP port is opened. If no string is desired, use
0 as the <string>parameter. Max string length is 32 characters. Default is *OPEN*
set comm remote <string> - sets the string that is sent to the remote TCP client when the TCP port is opened. If no string is
desired, use 0 as the <string>parameter. Max string length is 32 characters. Default is *HELLO*
set comm idle <secs> - sets the Idle Timer Value. This is the number of seconds with no transmit or receive data before the
connection is closed automatically. Default is 0, never disconnect on idle.
set comm match <value> |<hex> - sets the match character, where <value> is a decimal number from 0 to 127 or a hex
number from 0 to 7F. When this configuration option is set, the module sends an IP packet each time the match character
appears in the data. You enter <value> either as the decimal (e.g., 13) or hex (e.g., 0xd) equivalent of the of the ASCII
character. Setting the match character to 0 disables matching.
Flush timer is one of three ways to control TCP/IP packet forwarding. The others are match character and size. For more
information see section 10.4.

WiSnap User Manual 4.41 05282015-ML
Page 15
set comm size <value> - sets the flush size. An IP packet will be sent each time <value> bytes are received. Default is 64 bytes.
You should set this value to the largest possible setting to maximize TCP/IP performance. Maximum value = 1420 (at 9600)
bytes.
NOTE: This value is set automatically when the baud rate is set, in an attempt to optimize the link. It is assumed that
higher baud rates equate to more data and hence the flush size is increased.
Flush size is one of three ways to control TCP/IP packet forwarding. The others are match character and timer. For more
information see section 10.4.
set comm time <num> - sets the flush timer. An IP packet will be sent if no additional bytes are received for <num>
milliseconds. <num> is one milliseconds intervals. 1 is the minimum value. Default is 10 (10 milliseconds). Setting this value to 0
will disable forwarding based on the flush timer.
Flush timer is one of three ways to control TCP/IP packet forwarding. The others are match character and size. For more
information see section 10.4.
5.4 DNS Parameters
set dns address <addr> - sets the IP address of the DNS sever, where <address> is an IP address in the form
<octet>.<octet>.<octet>.<octet> with <octet> being a number between 0 and 255. This address is automatically set when using
DHCP; you must set the DNS IP address for static IP or automatic IP modes.
set dns name <string> - sets the name of the host for TCP/IP connections to <string>, where <string> is up to 32 characters (32
bytes).
set dns backup <string> - sets the name of the backup host for TCP/IP connections to <string>, where <string> is up to 32
characters (32 bytes). The FTP client uses the backup string to download the firmware via the ftp update command. Default:
rn.microchip.com
5.5 FTP Parameters
set ftp dir <string> - sets the starting directory on the FTP server, where <string> is up to 32 characters. To read/write to
subfolders, use the \ character. To indicate the root directory, use a period.
set ftp filename <file> - sets the name of the file transferred when issuing the ftp u or ftp g commands, where <filename> is
the firmware image. If you specify any file other than the firmware image, the WiSnap module downloads the file and issues
the UPDATE FAIL=3 error.
set ftp addr <addr> - sets the ftp server IP address. Default 0.0.0.0.
set ftp remote <port> - sets the ftp server remote port number (default is 21).
set ftp user <name> - sets the ftp user name for accessing the FTP server.
set
ftp pass <pass> - sets the ftp password for accessing the FTP server.
set ftp time <value> - sets the FTP timeout value, where <value> is a decimal number that is five times the number of seconds
required. The module uses this timer to close the FTP connection automatically after the specified time.
5.6 IP Parameters

WiSnap User Manual 4.41 05282015-ML
Page 16
set ip address <addr> - sets the IP address of the WiSnap module, where <address> is an IP address in the form
<octet>.<octet>.<octet>.<octet> with <octet> being a number between 0 and 255. If DHCP is turned on, the IP address is
assigned and overwritten during association with the access point.
Example: set ip a
10.20.20.1
set ip backup <addr>- sets a secondary host IP address. If the primary host IP is not reachable the module will try the
secondary IP address if set.
set ip dchp <value> - enable/disable DHCP mode. If enabled, the IP address, gateway, netmask, and DNS server are requested
and set upon association with access point. Any current IP values are overwritten.
DHCP Cache mode can reduce the time it takes the module to wake from deep sleep thus saving power. In cache mode, the
lease time is checked and if not expired, the module uses the previous IP settings. If the lease has expired the module will
attempt to associated and use DHCP to get the IP settings. DHCP cached IP address does not survive a power cycle or reset.
Mode
Protocol
0
DHCP OFF, use stored static IP address
1
DHCP ON, get IP address and gateway from AP
2
Auto-IP, generally used with Ad hoc networks
3
DHCP cache mode, uses previous IP address if lease is not expired
(leave survives reboot)
4
Enables DHCP server in soft AP mode
set ip flags <value> - sets TCP/IP advanced functions. Value is a bit mapped flag register. Default =
0x7.
Bit
Protocol
0
TCP connection status - see note below
1
Bypass Nagle algorithm and use TCP_NODELAY
2
TCP retry enabled (42 total)
3
UDP retry (attempts retry if no ACK from UDP)
4
DNS host address caching enabled
5
ARP table caching enabled
6
UDP auto pairing enabled
7
Add 8 byte timestamp to UDP or TCP packets
NOTE: When the link to an associated to an access point is lost while a TCP connection is active, the TCP connection
can be left in a hung/inconsistent state. In some cases, the TCP connection will not recover. In version 2.20 and later,
if the link to the access point is regained within 60 seconds, the TCP connection will survive.
With version 2.20 we have changed the operation of bit0 in the “ip flags” register. Previously this bit specified the TCP
copy function, but controls the TCP socket function while associated on a network.
If bit 0 is set (default) TCP connections are kept open when the connection to the access point is lost.
If bit 0 is cleared (by setting “set ip flags 0x6” for example) then when the connection to the access point is
lost and TCP is connected, the connection will be closed.
set ip gateway <addr>- sets the gateway IP address, If DHCP is turned on, the gateway IP address is assign and overwritten
during association with the access point.
set ip host <addr> - sets the remote host IP address. This command is used for making connections from the WiSnap module
to a TCP/IP server at the IP address <addr>.
set ip localport <num> - sets the local port number to listen for incoming connections, where <num> is an integer number
representing the port.

WiSnap User Manual 4.41 05282015-ML
Page 17
set ip netmask <value> - sets the network mask. If DHCP is turned on, the net mask is assign and overwritten during
association with the access point.
set ip protocol <value> - sets the IP protocol. Value is a bit mapped setting. To connect to the WiSnap module over TCP/IP
such as Telnet the device must have the use the TCP Server protocol / bit 2 set. To accept both TCP and UDP use value = 3 (bit
1 and bit 2 set).
Bit Position
Protocol
0
UDP
1
TCP Server & Client (Default)
2
Secure (only receive packets when IP address matches the store
host IP)
3
TCP Client only
4
HTTP client mode
set ip remote <value>- sets the remote host port number for outgoing connections.
set ip tcp-mode <mask> - controls the TCP connect timers, DNS preferences, and remote configuration options. <mask> is a
hex number referring to a bit-mapped register as shown below.
Bit Position
Protocol
0
Shorten the TCP connect timer (use with bit 1)
1
Shorten the TCP connect timer (use with bit 0)
2
Forces the module to use DNS first to resolve the IP address,
even if the host IP is set
3
Reserved
4
Disables remote configuration security purposes
Example:
-set ip tcp-mode 0x4 –Forces the module to use DNS
-set ip tcp-mode 0x10 –Disables remote configuration
5.7 OPTIONAL Parameters
set opt jointmr <msecs> - join timer is the time in milliseconds (default=1000) the join function will wait for an access point to
complete the association process. This timer is also the timeout for the WPA handshaking process.
set opt sensor <mask> - deprecated in firmware versions 2.23 and later. Use set q sensor. Bitmask value that determines
which sensor pins to sample when sending data using the UDP broadcast packet and the HTTP auto sample function.
set q sensor <mask> - specifies which sensor pins to sample when sending data using the UDP broadcast packet or the HTTP
auto sample function, where <mask> is a bit-mapped register.
Example: set q sensor 0xff.
NOTE: In versions of firmware prior to 2.23, this command is named set option sensor
set opt replace <char> - replacement character for spaces. The replacement character is used when entering SSID and pass
phrases that include space. This is used by the WiSnap command parser only. Each occurrence of the replacement character
is changed into a space. The default is “$” (0x24).
set opt format <mask> - settings for HTTP client/web server value is a bitmapped register. See Section 13, web server modes.

WiSnap User Manual 4.41 05282015-ML
Page 18
Bit
Function
0
Automatically send HTML data header based on broadcast
interval
1
Send users BINARY data (converted to ASCII hex)
2
Sample the TPIO and AtoD pins format to ASCII hex
3
Appends &id= <the value of the deviceid string set with “set opt
device <string>”>
4
Appends &rtc= <real time clock value in message as 32 bit HEX
value in format aabbccddeeff>
set opt deviceid <string> - Configurable Device ID - can be used for storing serial numbers, product name or other device
information. This information is sent as part of the broadcast hello packet that is sent as a UDP. The current value can be
shown with the get option or show deviceid commands. Max string size is 32 bytes. The default is “WiSnap<DEVICEID>M1”.
set opt password <string> - TCP connection password. Provides minimal authentication by requiring
any remote device that
connects to send and match a challenge <string>. When set, all newly opened connections must first send the exact characters
that match the stored password otherwise the WiSnap module will close the connection. When the password is set, the
WiSnap module sends the string “PASS?”to the remote host. All characters in the string must be sent in one TCP packet. Max
string size is 32 bytes. To disable the password feature use string=0 which is the default.
5.8 SYSTEM Parameters
set sys autoconn <secs> - TCP mode: sets the auto connect timer. This command causes the module periodically connect to
the host. The timer <secs> determines how often to connect to the stored remote host. If set to 1, the module will only make
one attempt to auto connect upon power up. If set to 2 or greater, auto connect will re-open the connection after the
connection is closed. Default=0 disables.
set sys autosleep <num> - sets the auto-sleep timer. 0 disables. If the protocol is set to UDP ONLY, this timer is used as a
quick sleep function. Device will sleep <num> ms after transmission of the first UDP packet.
set sys iofunc <value> - sets the IO port alternate functions. Bit-mapped value. For more details see section 10.5
set sys mask <mask> - sets the IO port direction mask. Bit-mapped value. For more information see section 10.5
set sys printlvl <value> - sets the debug print messages printed by the WiSnap module on the UART, where <value> is one of
the values shown on the table below. Default is 1.
Value
Description
0
Quiet mode. Messages are not printed when the module wakes
up or powers up.
1
Print all status messages.
2
Print only critical network access point connection level status,
e.g., Associated! or Disconnect from <SSID>.
4
Print the DHCP and IP address status information. After you
have verified the module’s configuration, you can turn off this
option so that the messages do not interfere with the data.
0x4000
Change the scan format output to an MCU friendly format.
0x10
Enables the UART heartbeat message.
set sys output <value> <mask> - sets output PIO pins to HIGH or LOW. Bit-mapped value. Optional mask only sets a subset of
pins.
Example: To toggle GPIO8, use the following commands:
-set sys mask 0x21f0 - Set GPIO8 as output

WiSnap User Manual 4.41 05282015-ML
Page 19
-set sys output 0x0100 0x0100 - Drives GPIO8 high
-set sys output 0x0000 0x0100 - Drives GPIO8 low
set sys sleep <secs> - sets the sleep timer, where <value> is a decimal number. The sleep timer is the time (in seconds) after
which the module goes to sleep. This timer is disabled during an open TCP connection. When the TCP connection is closed, the
module counts down and puts the module to sleep after <value> seconds. Setting the value to 0 disables the sleep timer, and
the module will not go to sleep based on this counter. 0 disables.
NOTE: If not using Sensor pins to wake the module, be sure to set the wake timer before issuing the sleep timer or the
module will not wake up.
See section 10.1 for more details on using system timers
set sys trigger <flag>| <mask> - sets the sensor input(s) to wake on (0-3). With this parameter setting, the module wakes from
sleep state using the sensor input 0, 1, 2, and 3, where <flag> is a decimal number referring to a bit-mapped register as shown
in the table below and <mask> is a hex number. You use either <flag> or <mask> with this parameter setting. This command
sets the sensor input(s) to wake on (0 to 3). Setting <flag> to 0 disables wake on sensor inputs. Bit-mapped value.
Bit Position
Description
0
Trigger sensor input 0
1
Trigger sensor input 1
2
Trigger sensor input 2
3
Trigger sensor input 3
4
Enable WPS function
5
Enable sleep on GPIO8
The following table describes how you can wake the module using sensor input.
Wake on Sensor Input
Value
Command
0
1
set sys trigger 1
1
2
set sys trigger 2
2
4
set sys trigger 4
3
8
set sys trigger 8
NOTE: Setting the system trigger value to 0x10 enables WPS functionality. WPS is disabled by default.
Setting the trigger value to 0x20 (i.e., using
<mask>)
puts the module to sleep when GPIO8 is pulled high. To enable this
feature, use the set sys trigger 0x20 command. This command makes GPIO8 an interrupt pin and puts the module to sleep as
soon as it is pulled high, regardless of the module’s state; the module goes to sleep even if it is associating with a network or
has an open, active TCP connection.
This command is useful for when the module is failing to associate with network because it is out of range (or for any other
reason), or if the module must be put to sleep quickly.
NOTE: GPIO8 must be low on power up and stay low until you want to put the module to sleep.
set sys wake <secs> - sets the auto wake timer. 0 disables. See section 10.1 for more details on using system timers.
set q power <value> -register automatically turns on the sensor power, where <value> is shown in the table below. This
parameter sets an 8-bit register with two 4-bit nibbles. If the top nibble is set, power is applied upon power up and removed
upon power down or sleep. If the bottom nibble is set, power is applied when a sampling event occurs such as:
UDP broadcast
Automatic web posting of sensor data
Power is removed immediately after sampling is complete

WiSnap User Manual 4.41 05282015-ML
Page 20
Value
Sensor pin voltage
0
Turn off the sensor power
1
Ground the sensor pin
2
1.2-V internal regulated reference
3
VBATT input pin
4
3.3-V output of on-board regulator
Example:
-set q power 0x20 - Sets power to 1.2 V automatically upon power up
-set q power 0x02 - Sets power to 1.2 V when a sampling event occurs
-set q power 0x40 - Sets power to 3.3 V automatically upon power up
-set q power 0x04 - Sets power to 3.3 V when a sampling event occurs
5.9 TIME Server Parameters
set time address <addr> - sets the time server address. (sNTP servers)
set time port <num> - sets the time server port number. Defaults to 123 which is almost always the sNTP server port.
set time enable <value> - enable or disable fetching time from the specified sNTP time server. Default=0= disabled. A value or
1 gets time only once on power up. Any value > 1 gets time continuously every <value> minutes.
set time raw <value>- setting parameter allows you to set the RTC raw value from the console
,
where <value> is a decimal
number in seconds. The RTC ticks at 32,768 Hz.
5.10 UART Parameters
set uart baud <rate> - sets the UART baud rate. Valid settings are {2400, 4800, 9600, 19200, 38400, 57600, 115200,
230400}.
Example: set u b 9600 sets the baud rate to 9600 baud.
NOTE: the RS-232 interface on the WiSnap does not work below 2400 or above 230400 baud.
set uart instant <rate> - this immediately changes the baud rate, where <value> is 2400, 4800, 9600, 19200, 38400, 57600,
115200, 230400, 460800, or 921600. This is useful when testing baud rate settings, or switching baud rate “on the fly”
remotely while connected over TCP. This setting does not affect configuration. Returns the AOK response, but will not exit
command mode.
NOTE: In firmware version 2.22 and lower, the module does NOT return an AOK over telnet before exiting command
mode.
If used in local mode, the baud rate changes and the module sends AOK using the new baud rate. If the host switches to the
new baud rate immediately, the host may see the AOK string at the new baud rate. Depending on the baud rate, it takes at
least ten times the bit rate for the module to issue the first character.
set uart raw <value> - sets a RAW UART value, where <value> is a decimal number representing the baud rate. Used to set
non-standard rates. The lowest possible baud rate is 2400.
Using non-standard raw baud rates with hardware flow control can be more useful at speeds as the microcontroller interfaced
to the module may be able to better match the UART speed and get better results. The table below shows the supported raw
baud rates:
Table of contents
Other Serialio Adapter manuals
Popular Adapter manuals by other brands

NETGEAR
NETGEAR WNHD3004 - High Performance Wireless-N HD Home Theatre... user manual
Clas Ohlson
Clas Ohlson 36-4155 instructions
NETGEAR
NETGEAR Wg111v2 - Usb Wifi Card Includes Driver Cd Basic setup
TEXIO
TEXIO RK-601E instruction manual
Planet Networking & Communication
Planet Networking & Communication WL-U356M Quick installation guide
Belkin
Belkin F1PG200ENau user manual

