Seura SSB-1 User manual

WARRANTY REGISTRATION
REGISTER FOR
EXTRA BENEFITS
Activate within 30 days of purchase:
seura.com/activate
OUTDOOR 80W
SOUNDBAR
MODELS
SSB-1
SSB-2

2
Welcome
Thank you for purchasing a Séura Outdoor 80W Soundbar. Please read these instructions carefully before
operating your new product.
Contents
.................................................................................................................3
Safety Warnings.............................................................................................................4
Get to know your Séura® Outdoor Soundbar ........................................................9
Parts and Tools ............................................................................................................. 11
Installation Option 1: Mount to Bottom of Séura Outdoor TV........................... 12
Installation Option 2: Mount to a Wall ....................................................................17
Operating Instructions ...............................................................................................20
Caring for your Séura Soundbar .............................................................................20
Troubleshooting........................................................................................................... 21

3
*Installation in sunlight reduces the maximum permitted air temperature.
Specications
Model: SSB-1 Model: SSB-2
GENERAL
SÉURA TV COMPATIBILITY TV Models SHD2-43,
SHD2-55, UB4-50
TV Models SHD2-65,
SHD2-75, UB4-65, UB4-85
OPERATING TEMP. RANGE -40°F to 140°F*
OPERATING HUMIDITY RANGE 10–90% Relative Humidity, Non-Condensing
WATERPROOF RATING IP55
INTEGRATION
POWER CONSUMPTION 100-240V, 50-60Hz, 80W Peak
OPTICAL AUDIO INPUT
ANALOG AUDIO INPUT
AUDIO
DRIVERS
FREQUENCY RESPONSE 40Hz-20kHz
CHANNELS 2
SPEAKER OUTPUT
INSTALLATION
GRILL TYPE Plated Steel
PRODUCT DIMENSIONS 37.8" w x 5.5" h x 3.5" d 57.0" w x 5.5" h x 3.5" d
PRODUCT WEIGHT 13.0 lbs 20.0 lbs
VESA PATTERN 300mm x 60mm, 400mm x 60mm 400mm x 60mm, 600mm x 60mm
MOUNTING Mounting brackets and hardware included
for mounting to a wall or Séura Outdoor TV
OTHER
CERTS. AND COMPLIANCE UL, FCC
WARRANTY Séura warrants Outdoor Soundbars with respect to labor and parts for

4
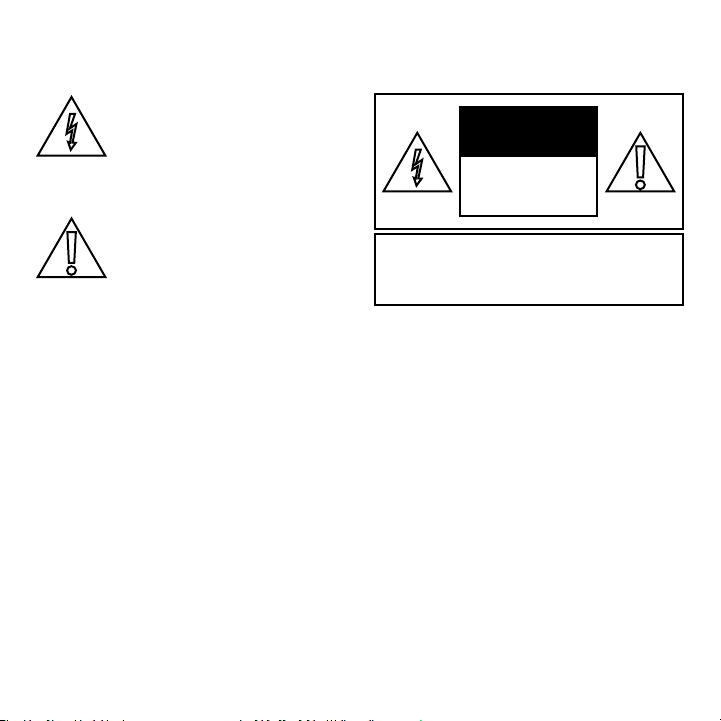
This symbol is intended to alert the
user to the presence of uninsulated
“dangerous voltage” within the product’s
magnitude to constitute a risk of
electric shock to persons.
This symbol is intended to alert the user
to the presence of important operating
and maintenance instructions in the
literature accompanying the appliance.
WARNING: READ ALL INSTRUCTIONS BEFORE ATTEMPTING TO
INSTALL OR SERVICE THIS PRODUCT.
Warnings:
CAUTION
RISK OF ELECTRIC SHOCK
DO NOT OPEN
CAUTION: TO REDUCE THE RISK OF ELECTRIC SHOCK, DO
PARTS INSIDE. REFER SERVICING TO QUALIFIED SERVICE
PERSONNEL.
Do not submerge Séura®Outdoor Soundbar in water: The Séura®Outdoor Soundbar will resist water
exposure from normal rain, sprinklers, snow, etc.; however, it is not designed to be submerged in water.
Do not wash with garden hose or pressure-wash: Séura®Outdoor Soundbar will resist water exposure from
normal rain, sprinklers, snow etc.; however, it is not designed to withstand pressure washers, high-pressure
water jets, projected snow from a blower, or hurricane-type weather.
Do not let metal pieces or objects of any kind fall into the soundbar.
inserting an object can cause electric shock and/or short internal parts.
To prevent re
Warnings
when installing, using, and maintaining your outdoor soundbar. The socket-outlet should be installed
near the equipment and be easily accessible. The soundbar should be connected to a grounded GFCI
protected main socket outlet.
WARNING: If you manipulate against the recommended usage, serious injury or death to user may result.
5
Ce symbole est destiné à alerter l’utilisateur
de la présence d’une «tension dangereuse»
non isolée à l’intérieur de l’enceinte du
produit qui peut être d’une amplitude
électrique pour les personnes.
Ce symbole est destiné à alerter l’utilisateur
de la présence d’instructions importantes
d’utilisation et de maintenance dans la
documentation accompagnant l’appareil.
AVERTISSEMENT: LIRE TOUTES LES INSTRUCTIONS AVANT
D’INSTALLER OU SERVICE CE PRODUIT.
Avertissements:
CAUTION
RISQUE DE CHOC
ELECTRIQUE. NE PAS
OUVRIR.
ATTENTION: POUR RÉDUIRE LE RISQUE DE CHOC
AUCUNE PIÈCE RÉPARABLE PAR L’UTILISATEUR, RÉFÉREZ
L’ENTRETIEN AU PERSONNEL DE SERVICE QUALIFIÉ.
N’immergez pas la barre de son d’extérieur Séura® dans l’eau : la barre de son d’extérieur Séura® résistera
à l’exposition à l’eau de la pluie normale, des arroseurs, de la neige, etc. ; cependant, il n’est pas conçu pour
être immergé dans l’eau.
Ne pas laver avec un tuyau d’arrosage ou un lavage à pression : la barre de son d’extérieur Séura® résistera
à l’exposition à l’eau de la pluie normale, des arroseurs, de la neige, etc. ; cependant, il n’est pas conçu pour
ou aux intempéries de type ouragan.
Ne laissez pas de pièces métalliques ou d’objets de quelque nature que ce soit tomber dans la barre de son.
Une haute tension circule dans le produit et l’insertion d’un objet peut provoquer un choc électrique et/ou
un court-circuit des pièces internes.
Pour éviter les incendies,
barre de son.
AVERTISSEMENTS
Pour réduire le risque d’incendie, de choc électrique et d’autres blessures, garder ces consignes de sécurité à l’esprit
lors de l’installation, l’utilisation et l’entretien de votre moniteur en plein air. La prise de courant doit être installée près
de l’équipement et être facilement accessible. Le moniteur doit être relié à une prise de courant avec terre protégé par
disjoncteur différentiel.
ATTENTION: Si vous manipulez contre l’utilisation recommandée, des blessures graves ou la mort à l’utilisateur peuvent en
résulter.

6
1. Read these instructions.
2. Keep these instructions.
3. Heed all warnings.
4. Follow all instructions.
5. Do not use this product for other than
intended use.
6. Close adult supervision is necessary
when any product is used by or near
children.
7. Only use the attachments/accessories
8.
by the manufacturer or sold with the
apparatus.
9. To prevent injury, this apparatus must
be securely attached to a TV or wall
in accordance with the installation
instructions.
10. This Séura product is intended for use
indoors and outdoors.
11. This product is water resistant. Do not
immerse this product in water.
12.
shock, do not expose the inside of this
apparatus to rain or moisture.
13. Do not use or place any combustible or
14. Unplug this apparatus during lightning
storms or when unused for long periods
of time. Do not touch this apparatus,
antenna, power cables, or power plugs
during a thunder or lightning storm.
15. Do not touch the power plugs with wet
hands.
16. Protect the power cord from being
walked on or pinched particularly at
plugs, convenience receptacles, and the
point where they exit from the apparatus.
17. Inspect the desired location for
installation and be aware of all electrical
wiring pathways, water pipes, gas lines,
or other potentially hazardous conditions
that may exist to protect from accidental
damage during creation of on-site
conditions.
18. Do not install the device near any heat
sources such as radiators, heating pipes,
heaters, furnaces or other devices
19. Adequate ventilation must be maintained
to ensure reliable and continued
operation and to protect the product
from overheating.
20. Do not mount this product near a motor
or transformer where strong magnetism
is generated.
21. Do not place the
product on an
unstable place.
Improper installation
may cause the
product to fall,
resulting in potential
serious personal
injuries, as well
as damage to the
product. Follow mounting instructions
properly for safe operation of the
product.
22. Do not move or transport the product
with any cables (power cables, content
source devices. Damages may occur to
the cables, plugs, or jointing connectors
of the cables due to forcible bending
and stress, which may cause damages
to the waterproof seal of the product,
or shorted circuit.
23. It is REQUIRED that this product is
plugged into an electrical outlet
protected by a Ground Fault Circuit
to do so will void any warranty for this
product.
24. The cable distribution system should be
ANSI/NFPA 70, the National Electrical
of Outer Conductive Shield of a Coaxial
Cable.
25. The apparatus shall be connected to a
MAINS socket outlet with a protective
earthing connection. Where the MAINS
plug or an appliance coupler is used as
the disconnect device, the disconnect
device shall remain readily operable.
26. The disconnect device shall remain
readily operable.
27. The socket-outlet shall be installed
near the equipment and shall be easily
accessible.
28. Do not defeat the safety purpose of
the polarized or grounding type plug.
A polarized plug has two blades with
one wider than the other. A grounding
type plug has two blades and a third
grounding prong. The wide blade or the
third prong is provided for your safety.
your outlet, consult an electrician for
replacement of the obsolete outlet.
29. Use properly rated power voltage. Use
electric shock and severe damages to
the product.
30. Do not overload AC outlets or extension
electric shock.
31. Ensure all required electrical
have been installed by the appropriate
individuals and are code approved.
32. Ensure all framing requirements, if
needed, have been completed to building
code and pose no structural issues.
33. Do not operate any product with a
damaged cord or plug or operate it after
the appliance malfunctions or has been
damaged in any manner.
34. To electrically disconnect the product,
turn OFF the product, then remove the
electrical power plug from the outlet.
35. Any severe physical impact on the
product may cause certain components
to fall out of place within and break,
such event, do not operate the product.
Contact the manufacturer for support.
36. If you notice any smoke or scorched
smell near the product, immediately
turn off and unplug the power cord and
and/or repair.
37.
to service the product. Removing covers
can expose you to high voltage and other
dangerous conditions.
38.
personnel. Servicing is required when
the apparatus has been damaged in any
way, such as objects have fallen into
the apparatus, the apparatus does not
operate normally, or the apparatus has
been dropped.
Important Safety Instructions

7
1. Lisez ces instructions.
2. Conservez ces instructions.
3. Tenez compte de tous les avertissements.
4. Suivez toutes les instructions.
5. N’utilisez pas ce produit pour un usage autre
que celui prévu.
6. La surveillance étroite d’un adulte est
nécessaire lorsqu’un produit est utilisé par ou
à proximité d’enfants.
7. N’utilisez que les pièces jointes/accessoires
spéciés par le fabricant.
8. Utiliser uniquement avec le support spécié
par le fabricant ou vendu avec l’appareil.
9. Pour éviter les blessures, cet appareil doit
être solidement xé à un téléviseur ou à
un mur conformément aux instructions
d’installation.
10. Ce produit Séura est destiné à une utilisation
en intérieur et en extérieur.
11. Ce produit est résistant à l’eau. Ne plongez
pas ce produit dans l’eau.
12. Pour réduire le risque d’incendie ou de choc
électrique, n’exposez pas l’intérieur de cet
appareil à la pluie ou à l’humidité.
13. Ne pas utiliser ou placer de substances
combustibles ou inammables à proximité
du produit.
14. Débranchez cet appareil pendant les
orages ou lorsqu’il n’est pas utilisé pendant
de longues périodes. Ne touchez pas cet
appareil, l’antenne, les câbles d’alimentation
ou les prises d’alimentation pendant un
orage ou un orage.
15. Ne touchez pas les ches d’alimentation
avec les mains mouillées.
16. Protégez le cordon d’alimentation contre tout
piétinement ou pincement, en particulier au
niveau des ches, des prises de courant et
du point de sortie de l’appareil.
17. Inspectez l’emplacement souhaité pour
l’installation et soyez conscient de tous les
chemins de câblage électrique, conduites
d’eau, conduites de gaz ou autres conditions
potentiellement dangereuses qui peuvent
exister pour protéger contre les dommages
accidentels lors de la création de conditions
sur site.
18. N’installez pas l’appareil à proximité de
sources de chaleur telles que des radiateurs,
des tuyaux de chauffage, des radiateurs, des
fours ou d’autres appareils (y compris des
amplicateurs) qui produisent de la chaleur.
19. Une ventilation adéquate doit être
maintenue pour assurer un fonctionnement
able et continu et pour protéger le produit
contre la surchauffe.
20. Ne montez pas ce produit à proximité d’un
moteur ou d’un transformateur où un fort
magnétisme est généré.
21. Ne placez pas
le produit sur un
endroit instable. Une
mauvaise installation
peut provoquer la
chute du produit, ce
qui peut entraîner
des blessures graves
potentielles, ainsi que
des dommages au
produit. Suivez correctement les instructions
de montage pour un fonctionnement sûr
du produit.
22. Ne déplacez ou ne transportez pas le produit
avec des câbles (câbles d’alimentation,
câbles de connectivité de contenu)
branchés sur les périphériques sources. Des
dommages peuvent survenir aux câbles,
aux ches ou aux connecteurs de jonction
des câbles en raison d’une exion forcée et
d’une contrainte, ce qui peut endommager
le joint étanche du produit, le rendant sujet
à un incendie, un choc électrique ou un
court-circuit.
23. Il est OBLIGATOIRE que ce produit soit
branché sur une prise électrique protégée
par un disjoncteur de fuite à la terre
(GFCI) pour se protéger contre les chocs
électriques, les incendies et/ou les blessures.
Ne pas le faire annulera toute garantie pour
ce produit.
24. Le système de distribution par câble doit
être mis à la terre conformément à la norme
ANSI/NFPA 70, National Electrical Code
(NEC), Section 820.93, Grounding of Outer
Conductive Shield of a Coaxial Cable.
25. L’appareil doit être connecté à une prise
de courant SECTEUR avec une connexion
à la terre de protection. Lorsque la prise
SECTEUR ou un coupleur d’appareil est
utilisé comme dispositif de déconnexion,
le dispositif de déconnexion doit rester
facilement utilisable.
26. Le dispositif de déconnexion doit rester
facilement utilisable.
27. La prise de courant doit être installée à
proximité de l’équipement et doit être
facilement accessible.
28. N’allez pas à l’encontre de l’objectif de
sécurité de la prise de type polarisée ou mise
à la terre. Une che polarisée a deux lames
dont l’une est plus large que l’autre. Une
prise de type mise à la terre a deux lames et
une troisième broche de mise à la terre. La
lame large ou la troisième broche est fournie
pour votre sécurité. Lorsque la che fournie
ne rentre pas dans votre prise, consultez
un électricien pour le remplacement de la
prise obsolète.
29. Utilisez une tension d’alimentation
correctement évaluée. L’utilisation d’une
tension non nominale peut provoquer un
incendie, un choc électrique et de graves
dommages au produit.
30. Ne surchargez pas les prises secteur ou les
rallonges. Une surcharge peut provoquer un
incendie ou un choc électrique.
31. Assurez-vous que toutes les spécications
électriques requises sont respectées et ont
été installées par les personnes appropriées
et sont approuvées par le code.
32. Assurez-vous que toutes les exigences de
charpente, si nécessaire, ont été remplies
conformément au code du bâtiment et ne
posent aucun problème structurel.
33. N’utilisez pas un produit avec un cordon ou
une che endommagés ou ne l’utilisez pas
après un dysfonctionnement de l’appareil
ou a été endommagé de quelque manière
que ce soit.
34. Pour déconnecter électriquement le produit,
éteignez le produit, puis retirez la che
d’alimentation électrique de la prise.
35. Tout impact physique grave sur le produit
peut entraîner le déplacement et la rupture
de certains composants, ce qui peut
provoquer un incendie ou un choc électrique.
Dans un tel cas, n’utilisez pas le produit.
Contactez le fabricant pour obtenir de l’aide.
36. Si vous remarquez de la fumée ou une odeur
de brûlé à proximité du produit, éteignez
et débranchez immédiatement le cordon
d’alimentation et contactez un personnel
qualié pour l’entretien et/ou la réparation.
37. Seules les personnes qualiées devraient
essayer de réparer le produit. Le retrait
des couvercles peut vous exposer à haute
tension et d’autres conditions dangereuses.
38. Adressez-vous à un personnel qualié. Un
entretien est nécessaire lorsque l’appareil
a été endommagé de quelque manière
que ce soit, comme des objets sont tombés
dans l’appareil, l’appareil ne fonctionne pas
normalement ou l’appareil est tombé.
Consignes De Sécurité Importantes

8
Spécications de ce produit sont sujettes à modications sans préavis; ce manuel ne peut donc pas tenir compte de l’état de la technique actuelle.
FCC Supplier’s Declaration of Conformity
WARNING: Cancer and Reproductive Harm: www.p65warnings.ca.gov.
Séura Outdoor 80W Soundbar
SSB-1, SSB-2
This device complies with part 15 of the FCC Rules. Operation is subject to the follow two
accept any interference received, including interference that may cause undesired operation.
Séura
Address: 1230 Ontario Road, Green Bay, WI 54301 United States
Phone number: 920-857-9069
This equipment complies with FCC radiation exposure limits set forth for an uncontrolled environment.
This equipment should be installed and operated with a minimum distance of 20 cm between the radiator
and any part of your body.
• Reorient or relocate the receiving antenna.
• Increase the separation between the equipment and receiver.
• Connect the equipment into an outlet on a circuit different from that to which the receiver is connected
• Consult the dealer or an experienced radio/TV technician for help.
Caution:
responsible for compliance could void the user’s authority to operate the equipment.
Note: This equipment has been tested and found to comply with the limits for a Class B digital device,
pursuant to part 15 of the FCC Rules. These limits are designed to provide reasonable protection against
harmful interference in a residential installation. This equipment generates uses and can radiate radio
frequency energy and, if not installed and used in accordance with the instructions, may cause harmful
interference to radio communications. However, there is no guarantee that interference will not occur in a
particular installation. If this equipment does cause harmful interference to radio or television reception,
which can be determined by turning the equipment off and on, the user is` encouraged to try to correct the
interference by one or more of the following measures:

9
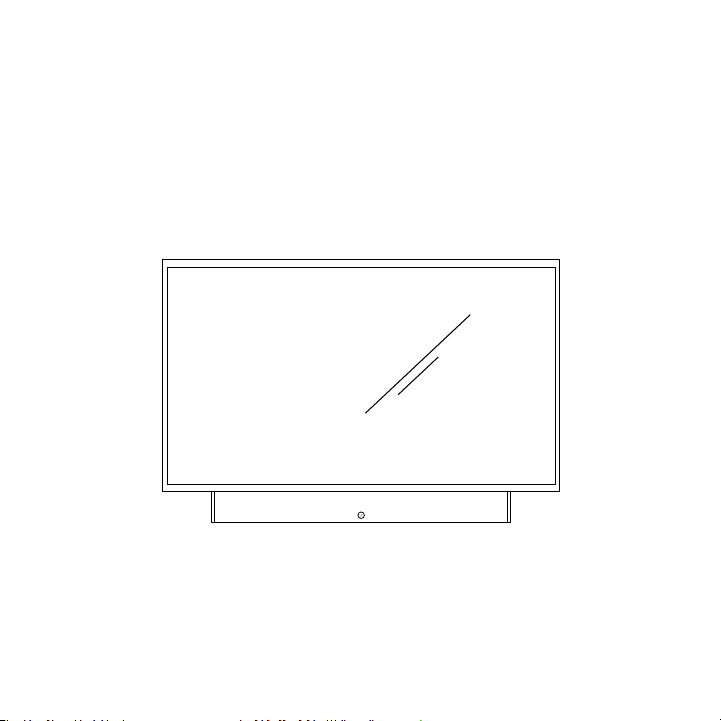
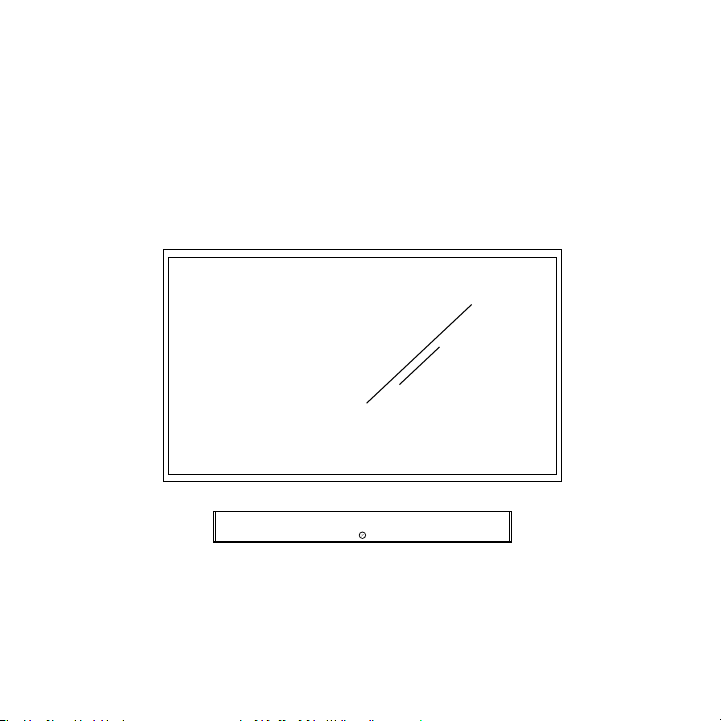
Get to know your Séura® Outdoor Soundbar
Audio Sources
sound for Séura Outdoor TVs. The soundbar uses a 3.5mm input jack dependent on a variable audio input
similar to a standard headphone jack. Since there is no independent volume control on the soundbar, the
audio output device requires volume control. Devices such as cell phones, MP3 players, etc. that would
normally have a connection for headphones would also be capable of connecting to the Séura soundbar.
are not compatible.
Power Source
The 80W Outdoor Soundbar is designed for use with 100-240 volt, 50-60 Hz, 80W peak AC current.
WARNING: The power cable connection does not have a watertight seal and cannot be connected to
an outlet exposed to the outdoors. The power supply also needs to be stored inside of a weatherproof
compartment so it is not exposed to outdoor elements.
The power cable from the soundbar may be connected to the power outlet inside of a Séura TV’s
weatherproof media compartment or to a GFCI protected AC outlet with an “in-use” waterproof cover.

10
Get to know your Séura® Outdoor Soundbar
Selecting the Installation Location
the distance from the heat source is such that
the air temperature surrounding the display does
not exceed the maximum operating temperature.
A mantle or other heat shield is recommended to
further protect the display from heat. Installation
is not recommended and may result in damage
to the electronics. The soundbar is not for
installation in a sauna or directly above a hot tub
where extreme heat and steam could damage
the electronics. If you have questions about your
situation, you may call Séura at 1-800-957-3872 to
speak to a design expert.
Operation and Storage Requirements
The temperature range for operating the device is -40°F to 140°F. Installation in sunlight may make the
product temperature higher than the outdoor air temperature. The required storage temperature is -40°F
to 140°F at an air humidity of 10 - 90% RH non-condensing. The device must be stored in the complete
Optical
Digital
Audio Input
Aux In
Power
Input
Micro
USB
adhesive!
push

11
• Soundbar
•
•
• Two soundbar mounting brackets – short (for
• Two soundbar mounting brackets – long (for
• Two 4-inch strips of VHB tape (for optional
•
• Two wall mounting brackets (only needed if
• Six 6-32 screws, 5/16-inch in length (only
• Ten 6-32 screws, 11/32-inch in length (extra
screws for mounting gasket plate over the
pre-installed, so these screws are extra
replacements if needed
• 5mm Allen Wrench
• Resource Information
• Philips #2 Screwdriver
•
•
•
• Four M8 screws (for attaching Soundbar
Mounting Brackets to Séura Full Sun Series
the soundbar to the TV are included with
Séura Shade Series 2™ Outdoor TVs and Séura
outdoor mounts.
• Screws and anchors (for mounting soundbar
to a wall via keyhole slot on wall mounting
Parts Included
Tools Needed
Parts NOT Included
12
Optical
Digital
Audio Input
Aux In
Power
Input
Micro
USB
adhesive!
push
Installation Option 1
Mount to Boom of Séura Outdoor TV

13
Step 1: Prep for Installation
a. Lay the TV face down on a soft, clean surface.
Position the soundbar face down along the bottom
edge of the TV. Take caution not to lay the TV on a
surface that will scratch or damage the screen.
WARNING: Ensure the Séura display is properly
the display. Pressure on the front of the panel may
damage the unit.
b.
additional stability between the soundbar and the
TV. This bond is permanent and optional to use. On
both VHB strips, remove the backing from one side
and attach the tape to the bottom of the television.
Each strip should be placed on the thin bottom
edge of the TV and positioned a few inches from
the side of the TV.
c. Included in each of the four VESA holes on the
back of the TV are factory screws. Use a Philips #2
screwdriver to remove these screws.
Note: The VESA screws on Full Sun Series TVs are
not long enough to attach the soundbar brackets
Outdoor Mount, then use the screws provided with
the mount and you can save these VESA screws for
a future project as you won’t need them for this
installation.
Optical
Digital
Audio Input
Aux In
Power
Input
Micro
USB
adhesive!
push
Optical
Digital
Audio Input
Aux In
Power
Input
Micro
USB
adhesive!
push
Optical
Digital
Audio Input
Aux In
Power
Input
Micro
USB
adhesive!
push

14
Step 2: Aach the soundbar mounting brackets to the TV
a. Lay the soundbar mounting brackets on the back
of the TV and soundbar. Use the shorter set of
soundbar mounting brackets for 50-inch and
smaller Séura TVs. Use the longer set of soundbar
mounting brackets for 55-inch and larger Séura
TVs. The VESA holes on the TV and holes on the
soundbar should line up with the holes on the
soundbar mounting brackets. Extra holes on the
back of the soundbar are for mounting to other TV
sizes and will be unused.
Helpful hint: Each soundbar mounting bracket is
labeled with one side that says “This Side Away
From TV” which is the side that does not touch
the TV. Reference the arrows on the label that
indicates the direction the bars should face.
b. Use four M6 screws and the Allen wrench to
loosely screw the soundbar mounting brackets
to the soundbar. Lift the soundbar up slightly to
align it when doing this. Do not tighten. Leave
the screws loose so you can properly align the
soundbar later.
c.
on top of the soundbar mounting brackets.
Reference your TV mount installation instructions
to ensure proper placement. Use four M8 screws
or the VESA screws that came with your TV mount
the TV mount brackets and soundbar mounting
brackets tight to the TV.
Optical
Digital
Audio Input
Aux In
Power
Input
Micro
USB
adhesive!
push
Optical
Digital
Audio Input
Aux In
Power
Input
Micro
USB
adhesive!
push
NOTE: If using a Séura Outdoor Mount, use the
hardware included with the Séura mount. If using
a competitor’s mount, use screws that are long
soundbar mounting brackets and into the VESA
holes, but not too long where it won’t tighten the
brackets to the TV.
Do not tighten yet!

15
Optical
Digital
Audio Input
Aux In
Power
Input
Micro
USB
adhesive!
push
Optical
Digital
Audio Input
Aux In
Power
Input
Micro
USB
adhesive!
push
Optical
Digital
Audio Input
Aux In
Power
Input
Micro
USB
adhesive!
push
Step 3: Aach the soundbar to the TV
a.
b. Slide the soundbar so it touches the bottom of the
c.
against the TV edge to fully engage the VHB tape.
d. Use the Allen wrench to fully tighten the four M6
screws to hold the soundbar to the soundbar
mounting brackets.
Optical
Digital
Audio Input
Aux In
Power
Input
Micro
USB
adhesive!
push
Fully tighten

16
Step 4: Make AV connections
1. Unscrew the thumb screws on the AV compartment
on the back of the TV to open it. Plug the 3.5mm
RCA cable from the soundbar into the Line Out
port on the TV. Plug the power cable from the
soundbar into the power outlet on the TV.
WARNING: The power cable from the soundbar
must be connected to the power outlet inside of
the TV’s weatherproof media compartment. The
power cable connection does not have a watertight
seal and cannot be connected to an outlet exposed
needs to be stored inside of the weatherproof
media compartment so it is not exposed to
outdoor elements.
2. Neatly coil up any excess wires into the AV
compartment of the TV. Route the wires so they
exit the media compartment by the foam gasket.
3. Close the AV compartment lid and tighten the
screws.
Congratulations! Your soundbar is attached and connected to the TV!
Please refer to the mount installation instructions to complete mounting your TV.
Optical
Digital
Audio Input
Aux In
Power
Input
Micro
USB
adhesive!
push
17
Installation Option 2
Mount to a Wall
Optical
Digital
Audio Input
Aux In
Power
Input
Micro
USB
adhesive!
push

18
Step 1: Identify wall mounting location.
Step 2: Aach wall mounting hardware.
Step 3: Aach the two wall mounting brackets to the soundbar.
Mark the wall where you want to hang the soundbar. Using a level and a pencil, mark two holes 23.9" apart
for soundbar model SSB-1 or 30.2" apart for soundbar model SSB-2. When installed, the top of the soundbar
will sit approximately 2.5" higher than the screw location. The bottom of the soundbar will be approximately
3.0" lower than the screw location.
Wall mounting hardware is not included. Drill anchors and screws that support the weight of the soundbar
into the wall. The keyhole slots on the two wall mounting brackets will be used to hang the soundbar on
the wall.
Each bracket has three tiny holes to screw through. Use the provided six 6-32 screws and Philips #2
screwdriver to tighten the wall mounting brackets to the soundbar.
Optical
Digital
Audio Input
Aux In
Power
Input
Micro
USB
adhesive!
push

19
Step 4: Make AV connections.
Connect the 3.5mm RCA cable from the soundbar to the Line Out port on the TV. Connect the power cord
from the soundbar to a GFCI protected AC outlet with an “in-use” waterproof cover. The 80W Outdoor
Soundbar is designed for use with 100-240 volt, 50-60 Hz, 80W peak AC current.
WARNING: The power cable connection does not have a watertight seal and cannot be connected to an
compartment so it is not exposed to outdoor elements.

20
Operating Instructions
Caring for your Séura Soundbar
The Séura Outdoor Soundbar powers on and off with the TV. Seamlessly integrated with display controls, the
Use of a Séura Outdoor Cover when not in use is recommended to keep your outdoor TV and soundbar clean
and dry.
To care for the soundbar, clean regularly by gently wiping the surface of the front grill and cabinet with a
Cleaning with an abrasive cloth or using strong force may scratch the surface of the cabinet and grill. Do not
use solvents or chemical cleaners as they may damage the cabinet or grill. Do not apply insecticides or other
volatile liquids on the soundbar. Do not use a garden hose or pressure washer on the unit. Do not use higher
pressure air to blow out the speaker grill or cabinet.
Other manuals for SSB-1
1
This manual suits for next models
1
Table of contents
Other Seura Speakers System manuals


