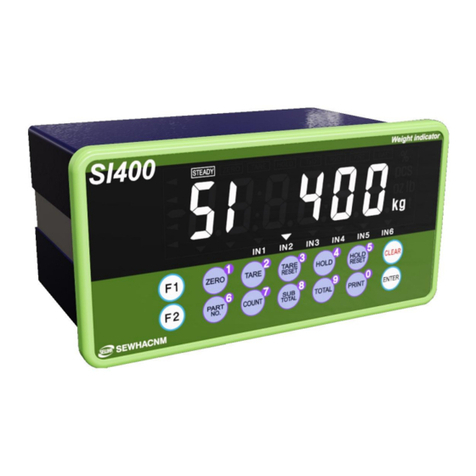
Sewhacnm SI Digital Indicator Series User manual

XDesignerPlus Ver2.0 외부 장치 접속 매뉴얼
1 / 22
SEWHA CNM CO., LTD
SI Digital Indicator Series
Support version
OS
V3.0 and over
XDesignerPlus
2.1.0.0 and over
CONTENTS
Thank you for using TOP series of M2I corporation.
Please read this manual carefully to know connection methods and
procedures of “TOP to External device”.
1. System configuration
Page 2
A section for showing connectable external devices, serial signal
types, connection configurations. Refer this section to select the
right system configuration.
2. Selection of TOP, External device
Page 3
A section for selecting a Top model and the external device.
3. Example of system setting
Page 4
A section for explaining examples to connect communications of
TOP to External Device.
Select the correct example in your case according to “1. System
configuration”
4. Communication setting
Page 8
A section for Communication setting.
The setting should be the same with the external device.
5. Cable diagram
Page 11
A section for cable to connect to external device.
Select a suitable cable diagram for your system.
6. Usable address
Page 13
A section for usable address to communicate with external
device.

XDesignerPlus Ver2.0 외부 장치 접속 매뉴얼
2 / 22
1. System configuration
System configurations of TOP and “SEWHA CNM –SI Digital Indicator Series”
Indicator Model
Link I/F
Com type
Setting system
Cable
SI 580
SI 480
RS232C I/F
(D-sub 9 pin)
RS–232C
3.1 setting ex 1
( Page 4 )
5.1 Cable diagram 1
(Page 11 )
RS232C I/F
(Terminal Block 3 pin)
RS–232C
3.1 setting ex 1
(Page 4 )
5.2 Cable diagram 2
(Page 11 )
RS485 I/F
(Terminal Block 4 pin)
RS–485
(2 wire)
3.2 setting ex 2
(Page 6 )
5.3 Cable diagram 3
(Page 12 )
SI 4500
SI 4410
SI 4400
SI 4300
SI 4200
SI 4100
SI 4010
SI 4000
RS232C I/F
(D-sub 9 pin)
RS–232C
3.3 setting ex 3
(Page 4 )
5.1 Cable diagram 1
(Page 11 )
RS232C I/F
(Terminal Block 3 pin)
RS–232C
3.3 setting ex 3
(Page 4 )
5.2 Cable diagram 2
(Page 11 )
RS485 I/F
(Terminal Block 4 pin)
RS–485
(2 wire)
3.4 setting ex 4
(Page 6 )
5.3 Cable diagram 3
(Page 12 )
■Connection configuration
ㆍ1 : 1(TOP 1 unit to External device 1 unit) connection –It is available with RS232C/422/485.
ㆍ1 : N(TOP 1 unit to External device N unit) connection –It is available with RS422/485.

XDesignerPlus Ver2.0 외부 장치 접속 매뉴얼
3 / 22
2. Selection of TOP, External device.
Select a external device which is communicated to the TOP..
Setting Items
Description
TOP
Series
Select a TOP series which is communicated with the external device.
Install a OS file v3.1 as diagram below before download a project file you have made.
Series
OS version
XTOP / HTOP
V3.1
Name
Select a TOP model which is communicated with the external device.
External
Device
Vendor
Select vendor of the external device which is communicated with the TOP.
Select “SEWHA CNM”.
PLC
Select a model name of the external device which is communicated with the TOP.
Select “SI Digital Indicator Series”.

XDesignerPlus Ver2.0 외부 장치 접속 매뉴얼
4 / 22
3. Example of system setting
Set setting of communication interface of TOP and SI Digital Indicator Series.
3.1 Example 1
Set your system as below.
Item
TOP
“SI Digital Indicator Series”
Serial Signal Level (port/channel)
RS-232C
RS-232C
User set
Station number(Instrument Address)
─
1
User set
Serial Baud rate
[BPS]
9600
User set
Serial data bit
[Bit]
8
User set
Serial stop bit
[Bit]
1
User set
Serial parity bit
[Bit]
NONE
User set
(1) XDesignerPlus setting
Set [project property] of XDesignerPlus as below and download it to TOP..
■[Project > Project property > project > TOP Setting > TOP’s Name]
Set communication interface of TOP.
■External device setup
Set [PLC Comm. Info] of SI Digital Indicator Series.
-Equipment No.: Number of external device.
-Series : Select the name of external device.
(2) External device setup
Set the Menu of “F-FUNCTION”as below by the keys of front panel and reboot external device after setting.
If you need details of setting, please read manual of external device.
(1) Communication/Extended mode “SI Digital Indicator Series”of are both available to use.
This section explains about setting of communication mode.
(2) .If a loadcell is not connected to a indicator, the indicator does not operate and the communication
is not operated, too.
1. Set “F-FUNCTION”as below.
F-FUNCTION
Setting
Descriptions
Remarks
F18
01
Select “Instrument No.”of the indicator.
–
F30
00
Data bit : 8 bit, Stop bit : 1 bit, Parity bit : None
–
F31
02
9600 bps
–
F32
01
Command Mode
necessary
F34
00
Check sum Command Mode is set disable.
necessary

XDesignerPlus Ver2.0 외부 장치 접속 매뉴얼
5 / 22
3.2 Example 2
Set your system as below.
Item
TOP
“SI Digital Indicator Series”
Serial Signal Level (port/channel)
RS-485 (COM2)
RS-485
User set
Station number(Instrument Address)
─
1
User set
Serial Baud rate
[BPS]
9600
User set
Serial data bit
[Bit]
8
User set
Serial stop bit
[Bit]
1
User set
Serial parity bit
[Bit]
NONE
User set
(1) XDesignerPlus setting
Set [project property] of XDesignerPlus as below and download it to TOP..
■[Project > Project property > project > TOP Setting > TOP’s Name]
Set communication interface of TOP.
■External device setup
Set [PLC Comm. Info] of SI Digital Indicator Series.
-Equipment No.: Number of external device.
-Series : Select the name of external device.
(2) External device setup
Set the Menu of “F-FUNCTION”as below by the keys of front panel and reboot external device after setting.
If you need details of setting, please read manual of external device.
(1) Communication/Extended mode “SI Digital Indicator Series”of are both available to use.
This section explains about setting of communication mode.
(2) .If a loadcell is not connected to a indicator, the indicator dose not operate and the communication
is not operated, too.
1. Set “F-FUNCTION”as below.
F-FUNCTION
Setting
Descriptions
Remarks
F18
01
Select “Instrument No.”of the indicator.
–
F30
00
Data bit : 8 bit, Stop bit : 1 bit, Parity bit : None
–
F31
02
9600 bps
–
F32
01
Command Mode
necessary
F34
00
Check sum Command Mode is set disable.
necessary

XDesignerPlus Ver2.0 외부 장치 접속 매뉴얼
6 / 22
3.3 Example 3
Set your system as below.
Item
TOP
“SI Digital Indicator Series”
Serial Signal Level (port/channel)
RS-232C
RS-232C
User set
Station number(Instrument Address)
─
1
User set
Serial Baud rate
[BPS]
9600
User set
Serial data bit
[Bit]
8
User set
Serial stop bit
[Bit]
1
User set
Serial parity bit
[Bit]
NONE
User set
(1) XDesignerPlus setting
Set [project property] of XDesignerPlus as below and download it to TOP..
■[Project > Project property > project > TOP Setting > TOP’s Name]
Set communication interface of TOP.
■External device setup
Set [PLC Comm. Info] of SI Digital Indicator Series.
-Equipment No.: Number of external device.
-Series : Select the name of external device.
(2) External device setup
Set the Menu of “F-FUNCTION”as below by the keys of front panel and reboot external device after setting.
If you need details of setting, please read manual of external device.
(1) Communication/Extended mode “SI Digital Indicator Series”of are both available to use.
This section explains about setting of communication mode.
(2) .If a loadcell is not connected to a indicator, the indicator dose not operate and the communication
is not operated, too.
1. Set “F-FUNCTION”as below.
F-FUNCTION
Setting
Descriptions
Remarks
F18
01
Select “Instrument No.”of the indicator.
–
F30
00
Data bit : 8 bit, Stop bit : 1 bit, Parity bit : None
–
F31
02
9600 bps
–
F32
01
Command Mode
necessary
F34
00
Check sum Command Mode is set disable.
necessary

XDesignerPlus Ver2.0 외부 장치 접속 매뉴얼
7 / 22
3.4 Example 4
Set your system as below.
Item
TOP
“SI Digital Indicator Series”
Serial Signal Level (port/channel)
RS-485 (COM2)
RS-485
User set
Station number(Instrument Address)
─
1
User set
Serial Baud rate
[BPS]
9600
User set
Serial data bit
[Bit]
8
User set
Serial stop bit
[Bit]
1
User set
Serial parity bit
[Bit]
NONE
User set
(1) XDesignerPlus setting
Set [project property] of XDesignerPlus as below and download it to TOP..
■[Project > Project property > project > TOP Setting > TOP’s Name]
Set communication interface of TOP.
■External device setup
Set [PLC Comm. Info] of SI Digital Indicator Series.
-Equipment No.: Number of external device.
-Series : Select the name of external device.
(2) External device setup
Set the Menu of “F-FUNCTION”as below by the keys of front panel and reboot external device after setting.
If you need details of setting, please read manual of external device.
(1) Communication/Extended mode “SI Digital Indicator Series”of are both available to use.
This section explains about setting of communication mode.
(2) .If a loadcell is not connected to a indicator, the indicator dose not operate and the communication
is not operated, too.
1. Set “F-FUNCTION”as below.
F-FUNCTION
Setting
Descriptions
Remarks
F18
01
Select “Instrument No.”of the indicator.
–
F30
00
Data bit : 8 bit, Stop bit : 1 bit, Parity bit : None
–
F31
02
9600 bps
–
F32
01
Command Mode
necessary
F34
00
Check sum Command Mode is set disable.
necessary

XDesignerPlus Ver2.0 외부 장치 접속 매뉴얼
8 / 22
4. Communication setting
Communication setting can be set on XDesignerPlus or TOP Main Menu. The setting should be the same with the external device.
4.1 XDesignerPlus setup
Set [project property] of XDesignerPlus as below and download it to TOP.
■[Project > Project property > project > TOP Setting > TOP’s Name]
Set communication interface of TOP..
■External device setup
Set [PLC Comm. Info] of SI Digital Indicator Series.
■Setting communication Interface
Item
Description
Serial Baud Rate
Setup [communications Baud rate] of PLC connected with COM2/1 port.
Serial Data Bit
Setup [Data Bit] of PLC connected with COM2/1 port.
Serial Stop Bit
Setup [Stop Bit] of PLC connected with COM2/1 port.
Serial Parity Bit
Setup [Parity Bit] of PLC connected with COM2/1 port.
Serial Signal Level
Setup signal level(RS-232C/422/485) of PLC connected with COM2/1 port.
Station Num. In Diag [0~31]
Setup [Station Number] (use when communications diagnosis) of PLC connected with COM2/1 port.
Time Out [ x100 mSec ]
Setup [Time Out] of PLC connected with COM2/1 port. (Timeout:: waiting time for answer of PLC)
Send Wait [ x10 mSec ]
Setup [Send Wait] of PLC connected with COM2/1 port.
(Send Wait: communicate after waiting setting time when touch screen requires communications.)
■Setting N:1 communication Interface
Item
Description
N:1 Use
Decide if use function of [N:1] function.
[N:1] is the communications between multiple Touch machines and one PLC.
If set [No], setup of No.17 and 18 below are to be ignored.
N:1 Station Number (0~31)
Setup [Station Number] when use [N:1] function.
N:1 Max Machine (2~31)
Setup number of touch machine when use [N:1] function.
■Setting external device
Item
Description
Equipment No.
Number of external device. [ 01 –99 ] ([1] is default)
Series
Select the name of external device.

XDesignerPlus Ver2.0 외부 장치 접속 매뉴얼
9 / 22
4.2 Setting TOP Main Menu
[In to the Main Menu] While the power of TOP is turned on and the buzzer beeps once, Touch the
screen’s upper part under the TOP logo on the front sheet.
Note: When turn on the power while pressing the touch, it does not convert into the Menu mode.
When the buzzer sound is unable to confirm because of the noise surroundings, the power of
touch shall be allowed while continuously press and off on the lower part of the logo.
■[Main Menu > Comm. Setup]
Communication setup
1. COM2 Serial Baud Rate : 38400 [BPS]
COM 2 port
2 COM2 Serial Data Bit : 8 [BIT]
Setting communication
3 COM2 Serial Stop Bit : 1 [BIT]
Interface
4 COM2 Serial Parity Bit : NONE [BIT]
5 COM2 Serial Signal Level : RS-232C
6 COM2 Station Num. In Diag.(0~31) : 00
7 COM2 Time Out : 10 * 100 [mSec]
8 COM2 Send Wait : 00* 10 [mSec]
9 COM1 Serial Baud Rate : 38400 [BPS]
COM 1 port
10. COM1 Serial Data Bit : 8 [BIT]
Setting communication
11. COM1 Serial Stop Bit : 1 [BIT]
Interface
12. COM1 Serial Parity Bit : NONE [BIT]
13. COM1 Serial Signal Level (0~31) : 00
14. COM1 Time Out : 10 * 100 [mSec]
15. COM1 Send Wait : 00* 10 [mSec]
16. N:1 Use : No
COM 2 port
17. N:1 Station Number (0~31) : 00
Setting N:1 communication
18. N:1 Max Machine (2~31) : 02
Interface
■Setting communication Interface
Item
Description
Serial Baud Rate
Setup [communications Baud rate] of PLC connected with COM2/1 port.
Serial Data Bit
Setup [Data Bit] of PLC connected with COM2/1 port.
Serial Stop Bit
Setup [Stop Bit] of PLC connected with COM2/1 port.
Serial Parity Bit
Setup [Parity Bit] of PLC connected with COM2/1 port.
Serial Signal Level
Setup signal level(RS-232C/422/485) of PLC connected with COM2/1 port.
Time Out [ x100 mSec ]
Setup [Time Out] of PLC connected with COM2/1 port. (Timeout:: waiting time for answer of PLC)
Send Wait [ x10 mSec ]
Setup [Send Wait] of PLC connected with COM2/1 port.
(Send Wait: communicate after waiting setting time when touch screen requires communications.)
Station Num. In Diag [0~31]
Setup [Station Number] (when use communications diagnosis) of PLC connected with COM2/1 port.
■Setting N:1 communication Interface
Item
Description
N:1 Use
Decide if use function of [N:1] function.
[N:1] is the communications between multiple Touch machines and one PLC.
If set [No], setup of No.17 and 18 below are to be ignored.
N:1 Station Number (0~31)
Setup [Station Number] when use [N:1] function.
N:1 Max Machine (2~31)
Setup number of touch machine when use [N:1] function.

XDesignerPlus Ver2.0 외부 장치 접속 매뉴얼
10 / 22
4.3 Communication Diagnosis
■TOP –Check interface setting of external device and TOP
- Touch the top of screen to go into the Main Menu after reset the power of TOP.
- Check [Comm. Setup] whether it is the same of external device’s setup or not.
■Diagnosis of error of communication status
- “Diagnosis > Touch Start of “Com2 or Com1 Communication Diagnosis ”.
- A dialog box of diagnostics is showed and check Setting of TOP and external device with the communication Diagnosis Sheet
below if the dialog box shows “Time Out Error!”
OK!
The communication status is good
Time Out Error!
The communication status is error
- Error of the cable or Setting of TOP/External device
■communication Diagnosis Sheet
- If you have problems of communication of TOP/External device, check your system with the sheet below.
Subject
Contents
Check
TOP
Version information
xDesignerPlus :
O.S :
Using port
COM 2
COM 1
The name of driver
OK
NG
Others setting state
OK
NG
Station No.
Project property
OK
NG
Comm. diagnosis
OK
NG
Serial
Baud rate
[BPS]
[BPS]
OK
NG
Parameter
Data bit
[BIT]
[BIT]
OK
NG
Stop bit
[BIT]
[BIT]
OK
NG
Parity bit
[BIT]
[BIT]
OK
NG
System
configuration
Type of system connection
1:1
1:N
N:1
1:1 (RS-232C is fixed)
OK
NG
The name of cable connected
OK
NG
External
The name of CPU
OK
NG
Device
The name of comm.. port
(the name of module)
OK
NG
protocol(mode)
OK
NG
Station number
OK
NG
Others setting state
OK
NG
Serial
Baud rate
[BPS]
[BPS]
OK
NG
Parameter
Data bit
[BIT]
[BIT]
OK
NG
Stop bit
[BIT]
[BIT]
OK
NG
Parity bit
[BIT]
[BIT]
OK
NG
Range of available address
(6. Usable address)
OK
NG

XDesignerPlus Ver2.0 외부 장치 접속 매뉴얼
11 / 22
5. Cable diagram
This Chapter introduces cable wiring guidance for communication between TOP and PLC concerned. (The cable diagrams in
this section may differ from the recommendations of SEWHA CNM)
5.1 Cable Diagram Table 1
■1 : 1 Connection
(A) XTOP COM 2 Port(9Pin)
XTOP COM2
Cable Wiring
“SI Digital Indicator Series”
Pin Assignment *1
Signal
Pin No.
Pin No.
Signal
Pin Assignment *1
Front View of
D-SUB 9 Pin (male)
CD
1
1
Front View of
D-SUB 9Pin
(female)
RD
2
2
TxD
SD
3
3
RxD
DTR
4
4
SG
5
5
SG
DSR
6
6
RTS
7
7
CTS
8
8
9
9
*1) Pin assignment of the cable connector is seen on the face of Front View
(B) XTOP COM 2 Port(15Pin)
XTOP COM2
Cable Wiring
“SI Digital Indicator Series”
Pin Assignment *1
Signal
Pin No.
Pin No.
Signal
Pin Assignment *1
Front View of
D-SUB 15 Pin
(male)
CD
1
1
Front View of
D-SUB 9 Pin
(female)
RD
2
2
TxD
SD
3
3
RxD
DTR
4
4
SG
5
5
SG
DSR
6
6
RTS
7
7
CTS
8
8
9
9
*1) Pin assignment of the cable connector is seen on the face of Front View
(C) XTOP/ATOP COM 1 PORT ( 6Pin)
XTOP/ATOP COM 1 Port
Cable Wiring
“SI Digital Indicator Series”
Pin Assignment *1
Signal
Pin No.
Pin No.
Signal
Pin Assignment *1
Front View of
D-SUB 6 Pin (male)
1
Front View of,
D-SUB 9 Pin
(female)
RD
2
2
TxD
SG
3
5
SG
4
5
SD
6
3
RxD
*1) Pin assignment of the cable connector is seen on the face of Front View

XDesignerPlus Ver2.0 외부 장치 접속 매뉴얼
12 / 22
5.1 Cable Diagram Table2
■1 : 1 Connection
(A) XTOP COM 2 Port(9Pin)
XTOP COM2
Cable Wiring
“SI Digital Indicator Series”
Pin Assignment *1
Signal
Pin No.
Signal
Pin Assignment *1
Front View of,
D-SUB 9 Pin (male)
CD
1
Serial I/F
Terminal Block (3 pin)
RD
2
Tx
SD
3
Rx
DTR
4
SG
5
GND
DSR
6
RTS
7
CTS
8
9
*.1) Pin assignment of the cable connector is seen on the face of Front View
(B) XTOP COM 2 Port(15Pin)
XTOP COM2
Cable Wiring
“SI Digital Indicator Series”
Pin Assignment*1
Signal
Pin No.
Signal
Pin Assignment *1
Front View of,
D-SUB 15 Pin(male)
CD
1
Serial I/F
Terminal Block (3 pin)
RD
2
Tx
SD
3
Rx
DTR
4
SG
5
GND
DSR
6
RTS
7
CTS
8
9
*.1) Pin assignment of the cable connector is seen on the face of Front View
(C) XTOP/ATOP COM 1 Port ( 6Pin)
XTOP/ATOP COM 1 Port
Cable Wiring
“SI Digital Indicator Series”
Pin Assignment *1
Signal
Pin No.
Signal
Pin Assignment *1
Front View of
D-SUB 6 Pin (male)
1
Serial I/F
Terminal Block (3 pin)
RD
2
Tx
SG
3
GND
4
5
SD
6
Rx
*.1) Pin assignment of the cable connector is seen on the face of Front View

XDesignerPlus Ver2.0 외부 장치 접속 매뉴얼
13 / 22
5.3 Cable Diagram Table3
■1 : 1 Connection
(A) XTOP COM 2 Port(9pin)
XTOP COM2
Cable Wiring
“SI Digital Indicator Series”
Pin Assignment *1
Signal
Pin No.
Signal
Pin Assignment *1
Front View of ,
D-SUB 9 Pin (male)
RDA
1
T+
Serial I/F
Terminal block (4 Pin)
2
T–
3
R+
RDB
4
R–
SG
5
SDA
6
7
8
SDB
9
*1) Pin assignment of the cable connector is seen on the face of Front View
(B) XTOP COM 2 Port(15Pin)
XTOP COM2
Cable Wiring
“SI Digital Indicator Series”
Pin Assignment *1
Signal
Pin No.
Sig
Pin Assignment *1
Front View of
D-SUB 15 Pin
(male)
–
1
T+
Serial I/F
Terminal block (4 Pin)
(Omitted)
T–
R+
–
10
R–
RDA
11
RDB
12
SDA
13
SDB
14
SG
15
*1) Pin assignment of the cable connector is seen on the face of Front View
■1 : N Connection –Refer to the 1:1 Connection, Attach the following manner
TOP
Cable Wiring
Device
Cable Wiring
Device
Signal
Signal
Signal
RDA
T+
T+
RDB
T–
T–
SDA
R+
R+
SDB
R–
R–
SG
–––

XDesignerPlus Ver2.0 외부 장치 접속 매뉴얼
14 / 22
6. Available Address
■The available address of device are as below.
Maybe the device(address) range could be different according to product. TOP Series are capable of supporting maximum address
range which is available in external Device.
■SI 580
Device
Bit Address
Word Address
Command Address
Remarks
Current Weight
–––––
CWT:W
–––––
*1)
Current Weight State1
CWT:S1.00 –CWT:S1.02
CWT:S1
–––––
*1), 3)
Current Weight State2
CWT:S2.00 –CWT:S2.01
CWT:S2
–––––
*1), 4)
Total Count of Weighing
–––––
GRD:C
–––––
*1)
Total Value of Weighing
–––––
GRD:W
–––––
*1)
Input State
WRS:I.00 –WRS:I.03
WRS:I
–––––
*1), 5)
Output State
WRS:O.00 –WRS:O.05
WRS:O
–––––
*1), 6)
Serial Number
–––––
PNO
–––––
Value of weighing completed
–––––
FIN
–––––
Value of container Setting
–––––
TAR
–––––
*1)
Set-point1
–––––
SP1
–––––
Set-point2
–––––
SP2
–––––
Set-point3
–––––
SP3
–––––
Set-point4
–––––
SP4
–––––
Zero Point Setup
–––––
–––––
WZER
*2)
Container Setup
–––––
–––––
WTAR
*2)
Container Release
–––––
–––––
WTRS
*2)
Print
–––––
–––––
WPRT
*2)
Print Total Value
–––––
–––––
WGPR
*2)
Delete Total Value
–––––
–––––
WGTC
*2)
Start measurement of weighing
–––––
–––––
WSTR
*2)
Stop Measurement of Weighing
–––––
–––––
WSTP
*2)
Change count of Weighing
–––––
–––––
WSNO
*2)
Hold Setup
–––––
–––––
WHOL
*2)
Hold Release
–––––
–––––
WHRS
*2)
*1) Read Only Device
*2) Write Only Device
*3) The data are as below concerned to each Bit
Bit
descriptions
Bit
descriptions
Bit
descriptions
0
Stable
1
Unstable
2
Over Load
*4) The data are as below concerned to each Bit
Bit
descriptions
Bit
descriptions
0
Total Weight
1
Net Weight
*5) Display On/Off state on input
Bit
descriptions
Bit
descriptions
0
Input 1 on/off
2
Input 3 on/off
1
Input 2 on/off
3
Input 4 on/off
*6) Display On/Off state of output
Bit
descriptions
Bit
descriptions
0
Output 1 on/off
2
Output 3 on/off
1
Output 2 on/off
3
Output 4 on/off

XDesignerPlus Ver2.0 외부 장치 접속 매뉴얼
15 / 22
■SI 480
Device
Bit Address
Word Address
Command Address
Remarks
Current Weight
–––––
CWT:W
–––––
*1)
State 1
CWT:S1.00 –CWT:S1.02
CWT:S1
–––––
*1), 3)
State 2
CWT:S2.00 –CWT:S2.01
CWT:S2
–––––
*1), 4)
Total Count of Weighing
–––––
GRD:C
–––––
*1)
Total Value of Weighing
–––––
GRD:W
–––––
*1)
Value of Container Setting
–––––
TAR
–––––
*1)
Zero Point Setup
–––––
–––––
WZER
*2)
Container Setup
–––––
–––––
WTAR
*2)
Container Release
–––––
–––––
WTRS
*2)
Print
–––––
–––––
WPRT
*2)
Print Total Value
–––––
–––––
WGPR
*2)
Delete Total Value
–––––
–––––
WGTC
*2)
Start Measurement of Weighing
–––––
–––––
WSTR
*2)
Stop Measurement of Weighing
–––––
–––––
WSTP
*2)
Change Count of Weighing
–––––
–––––
WSNO
*2)
Hold Setup
–––––
–––––
WHOL
*2)
Hold Release
–––––
–––––
WHRS
*2)
*1) Read Only Device
*2) Write Only Device
*3) The data are as below concerned to each Bit
Bit
descriptions
Bit
descriptions
Bit
descriptions
0
Stable
1
Unstable
2
Over Load
*4) The data are as below concerned to each Bit
Bit
descriptions
Bit
descriptions
0
Total Weight
1
Net Weight

XDesignerPlus Ver2.0 외부 장치 접속 매뉴얼
16 / 22
■SI 4500
Device
Bit Address
Word Address
Command Address
Remarks
Current Weight
–––––
CWT:W
–––––
*1)
State 1
CWT:S1.00 –CWT:S1.02
CWT:S1
–––––
*1), 3)
State 2
CWT:S2.00 –CWT:S2.01
CWT:S2
–––––
*1), 4)
Input State
WRS:I.00 –WRS:I.03
WRS:I
–––––
*1), 5)
Output State
WRS:O.00 –WRS:O.05
WRS:O
–––––
*1), 6)
Value of Weighing Completed
–––––
FIN
–––––
Zero Point Setup
–––––
–––––
WZER
*2)
Container Setup
–––––
–––––
WTAR
*2)
Container Release
–––––
–––––
WTRS
*2)
Print
–––––
–––––
WPRT
*2)
Start Measurement of Weighing
–––––
–––––
WSTR
*2)
Stop Measurement of Weighing
–––––
–––––
WSTP
*2)
Change count of weighing
–––––
–––––
WSNO
*2)
*1) Read Only Device
*2) Write Only Device
*3) The data are as below concerned to each Bit
Bit
descriptions
Bit
descriptions
Bit
descriptions
0
Stable
1
Unstable
2
Over Load
*4) The data are as below concerned to each Bit
Bit
descriptions
Bit
descriptions
0
Total Weight
1
Net Weight
*5) Display On/Off state of Input
Bit
descriptions
Bit
descriptions
0
Input 1 on/off
2
Input 3 on/off
1
Input 2on/off
3
Input 4 on/off
*6) Display On/Off state of Output
Bit
descriptions
Bit
descriptions
0
Output 1 on/off
3
Output 4 on/off
1
Output 2 on/off
4
Output 5 on/off
2
Output 3 on/off
5
Output 6 on/off

XDesignerPlus Ver2.0 외부 장치 접속 매뉴얼
17 / 22
■SI 4410
Device
Bit Address
Word Address
Command Address
Remarks
Current Weight
–––––
CWT:W
–––––
*1)
State 1
CWT:S1.00 –CWT:S1.02
CWT:S1
–––––
*1), 3)
State 2
CWT:S2.00 –CWT:S2.01
CWT:S2
–––––
*1), 4)
Total Count of Weighing
–––––
GRD:C
–––––
*1)
Total Value of Weighing
–––––
GRD:W
–––––
*1)
Subtotal Count of Weighing
–––––
SUB:C
–––––
*1)
Subtotal Value of Weighing
–––––
SUB:W
–––––
*1)
Input State
WRS:I.00 –WRS:I.03
WRS:I
–––––
*1), 5)
Output State
WRS:O.00 –WRS:O.05
WRS:O
–––––
*1), 6)
Serial Number
–––––
PNO
–––––
Value of Weighing Complet
–––––
FIN
–––––
Value of Container Setting
–––––
TAR
–––––
*1)
Zero Point Setup
–––––
–––––
WZER
*2)
Container Setup
–––––
–––––
WTAR
*2)
Container Release
–––––
–––––
WTRS
*2)
Print
–––––
–––––
WPRT
*2)
Print Total Value
–––––
–––––
WGPR
*2)
Delete Total Value
–––––
–––––
WGTC
*2)
Start Measurement of Weighing
–––––
–––––
WSTR
*2)
Stop Measurement of Weighing
–––––
–––––
WSTP
*2)
Change Count of Weighing
–––––
–––––
WSNO
*2)
*1) Read Only Device
*2) Writable Device
*3) The data are as below concerned to each Bit
Bit
descriptions
Bit
descriptions
Bit
descriptions
0
Stable
1
Unstable
2
Over Load
*4) The data are as below concerned to each Bit
Bit
descriptions
Bit
descriptions
0
Total Weight
1
Net Weight
*5) Display On/Off state of Input
Bit
descriptions
Bit
descriptions
0
Input 1 on/off
2
Input 3 on/off
1
Input 2 on/off
3
Input 4 on/off
*6) Display On/Off state of output
Bit
descriptions
Bit
descriptions
0
output 1 on/off
3
output 4 on/off
1
output 2 on/off
4
output 5 on/off
2
output 3 on/off
5
output 6 on/off

XDesignerPlus Ver2.0 외부 장치 접속 매뉴얼
18 / 22
■SI 4400
Device
Bit Address
Word Address
Command Address
Remarks
Current Weight
–––––
CWT:W
–––––
*1)
State 1
CWT:S1.00 –CWT:S1.02
CWT:S1
–––––
*1), 3)
State 2
CWT:S2.00 –CWT:S2.01
CWT:S2
–––––
*1), 4)
Total Count of Weighing
–––––
GRD:C
–––––
*1)
Total Value of Weighing
–––––
GRD:W
–––––
*1)
Subtotal Count of Weighing
–––––
SUB:C
–––––
*1)
Subtotal Value of Weighing
–––––
SUB:W
–––––
*1)
Serial Number
–––––
PNO
–––––
Value of Weighing Complete
–––––
FIN
–––––
Value of Container Setting
–––––
TAR
–––––
*1)
Zero Point Setup
–––––
–––––
WZER
*2)
Container Setup
–––––
–––––
WTAR
*2)
Container Release
–––––
–––––
WTRS
*2)
Print
–––––
–––––
WPRT
*2)
Print Total Value
–––––
–––––
WGPR
*2)
Delete Total Value
–––––
–––––
WGTC
*2)
Start Measurement of Weighing
–––––
–––––
WSTR
*2)
Stop Measurement of Weighing
–––––
–––––
WSTP
*2)
Change Count of Weighing
–––––
–––––
WSNO
*2)
*1) Read Only Device
*2) Writable Device
*3) The data are as below concerned to each Bit
Bit
descriptions
Bit
descriptions
Bit
descriptions
0
Stable
1
Unstable
2
Over Load
*4) The data are as below concerned to each Bit
Bit
descriptions
Bit
descriptions
0
Total Weight
1
Net Weight

XDesignerPlus Ver2.0 외부 장치 접속 매뉴얼
19 / 22
■SI 4300
Device
Bit Address
Word Address
Command Address
Remarks
Current Weight
–––––
CWT:W
–––––
*1)
State 1
CWT:S1.00 –CWT:S1.02
CWT:S1
–––––
*1), 3)
State 2
CWT:S2.00 –CWT:S2.01
CWT:S2
–––––
*1), 4)
Total Count of Weighing
–––––
GRD:C
–––––
*1)
Total Value of Weighing
–––––
GRD:W
–––––
*1)
Subtotal Count of Weighing
–––––
SUB:C
–––––
*1)
Subtotal Value of Weighing
–––––
SUB:W
–––––
*1)
Input State
WRS:I.00 –WRS:I.03
WRS:I
–––––
*1), 5)
Output State
WRS:O.00 –WRS:O.05
WRS:O
–––––
*1), 6)
Serial Number
–––––
PNO
–––––
Value of Weighing complete
–––––
FIN
–––––
Value of Container Setting
–––––
TAR
–––––
*1)
Zero Point Setup
–––––
–––––
WZER
*2)
Container Setup
–––––
–––––
WTAR
*2)
Container Release
–––––
–––––
WTRS
*2)
Print
–––––
–––––
WPRT
*2)
Print Total Value
–––––
–––––
WGPR
*2)
Delete Total Value
–––––
–––––
WGTC
*2)
Change Count of Weighing
–––––
–––––
WSNO
*2)
Hold Setup
–––––
–––––
WHOL
*2)
Hold Release
–––––
–––––
WHRS
*2)
*1) Read Only Device
*2) Writable Device
*3) The data are as below concerned to each Bit
Bit
descriptions
Bit
descriptions
Bit
descriptions
0
Stable
1
Unstable
2
Over Load
*4) The data are as below concerned to each Bit
Bit
descriptions
Bit
descriptions
0
Total Weight
1
Net Weight
*5) Display On/Off state of Input
Bit
descriptions
Bit
descriptions
0
Input 1 on/off
2
input 3 on/off
1
input 2 on/off
3
Input 4 on/off
*6) Display On/Off state of output
Bit
descriptions
Bit
descriptions
0
output 1 on/off
3
output 4 on/off
1
output 2 on/off
4
output 5 on/off
2
output 3 on/off
5
output 6 on/off

XDesignerPlus Ver2.0 외부 장치 접속 매뉴얼
20 / 22
■SI 4200
Device
Bit Address
Word Address
Command Address
Remarks
Current Weigh
–––––
CWT:W
–––––
*1)
State 1
CWT:S1.00 –CWT:S1.02
CWT:S1
–––––
*1), 3)
State 2
CWT:S2.00 –CWT:S2.01
CWT:S2
–––––
*1), 4)
Total Count of Weighing
–––––
GRD:C
–––––
*1)
Total Value of Weighing
–––––
GRD:W
–––––
*1)
Subtotal Count of Weighing
–––––
SUB:C
–––––
*1)
Subtotal Value of Weighing
–––––
SUB:W
–––––
*1)
Serial Number
–––––
PNO
–––––
Value of Weighing Complete
–––––
FIN
–––––
Value of Container Setup
–––––
TAR
–––––
*1)
Zero Point Setup
–––––
–––––
WZER
*2)
Container Setup
–––––
–––––
WTAR
*2)
Container Release
–––––
–––––
WTRS
*2)
Print
–––––
–––––
WPRT
*2)
Print Total Value
–––––
–––––
WGPR
*2)
Delete Total Value
–––––
–––––
WGTC
*2)
Change Count of Weighing
–––––
–––––
WSNO
*2)
Hold Setup
–––––
–––––
WHOL
*2)
Hold Release
–––––
–––––
WHRS
*2)
*1) Read only Device
*2) Writable Device
*3) The data are as below concerned to each Bit
Bit
descriptions
Bit
descriptions
Bit
descriptions
0
Stable
1
Unstable
2
Over Load
*4) The data are as below concerned to each Bit
Bit
descriptions
Bit
descriptions
0
Total Weight
1
Net Weight
This manual suits for next models
10
Table of contents
Other Sewhacnm Touch Panel manuals
Popular Touch Panel manuals by other brands
Acnodes
Acnodes FPC 8059 Specifications
Chipsee
Chipsee PPC/EPC-A8-70-HB-C user manual
Samsung
Samsung HARMAN AMX VARIA-80 quick start guide
Beijer Electronics
Beijer Electronics X2 marine 15-B2 SC installation manual
Zennio
Zennio Touch-MyDesign Display One user manual

Advantech
Advantech IPPC-7158 Series user manual
