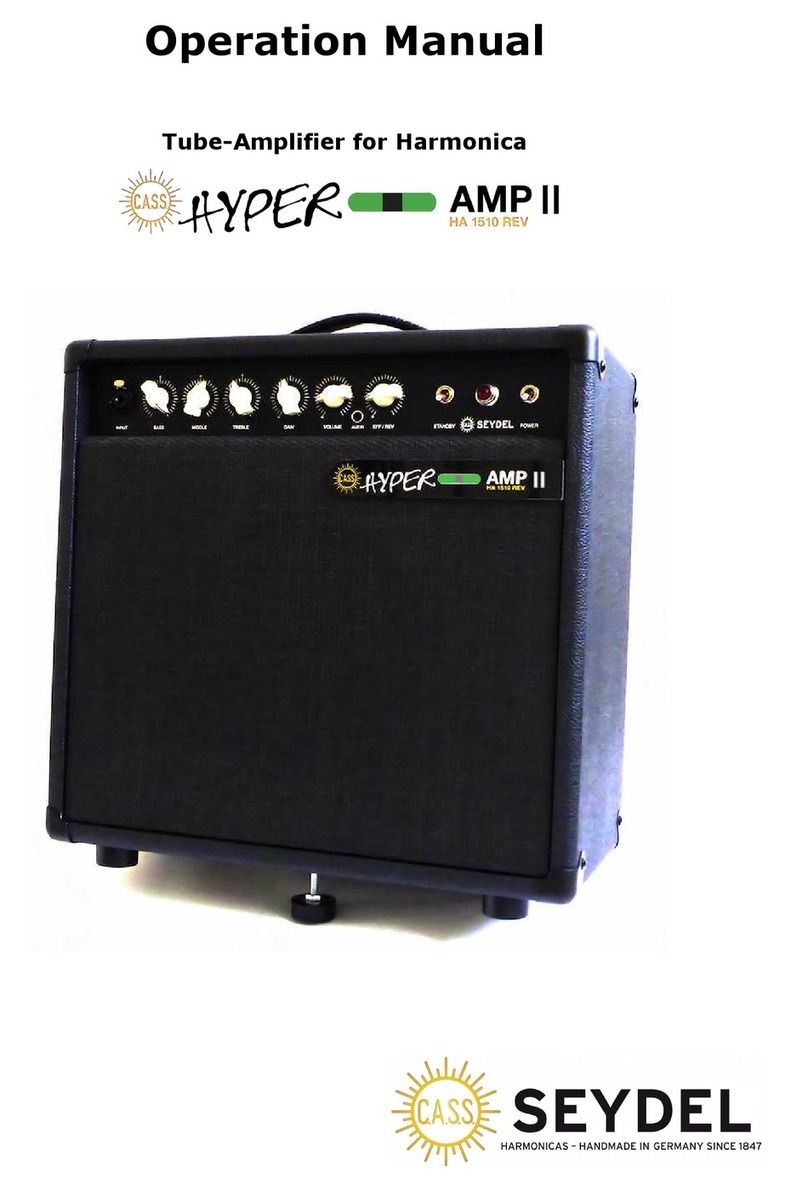
Seydel Hyperamp HA1510 User manual

Operation Manual
Tube-Amplifier for Harmonica
Hyperamp HA1510 and HA1510REV

1
Preface
Dear harmonica player,
Many thanks for your confidence in buying the SEYDEL Hyperamp HA1 10 (REV).
After many test runs with many different players and all kinds of microphones, in
which we participated with attentive, critical ears, it is now achieved:
The Hyperamp, developed together with Seydel and tube-amp engineers of the
VERMONA-factory situated close to Klingenthal, is an uncompromising, hand
wired tube-amp, with all the features a harmonica player would want.
To live up to expectations took a lot of experiments and patience – again and
again we had to change technical details until we all were more than satisfied
with the result.
The Hyperamp HA1510(REV is attractive in the consistent way of using
conservative vintage technology on the one hand and on the other hand offering
special features that are not found with other amplifier models.
Many amps originally are built for electric guitar or bass - but the Hyperamp is
designed from the ground up specifically for the needs of the harp player! That is
why the special harmonica sound is created, that once helped our small
instrument to become "the mother of the band" (Otis Spann, piano player of the
Muddy Waters Band).
This impressive sound thrills players and audiences this very day and many
players are looking for their sound - with the adaptability for different kind of
microphones the Hyperamp is a unique and universal voice for the harmonica
player.
It follows all nuances which are produced by the player's harp and microphone
and therefore is the ideal elongation of the "sound chain". This begins with you
and the harmonica and is forwarded through the microphone and the amplifier,
until it reaches yours and the audience’s ears to get them excited.
Have much fun with the SEYDEL-Hyperamp HA1 10(REV) – we can help you to
find another piece of your sound!
With our best thanks!
The SEYDEL-team

2
Please note!
To make the device operate always reliably, please follow the advice
below:
-Do not open the chassis (risk of electric shocks!).
-Avoid dust and too much humidity, direct sunlight or too low or high
temperatures.
-Pay attention to ventilate the backside properly.
-Do not transport the device until 10 minutes of cooling down, avoid
dropping, or rough handling (tubes!).
-Place the device always on a stable and horizontal underlay.
-Avoid operation close to running radiators.
-Pay attention not to let fluids enter the device.
-Do not run the device without a speaker connected.
-After switching on, the tubes need about half a minute to warm up –
the full performance is reached not until a few minutes.
-Please replace the tubes with those of the same type only.
-Always run the device with an undamaged power cord and make
sure that you choose the appropriate input voltage (11 V/230V).
-Run the device with grounded circuits only.
Please let the device be checked by a skilled technician if
-the power cord is damaged
-objects or fluids entered the device
-the device was exposed to excessive moisture
-you determine weird action
-the device was dropped or the chassis is damaged

3
Control elements at the front
1) INPUT: 6,3mm guitar-connector (mono) to connect a high-impedance
microphone
2) BASS/MIDDLE/TREBLE: tone control
3) VOLUME: Main volume control
4) EFF/REV: control to add external effects (Reverb, HA1 10REV only)
) INPUT: XLR-connector to connect a low-impedance microphone
6) STANDBY: Switch to mute the PA (stand-by)
7) POWER: on/off switch
8) Operation lamp
Level indicator (not shown here; in the Hyperamp-logo): shows the
saturation of the pre-amp
Rear control elements
1)
Electric supply with fuse and replacement fuse (grounded rubber
connector)
2)
Connectors EFF RET and EFF SEND: to add an external effects circuit
(the internal reverb is then muted (HA1 10REV only). Applying the
parallel effects loop the direct signal in the amp is mixed up with the
effect's signal. The disadvantage is that some effects are limited (e.g.
distortion). The advantage is that the direct signal is conducted to the
power amplifier as the crow flies and therefore remains unaltered.
3)
XLR-connector DI OUT: direct connection to a mixer or PA (direct
injection)
4)
Speaker jack EXTERN: connection for an external speaker (please note
point 6!)
3
4
6
7
1
2
8

4
)
Speaker jack INTERN: connection to the internal speaker
6)
Switch 4 / 8 Ohm: toggle switch for the connection of an additional 8
Ohm speaker – the impedance switch must then be set to 4 Ohm.
Under normal operation, without a second speaker it has to be set to 8
Ohm.
Putting into operation
1) Be sure that the 4 / 8 Ohm switch on the rear is set to appropriate value
of the connected speaker(s).
2) Be sure that the power cord is connected.
3) Switch the Volume control (3) to the very left and set the Standby-switch
to the lower position.
4) Connect a suited microphone with shielded line cable in one of the two
input jacks, (1) or ( ).
) Switch on the device (power-switch (7) in up position).
6) After warming-up the tubes for at least 30 seconds switch on the Standby
switch (6), (position up).
7) Choose the desired volume by turning the VOLUME control (3) to the right.
8) Choose the desired sound by adjusting the tone controls (2).
9) Add the desired Effect/Reverb (HA1 10REV only)-fraction to the sound by
using the EFF/REV control (4).

Safety instructions
1) The Amplifier can produce very high volumes that may harm your hearing.
2) Depending on the sensitivity of the connected microphone and the chosen
volume there is danger for feedback (“squealing” or “skirling”) that may
harm your ears or damage the speaker.
3) To replace the fuse always disconnect the power cord. Use only fuses with
the same value as the supplied ones.
4) The tubes can get hot! Danger of burns, if grabbing in the amp’s upper
back!
) Make no attempts to repair. The manufacturer then does not accept any
liabilities!
6) Let the chassis be opened only by a technician.
7) Use effect-pedals only with the EFF RET and EFF SEND jacks at the back
side.

6
Playing the harp amplified
For playing harmonica amplified the so-called
bullet microphones are very popular. These
high-impedance microphones often feature a
non-linear frequency response - therefore they
have unique tone characteristics. The
technology used really can be called “out of
primitive times”. The functional principle ranges
from dynamic elements to crystal and ceramic
capsules. They are connected to the 6.3mm
guitar jack (1) of the Hyperamp.
Besides the different sound these microphones share a
common feature – they are more or less nodular and
therefore can be held with both hands. The hands cover
the harmonica and they “seal” the microphone and
harmonica together (so-called “cupping”). Playing the
harmonica, the microphone reaches its dynamic limit and a
compressed and often distorted sound is developed. This is amplified by the
Hyperamp. Often an additional distortion is desired. You can watch the magic eye
indicator in the amp’s logo – it then shows a very small bar.
The produced sound is also the result of a good sounding
harmonica and a developed playing technique
(breathing/embouchure/resonance) and also depends on
the microphone used and the “cupping”-technique.
The Hyperamp is equipped with a very effective tone control for bass, middle and
treble. Depending on the type of microphone certain frequency ranges can be
altered or attenuated. At the beginning it is a good idea to adjust all controls to
12 o’clock position. Then you can try to add or subtract bass or treble. Mostly the
trebles are attenuated, due to the fact that the harmonica is loud in this
frequency range.
The middle-control is suited to damp or remove feedback at high volumes.
Feedback is possible with all microphone-amplifier-speaker combinations. The

7
amplified sound is recorded by the microphone and re-amplified – the sound is
“looped” and as a result of this a nasty squealing sound is produced. Feedback
often can be prevented by lowering the volume or by adding fewer effects. Many
microphones have a volume control, or on/off switch. It is good for the musician
not to stay right in front of the speaker’s sound cone. If required you can also
turn the amp out of your direction a little bit.
To apply low impedance microphones (e.g. standard dynamic microphones for
singing) the Hyperamp features a second input (XLR-jack ( )).
Microphones are available for many purposes – often a harmonica player selects
a model which is suited in design and sound from his personal point of view.
By the use of an additional speaker, volume and sonority of the amp can be
enhanced (see “Control elements on the backside”, point 6). Through the DI-
socket (direct injection) on the rear panel the signal can be directed to the mixer
without changing the sound of the amp on stage.

8
Technical data - Hyperamp HA 1510 REV
Output: 1 VA an 4 / 8 Ohm (switchable) *
Speaker: 10’’ Jensen P10R 8 Ohm “SPECIAL DESIGN“
Power amplifier: Class A (2 x EL84)
Level indicator: EM84 (magic eye), at the front
Input1: Guitar socket 6,3 mm (mono), -10 dBu at 1 MOhm
Input2: XLR-socket, -30 dBu at 200 Ohm ***
Effects: parallel, with Level-(Reverb-) control **
DI-output: XLR with transformer (magnetically shielded)
Sound control: 3 bands
ontrols at the front: INPUT 1, INPUT 2, BASS, MIDDLE, TREBLE, VOLUME,
EFFECT/REVERB, Standby-switch, line-switch, operation
light
ontrols at the rear: Electric supply with fuse and replacement fuse, sockets
EFF RET and EFF SEND, XLR-socket DI OUT, socket for
ext. speaker EXTERN, socket for int. speaker INTERN,
Impedance switch 4 / 8 Ohm
Tube assembly: 1 x EZ81, 2 x EL84, 1 x ECC81, 2 x ECC83, 1 x EM84
Spring reverb: Accutronics, 3 springs (HA1 10REV only)
Dimensions (in mm): 484 x 480 x 260 mm
Weight: HA1 10: ~13, kg, HA1 10REV: ~14, kg
* Through a second speaker jack an external 8 Ohm speaker can be connected, the impedance switch
then has to be turned to 4 Ohm. In normal action without an additional speaker it is set to 8 Ohm.
** Applying the parallel effects loop the direct signal in the amp is mixed up with the effect's signal.
The disadvantage is that some effects are limited (e.g. distortion). The advantage is that the direct
signal is conducted to the power amplifier as the crow flies and therefore remains unaltered. With the
HA1 10REV the EFF/REV-control adjusts the amount of reverb. If an external effect-pedal is connected
to the EFFECT RETURN jack, the internal spring reverb is switched off.
*** This Input ( ) is silenced if a guitar plug is connected to Input (1).

9
Warranty
The manufacturer guarantees that the device is free of faults in material or
manufacturing faults. This warranty applies for the date of purchase until the
period valid by law (according to German law). This warranty does not cover
products that are damaged from false handling, transport, omission, accident,
false usage or modification, that were not approved explicitly by the
manufacturer. This warranty excludes all warranties getting beyond, neither
verbalized nor recommended. The manufacturer is not liable for accident, loss or
damage, which is done deliberately, un-deliberately, carelessly or otherwise.
Furthermore the manufacturer is not liable for wilful damage to property, loss of
ownership or time loss or any kind of impairment that results from faults in
material or manufacturing process of a product.
The tubes are consumables and are not covered by this warranty.
Things not mentioned explicitly here are excluded from the warranty.
All modifications done to technically improve the device, can be done without any
announcement on the part of the manufacturer.
Conformance declaration
For SEYDEL-Hyperamp HA1 10 and HA1 10REV
We declare that, if operation conditions and environment are those
recommended in this manual, the product is in accordance with the following
norms or standard documents:
EN 61000-3-2, EN 61000-3-3, EN 013, EN 020, EN6006 after the
requirements and guidelines 89/336/EWG und 73/23/EWG.
Robert-Koch Straße 1
D-08248 Klingenthal
Tel: +49 (0) 37467 22 48
info@seydel1847.com
www.seydelusa.com
www.seydel1847.com
This manual suits for next models
1
Table of contents
Other Seydel Amplifier manuals
