Shade N' Shelters UMB-11-DLX User manual

1of11
Owner’s Manual
11' Deluxe Square Offset Umbrella
with Umbrella Base
Model Number: UMB-11-DLX
SKU Number: 101644193
Additional product information: https://shadenshelters.com/11-square-solar-umbrella
2of11
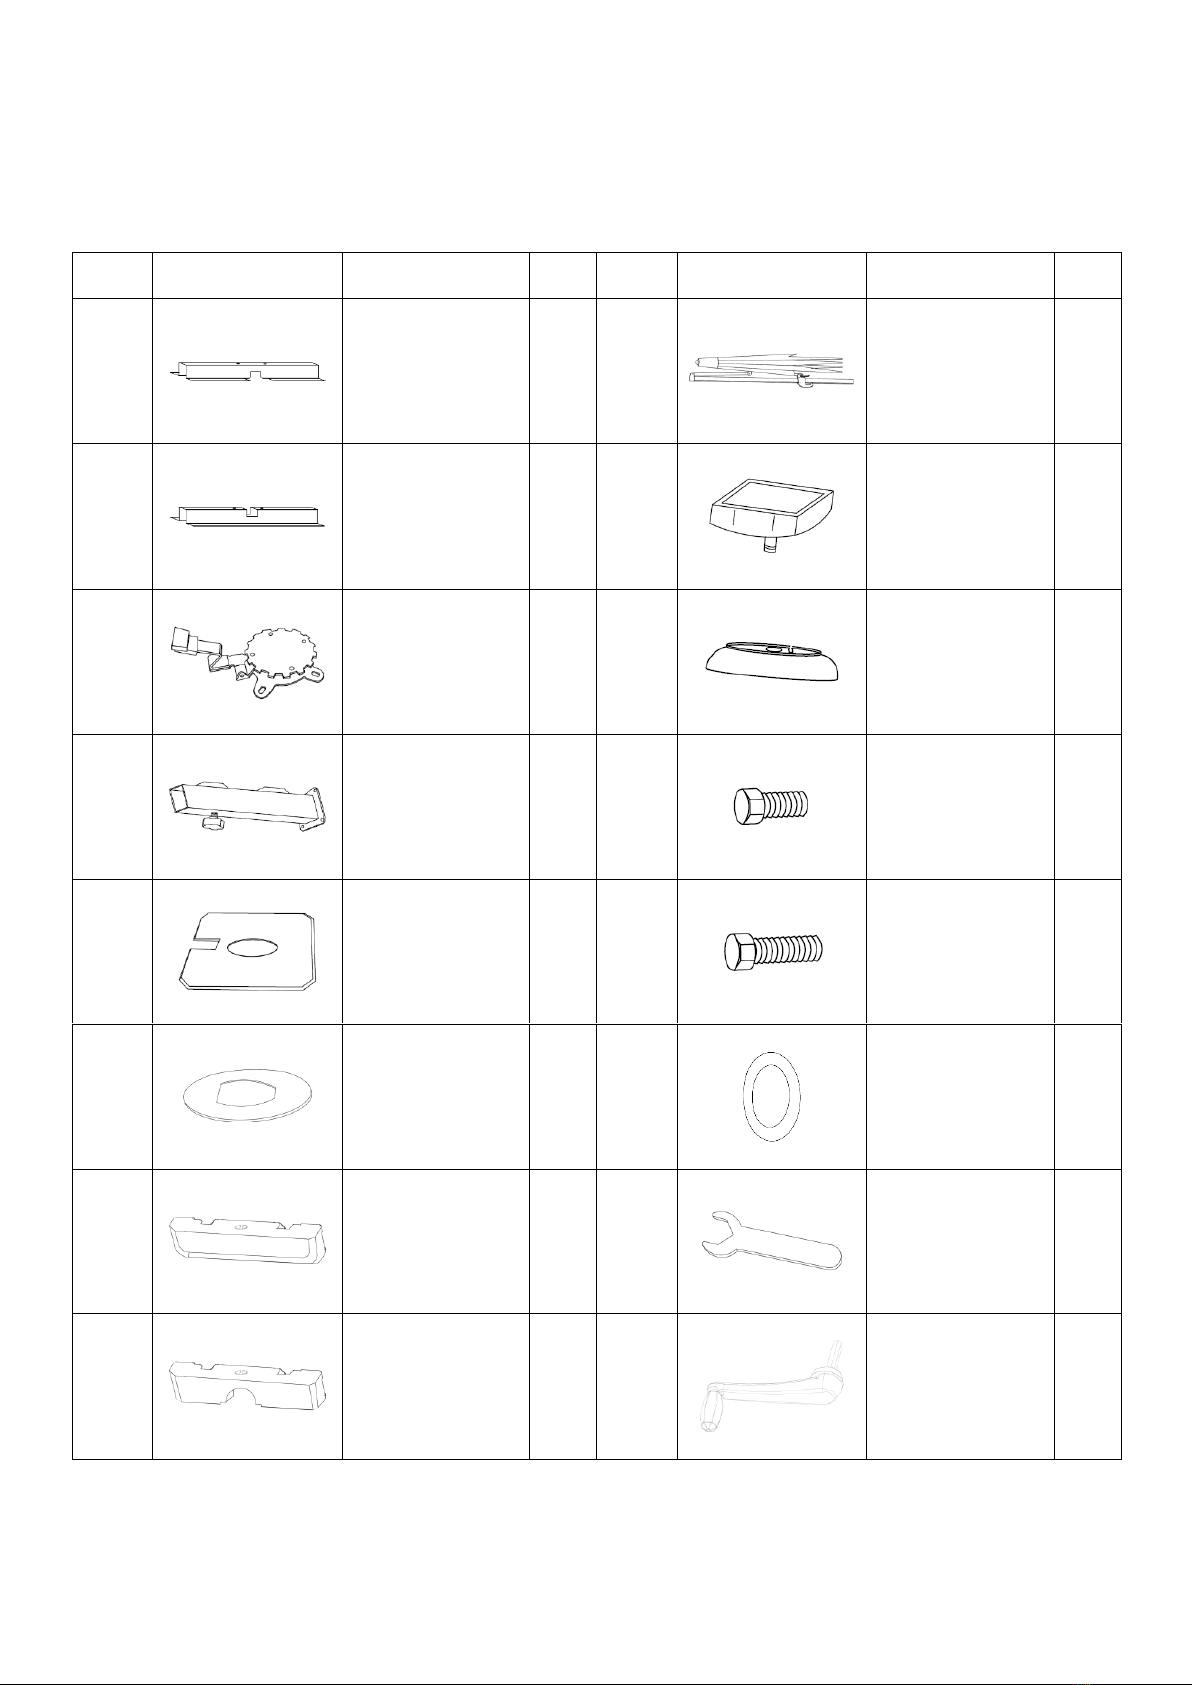
Parts List
11' Deluxe Square Offset Umbrella
Letter
Illustration
Description
Qty.
Letter
Illustration
Description
Qty.
A
Base Plate
1
I
Main Support
Post with
Umbrella
Canopy
1
B
Base Plate
1
J
Solar Panel
1
C
Swivel Plate
1
K
Umbrella Cap
1
D
Lower Umbrella
Support Post
1
L
M8 x 15mm Bolt
4
E
Swivel Plate
Cover-Bottom
1
M
M8 x 20mm Bolt
4
F
Swivel Plate
Cover-Top
1
N
Steel Washer
8
G
Poly Base - Side
2
O
Open Wrench
1
H
Poly Base -
Middle
2
P
Crank Handle
1

3of11
Assembly Instructions
11' Deluxe Square Offset Umbrella
Important:
⚫Read all the instructions before assembly. Failure to do so may result in faulty assembly and
potential injury.
⚫Before beginning to assemble the product, remove all protective materials, hardware kit(s), and
identify all parts packed in the carton are present. (Note: If any part is missing or damaged, do not
attempt to assemble). Contact Shade N’ Shelters Customer Support Team. See page 11.
⚫Two people are required to assemble heavy items.
⚫Assemble product on a soft and non-abrasive surface, such as carpet to avoid damaging the item.
SAFTEY WARNINGS
➢Completely Fill Poly Base with sand or water prior to assembly and use.
➢Close and secure the umbrella when not in use or during inclement weather.
➢Never use umbrella in high wind conditions or near flame/heat sources.
ASSEMBLY INSTRUCTIONS
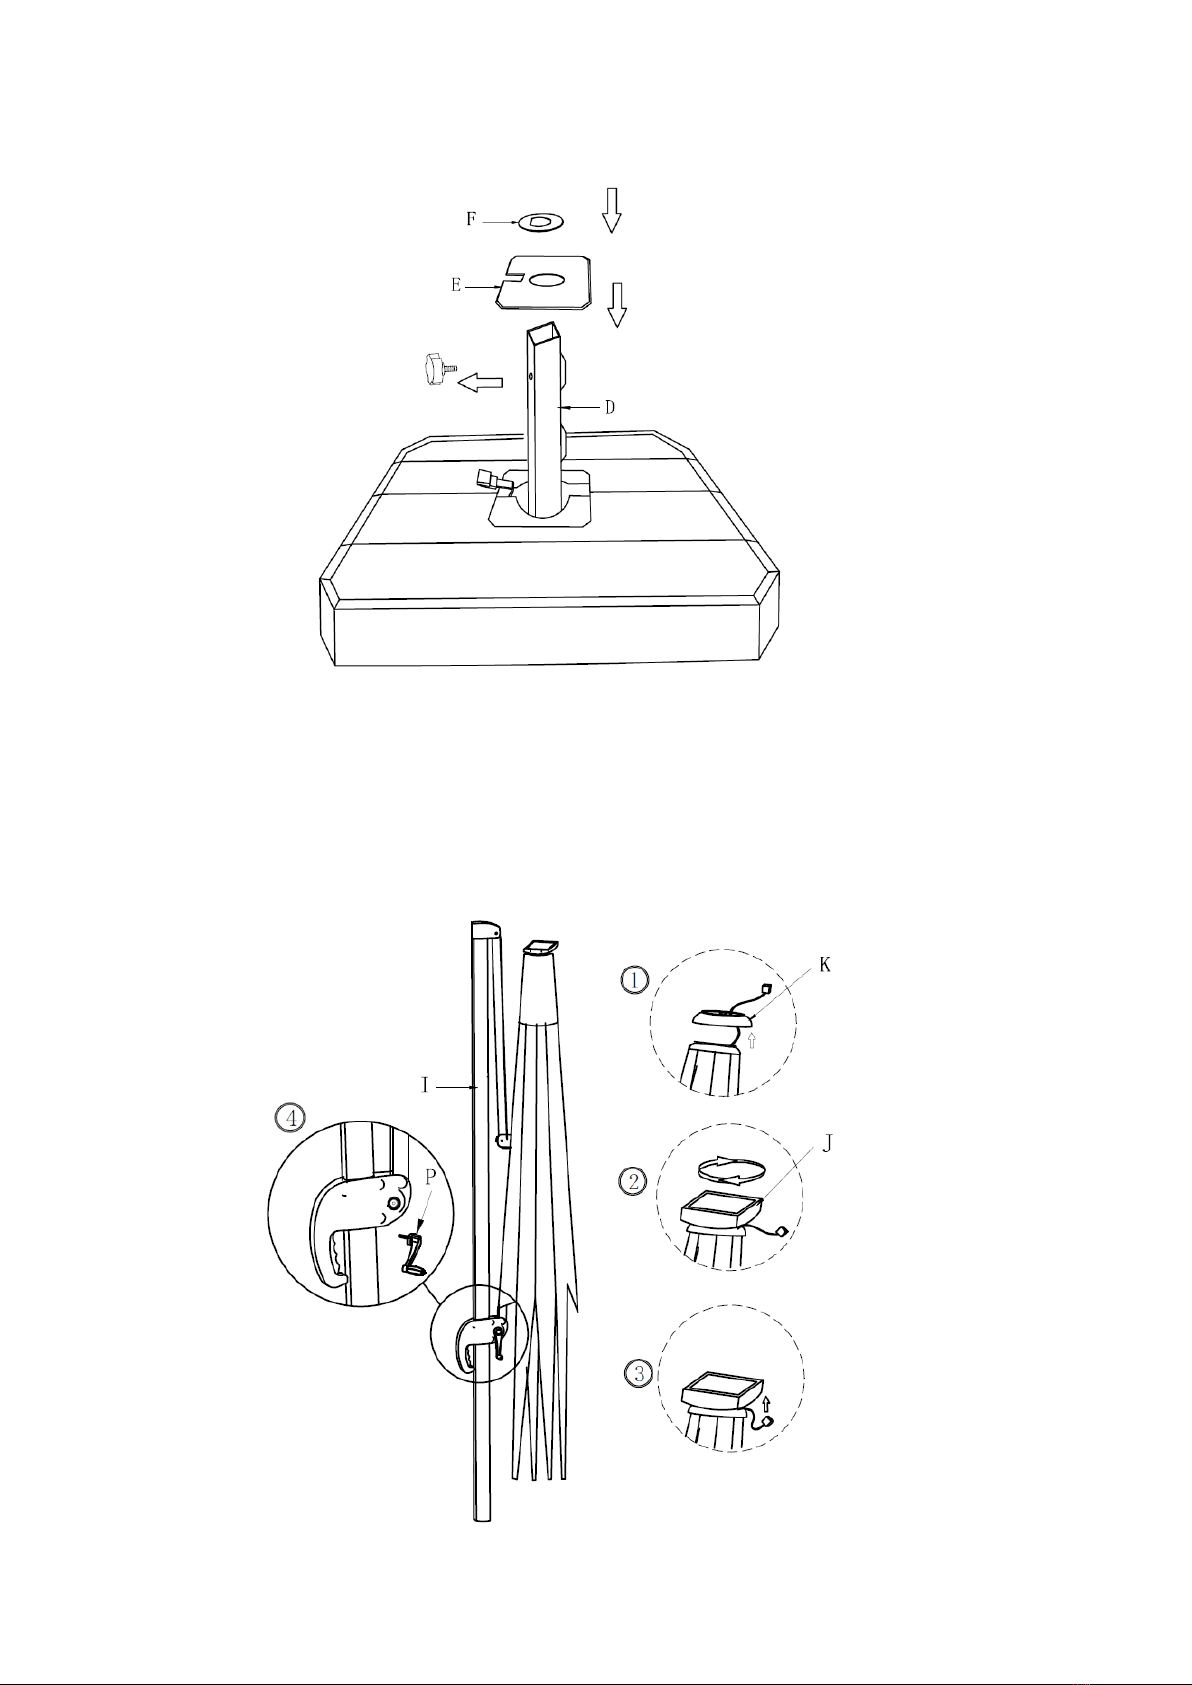
Step 1: Place Base Plate (A) across the top of Base Plate (B). Secure the Swivel Plate (C) using Bolts (M)
and Washers (N). Attach the Lower Umbrella Support Post (D) to the Swivel Plate (C) using Bolts
(L) and Washers (N). Tighten all Bolts. See Figure 1.
Figure 1
4of11
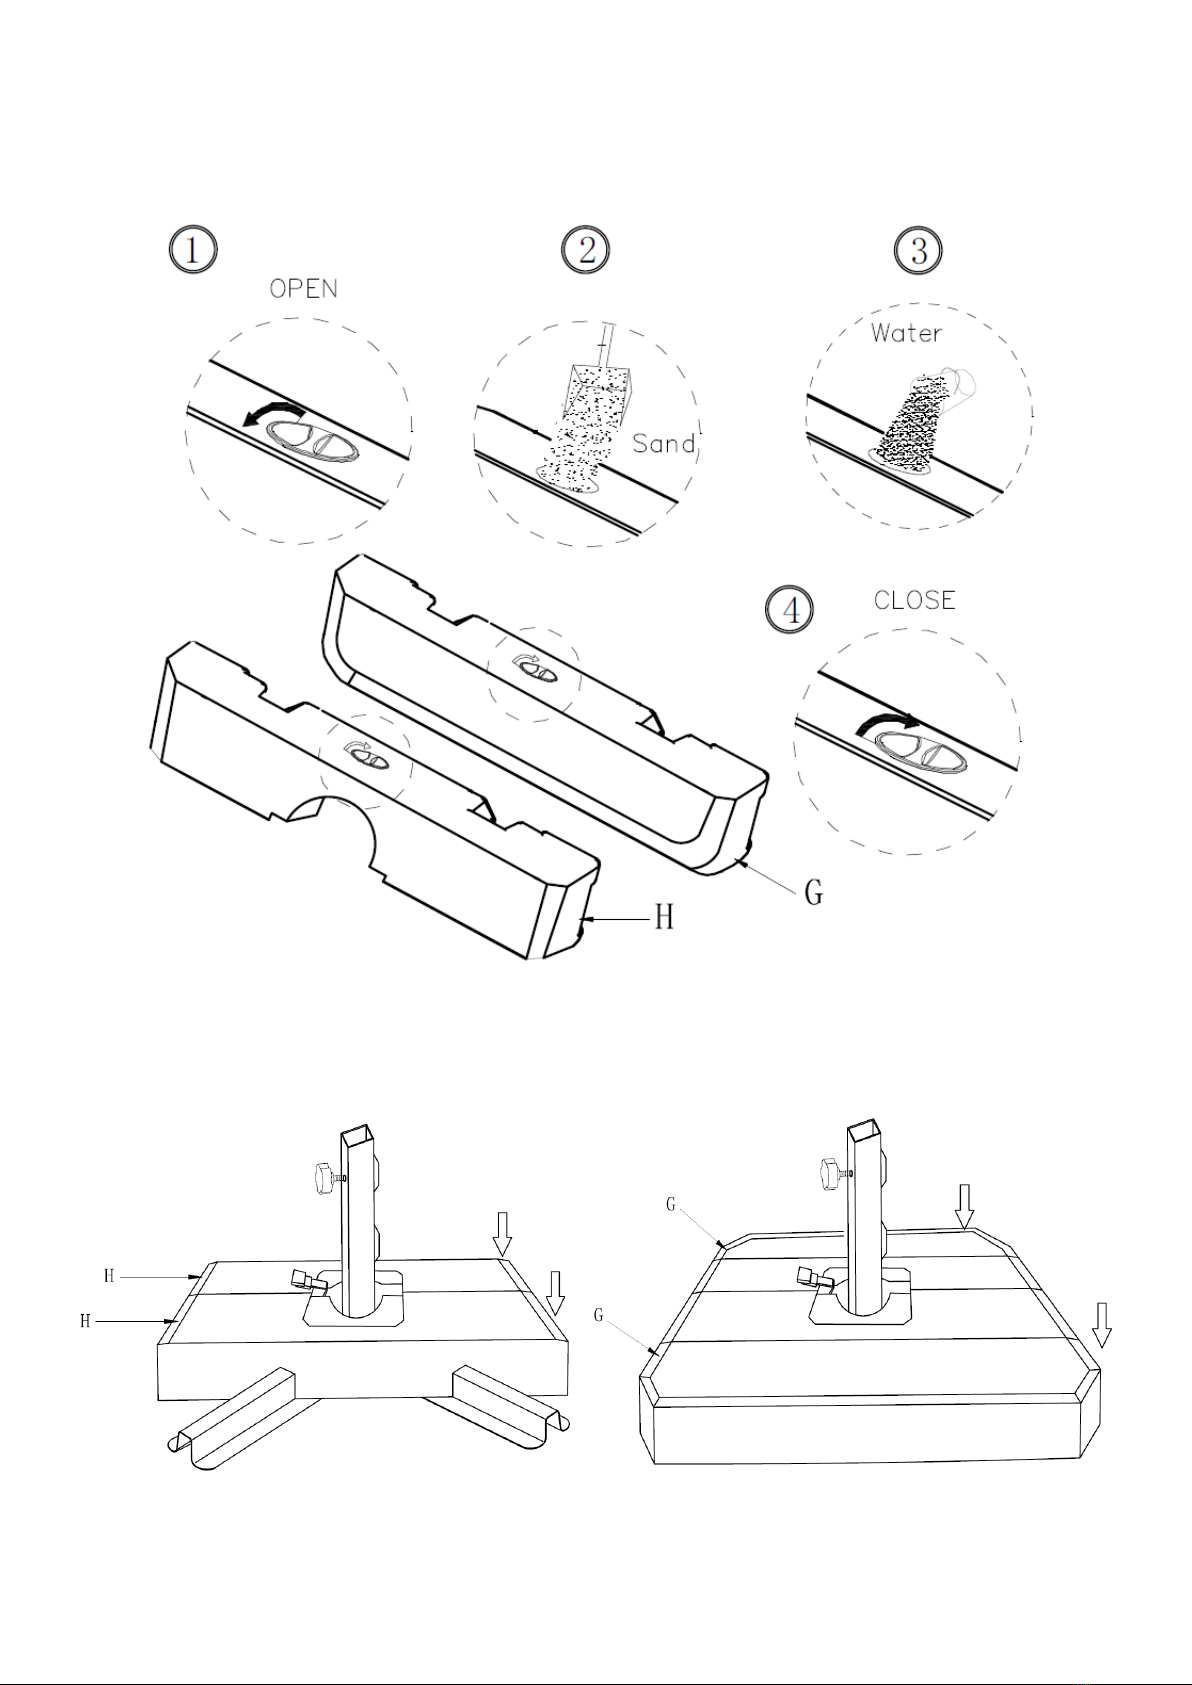
Step 2: Remove caps from the side of all Poly Bases (G & H) and fill completely with Sand or Water. Secure
the caps on all bases. See Figure 2.
Note: Poly Bases must be completely filled with sand or water before proceeding to
the next step.
Figure 2
Step 3: Place the Filled Poly Bases (G & H) on the Base Plates (A & B). See Figure 3-1 and Figure 3-2.
Figure 3-1 Figure 3-2
5of11
Step 4: Remove the Locking Nut from the Lower Umbrella Support Post (D) and attach the Bottom Swivel
Plate Cover (E) and Top Swivel Plate Cover (F). See Figure 4.
Note: The Locking Nut is reattached in Step 6.
Figure 4
Step 5: Place Umbrella Cap (K) on top of Umbrella Canopy and insert the Solar Panel Plug through the
opening on the Umbrella Cap (K). Secure the Solar Panel (J) to the top of the Umbrella Canopy by
turning clockwise. Attach the Solar Panel Plug to the Solar Panel (J).
Note: Do not attach the Solar Panel Plug until after the Solar Panel has been secured
to the top of the Umbrella Canopy. Insert the Crank Handle (P) into the Large Handle on the
Main Support Post with Umbrella Canopy (I). See Figure 5
Figure 5
Locking Nut
6of11
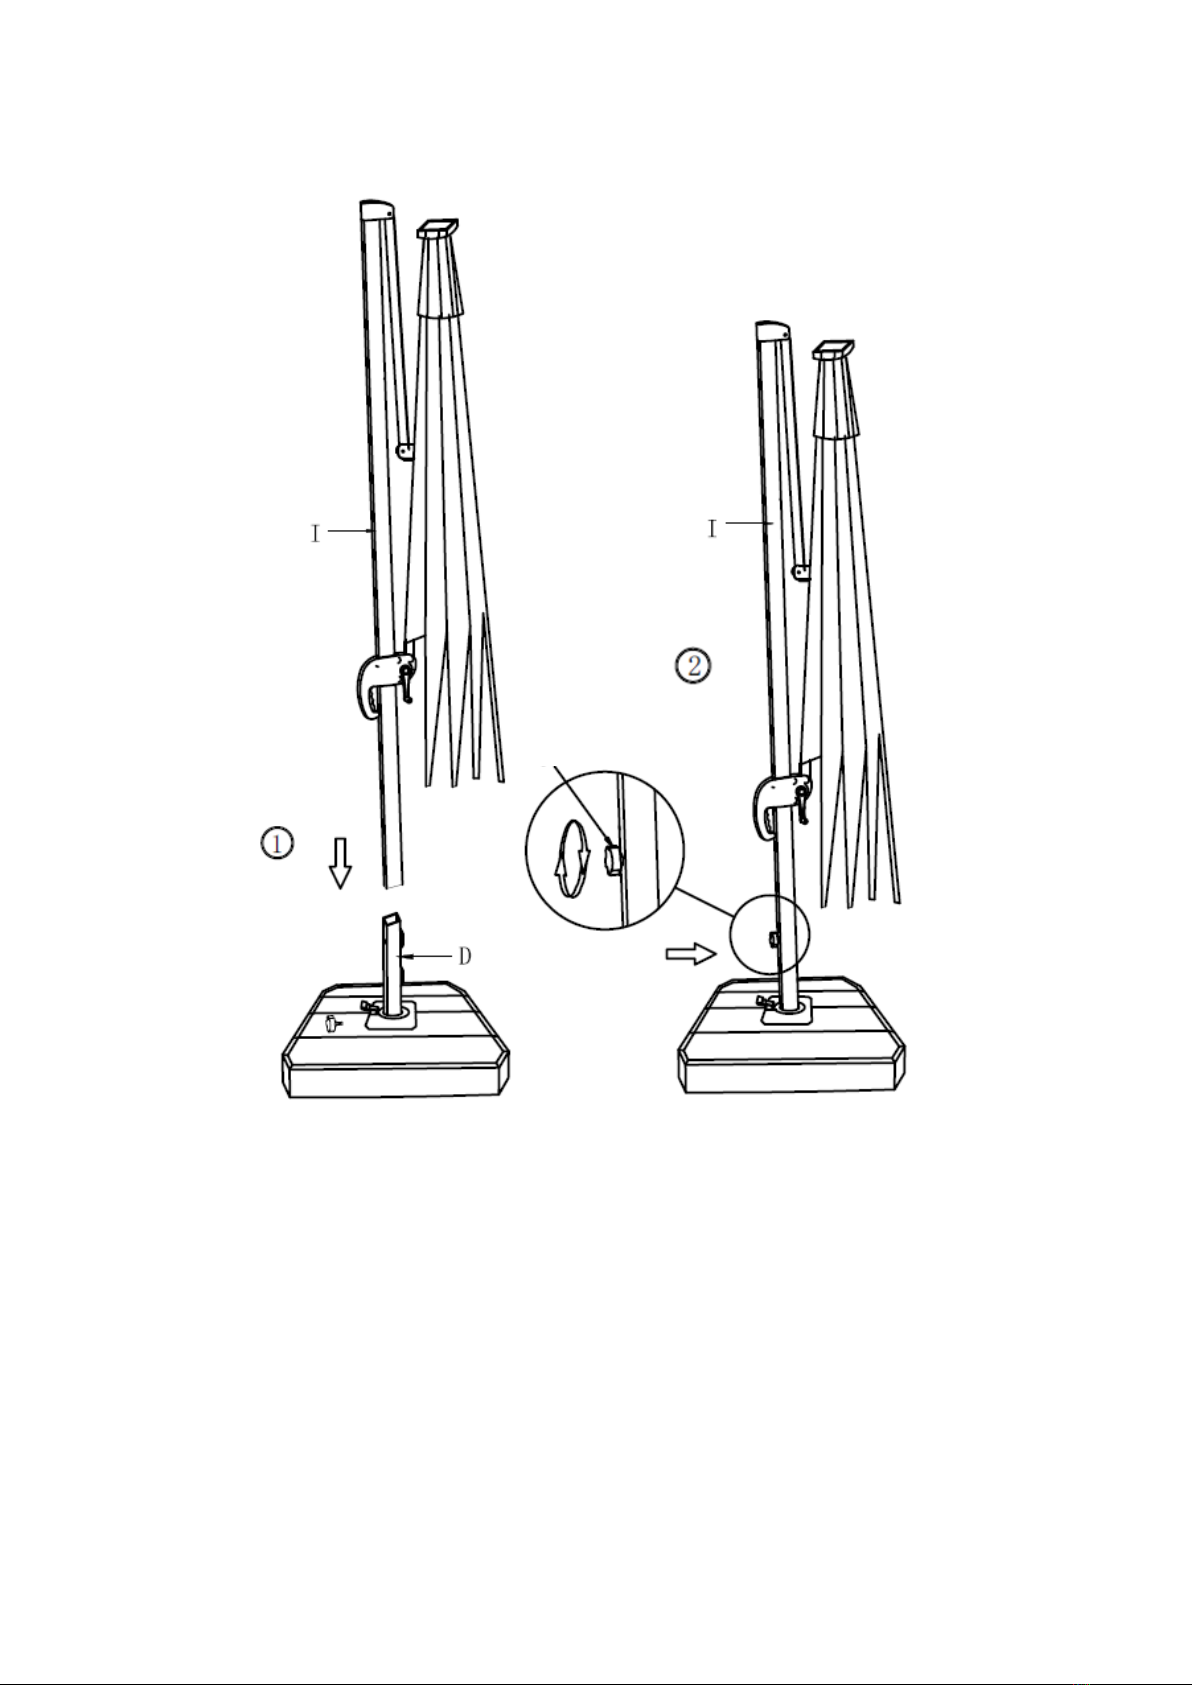
Step 6: Insert the Main Support Post with Umbrella Canopy (I) into the Lower Umbrella Support Post (D).
Attach and Tighten Locking Nut to secure the Lower Umbrella Support (D) to the Main Support
Post with Umbrella Canopy (I). See Figure 6.
Figure 6
Locking Nut

7of11
OPERATING INSTRUCTIONS
Step 7: RAISING AND LOWERING UMBRELLA CANOPY.
Once assembled loosen the Umbrella Fabric before raising. Press and hold the Lower Handle on
the Main Support Post and push to raise the Umbrella Canopy. The Umbrella Canopy height is
adjustable and must be secured into one of the pre-drilled hole locking positions on the Main
Support Post. See Figure 7.
Figure 7

8of11
Step 8: OPENING UMBRELLA CANOPY
Once the Umbrella Canopy is at the desired height, open the Canopy by turning the Umbrella Crank
(P) in the clockwise position. To close the Umbrella Canopy, turn the Umbrella Crank (P) in the
counter clockwise position.
Note: The Umbrella Canopy must be in the closed position prior to raising or
lowering the height. See Figure 8.
Figure 8
9of11
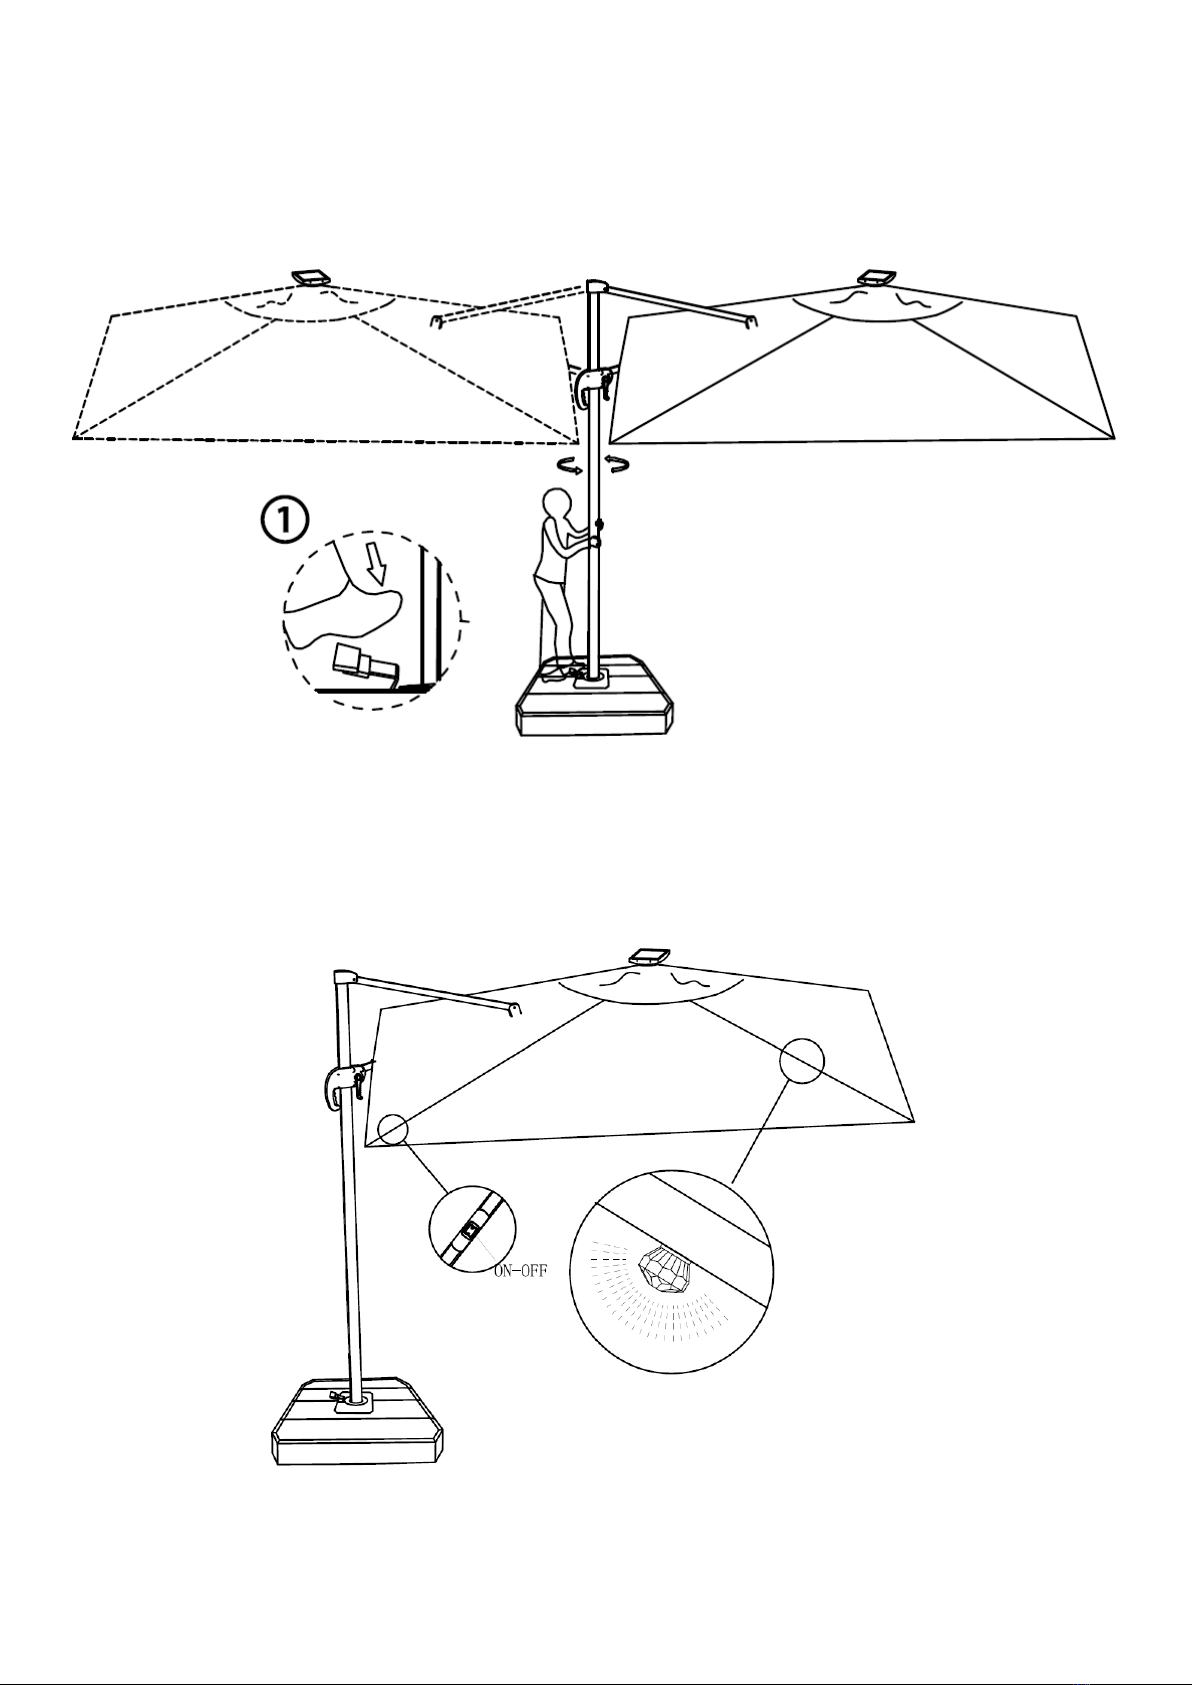
Step 9: ROTATING UMBRELLA CANOPY
Depress and hold the pedal on the Swivel Plate (C) with your foot while turning the Main Support
Post (I) to the desired locking position. The Main Support Post (I) can rotate 360 degrees. See
Figure 9.
Figure 9
Step 10: LED LIGHT ON/OFF
Press the On/Off Switch located on the inside of the Umbrella Canopy Frame. See Figure 10.
Note: Solar Panel must be charged in full sunlight for 4 to 6 hours prior to use. Fully
charged solar panel will provide light up to 4 hours.
Figure 10

10 of11
Step 11: SECURING UMBRELLA
Close and lower the Umbrella Canopy. Lock into the lowest position. Tie strap around post to
secure. See Figure 11-1 and Figure 11-2.
Figure 11-1 Figure 11-2

11 of11
Care & Maintenance
Maintain your umbrella by storing out of the elements when not in use.
Frame: Clean frames with a mild soap and warm water. Do not use abrasive materials, cleaners or bleach.
Rinse with clean water and dry thoroughly. Always clean, drain and dry thoroughly before storing
for the winter.
Fabric: Clean by hand with a mild solution of soap and water. Rinse fabric thoroughly and allow to drip
dry. Do not use bleach or solvents on fabrics.
Warranty
You must retain the original receipt to obtain warranty service.
What is covered?
Frame: Frame is warranted against rusting for 1-year.
Finish: Frame is warranted against peeling, cracking or blistering for 1-year if the product has not been
scratched or abraded.
Fabric: Fabric is covered by a 1-year warranty against manufacturing defects.
Solar Panel: Six months limited warranty.
What is not covered?
EXCLUSIONS: Use for commercial, contract, or other non-residential purposes, or items damaged due to acts of
nature, vandalism, misuse, or improper assembly are not covered. Discoloration or fading of the finish or fabrics
as a result of chemicals or spills, pool water chemicals or salt water is not covered. Mildew of fabric is not covered.
Corrosion and rusting of frames resulting from scratches are not covered. If within the stated warranty period this
product is found to be defective in material or workmanship, the purchaser must contact the manufacturer’s
customer service department. The manufacturer, at its option, will repair or replace the defective parts. Proof of
purchase (dated register receipt) is required for warranty claims. It remains the customer’s responsibility to pay
for freight and packing charges to and from the service center. Warranty is to the original purchaser and is non-
transferable. Any replacement of warranted items will be in the original style and color, or similar style and color
if the original is unavailable or has been discontinued.
Questions, problems, missing or damaged part? Before returning to the store call or email our Customer Service.
Customer Service Contact Information:
Hours: Monday - Friday 8:00 a.m. - 5:00 p.m. Central Time (CT)
Phone: 1-888-607-4417
Email: service@shadenshelters.com
This manual suits for next models
1
Table of contents


