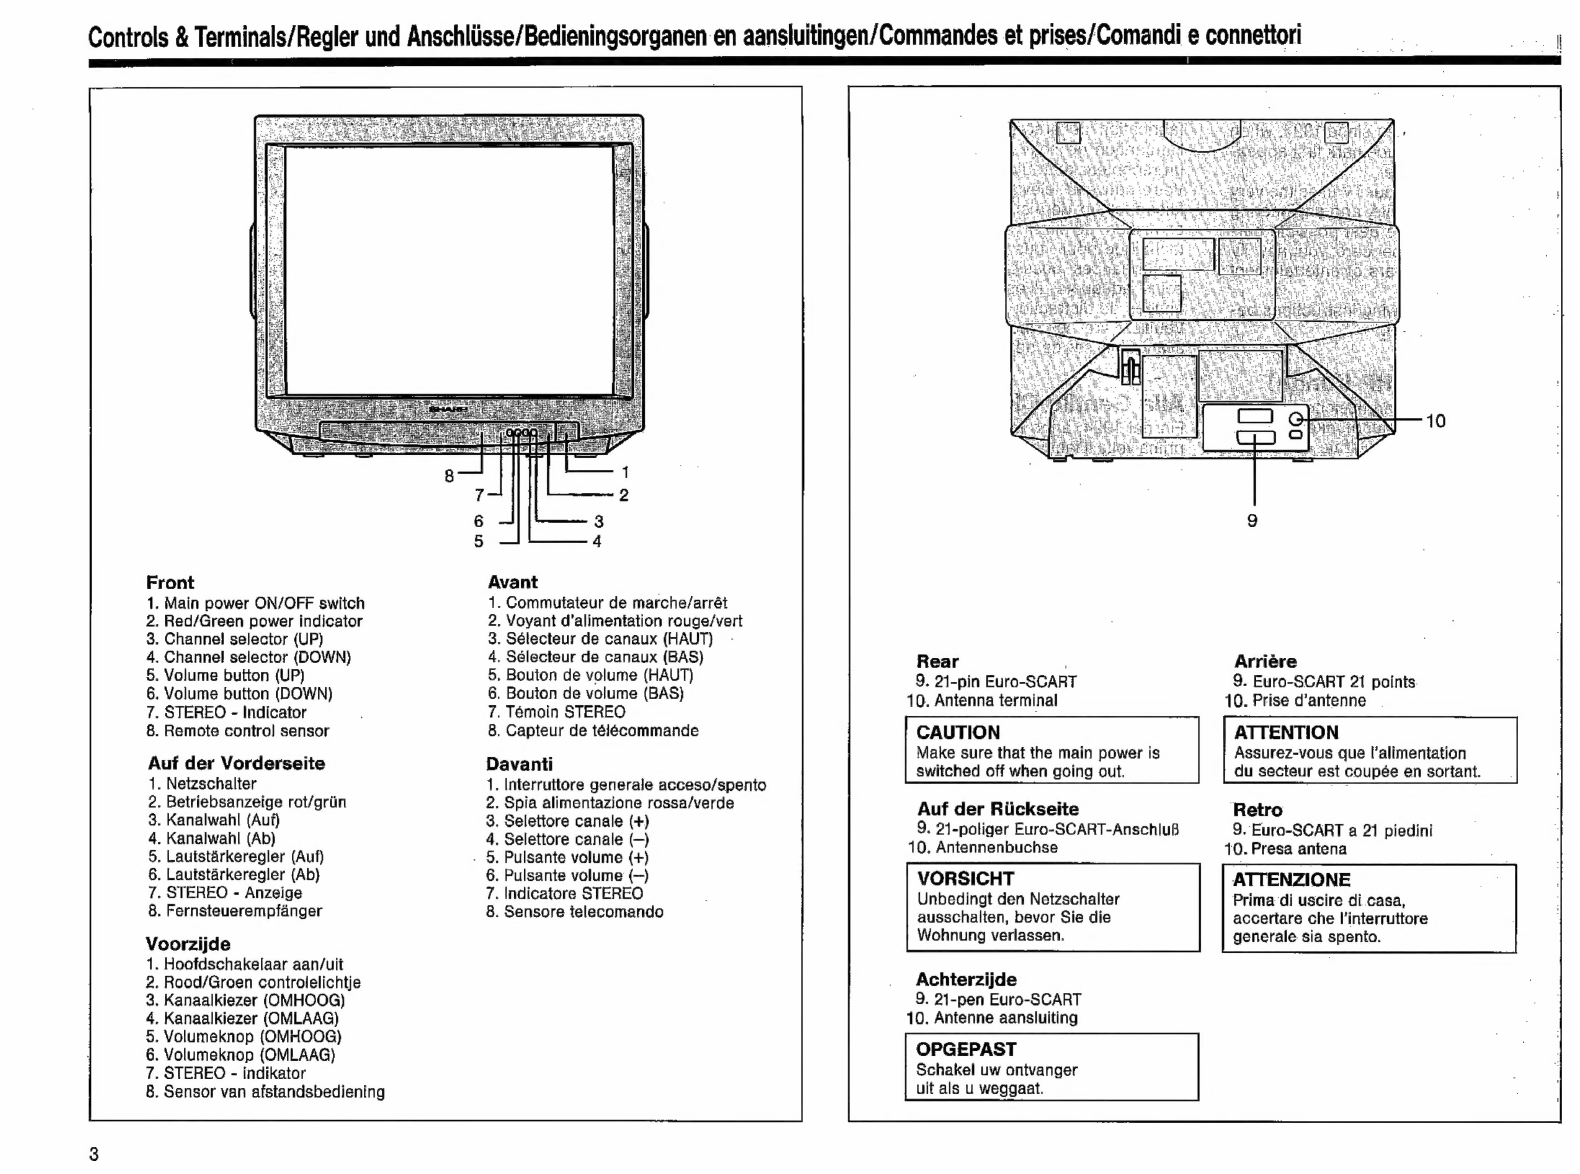
Remote
Control
Transmitter/Fernsteuersender/Afstandsbediening/Télécommande/Telecomando
TY¥-TEXT
G1014BMSA
4
3
8
ra
12
11
16
15
Remote
Control
Teletext
and
mode
control
.
Channel
preset
button
.
Picture
setting
button
.
Sound
setting
button
.
Feature
setting
button
.
Colour
button
(red)
.
Colour
button
(green)
.
Colour
button
(yellow)
.
Colour
button
(cyan)
.
Cancel
bution
.
Reveal
button
.
Store
button
.
Text/Mix
button
.
lop/Bottom/Full
button
.
Hold
button
.
Time
button
.
Picture
button
.
Index
button
TV
Control
18
.
0-9
digit
buttons
19.
20.
21;
22.
23.
24,
25.
26.
af.
Single/Double
entry
selector
Channel
mode
selector
TV/VIDEO
selector
Channel/Time
call
button
Channel
selectors
(Vv
/
A)
Sound
mode
selector
Sound
mute
button
Volume
control
buttons
Power
on/off
switch
CAUTION
Make
sure
that
the
power
is
switched
off
when
going
out.
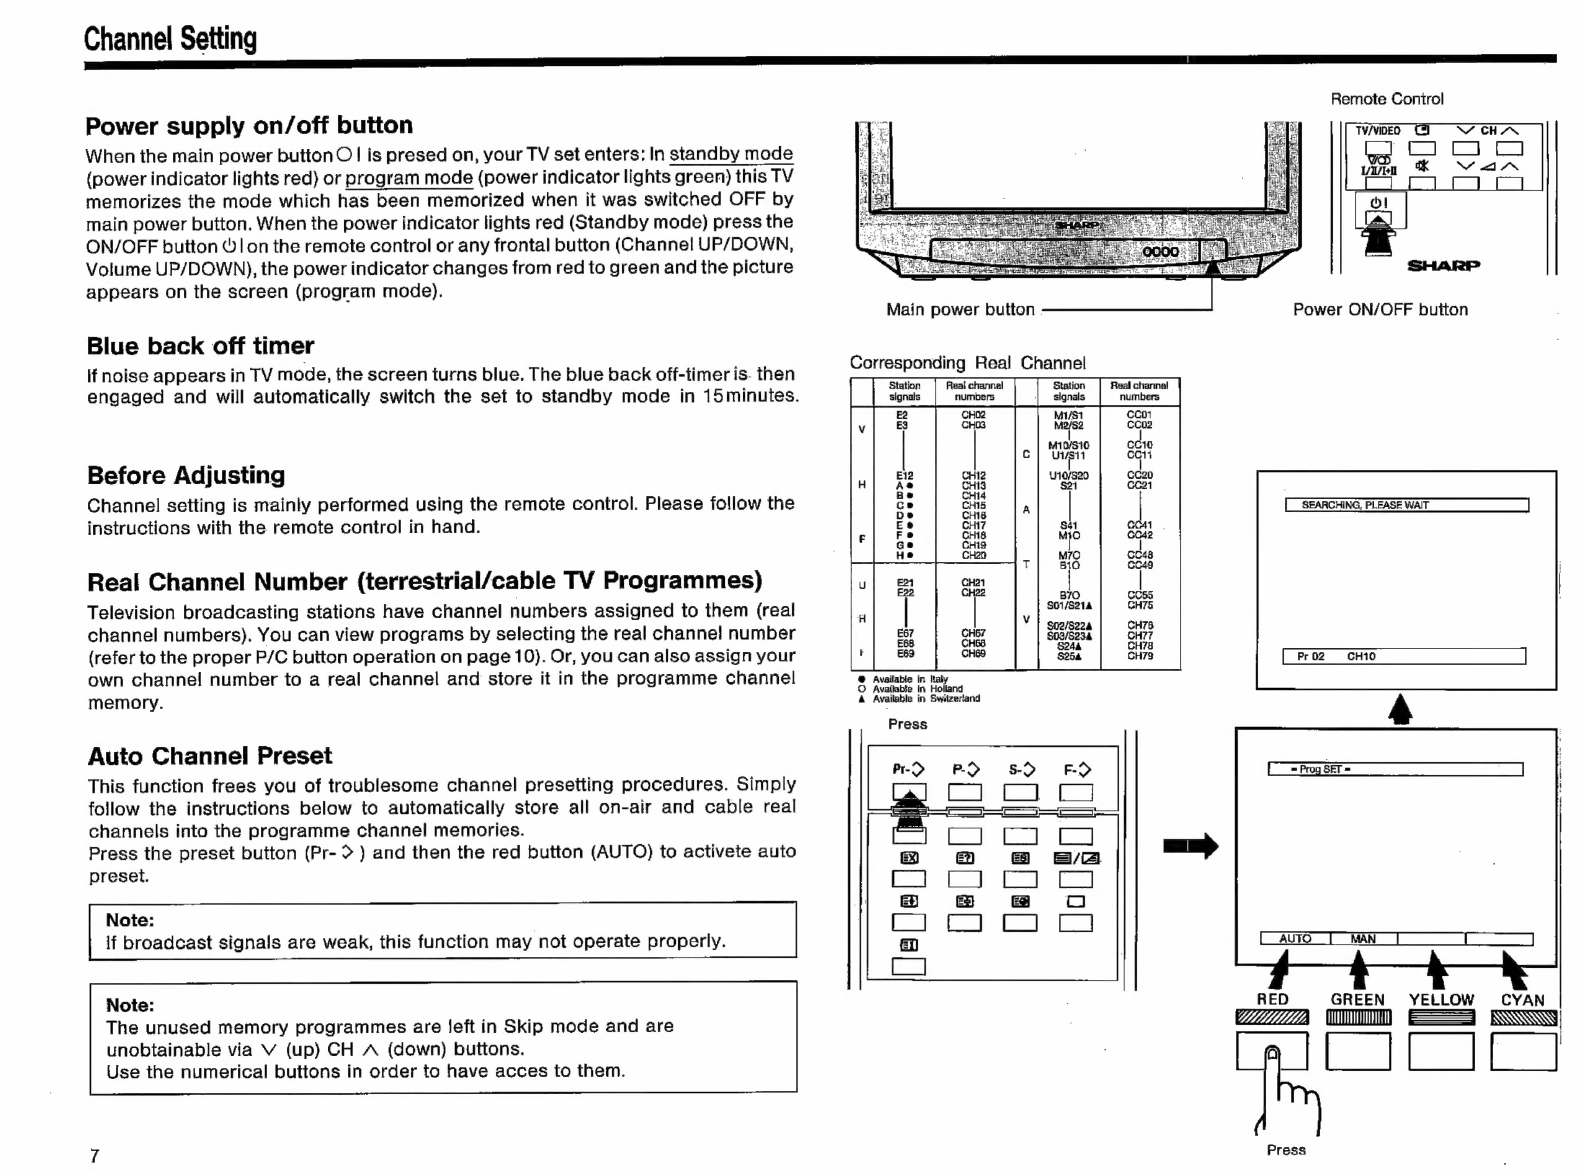
Fernbedienung
Teletext-und
Betriebsartenregler
1
oOnr
AO
b
©
NH
9:
10.
17.
12,
13.
14.
15.
16.
ire
,
Kanal-
Voreinstellungs-
Taste
.
Bildeinstellungs-
Taste
.
Toneinstellungs-
Taste
.
Funktionseinstellungs-
Taste
.
Farbtaste
(rot)
.
Farbtaste
(griin)
.
Farbtaste
(gelb)
.
Farbtaste
(cyan)
Léschtaste
Auideckungs-
Taste
Speichertaste
Text/Misch-
Taste
Tasie
flr
obere
Halfie/untere
Haltie/ganze
Seite
tialtetaste
Zeitiaste
Bildtaste
Indextaste
Fernseher-Regler
18.
19,
20.
a
22.
23.
24.
25.
26.
at
Zahlentaste
0-9
Taste
zur
Wahl
von
einstelliger/zweistelliger
Eingabe
Kanalbetriebsart-Wahlschalter
TV/VIDEO
-Wahltschaiter
Kanal/Zeitaufruf-Taste
Kanalwahl-Tasten
(v
/
A)
Tonbetriebsart-Wahlischalter
Tonabschalt-Taste
Lautstarketasten
Neizschalter
ZUR
BEACHTUNG
Wenn
man
das
Haus
verta8t,
sollte
man
auf
jeden
Fall
die
Spannungsversorgung
ausschalten.