Sharper Image SMP558-4 User manual

Touch MP3 Video Player
SMP558-4
4
GB
User Guide

In the box
USB Cable
Quick Start Guide CD (User Guide &
Video converter)
Touch MP3 Video Player
V
i
d
e
o
C
o
n
v
e
r
s
i
o
n
S
o
f
t
w
a
r
e
Installation CD
Pro Headphones
1

Features & Location of controls
•4 GB memory
•Touch 2.8” high resolution display
•Built-in speaker
•Stores & plays music, video, and pictures
•Digital voice recorder
1. Headphone jack
2. Power button [ ]
3. Power switch [ ] - quickly turn the player off
4. USB port
5. Stylus - use as another option to navigate the touch
screen
6. Display
7. Micro SD slot
VOLUME
UP/DOWN
LOCK/UNLOCK
BUTTON
MAIN MENU
1
2
7
3
5
4
TOPTOP
6
Features:
Supported les:
Music - MP3, WMA, OFF, APE, FLAC, and WAV
Video - RM, VVD, WMV, and FLV (converted videos)
Pictures - JPEG, BMP, GIF, PNG, and TIFF
2

Basic operation
After turning on your MP3
Player, you will see the main
menu.
Touch an option to select it.
browser
video
photos record
settings
music
switch, your last changes in the settings will be lost, and
the player will not remember the last song played.
Turning on/of
•To turn on the player place the [ ] switch to the “ON” position, and press and HOLD the [ ] button for 3 seconds until the LCD screen
lights up.
•To turn the player off, press and HOLD the [ ] button until the LCD screen shuts off, or place the [ ] switch to the “OFF” position.
3
3

Connecting to a computer
Disconnecting the USB cable:
1. Open the “Safe Device Removal” icon in the task bar, on the
lower right corner of the screen.
2. Select “USB Device” and click “Stop.”
3.
device,” disconnect the USB cable from your computer.
Important: to avoid any data loss, always perform a safe USB device
extraction before disconnecting the USB cable.
• System requirements:
• Pentium 200 MHz or above
• Microsoft Windows 2000/ME/XP/Vista/ Windows 7
• USB port
PC connection:
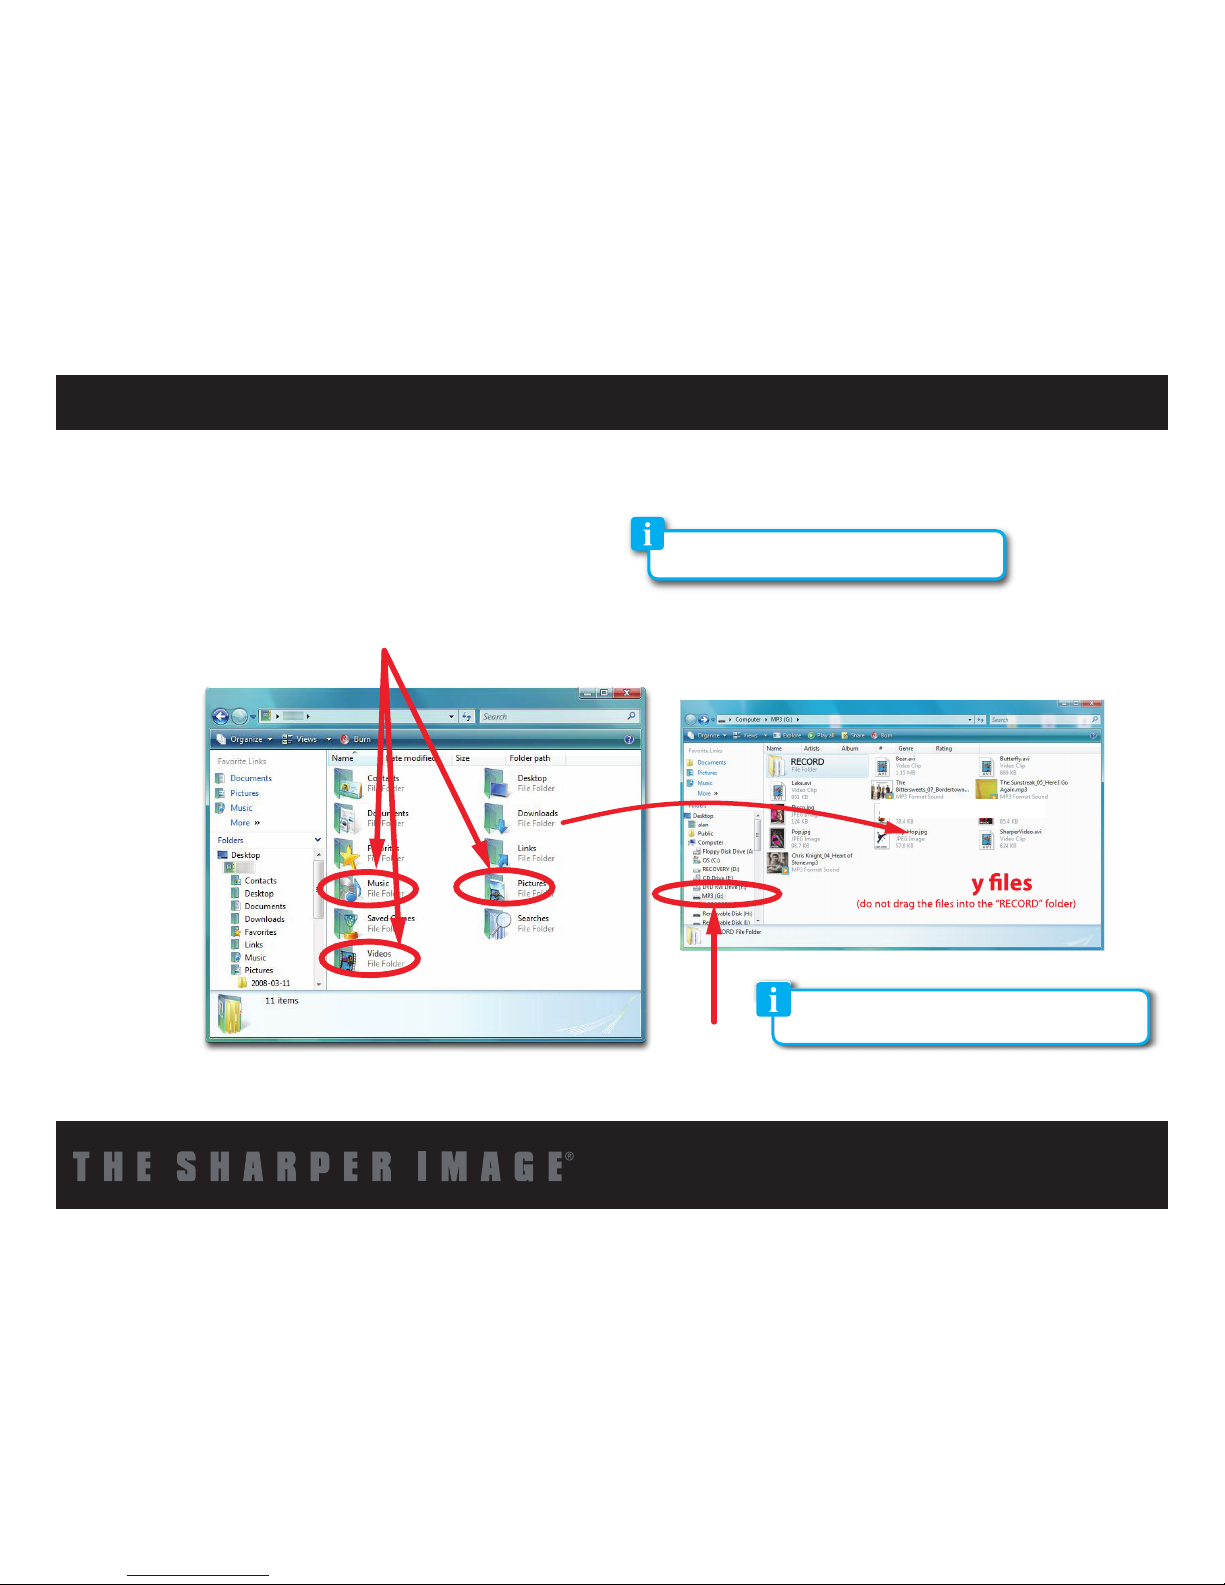
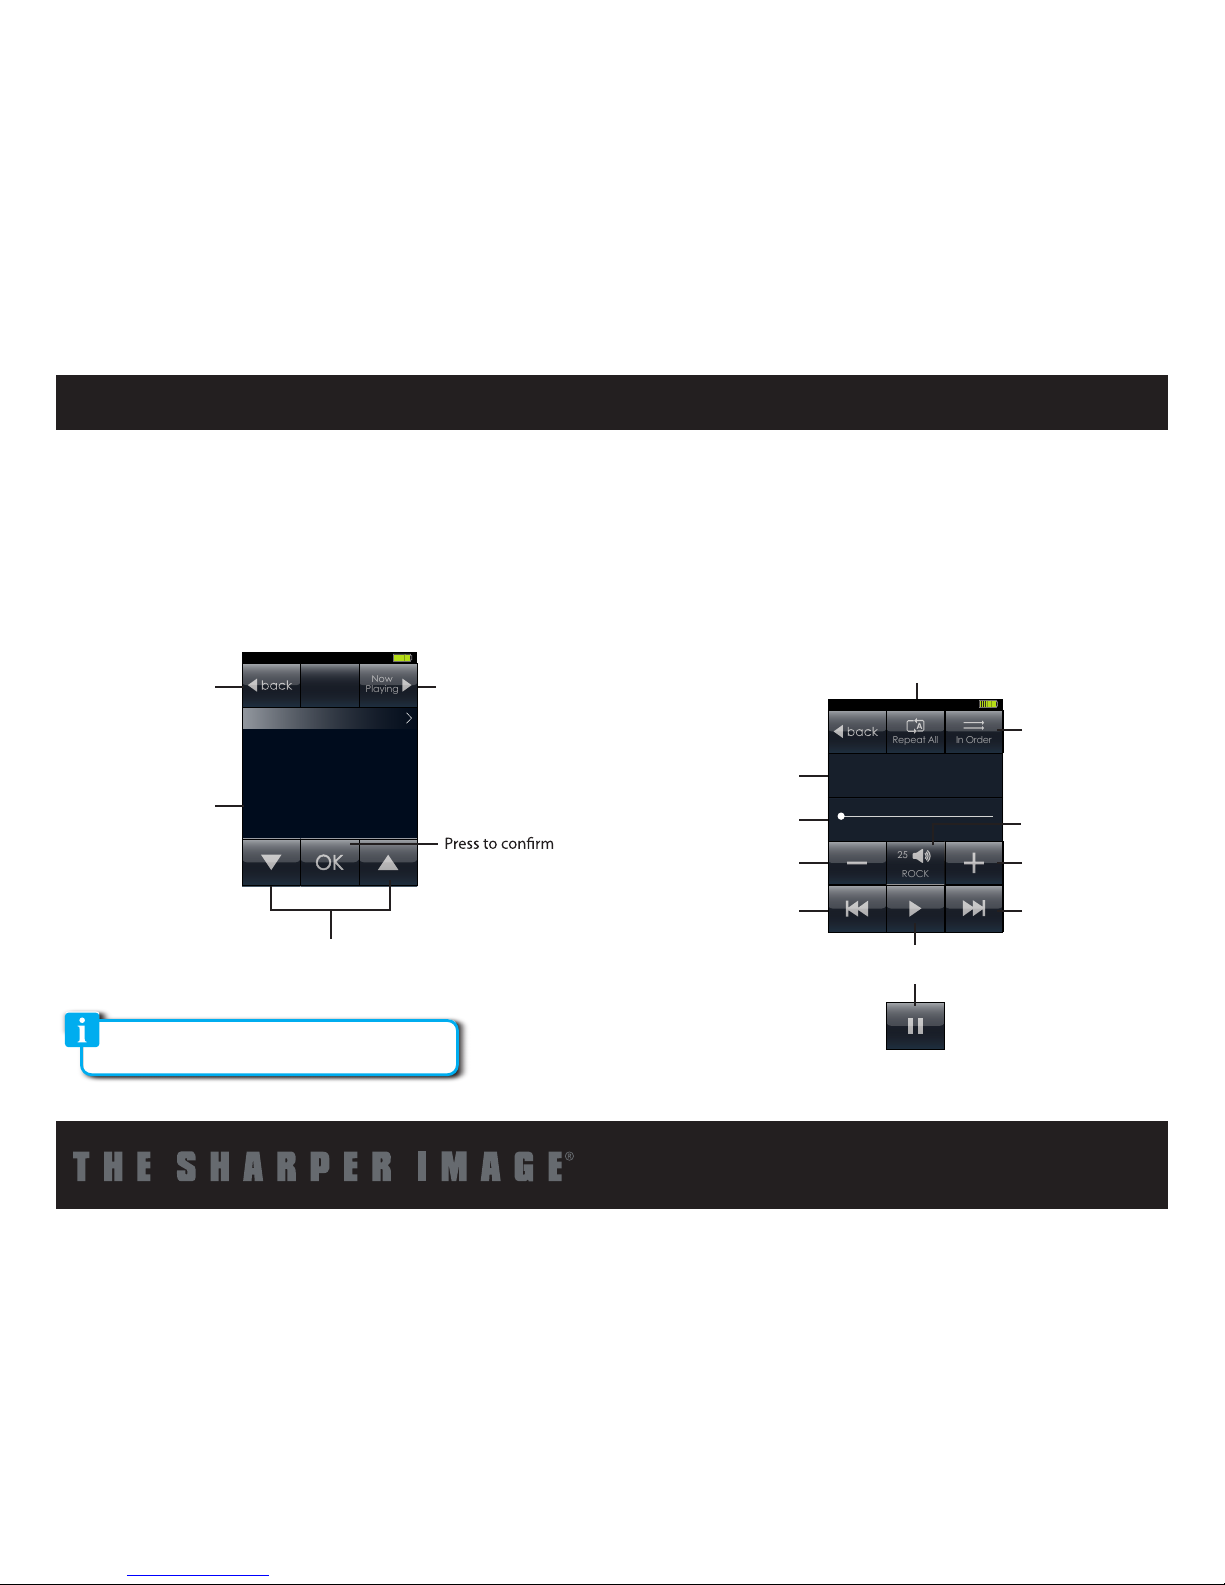
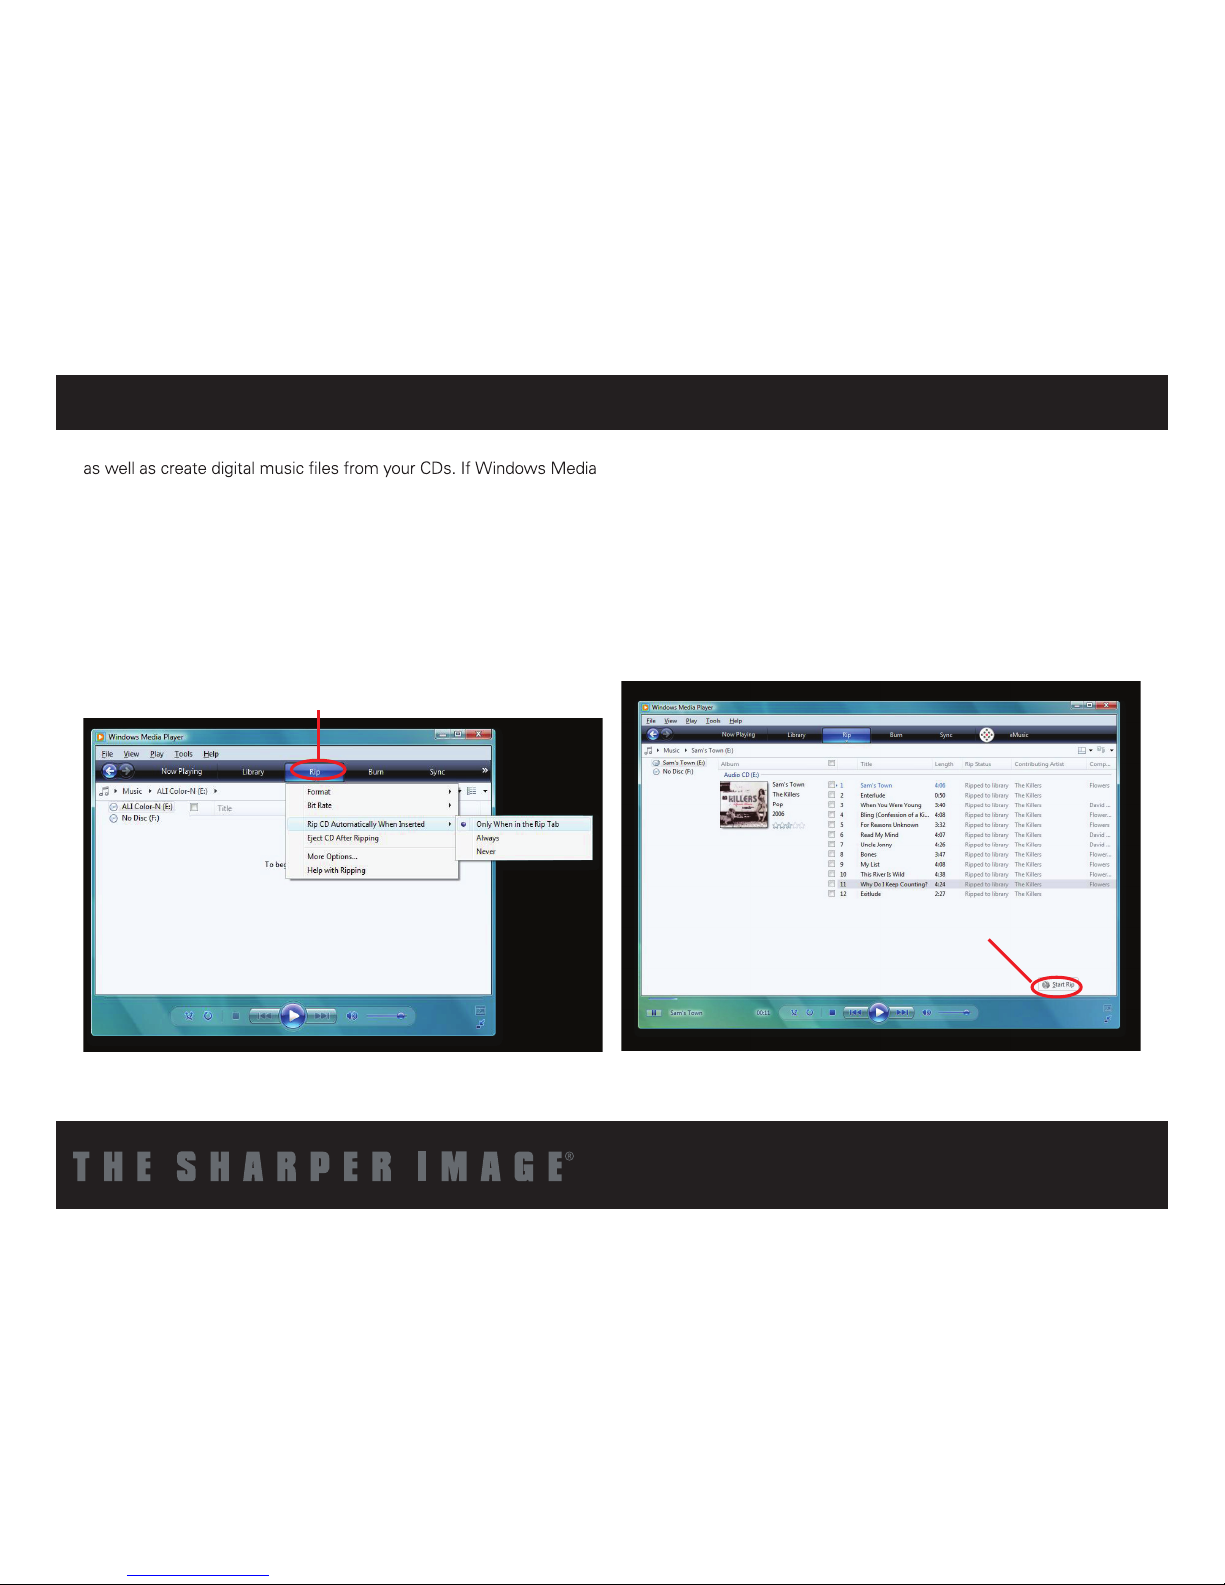
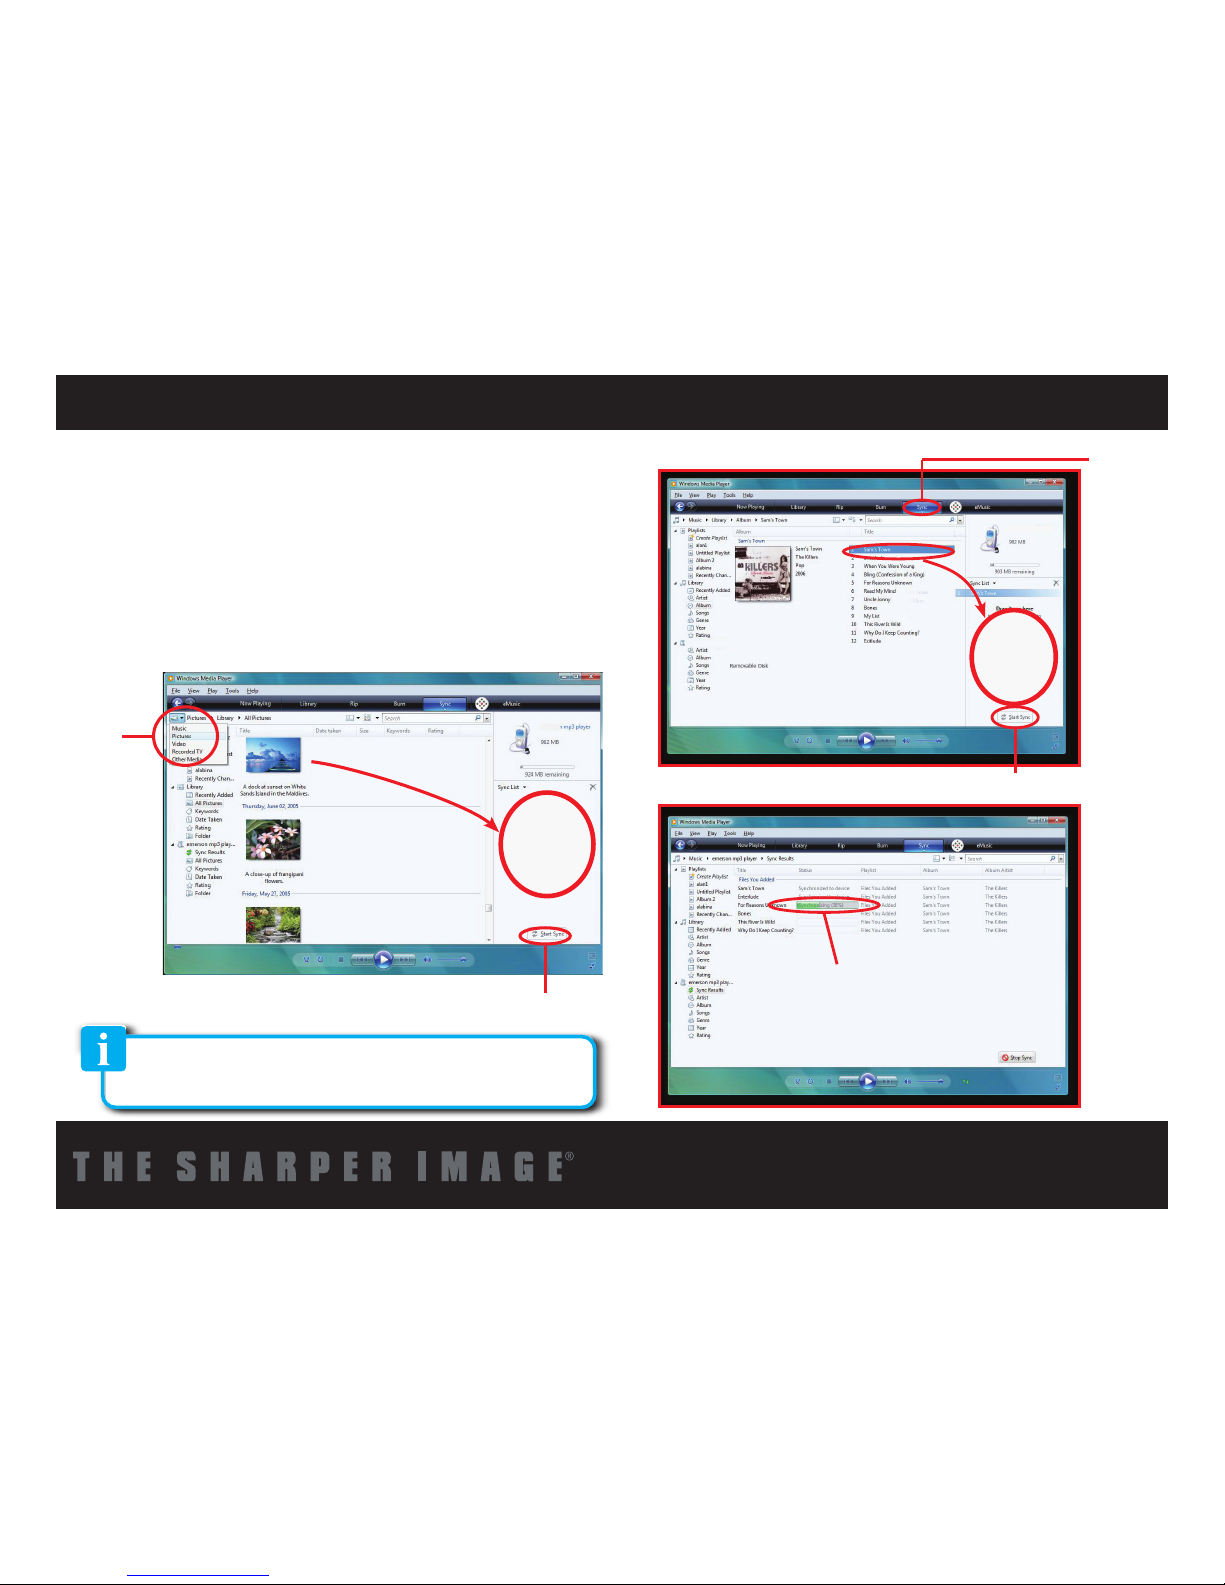
In order to enjoy the multimedia capabilities of your MP3 Player, you
have to first copy files from your PC to its internal memory.
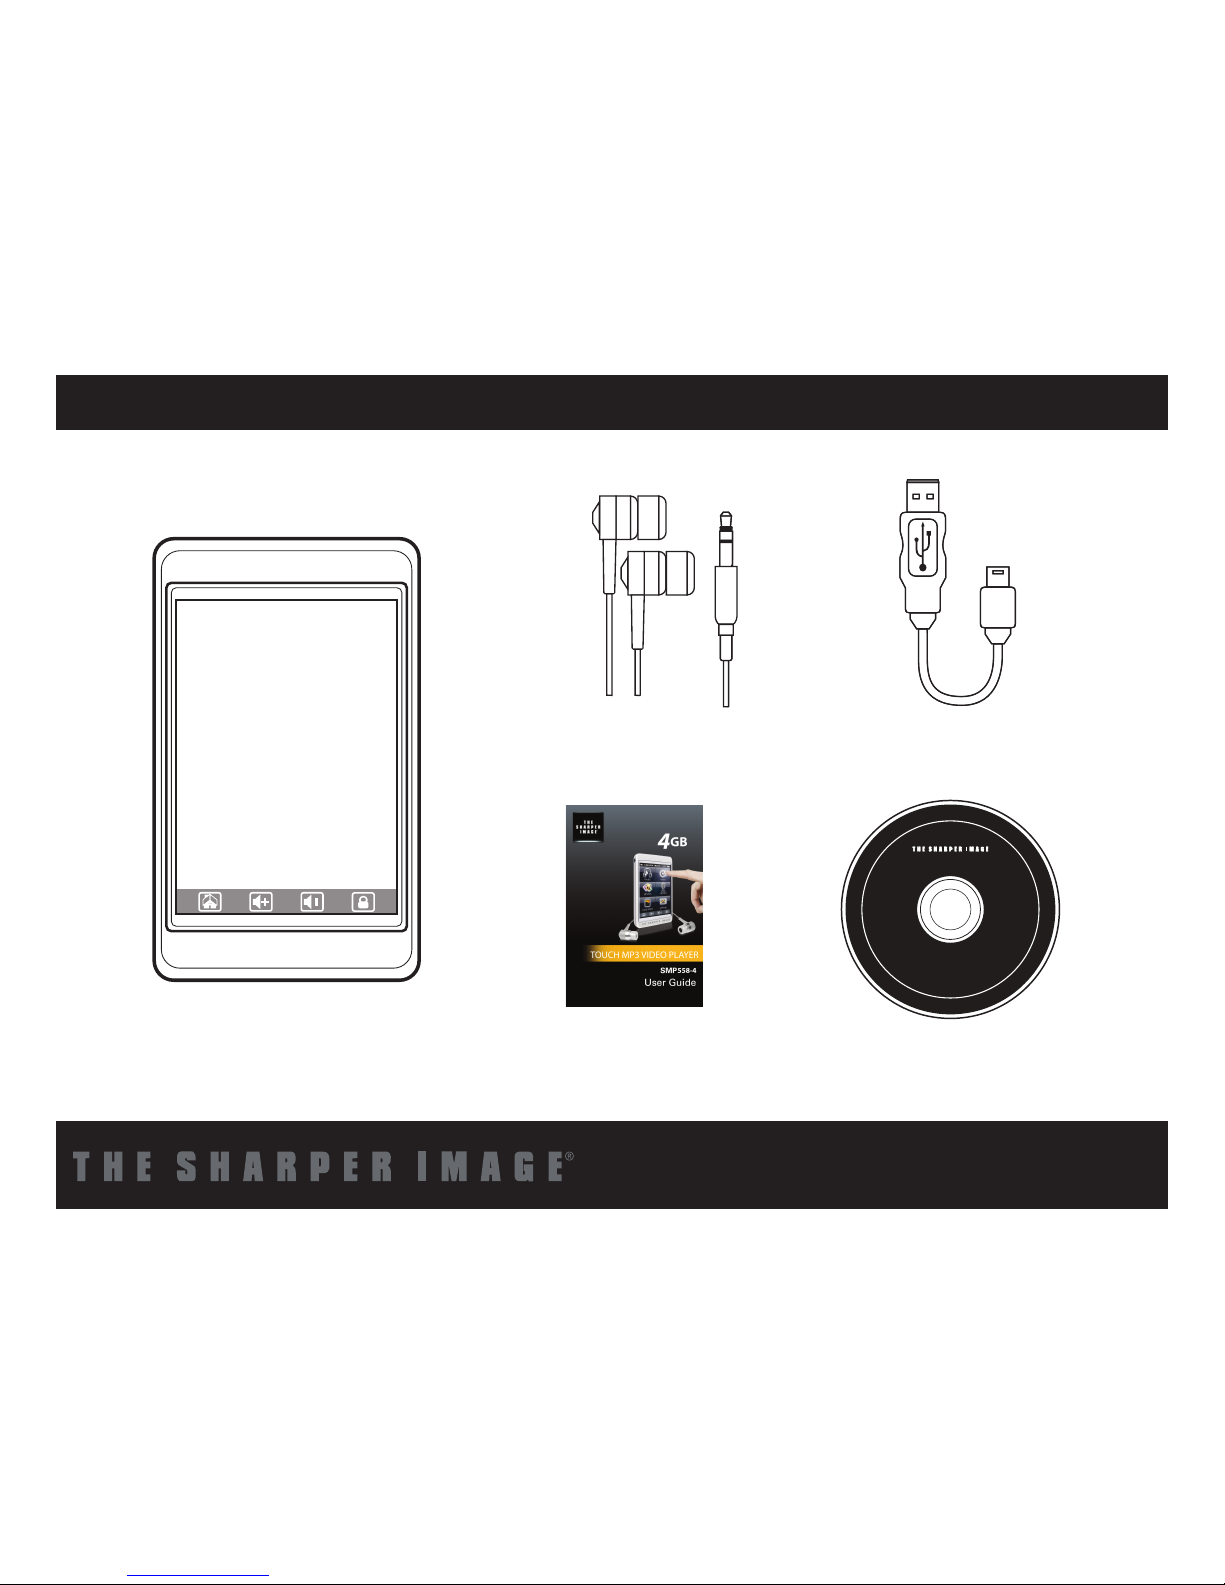
Connect your MP3 Player to the computer using the included USB 2.0
cable. The device will be detected automatically without installing any
driver. Once detected, you can read/write to the device’s memory just
as if you were using a regular disk drive.
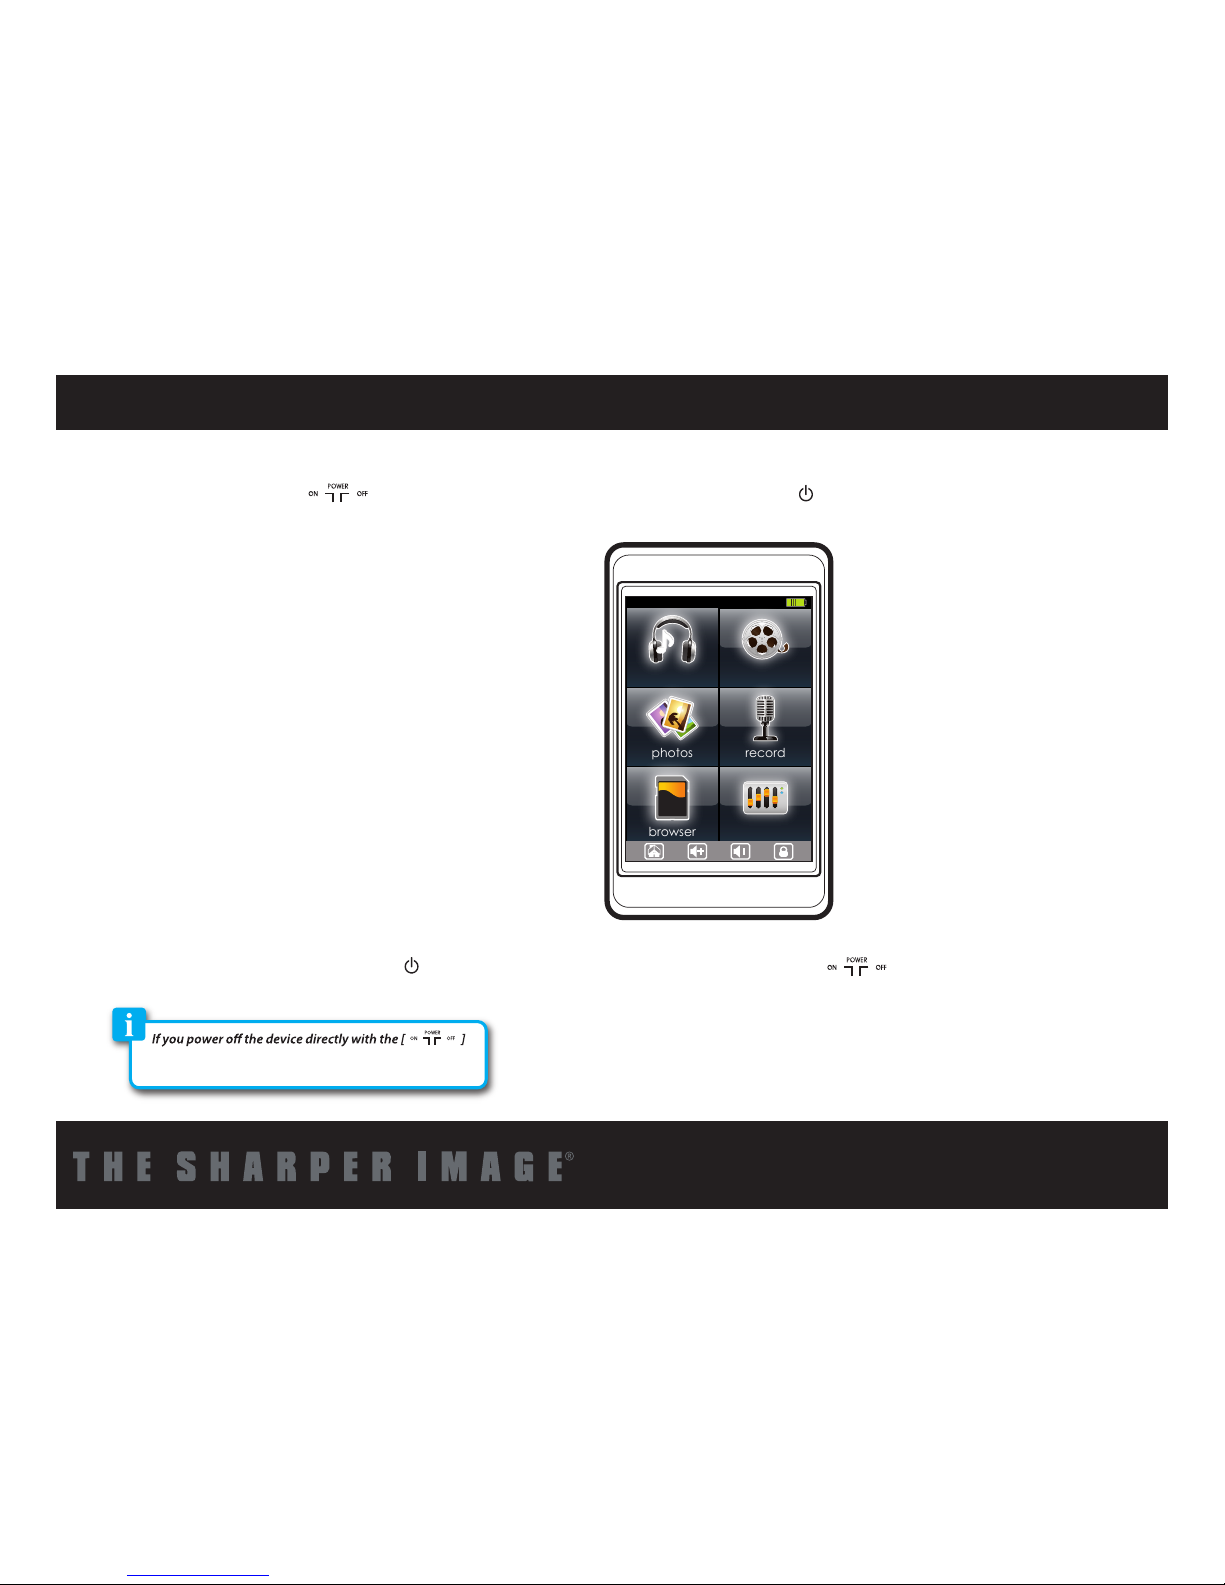
Make sure your computer is powered on, and follow the steps below
to connect the player to your computer.
1. Plug the larger USB connector of the USB cable into the USB port
on the computer.
2. Plug the other end (small) of the USB cable to the player.
3. The computer system detects “New hardware” and starts to install
the driver automatically. Wait for the system to finish the installation.
When it has finished, “MP3” will be created in “My Computer”.
4

Micro SD cardCharging the battery
The player supports Micro SD cards (not included), which allow you to
add up to 16 GB of additional memory to your MP3 Player.
To insert the Micro SD card:
1. Insert the Micro SD card into the card slot at the bottom of your
player, with the with the metal contacts facing up towards the front
of the player, and gently push it in until it clicks. Do not apply
excessive force, as this may damage your MP3 Player and Micro
SD card.
2. To view files on your Micro SD card, touch “browser” from
the Main menu and select “SD CARD”.
3. To remove the Micro SD card, gently push it in until it pops out.
Your MP3 Player has an integrated rechargeable Li-ion battery. It is
recommended to fully charge the player before using it for the first
time. Recharge the battery by connecting the player to a computer
using the included USB cable. Charging time is between 3-5
hours,
depending if the player is powered off or working. To keep the
battery in good condition, we recommend not charging it for more
than 8 hours.
• Do not use force while inserting or removing the Micro SD card.
• Do not remove the card during file transfers.
• Make sure the player is turned off before inserting or taking
out the card.
Charging
Charging . . .
Micro SD
5

Do not disconnect the USB cable when transferring les,
as doing so may damge your Mp3 Player and your les.
Transferring media to the player
YourMP3Player is capable of storingandplaying your favoritemusic,
photosandvideo.
To transfer media from your computer:
1. Connect your MP3 Player to your computer using the included
USB cable.
2. Open “Windows Explorer” or “My Computer,” and locate “MP3.”
3. Drag and drop, or copy and paste your media files into “MP3”
When you are done, disconnect your MP3 Player from the computer
using the “Safe Device Removal” utility in the taskbar.
*Screenshots above may be slightly dierent
MP3 (G:)
MP3
Drag or cop here
Drag or copy files here
Locate “MP3”
than your computer’s operating system.
The “RECORD”folder stores and organizes all your recorded
voice memos only.
6
(do not drag the files into the “RECORD” folder).

Music
1. Select “music” from the main menu.
2. Select a music file from either “All Songs”, “Aristis, ”Albums” or “My Favorites”.
3. Use the [] or [ ] button to select a music file and press “OK”, the “Now Playing screen” appears.
4. Use the [ back] button to go to previous screens or return to the main menu.
Now
Playing
Artists
Albums
My Favorites
Update
All Songs
Music
Music Main
Refresh & update
the player
Back to
previous screen
Jump to currently
playing song
Menu scroll up/down
Now Playing
Play mode
Artist/album/song
title display
Elapse time
counter
Volume up
Next
Volume down
Previous
Repeat mode
Volume level
EQ setting
Play
Pause
Sade/Soldier of Love
Be That Easy
In OrderRepeat All
00:00 -03:38
ROCK
25
7
It is possible to delete music les from “browser” in the main
menu or by connecting the player to your computer, and
deleting from there.

Windows Media Player allows you to organize your media collection,
Player is not installed on your computer, you can get the latest version
by going to
www.microsoft.com/windows/windowsmedia/player/download/
Getting music from your CDs onto your computer:
You can use Windows Media Player to copy, or “Rip”, music from
your audio CDs.
1. Open Windows Media Player.
2. Click on the “Rip” tab.
3. Insert a music CD into your computer’s CD drive.
4. Click the checkboxes to select which tracks to Rip.
5. Click “Start Rip.”
Using Windows Media Player
Click the“Rip” tab.
Click“Start Rip”
8

Windows Media Player is an easy way to add, or “Sync,”
music to your MP3 Player.
1. Open Windows Media Player.
2. Connect your MP3 Player to the computer using the USB cable.
3. Click on the “Sync” tab in Windows Media Player.
4. Drag media files to your MP3 Player withinWindows Media Player.
5. Click the “Start Sync” button.
Syncpicturesto yourMP3 Player
Sync music to yourMP3 Player
Click
on the
Category
button
and
select
Pictures
Drag
your
pictures
here
Click“StartSync”
Click the
“Sync”
tab
Click“StartSync”
Syncin progress
Drag
your
songs
here
MP3
You may also transfer/delete music or other media les by
dragging or copying them directly into your player, see
“Transferring media to the player” on page 6.
9

Video
1. Select “video” from the main menu.
2. If an SD card inserted in the player choose either “Player” or “SD CARD”
to search for video files.
3. Use the [] or [ ] button to select a video file and press “OK”.
4. Use the [ back] button to go to previous screens or return to the main
menu.
Video Main Browse Video
SD CARD
Player
Video
Video 02.avi
Video 01.avi
Video
Video 03.avi
Video 04.avi
Video 05.avi
Video 06.avi
DeleteDelete
Video Screen (Play)
Video Full Screen (Play)
00:00 -03:38
25
Back to
previous screen
Volume up
Next
Volume down
Previous
Volume
level
Elapse time
counter
Play
Pause
Touch the screen to make the video or photo interface
appear or disappear.
10
Before transferring a video to the playerit must be
converted to the correct format using the included
video converter.
See “Creating AVI videos” on the next page for more
information.

Creating AVI videos
Before transferring video files to the MP3 Player, you must convert them to the correct format.
With the included AVI Converter software tool you can easily convert most videos to the format supported by your player.
To install the AVI converter on your computer follow the steps below:
1. Insert the provided CD to the CD-ROM drive of your computer, and click on “Video Converter”.
2. Click “Install” and then “Next”.
3. Follow installation instructions to download the converter to your computer.
4. Click “Install” when you see the screen below, and then click “Finish”.
5. Click the icon on your “Desktop” to open the Video Converter.
AVIConverter
Click on “Video
Converter” and
then “Install”
Click “Next”
Click“Install” Click “Finish”
“AVI
Converter”
icon on your
“Desktop”
11

Creating AVI videos
player.
1. Connect the MP3 Playerto the USB port of yourcomputer
(optional).
2. Click on “AVI Converter ”from the “Start ” menu, orthe
icon on yourdesktop.
3. Click on the “Add” button and select 320 x 240 resolution.
4. Select the video file that you want to convert by clicking on the
“Source File” drop down window.
AVIConverter
320 x 240
Click“Add”
Click on the “Resolution”
drop down window
and select “320 x 240”
Click“Open”
Click on a video
“Source File”
drop down
window
12

Creating AVI videos
player.
5. Click on the “Target File Path” drop down window to select the destination for the converted video. You can send it directly to your
player by selecting “MP3”, and clicking “OK”, or if you would like to save the video to your computer, we recommend sending it to your
“Desktop” where you can easily find the video, and transfer it to your player. (See “TRANSFERRING MEDIA TO THE PLAYER”).
NOTE: To send a converted video directly to your player, it must be connected to the computer’s USB port at time of conversion.
320 x 240
OR
Desktop
Emerson MP3 (H:)
Click on the
“Target File Path”
drop down
window
Select where you
would like to send
the converted video
Choose“Desktop”and save the converted video
to the“Desktop”on your computer. After saving
the converted video to your desktop, you can
transfer it directly to your player
(see “TRANSFERRING MEDIA TO THE PLAYER”
on page 6).
Choose “ MP3” and save the
converted video directly to your MP3 Player.
Note: Your MP3 Player must be connected to
the USB port of your computer during the
conversion for this option.
Emerson MP3 (H:)
320 x 240
MP3
13

Creating AVI videos
player.
11. Click “Convert Now” to start the job queue. If more than one job is present they will be performed sequentially.
12. Once finished, press “Close”to exit the application.
13. Copy the new AVI file(s) to your player. See “TRANSFERRING MEDIA TO THE PLAYER”.
Click “Convert Now”
Lake.avi Lake.avi
Emerson MP3 320 x 240
Click “Save”
“Target File Name”
Click “Close”
then
320 x 240
Lake.avi
Emerson MP3
Lake.avi
6. Write the name of the new AVI video file to be created (”Target File Name”).
7. Choose the image quality of the new video. High quality will use more memory and the output file will be bigger.
8. Select the format of the output video (”Aspect Ratio”). Choose “Full” if you want the output video to include the whole original image.
Black bands will be added if necessary.“4:3” will fill the whole screen, but some part of the image may be removed from the video.
“16:9” for
panoramic option.
9. The “Scope” section allows you to determine the start and end of the input video. By default, the input video will be converted from start
to end.
10. Click “Save”to add the video recording to the list of pending jobs.
Note: You can add as many conversion jobs as you like in orderto convert several videos automatically. When you are done adding
jobs, press the “Close”button.
14

Photos
player.
1. Select “photos” from the main menu.
2. If an SD card inserted in the player choose either “Player” or “SD CARD” to search for photo files.
3. Use the [] or [ ] button to select a photo file and press “OK”.
4. Use the [ back] button to go to previous screens or return to the main menu.
SD CARD
Player
Photos
Photos Main
Browse Photos
Photo 02
Photo 01
Photos
Photo 03
Photo 04
Photo 05
Photo 06
DeleteDelete
photo
Slideshow Interface
(Play)
Slideshow Interface
(Pause)
Full Screen
Touch the screen to make the video or photo interface
appear or disappear.
15

Record
player.
To record voice memos, select “record” from the main menu.
Recorder Main
(Pause)
Recorder Main
(Recording)
Browse Memos
Delete
Recorder Memos
Memo 02
Memo 03
Memo 04
Memo 05
Memo 06
Memo 07
Memo 01
Recorder
Memos
Memos
Start recording
16
Pause recording
Save and view memos
Delete memos
Select memo files

Browser
player.
Select “browser” from the main menu to view or delete files on your MP3 Player.
Delete le Popup
(Deleting a le from the player)
If an SD card is inserted, the
above screen appears .
Browse les
(in the Player)
Browser Main
CAUTION
YES NO
Delete
Delete file?
File will be deleted
from the player
Browser Player
Video 02.avi
Video 03.avi
Video 04.avi
Video 05.wmv
Video 06.wmv
Video 07.wmv
Video 01.avi
SD CARD
Player
Delete le Popup
(Deleting a le from the
SD Card)
Browse les
(in the SD Card)
CAUTION
YES NO
Delete file?
File will be deleted
from the SD Card
Delete
SD CARD
Video 02.avi
Video 03.avi
Video 04.avi
Video 05.wmv
Video 06.wmv
Video 07.wmv
Video 01.avi
17

Settings
player.
Select “settings” from the main menu to access the system settings.
Music Menu Main Play Mode Menu
Music
Settings:
Repeat Mode Menu Equalizer MS PlayFX Set 3D Headphones Pure Bass Auto Volume
Music Settings
Repeat Mode
Equalizer
MS PlayFX Set
Play Mode
Play Mode
Shuffle
In Order
Repeat Mode
Repeat
Repeat All
Normal
MS PlayFX
Equalizer
Rock
Pop
Classical
Jazz
Normal
MS PlayFX Set
Pure Bass
Auto Volume
3D Headphones
3D Headphones
Low
Mid
High
Off
Pure Bass
Low
Mid
High
Off
Auto Volume
On
Off
Power Options:
Power O Menu
Power Options
Menu Main Sleep Menu
Power Off
Off
10 minutes
15 minutes
5 minutes
Power Options
Power Off
Sleep
Sleep
Off
10 minutes
15 minutes
30 minutes
60 minutes
90 minutes
5 minutes
Display:
Backlit Time Brightness
Display Menu Main
Display Backlit Time
30 Seconds
60 Seconds
90 Seconds
120 Seconds
240 Seconds
Always On
15 Seconds
Brightness
Brightness
Calibration
Backlit Time
2
3
4
5
1
Language:
Language Menu
Language
Spanish
French
English
Default Settings:
Default Settings
CAUTION
YES NO
Restore to
Default Settings
?
System Menu Main About Window Upgrade Firmware
Window
System:
CAUTION
YES NO
Upgrade Firmware
?
Total storage card Memory: 7800 MB
In use: 1220 MB Free: 6359 MB
Total internal flash memory: 7800 MB
In use: 1220 MB Free: 6359 MB
System
Upgrade Firmware
About
About
Settings Main
Settings
Display
Power Options
Language
Default Settings
System
Music Settings
18

Troubleshooting
player.
My computer is not detecting theMP3Player with Windows Vista
• There is a USB mass storage devices recognition issue with Win-
dows Vista acknowledged by Microsoft. A solution is available in
the Service Pack 1 which may be downloaded from Microsoft’s
website.
I cannot display my .jpg files
• Many digital cameras and image editing softwares add hid-
den data to the .jpg files. This data can prevent your MP3 from
loading the images. Try to eliminate them by saving the file with
another name.
If you have problems while operating your player, please check the points bellow before sending it to the service center.
Can not power on
• The battery may be exhausted, please recharge the battery.
Files can not be transferred to the player
• Check if the driver is installed correctly in the computer
by
disconnecting and then reconnecting the player to the computer
• Check the connection between the player and PC, and confirm
the USB cable is properly connected.
No sound from the headphones
• Please ensure the volume is turned up, and the headphones
are
properly connected.
• Check if the format of music file is supported by the player.
Can not record
• Check if there is enough memory and battery capacity.
Display is in the wrong language
• Please ensure you selected the correct language from the “Settings”
menu.
The buttons do not work
• Press the Lock/Unlock button on the bottom of the display to
unlock the player.
19
• Update the player by selecting “music” from main menu and
then select “Update”.
Other manuals for SMP558-4
1
Table of contents
Other Sharper Image MP3 Player manuals