11
Click“Install”
Click“Finish”
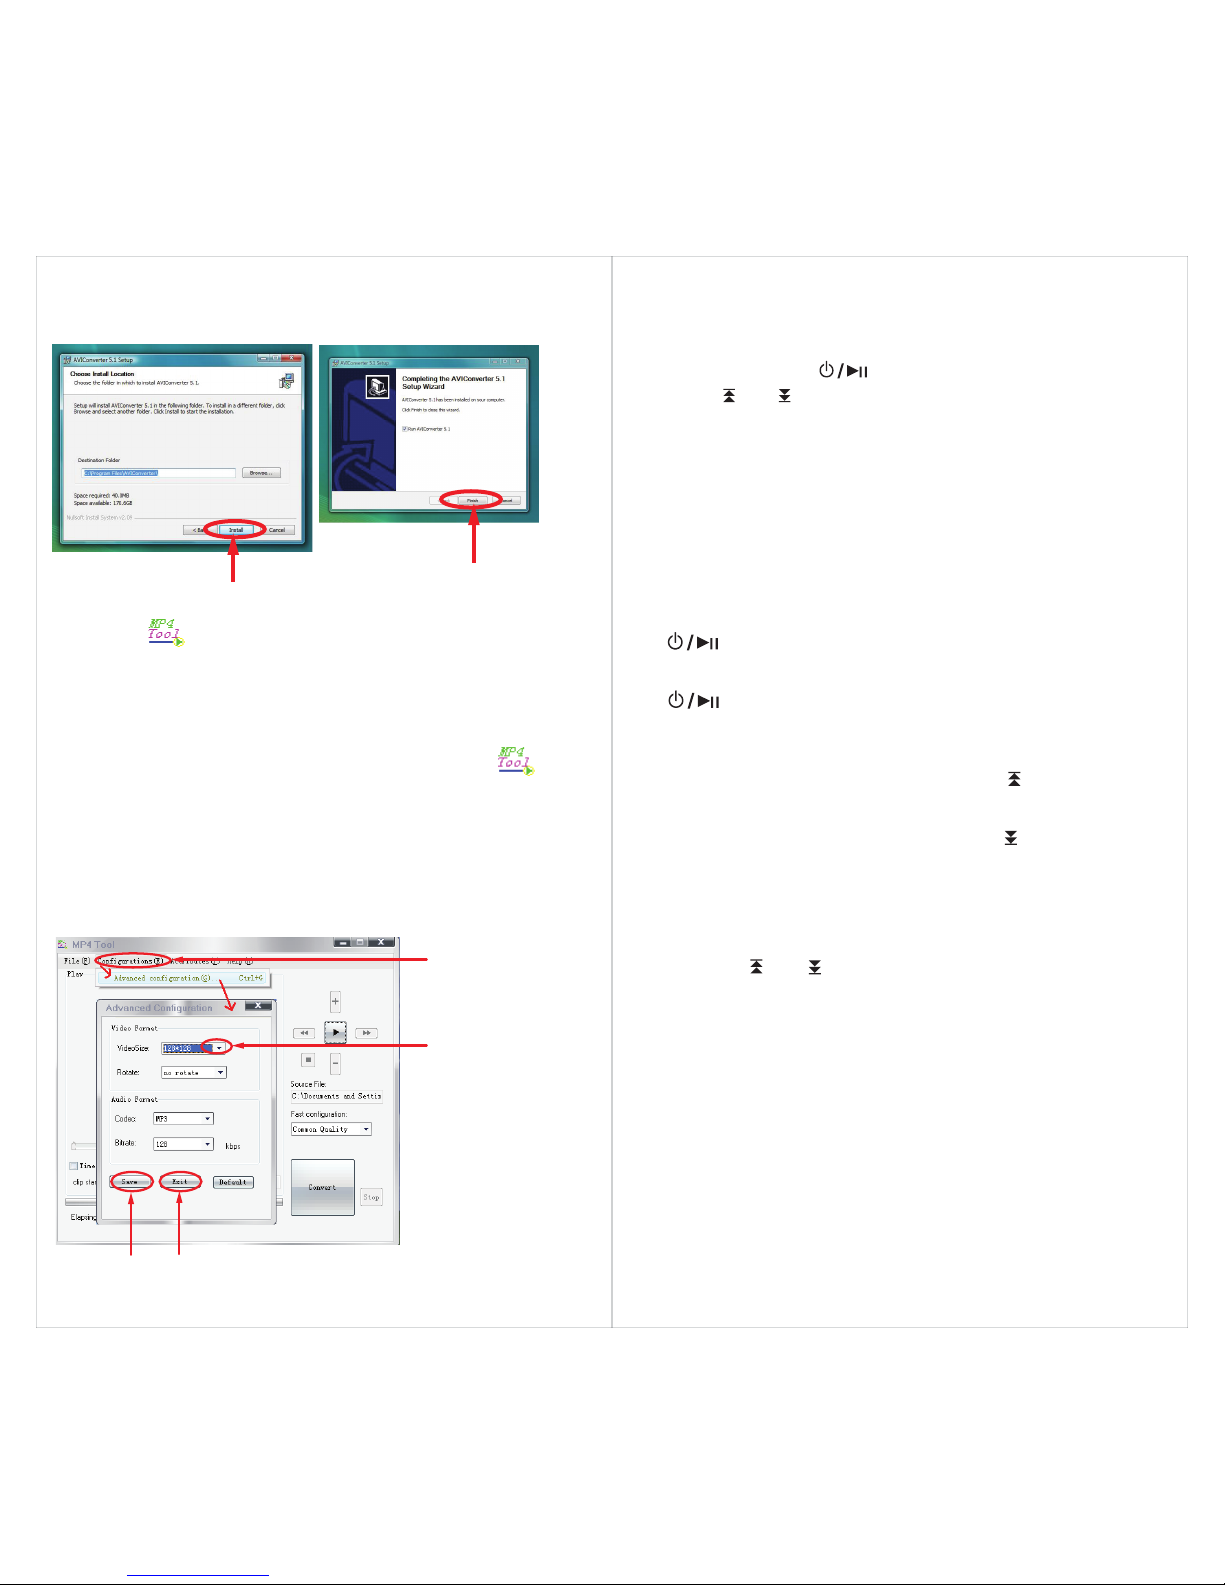
4. Click “Install” when you see the screen below, and then click
“Finish”.
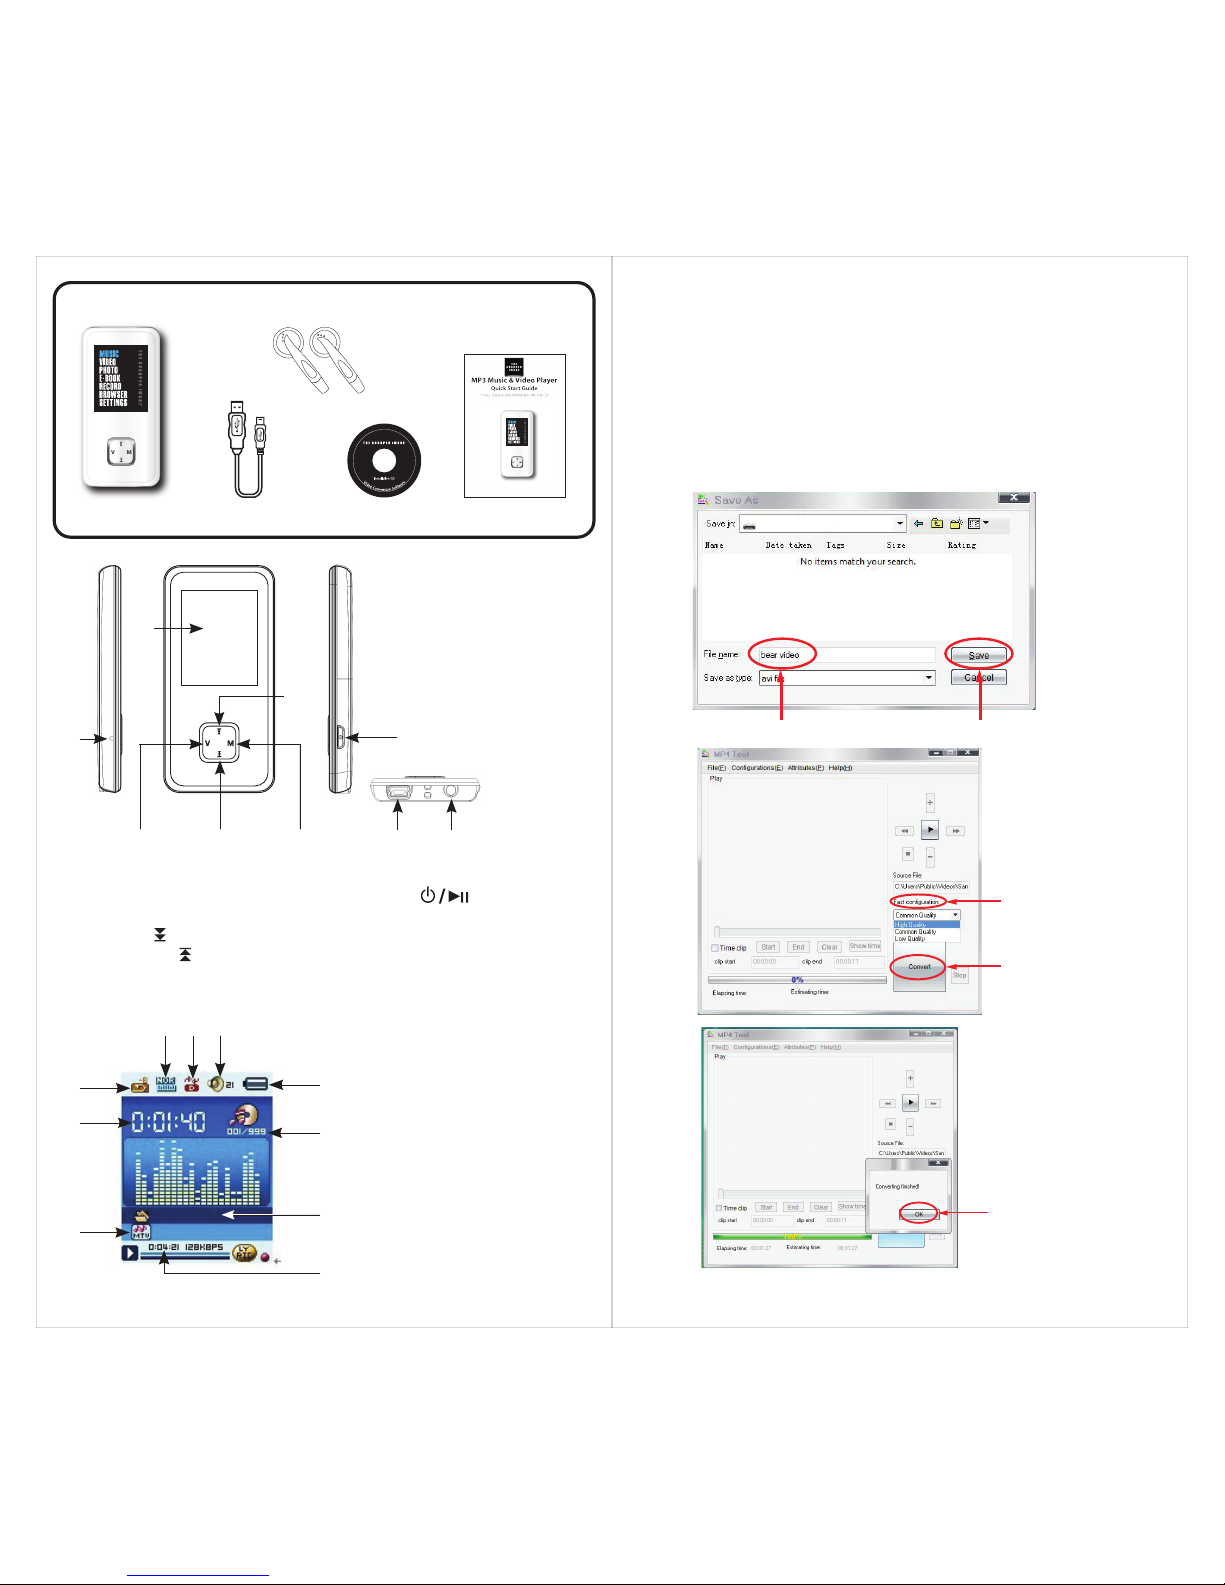
Getting Started
1. Make sure your battery is charged enough, and that the
earphones are properly connected.
2. Press and hold the [ ] button to turn on the player.
3. Use the [ ] or [ ] buttons to select an option from the main
menu, and press the [M] button to confirm your selection.
For more details on the player’s function, please refer to the
chapter“Basic Operation”below or the full user manual, located
on the provided CD.
Basic Operation
4
Adjusting the volume
Main menu
Turning on/off
●
To turn on the player press and HOLD the Power / Play
[ ] button for 3 seconds until the LCD screen lights up.
●
To turn the player off, press and HOLD the Power / Play
[ ] button until the LCD screen shuts off.
●
Press the [ V] button and then press the [ ] button to
decrease volume.
●
Press the [ V] button and then press the [ ] button to
increase volume.
●
Press the [ M] button to access the Main menu.
●
Using the [ ] or [ ] button, select the option, and then
press the [ M] button to enter.
●
To return to the Main menu, press and HOLD the [ M ]
button.
5.
Click the icon on your “Desktop” to open the Video
Converter.
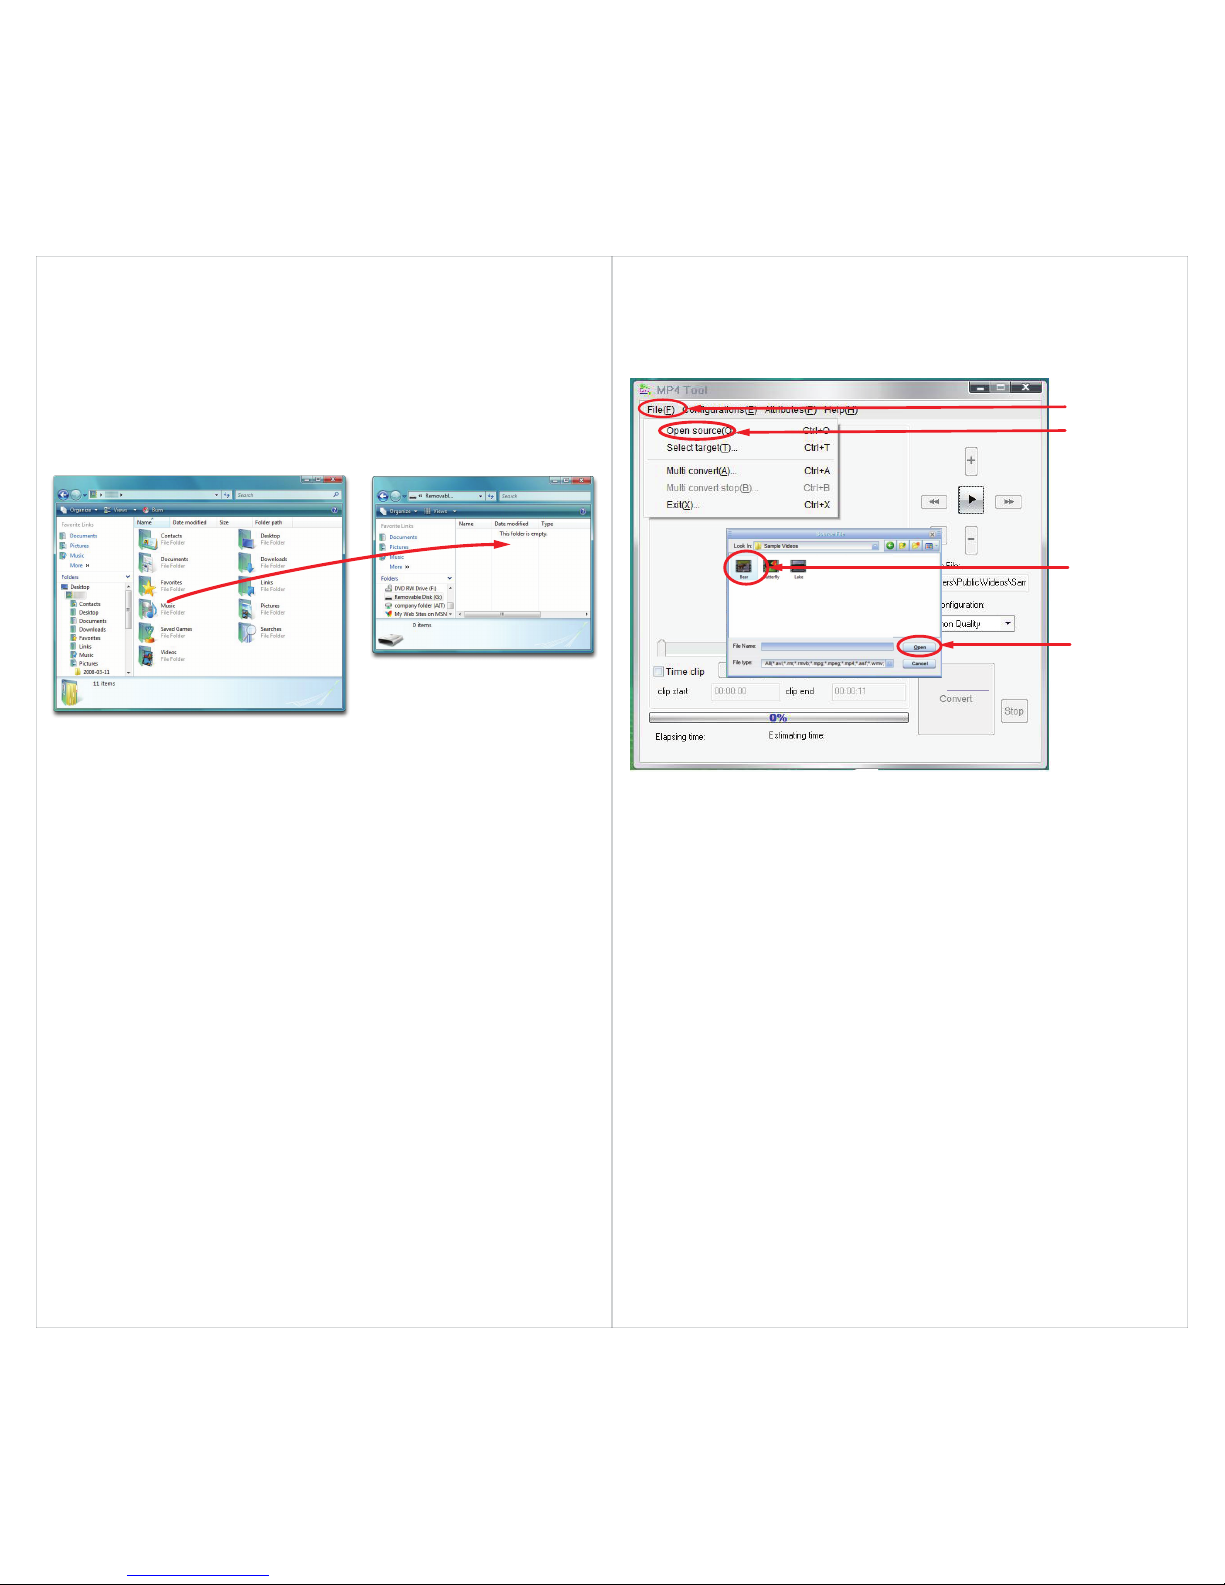
Converting videos
1. Connect the MP3 Player to the USB port of your computer
(optional).
2. Click on “MP4Tool ”from the “Start ” menu, or the icon
on your desktop.
3. Click on the “Congurations” drop down window, and then
“Advanced conguation”.
4. Click on the “VideoSize” drop down window and select “160
x 128” resolution.
5. Click “Save”, and then click “Exit”.
Click“Save” Click“Exit”
Click on the “VideoSize”
drop down window
and select “160 x 128”
Click “Configurations”
and then
“Advanced configuration”