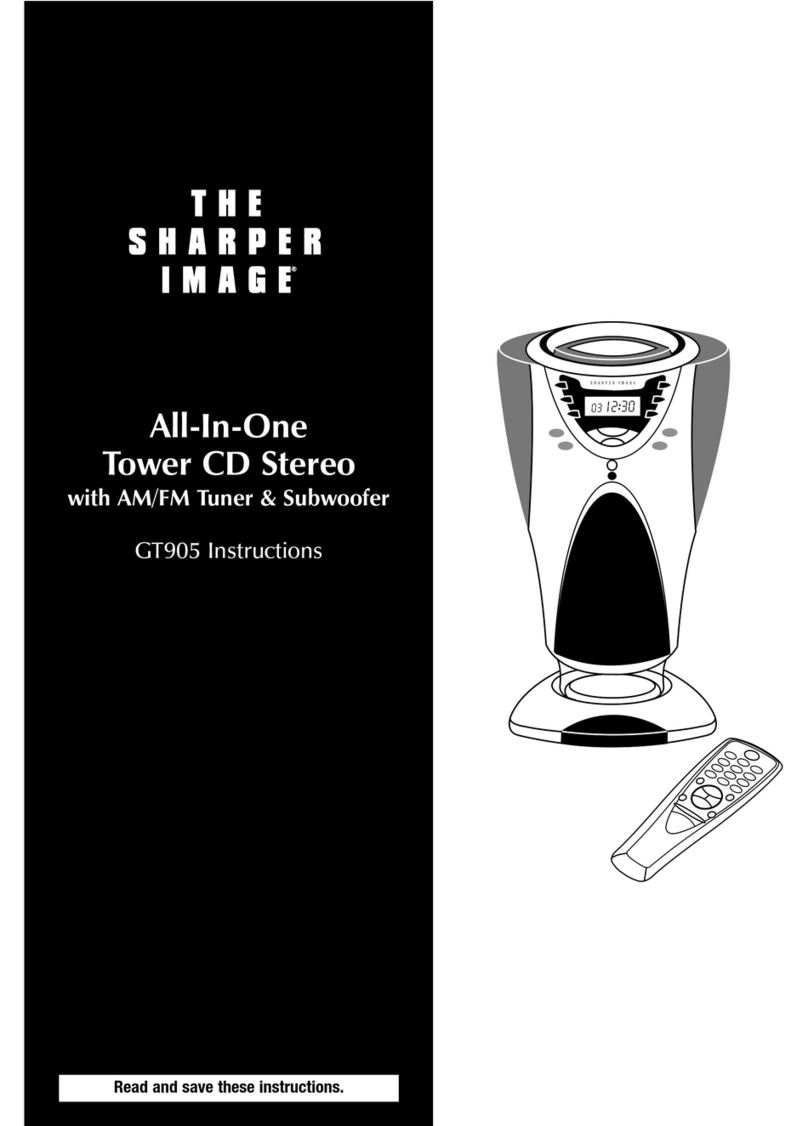
Sharper Image ZipConnect stereo METRO User manual

ZipConnect™stereo
METRO
CD/AM/FM Stereo
& Subwoofer + ZipConnect™
for iPod®& MP3 Players
GT308 Instructions
Read and save these instructions.


Dear Sharper Image Customer,
Thank you for your purchase! We appreciate your business very much.
This item was created by Sharper Image Design, our company’s own
product development group. Please accept my personal assurance of
your complete satisfaction with this product’s quality and performance.
We offer generous return privileges and excellent warranties on all
our products.
For more than 25 years, The Sharper Image has shared the fun of
discovering innovative products that make life better and more enjoyable.
We’ve been in business a long time because we are an exciting place to
shop and — just as importantly — we strive to deliver great customer
service that exceeds your expectations.
Enjoy your purchase!
Respectfully,
Richard Thalheimer
Founder, Chairman and Chief Executive Officer
Call 1-800-344-4444 for 24-7 ordering and customer service,
or go to , our complete online store.

Table of Contents
Warnings .......................................................................................................5
Important Safety Instructions ......................................................................6
Quick Start ....................................................................................................7
Installation .................................................................................................7
ZipConnect™ Operation............................................................................7
Tuner/Radio Operation...............................................................................8
CD Player Operation..................................................................................8
General Instructions.......................................................................................9
Overview...................................................................................................9
Parts Diagram ..............................................................................................10
Main Unit ................................................................................................10
Remote Control .......................................................................................13
Installation and Operation ...........................................................................15
Zip Connect™ Operation.........................................................................15
Changing the Zip Connect™ Module .......................................................16
Tuner/Radio Operation.............................................................................17
CD Player Operation................................................................................18
Auxiliary Input .........................................................................................20
Additional Features ..................................................................................21
Clock, Alarm and Sleep Timer Functions ..................................................21
Troubleshooting Guide.............................................................................24
Specifications...........................................................................................25
Statement of FCC/DHHS Compliance..........................................................26
FCC Label Compliance Statement................................................................26

Warnings
• To prevent fire or shock hazard, do not use this stereo’s plug with an exten-
sion cord, receptacle or other outlet unless the blades can be fully inserted to
prevent blade exposure.
• Do not expose this appliance to rain or moisture.
The lightning flash with arrowhead symbol, within an equilateral tri-
angle, is intended to alert the user to the presence of uninsulated
“dangerous voltage” within the product’s enclosure that may be of
significant magnitude to constitute a risk of electric shock to persons.
Warning: To reduce the risk of electric shock, do not remove cover
(or back). No user-serviceable parts inside. Refer servicing to quali-
fied service personnel.
The exclamation point within an equilateral triangle is intended to
alert the user to the presence of important operating and mainte-
nance (servicing) in the literature accompanying the unit.
5

Important Safety Instructions
1. Read these instructions.
2. Keep these instructions.
3. Heed all warnings.
4. Follow all instructions.
5. Do not use near water.
6. Clean only with a dry cloth.
7. Do not block any ventilation openings. Install in accordance with manufac-
turer’s instructions.
8. Do not install near any heat source such as radiators, heat registers, stoves,
amplifiers or other appliances that produce heat.
9. Do not defeat the safety purpose of the polarized or grounding-type plug. A
polarized plug has two blades and a third grounding prong. The wide blade
or the third prong are provided for your safety. If the provided plug does not
fit into your outlet, contact an electrician for replacement of the obsolete
outlet.
10.Protect the power cord from being walked on or pinched, particularly at
plugs, convenience receptacles and the point where they exit from the
apparatus.
11.Only use attachments/accessories specified by the manufacturer.
12.Unplug the stereo during lighting storms or when unused for long periods
of time.
13.Refer all servicing to qualified service personnel. Servicing is required when
the apparatus has been damaged in any way, such as when the power-sup-
ply cord or plug is damaged, liquid has been spilled or objects have fallen
into the apparatus, the apparatus has been exposed to rain or moisture,
does not operate normally or has been dropped.
This appliance should not be exposed to dripping or splashing water. An object
filled with liquid, such as a vase, should not be placed on the apparatus.
6

Quick Start
Installation
1. Connect the FM antenna wire to the FM ANTENNA jack.
2. Connect the AM loop antenna to the AM LOOP connecter.
3. For clock backup, install 2 AAA batteries (purchase separately) into the
backup battery compartment located on the bottom of the unit.
4. Insert the AC power plug into AC wall outlet.
5. To activate the remote control’s battery, remove the plastic tab from the
remote battery compartment.
ZipConnect™ Operation
1. To access the ZipConnect™ dock, press the RELEASE button on the top of
the stereo.
2. To enable the METRO stereo to play music from any audio player with
a headphone jack (MP3 player, iPod®, portable CD player) through the
system’s speakers, slowly pull and extend the ZipConnect™ cable to the
desired length. (See illustration in General Instructions.)
3. Insert the plug into the headphone jack of your audio device.
4. To retract the cable to the desired length, pull on the cable with a quick, gentle
tug, then gently guide it as it automatically spools back into the module.
5. Slide the audio player into the built-in stand on the ZipConnect™ dock and
adjust the width as needed.
6. To select ZipConnect as the auxiliary source, slide the ZipConnect switch
on the back of the stereo to the ZipConnect position.
7. To turn on the stereo, press the POWER button.
8. To listen to music from the auxiliary ZipConnect source, press the ZIP/AUX
button.
9. Turn on the connected audio player (MP3 player, iPod, portable CD player)
according to the manufacturer’s instructions.
10.Set the volume for audio player to about 70% of the maximum volume.
Note: You may need to adjust the volume on your personal audio player above
or below 70% to achieve a desired volume level or to reduce distortion. Start at
70% of the maximum volume and adjust from there.
11.To adjust the sound level of the stereo’s speakers, rotate the VOLUME +/-
dial.
7

Tuner/Radio Operation
1. Connect the FM antenna wire to the FM ANTENNA jack and extend, then
slide the FM ANT INT/EXT (Internal/External) switch to the EXT position.
Note: If you do not wish to use the external FM antenna, slide the FM ANT
INT/EXT to the INT position.
2. Connect the AM loop antenna to the AM LOOP connecter.
3. To activate the radio, press the RADIO/BAND button.
4. To select AM or FM band, press the RADIO/BAND button again.
5. To manually tune to desired station, repeatedly press the TUNE-/9or
TUNE+/:button.
6. To automatically search for stations with strong signals, press and hold the
TUNE-/9or TUNE+/:button until the display digit begins to scan then
release the button. The tuner stops on the first strong station signal it finds.
CD Player Operation
1. Press the POWER button.
2. If the “DISC IN” indicator is off, insert a CD into the CD IN/OUT slot.
3. The stereo begins CD playback automatically.
4. Adjust the sound level by rotating VOLUME +/- dial.
5. To skip to a desired CD track, press the 9or :button.
6. To fast-forward or rewind within the track playing, press and hold the 9or
:button.
7. To pause CD playback, press the PLAY/PAUSE4; button. To resume play-
back, press the PLAY/PAUSE4; button again.
8. To stop CD playback, press the STOP < button.
9. To turn off the unit, press the STOP < button again.
8

General Instructions
Overview
Features
1. Front-Loading CD Player
2. Built-in Subwoofer
3. Dot-Matrix LCD with Blue Backlight
4. ID3 Technology Displays MP3-CD Audio Text Tags
5. Digital PLL Tuner with 15 AM & 15 FM Presets
6. Remote Control with ZipConnect™ Capabilities
7. Headphone & AUX Audio Input Jacks
8. Digital Volume Control and Adjustable Equalizer (Classic, Pop, Jazz, Rock)
9. Snooze Alarm Clock and Sleep Timer
10.ZipConnect™ to play iPod + MP3 (included)
11.ZipConnect™ to charge + play iPod Shuffle™ (purchase separately)
12.ZipConnect™ to charge + play + remote control iPod & iPod mini
(purchase separately)
13.Plays CD/CD-R/CD-RW/MP3/WMA Discs
14.Playback Modes:
• Repeat One/Repeat Directory/Repeat All
• Program Playback up to 30 Tracks
• Random and Intro Playback
15.Programmable Alarm Wakes you to CD Track, Radio Station or Buzzer
Supplied Accessories
• Remote control with 2 CR2032 batteries
• AM Loop Antenna
• External FM Antenna
9
iPod is a registered trademark of Apple Computer, Inc. Shuffle is a trademark of Apple Computer, Inc.

Parts Diagram
Main Unit
Top
1. RELEASE Button: Opens ZipConnect dock door.
2. ZipConnect Dock and Stand
3. ZipConnect™ Module
4. iPod CHARGE Indicator: Illuminates when an iPod is connected to the
ZipConnect module using the optional charge+play+remote control
ZipConnect™for iPod and iPod mini (purchase separately).
5. SNOOZE Button: Activates the snooze function.
10
1
2
4
5
3

Main Unit
Front
DISC IN
CD EJECT
POWER
EQ AUTO
SEEK
RADIO/
BAND PRESET/DIR
POWER
STOP
PLAY/PAUSE
FWD SKIP
BWD SKIP
AL ON/OFF P-MODE DISPLAY VOLUME MODEPGM/
MEM
SLEEP
– +
+
–
WIDE
ZIP/
AUX
6. Power On Indicator
7. ZIP/AUX Button: Selects auxiliary audio input.
8. RADIO/BAND Button: Selects tuner function and AM/FM band.
9. AUTO SEEK Button: Searches and stores radio station automatically.
10.WIDE Button: Selects the virtual surround sound effect.
11.EQ Button: Selects equalizer (EQ) effect.
12.REW SKIP/TUNE-/9and FWD SKIP/TUNE+/:Buttons: Tunes the radio
down or up; skip/searches CD playback backward or forward.
13.AL ON/OFF Button: Turns the alarm on and off.
14.P-MODE Button: Selects CD play mode.
15.DISPLAY Button: Displays time and date.
16.VOLUME +/- Dial: Adjusts volume level up or down.
17.PGM/MEM Button: Sets CD program; saves radio preset station.
18.MODE Button: Enters the setting mode.
19.SLEEP Button: Selects sleep timer duration.
20.PLAY/PAUSE Button: Plays or pauses CD playback.
21.STOP Button: Stops CD playback
22.POWER Button: Turns the unit on and off.
11
6
10
8
11
9
7
22
21
20
13 14 15 16 17 18 19
12

Main Unit
DISC IN
CD EJECT
POWER
EQ AUTO
SEEK
RADIO/
BAND PRESET/DIR
POWER
STOP
PLAY/PAUSE
FWD SKIP
BWD SKIP
AL ON/OFF P-MODE DISPL AY VOLUME MODEPGM/
MEM
SLEEP
– +
+
–
WIDE
ZIP/
AUX
23.PRESET/DIR +/- Buttons: Selects preset radio station; selects CD
MP3/WMA directory.
24.CD EJECT Button: Ejects CD from the IN/OUT slot.
25.DISC IN Indicator
26.CD IN/OUT Slot
Side
27.Headphone Jack
Back
28.AUX IN Auxiliary Input Jack
29.AUX/ZipConnect Switch: Selects audio-in source or ZipConnect source as
the auxiliary input.
30.Audio Line Out Jack
31.AM Radio Loop Antenna Connecter
32.Internal or External (INT/EXT) FM Antenna Selection Switch
33.FM Wire Antenna Jack 12
27
28 29 30 31 32 33
26
23
25
24

Remote Control
1. POWER Button: Turns the unit on and off.
2. DISPLAY Button: Displays time and date.
3. EQ Button: Selects equalizer (EQ) effect
4. CD EJECT Button: Ejects CD from slot-in loader.
5. MODE Button: Enters the setting mode.
6. ZIP/AUX Button: Select auxiliary audio input.
7. SLEEP Button: Selects sleep timer duration.
8. AL ON/OFF Button: Turns the alarm on and off.
9. P-MODE Button: Selects CD play mode.
10.PGM/MEM Button: Sets CD program; saves radio preset station.
11.AUTO SEEK Button: Searches and stores radio stations automatically.
12.RADIO/BAND Button: Selects tuner function and AM/FM band.
13.SNOOZE Button: Activates the snooze function.
13
1
2
5
8
11
3
4
7
10
13
6
9 12

Remote Control
14.PRESET/DIR +/- Buttons: Selects preset radio station; selects CD
MP3/WMA directory.
15.VOL +/- Button: Adjusts volume level up or down.
16.PLAY/PAUSE Button: Plays or pauses CD playback.
17.REW/TUNE-/9and FWD/TUNE+/:Buttons: Tunes the radio down or up;
skip/searches CD playback backward or forward.
18.STOP Button: Stops CD playback
19.iPod REW 7and F.FWD 8Buttons (under sliding cover): searches iPod
playback in reverse or forward.*
20.iPod PLAY/PAUSE4; INSIDE Button (under sliding cover): Plays or pauses
iPod playback.*
*To enable the remote’s iPod capabilities, you much install the charge+play+
remote control ZipConnect module for iPod and iPod mini (purchase separately).
(See Changing the ZipConnect Module.)
14
14
15
16
17
18
19
20
Slide down
to open.

14.PRESET/DIR +/- Buttons: Selects preset radio station; selects CD
MP3/WMA directory.
15.VOL +/- Button: Adjusts volume level up or down.
16.PLAY/PAUSE Button: Plays or pauses CD playback.
17.REW/TUNE-/9and FWD/TUNE+/:Buttons: Tunes the radio down or up;
skip/searches CD playback backward or forward.
18.STOP Button: Stops CD playback
19.iPod REW 7and F.FWD 8Buttons (under sliding cover): searches iPod
playback in reverse or forward.*
20.iPod PLAY/PAUSE4; INSIDE Button (under sliding cover): Plays or pauses
iPod playback.*
*To enable the remote’s iPod capabilities, you much install the charge+play+
remote control ZipConnect module for iPod and iPod mini (purchase separately).
(See Changing the ZipConnect Module.)
Installation and Operation
1. Connect the FM antenna wire to the FM ANTENNA jack.
2. Connect the AM loop antenna to the AM LOOP connecter.
3. For the dual ZipConnect/auxiliary-in (AUX) feature:
a. To access the ZipConnect™ dock, press the RELEASE button on the top
of the stereo. Slowly pull and extend the ZipConnect™ cable to the
desired length and insert the plug into the headphone jack of your audio
device (MP3 player, iPod, portable CD player). (See ZipConnect Opera-
tion for more information.)
b. Plug one end of an audio cable (not included) into the stereo AUX IN
jack located on the back of the main unit and the other end into your
auxiliary device (TV, DVD player, VCR).
4. For clock backup, install 2 AAA batteries (purchase separately) into the
backup battery compartment located on the bottom of the unit.
5. Insert the AC power plug into AC wall outlet.
6. To activate the remote control’s battery, remove the plastic tab from the
remote battery compartment.
ZipConnect™ Operation
1. To access the ZipConnect™ dock, press the RELEASE button on the top of
the stereo.
2. To enable the METRO stereo to play music from any audio player with a
headphone jack (MP3 player, iPod, portable CD player) through the system’s
speakers, slowly pull and extend the ZipConnect™ cable to the desired
length. (See illustration below.)
15

ZipConnect™ Operation
3. Insert the plug into the headphone jack of your audio device.
4. To retract the cable to the desired length, pull on the cable with a quick,
gentle tug, then gently guide it as it automatically spools back into the module.
5. Slide the audio player into the built-in stand on the ZipConnect™ dock and
adjust the width as needed.
6. To select ZipConnect as the auxiliary source, slide the AUX/ZipConnect
switch on the back of the main unit to the ZipConnect position.
7. To turn on the stereo, press the POWER button.
8. To listen to music from the auxiliary ZipConnect source, press the ZIP/AUX
button.
9. Turn on the connected audio player (MP3 player, iPod, portable CD player)
according to the manufacturer’s instructions.
10.Set the volume for audio player to about 70% of the maximum volume.
Note: You may need to adjust the volume on your personal audio player above
or below 70% to achieve a desired volume level or to reduce distortion. Start at
70% of the maximum volume and adjust from there.
11.To adjust the sound level of the stereo’s speakers, rotate the VOLUME +/-
dial.
Changing the ZipConnect™ Module
For charging capability with an iPod, iPod mini or iPod Shuffle, the installed
ZipConnect module is interchangeable with a custom-designed module featur-
ing a retractable 30-pin connector or USB plug. These connections allow you
to charge your iPod’s internal battery as you listen to music. Charging occurs
whether the stereo’s power is on or off. For the iPod and the iPod mini, a
charge+play+remote control module is also available that allows you to access
select iPod functions through the stereo’s remote.
ZipConnect’s unique spooled cable allows users to pick up and use their iPod
— viewing its screen and clicking its wheel — while keeping it connected to
the sound system. These ZipConnect charge+play modules for iPod, iPod mini
and iPod Shuffle and charge+play+remote control modules for iPod and iPod
mini are available from The Sharper Image by calling 1-800-344-4444, ordering
online at www.sharperimage.com or visiting a Sharper Image store near you.
1. To replace the ZipConnect module installed into the stereo, grasp the hous-
ing of the ZipConnect module and pull it straight out from the permanent
ZipConnect sleeve. (See illustration on next page.)
16

Changing the ZipConnect™ Module
Note: If you are unable to get a secure grip on the module when trying to pull
it out from the sleeve, fully extend the ZipConnect cable and gently pull the
module out by the cable.
2. Slide the replacement ZipConnect module into the sleeve.
Note: The ZipConnect module can only fit into the sleeve the correct way. If
the module does not easily slide into the sleeve, rotate the ZipConnect module
around and insert it the other way.
3. For information on using the replacement ZipConnect module, see the
instruction manual included with the module.
Tuner/Radio Operation
External FM Antenna
Plug the external wire antenna into the FM antenna jack at the side of the
unit and extend. Reception quality depends on the length of the antenna; the
greater the distance, the stronger the reception quality. Select the “EXT” posi-
tion of the FM ANT INT/EXT switch.
Radio Tuning
1. To activate the radio, press the RADIO/BAND button.
2. To select AM or FM band, press the RADIO BAND button again.
3. To manually tune to desired station, repeatedly press the TUNE-/9or
TUNE+/:button.
4. To automatically search for stations with strong signals, press and hold the
TUNE-/9or TUNE+/:button until the display begins to scan then release
the button. The tuner will stop on the first strong station signal it finds.
17

Tuner/Radio Operation
Notes:
• Use manual tuning to select weaker stations that might be bypassed during
automatic tuning.
• If the automatic tuning does not stop on the exact frequency of the station,
for example, it stops on 100.85 MHz instead of 100.8 MHz, use the manual
tuning method to “fine tune” to the exact frequency of the desired station.
Radio Preset Stations
The unit allows you to store up to 15 AM and 15 FM stations in the tuner preset
memories for easy recall at any time.
1. To activate the radio, press the RADIO/BAND button.
2. To select AM or FM band, press the RADIO/BAND button again.
3. Tune to the radio station you want to store in memory using the TUNE-/9
or TUNE+/:button.
4. Press the PGM/ MEM button. The preset channel number “CH01” flashes
on display.
5. To select desired preset station number, press PRESET/DIR +/- button.
6. To confirm preset location, press the PGM/MEM button.
7. To store up to 15 AM and 15 FM station presets, repeat steps 2 to 5 above.
CD Player Operation
CD Playback
1. Press the POWER button.
2. If the “DISC IN” indicator is off, insert a CD into the CD IN/OUT slot.
3. The stereo begins CD playback automatically.
4. Adjust the sound level by rotating VOLUME +/- dial.
5. To skip to a desired CD track, press the 9or :button.
6. To fast-forward or rewind within the track playing, press and hold the 9
or :button.
7. To pause CD playback, press the PLAY/PAUSE4; button. To resume play-
back, press the PLAY/PAUSE4; button again.
8. To stop CD playback, press the STOP < button.
9. To turn off the unit, press the STOP < button again.
18

CD Player Operation
CD Play Modes
For CD disc:
• Repeat Playback
1. To repeat playback of one track, press the P-MODE button once. A repeat
one icon appears on the LCD.
2. To repeat playback of an entire CD, press P-MODE button twice. A repeat
all icon appears on the LCD.
• Intro Playback
1. To playback the first 10 seconds of each track on the disc, press the P-
MODE button three times. “INTRO” appears on the LCD.
2. To begin intro playback from track #1, press the PLAY/PAUSE4; button.
• Random Play
1. To playback CD tracks in random order, press the P-MODE button four
times. “SHUF” appears on the LCD.
2. To begin random playback, press the PLAY/PAUSE4; button. The track
number is selected at random and playback starts.
To cancel a CD play mode, press STOP <at any time.
For MP3/WMA disc:
• Repeat Playback
1. To repeat playback of one track, press the P-MODE button once. A repeat
one icon appears on the LCD.
2. To repeat playback a directory, press P-MODE twice. A repeat directory icon
appears on LCD.
3. To repeat playback of an entire CD, press P-MODE button three times.
A repeat all icon appears on the LCD.
• Intro Playback
1. To playback the first 10 seconds of each track on the disc, press the
P-MODE button four times. “INTRO” appears on the LCD.
2. To begin intro playback from track #1, press the PLAY/PAUSE4; button.
• Random Play
1. To playback CD tracks in random order, press the P-MODE button five
times. “SHUF” appears on the LCD.
2. To begin random playback, press the PLAY/PAUSE4; button. The track
number is selected at random and playback starts.
To cancel a CD play mode, press STOP < at any time.
19

CD Player Operation
CD Program Playback
This feature allows you to program up to 30 tracks to play in a desired order.
1. With CD playback stopped, press PGM/MEM button once. “PGM” and
“000” (track number) indicators flash on the display.
2. To select the track number for the first program position, press the 9or :
button. For MP3/WMA disc, another two digits showing the directory num-
ber appears on display. To select a directory, if necessary, press the PRESET/
DIR +/- button.
3. When desired track number is displayed, press the PGM/MEM button to set
the position. Track number “000” indicator flashes on display again.
4. To program up to 30 tracks, repeat steps 2 and 3 until all desired tracks are
entered.
5. To begin programmed playback, press the PLAY/PAUSE4; button. The
“PGM” indicator stops flashing and the CD starts programmed playback.
6. To cancel programmed playback, press STOP < button.
Notes:
• If you press the 9or :button during programmed playback, the unit will
skip forward to the next track in the program, not necessary the next track
on the disc.
• The CD play mode functions, repeat one track, repeat all programmed
tracks and “INTRO” playback, work in the same manner as during normal
CD playback. (See CD Play Modes above).
Auxiliary Input
The stereo also features additional auxiliary jacks for connection to one auxiliary
source in addition to the ZipConnect source.
1. Connect an audio cable from the auxiliary device into the AUX IN stereo jack.
2. To select this device as the auxiliary source, slide the AUX/ZipConnect
switch on the back of the unit to the AUX position.
3. To turn the unit on, press the POWER button.
4. Turn on the auxiliary device.
5. To select auxiliary audio input, press the ZIP/AUX button. The volume and
equalizer can now be controlled through the main unit. Operate all other
functions on the auxiliary device as usual.
20
This manual suits for next models
1
Table of contents
Other Sharper Image Stereo Receiver manuals