-
-
--
-
4
..
,
Prior
to using
fo
.r the firs,t tim,e ,
Ri:inise Ai1
d :
oisp
,,
en,
ser
T e ,i
..
e a . isre, ·,se ·
,d
:.
ri
the Ina rins
to
p,r, _
nt
.·a,ter ·
ron1
forming dr.opl:
ts
,
on
· our
d1
1she . T
ha
t
can
leave
s ~-r a, s. Ii al' ,o 1- - o
es
dry·n b. at o
ing
.,
at
r to ,
he
t
of
-
th
,e dishes.Your dish ,vasher
is
design,
ed
to
-e 1
--
drns
.
a1
s T
nenns
a,
d1
p~nser1sJo
at.ed
in
s1d
,
eth
1
edoornextlo
t
hede
,te,
rg
.e,n
td
1i:.spenser To
Ill
t
he
_,
lS ·
en
_e1
r,
~
pe
t·'
,...
.
ea
-and
po
,ur_
he
,
(nse
a
i,
_in .ot: •-dispens.
er
until the
te
v,
el
i
nd1e-ato
,r turns completel.y bl
,ac
·k.
l e, _ I, 1e of ,he·1, se aid
on
,a
1Iner
Is
abou ·
11
Om:I
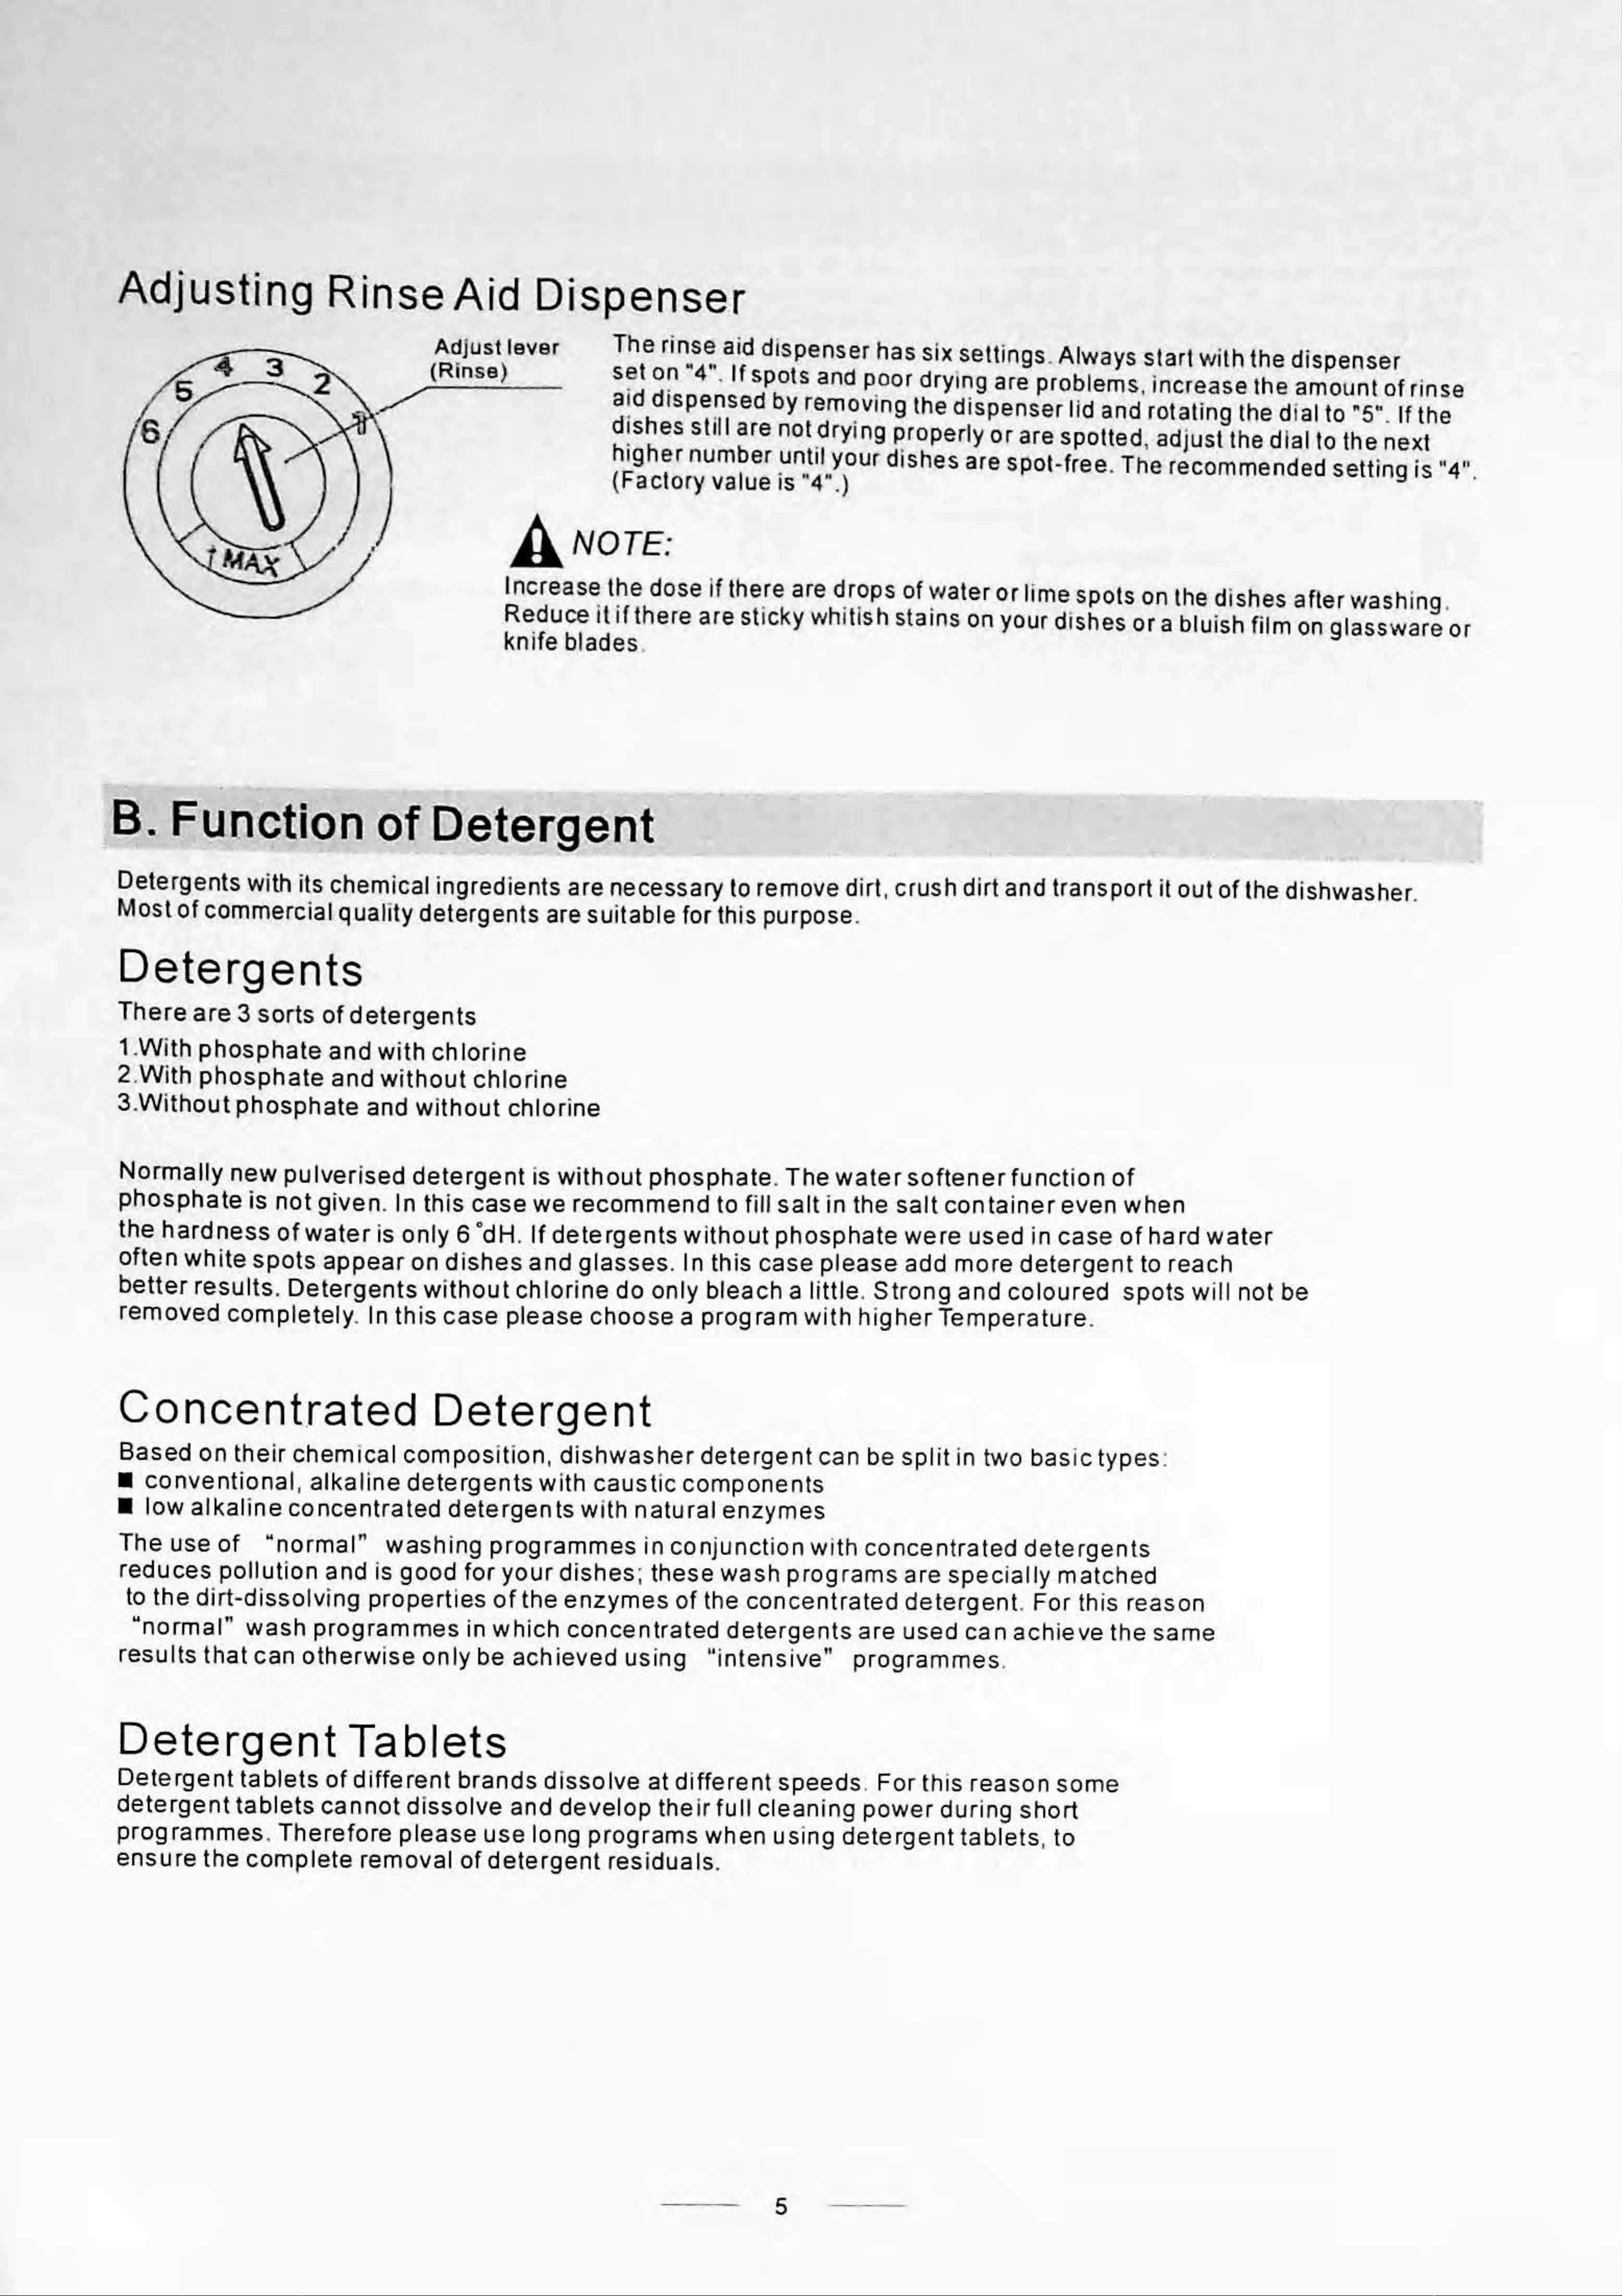
Fu
,n:ction,of
Ri
,nse Aid
, 1,
sea
d 1-
t11
1
L1
oma 1
ca
1
II
added d nn, 1 t e last r
~ns
,,
e. ensurIn tho,rough rinsjng. spot ,and streak free drying.
Attention!
o,·r
se
b a
nde
d rinse aid
or
di
sh
,
vashe
.
Ne
ver
fi
ll
the
rinse
ai
,ddispens
er
\Y
ith ,a
ny
,o
th
e,r
sub
s
ta
nces
(e g :ois·h -as er cleanin,g
ag
,ent, liq uid det,ergent) This
~ou
ld
da
mage
th
e app
ia,nce
.
When to Refill the Rinse Aid Dis,
pe
,nser
If
t
here
·is
no
rin
se-aid
w.
ar
in,g li,
ght
in
the
cont
rol
panel
,
you
can j
udge
the
amount
of
c,nse-,aid by the·color
,
of
th,e op ical l,evel ·ndi
cat
,
or
c
ri
located
next
to the
cap
.
Whe
n
the
ri
nse-aid
conta
iner rs
fu
ll, the
whole
indi
cator
w
ili
l
be
,
da
rk .As th,e ri
nse-a
id dim
ini
shes
, th,e
size
,
of
the
dark
dot
de
,crea
ses
. You
sho
u
Id
nev
er
l1
et
tn,e rinse aid
get
below 1 / 4
full
.
As
the
rinse a1
id
diminishe
s,
the
size
of
t
he
bla,ck ,
dot
on
the
ri
nse
a
id
level
indicator
cha
ng
11
e·s1 as i
llustrated
be
l
ow
.
e iF
ull'
.--=,..
3 I 4
fuU
® 1/ 2 full
0 1/ 4
fuH
-S
ho
uld
i
re
fill
to
elimi
nate
spott
ing
-
Empty
I I
....,i I I
Ii I
I --
I I -
,.
J '
I
I
--
,
11
I: -
I:11I -
-
~
~J
iJ
To
open the dispenser,turn the
ea
p
to
the ",
op
en" (
le
f
t)
arr
ow
and
:1ift it out.
fJ
Pour the rinse aid into the dispenser,
be
i
ng
careful not.
to
overfill.
,C (Rinse-.Ai,d in
dicator)
-
-
-
_, I -
-,
I'
8]
Re
pi
.ace the cap
by
inserting it ar gned with 11open1r arrow a
nd
t
ur
ningit
to
the closed {right) arrow.
A
-NOTE:
Cle~n
up
any
rinse
aid
sp
ilt
,
dur
i
ng
filling
with
an
absorbent
cloth to
av
,oi~ e
xc
_
ess
ive
foaming
during
the
next
wash
. Don't
forget
to replace th,e cap
before
you
close
dishwashe
r
door
.
4