ShelterIt 71020 User manual

- 1 -
ShelterIt™
10'x20'x8' Instant Shelter
INSTRUCTION MANUAL
# 71020
Parts Alert!
If you have a question or if there are missing parts, please call:
203-591-9032
Monday-Friday 9:00am-5:00 p.m. EST
Missing parts will be sent to you via courier.
Visit ShelterIt.com for instructional video
DO NOT RETURN TO STORE!
Please read instructions fully before beginning assembly!
V
isit Shelterit.com for installation Video

- 2 -
TABLE OF CONTENTS
SAFETY CAUTIONS…….....................................................3
PARTS LIST.........................................................................4
ASSEMBLY INSTRUCTIONS.............................................5-17
LIMITED WARRANTY...........................................................18
SAFETY and PRE-ASSEMBLY CAUTIONS
READ PRIOR TO ASSEMBLY!
DO NOT ASSEMBLE OR DISASSEMBLE THE STRUCTURE ON A WINDY DAY. ONCE ASSEMBLED, IF HIGH WINDS ARE
FORECASTED WE RECOMMEND YOU TO REMOVE THE COVER AND STORE UNTIL THE WINDY CONDITIONS HAVE PASSED.
WARNING!
1. The cover is made of 3-layer polyethylene. Please do not use open flames and heated elements inside or in close proximity to the product (including all types of
stoves, gas heaters, gas lanterns, citronella torches, mosquito coils, etc.). The fabric will burn if left in continuous contact with a flame or heat source. Any
damage to the cover as a result of using open flames or heating elements will void the Manufacturer’s warranty.
2. This is a temporary structure and is not recommended for use as a permanent structure.
3. Choose your shelter’s location carefully. Check for overhead utility lines, branches, etc. Do NOT install near roofs or other structures that may shed snow or ice
onto the shelter.
4. Inventory all parts before attempting installation.
5. Always wear safety glasses and gloves when assembling or disassembling this product.
6. The shelter must be Installed on a level surface.
7. Anchors must be used with all shelters. When erecting shelters, covers should NOT be installed on any product until it has been properly anchored to the ground.
Any shelter that is not anchored securely or properly will blow away. Proper anchoring of the shelter and suitable soil conditions are the responsibility of the
customer.
8. Never start gas engines from any vehicle or other machinery within a closed shelter. Special ventilation including an open door should be used at all times for
these situations. Any work with paints, cleaning products, etc, may require additional ventilation. When possible always avoid working with such chemicals inside
the shelter.

- 3 -
9. Do NOT use barbeque grills, smokers or other flammable equipment under or inside any shelter.
10. Do not cook, smoke, use flammable devices, refuel or store flammable materials in this shelter. Never use or ignite an open flame in the shelter. Open flames
must be kept a safe distance away from the shelter.
11. No snow accumulation should be allowed on the shelter. Monitor continuously for accumulated snow on the roof. Snow or ice accumulation may cause your
shelter to collapse. This shelter is NOT designed to hold heavy snow or ice loads. Brush snow and ice off the roof top with a broom or mop. Failure to remove
snow will void the Manufacturer’s warranty.
12. Never clear the roof of snow or debris from inside the shelter. Doing so will increase the risk of collapse, damage to property, personal injury and/or death.
13. Municipal by-laws must be verified prior to setting up this temporary shelter.
CARE & CLEANING
1. After assembly, periodically check the anchors, the tension of ratchets, buckles and all hardware to ensure the stability of the shelter. Especially during the first
few weeks it will be necessary to tighten the cover and hardware. Always ensure that all covers and hardware are kept tightened.
2. Do NOT apply any “Protect & Shine” type products to the cover or other harsh abrasives including bleach or cleansers. The cover can be easily cleaned with mild
soap and water. If storing the cover after cleaning, allow it to fully dry prior to storage.
3. Do NOT use the product for purposes or in an environment for which it is not intended, (e.g. extreme cold, high wind conditions, extreme heat, heavy rainfall, etc.).
Please note that the Manufacturer has no control over the elements such as wind, heavy snow or rain. The
Manufacturer cannot control the location or soil conditions into which the shelter is placed. The Manufacturer,
without control of the elements, location or soil conditions, cannot be held responsible for damages caused by
the shelter to other items or damages to the shelter itself.
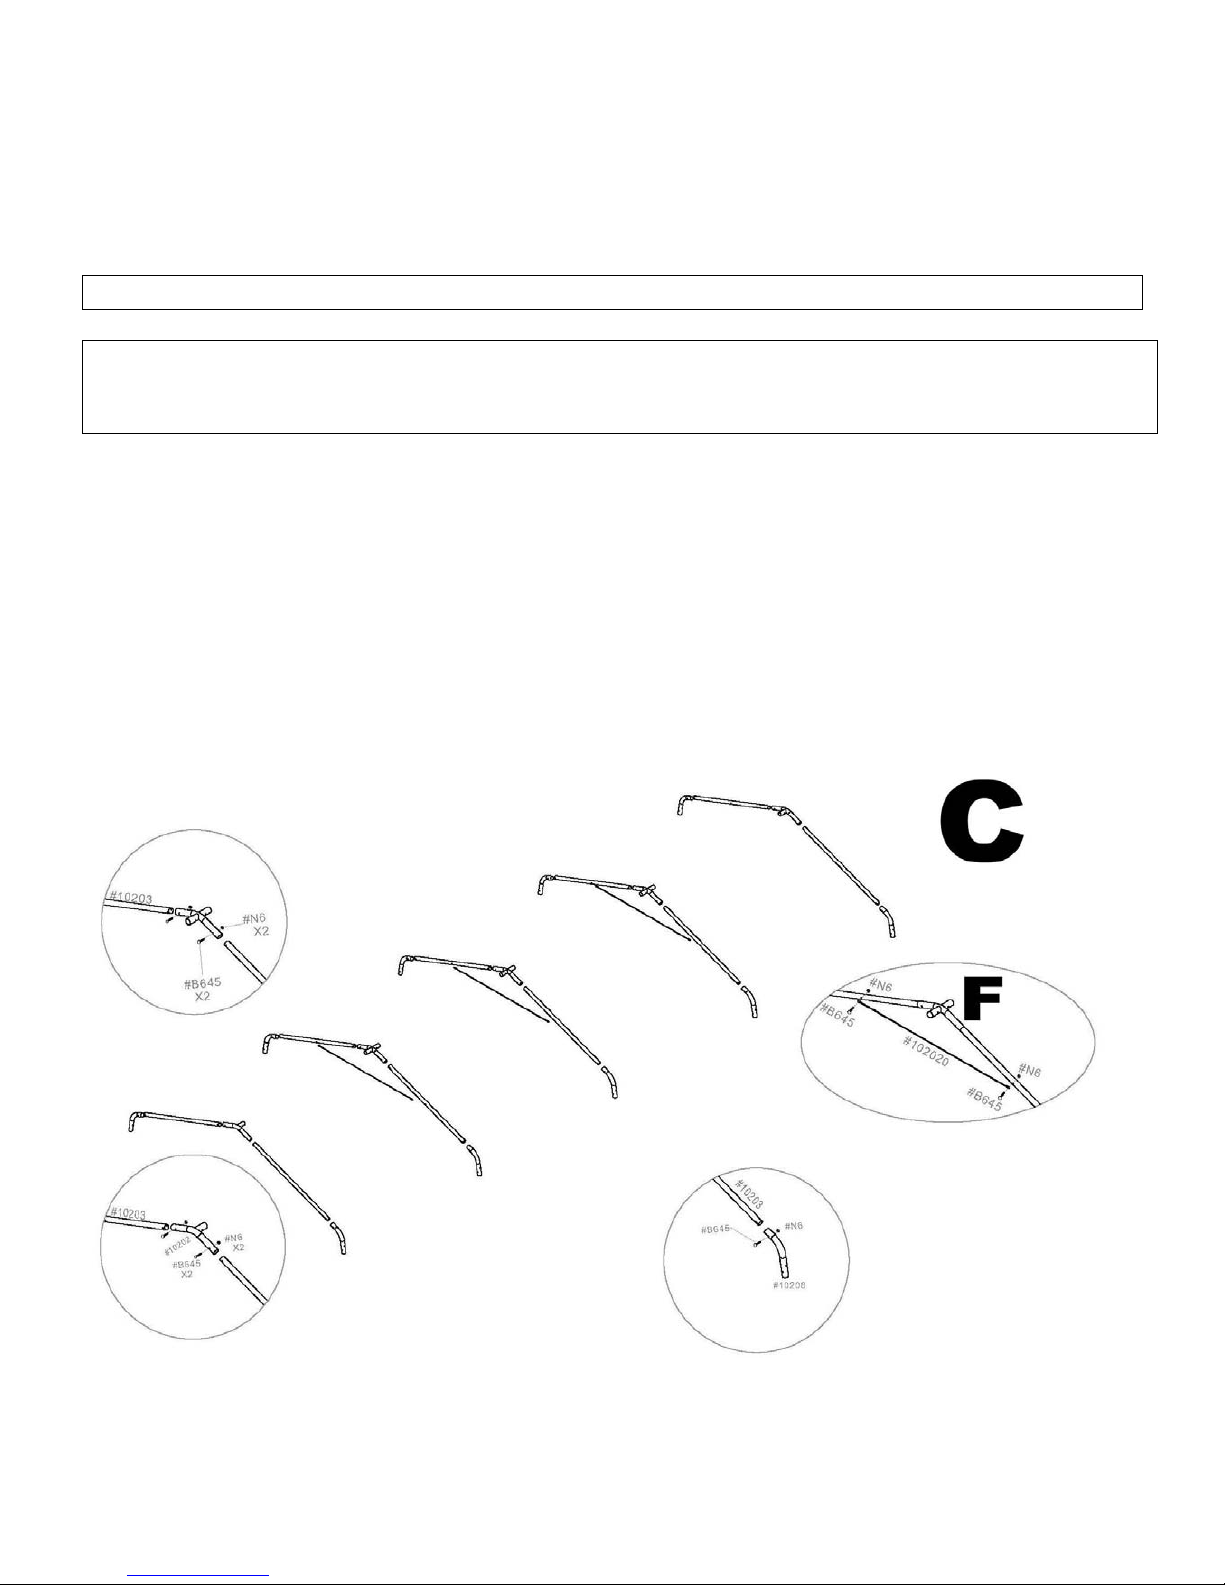
ASSEMBLY
Please read instructions fully before beginning assembly.
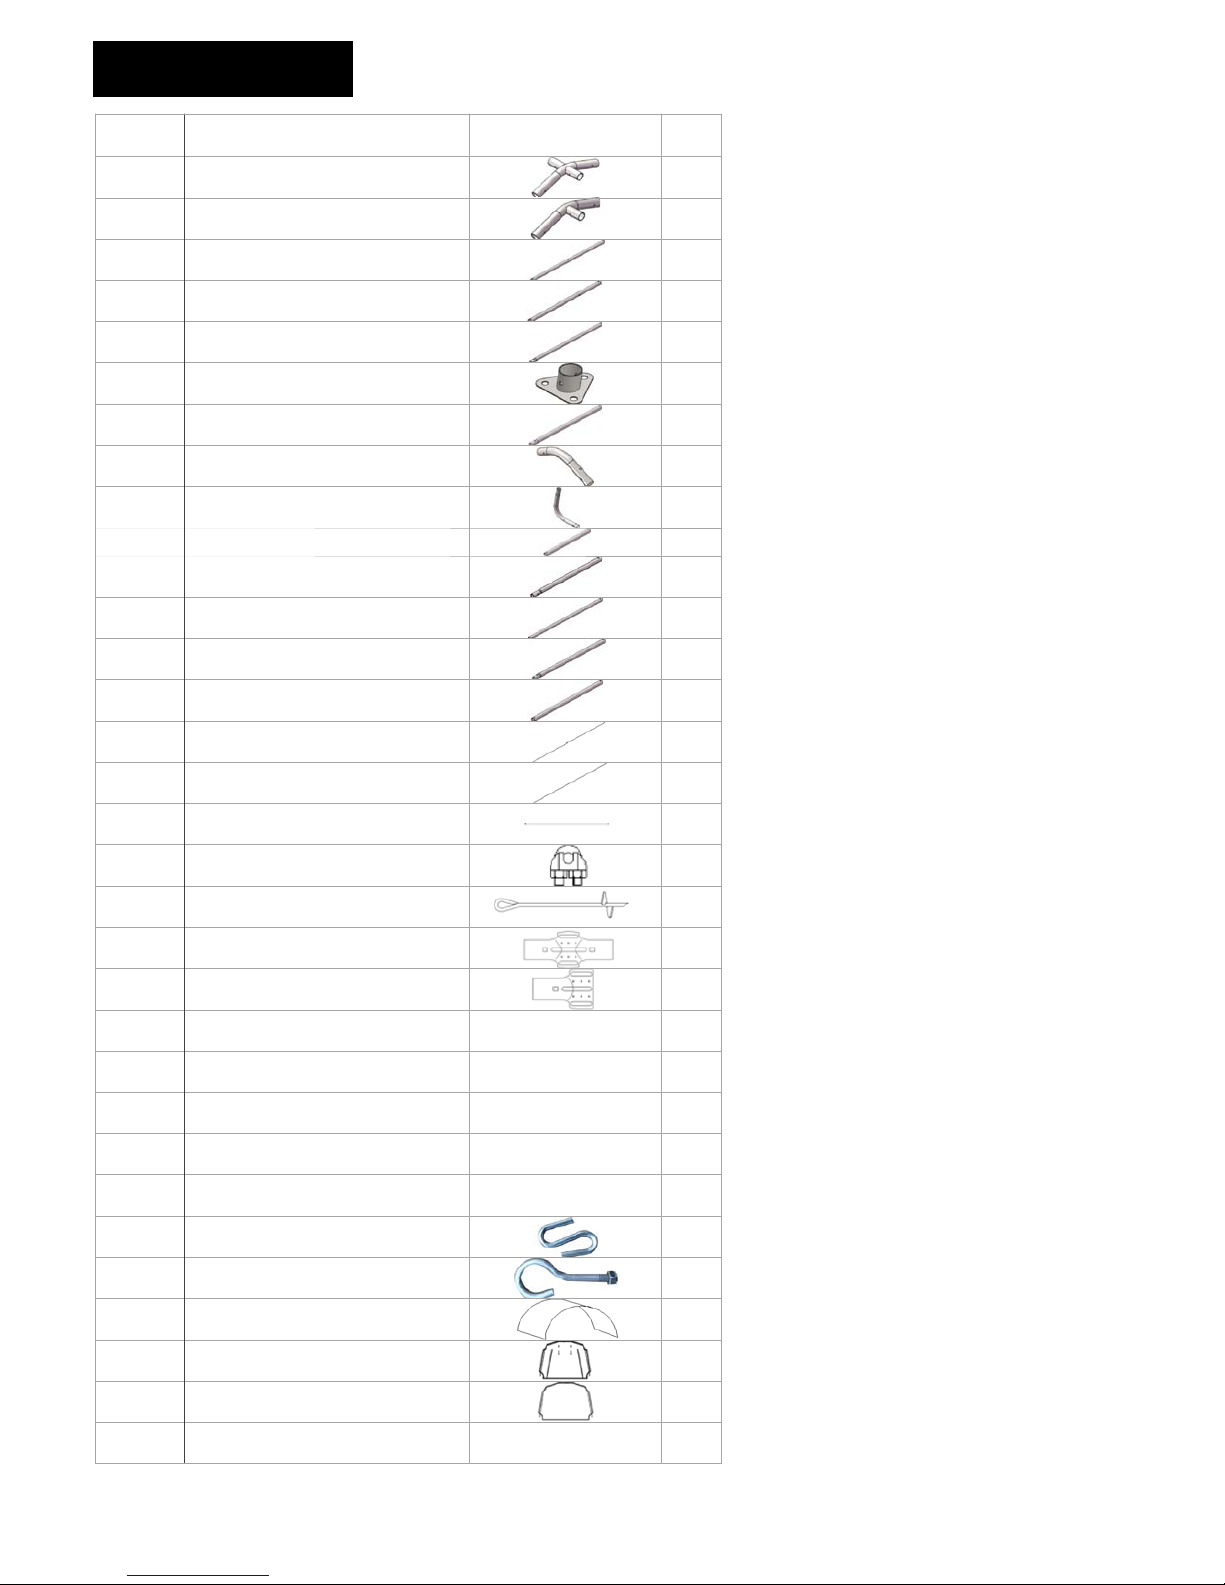
Step 1: Checking the Parts
Unpack and check the contents of the box. Make sure that you have all the parts described in the parts list shown hereafter.
If parts are missing, please contact customer service: 203-591-9032. Missing parts will be sent courier to you.
Do not return this product to the store!
V
isit Shelterit.com for installation Video

- 4 -
!
PARTS LIST 10x20x8
!
P a rt # D e s c rip tio n D ra w in g Q ty
10201 #1 4-way Peak Connector 3
10202 #2 3-way Peak Connector 2
10203 #3 Rafter Pole 10
10204 #4 Upright Pole1 10
10205 #5 Upright Pole2 and Top Cross Rail -s 10
10206 #6 Steel Foot Plate 6
10207 #7 Upright Pole 3 4
10208 #8 Side Connector 10
10209 #9 Bend Corner Leg 4
102010 #10/#11 Top Cross Rail 4
102012 #12 Bottom cross rail -s 8
102013 #13 Bottom cross rail 8
102016 #16 Side cross rail -s 14
102017 #17 The end of Side cross rail 2
102018 #18 Steel Rod for Win Brace 4
102020 #20 Steel Rod for middle rib 3
102021 Wire Cable 1' 4
102022 Cable Clamp 4
102023 Removable 15" Auger Anchor 4
102024 4-Way Cover Rail Clamp 12
102025 3-Way Cover Rail Clamp 8
B675 Bolt 3” M6x75mm 10+1
B633 Bolt 1” 3/8 M6x33mm 8+1
B645 Bolt 2” M6x45mm 96+1
N6 Nut M6 116+2
M6 Washer M6 8+1
S620 “S” Hook 4
E635 Eye Bolt with Nut 4
9913720 Roof Cover 1
2213720 Front Door Panel (with Zipper) 1
2413720 Back Panel 1
Owner’s Manual 1

- 5 -
Assembling the Frame Visit Shelterit.com for installation Video
Diagram A below represents the completed Frame Assembly once steps 1- 4 are completed.
Note: 2 or more people are required for safe and accurate assembly.
When assembling the frame HAND TIGHTEN the bolts for the cross rails where the Square are
located in Diagram A.
When putting the cover and doors on, they will need to be temporarily removed and retightened.
Table of contents
Other ShelterIt Tent manuals
Popular Tent manuals by other brands

Coleman
Coleman 2000033134 Assembly & instruction manual

Ozark Trail
Ozark Trail W784.1 Assembly instructions and owner's manual

SlingFin
SlingFin CrossBow 2 instructions

Coleman
Coleman 9600-141 instructions

Palram
Palram Arizona 5000 Wave - WINGS manual

COVERPRO
COVERPRO 56184 Owner's manual & safety instructions